| Author | Message | ||
Ezblast |
Re-route your breather line from your head - right now it is probably pointed toward the airbox cover so your carb doesn't get that sludge - lol - actually the act of a considerate person - the gas reversion is a tad typical thing that is greatly reduced by shimming your needle to the recommended - see the carb section for specifics on all the above. GT - JBOTDS! EZ  | ||
Ezblast |
If you go 600ccs blow the extra few bucks and get the Shift Kit by Baker for the 2000M2 (Tubers and Blasts share the same Tranny except for the trap door - which means a lot of things could be done) and install it - all your shifting complaints will disappear - if I ever get in that deep - that will go with anything done as a must do also. GT - JBOTDS! EZ | ||
Buellistic |
If you knew how to adjust the clutch and primary chain your OEM transmission it will shift the the way it was designed !!! A $2000.00 new transmission will not shift any better if the above adjustments are not correct !!! | ||
Ezblast |
A Baker Shift Drum kit costs 250 retail and is worth every penny - read what I say before you speak up - and if he was to get the tranny - I would suggest the 6 speed - of course;0) - I know folks in Fl are literate - I lived 12 years in Daytona - whats your problem? - lol GT - JBOTDS! EZ | ||
Ezblast |
A further note - check the trans section in the Main BW KV - testimonial after testimonial saying how good the kit is - that and the Muller Clutch Pull Kit for reduced clutch pull tension are always the 2 out of 3 things recommended for a Tuber tranny - that and the latest adjuster shoe are and always have been the must items for a Tuber tranny - it is no different with us, except our adjuster is supposed to be better than the Tubers, but the lucky Tubers have the trap door! GT - JBOTDS! EZ | ||
Buellistic |
Easy Pull Clutch is a lot($$$$$$$$) cheaper and does the same thing !!! This to, has to have a properly adjusted clutch and primary chain to receive total benefit of money spent ... | ||
Ezblast |
Maybe, however, the reason the other two items are popular is because the drum pins won't misalign and the detent plate is bolted to the drum - no cheesy clips to worry about breaking and smooth clicking shifting - the Baker unit is well loved by its owners, and the Muller unit is guaranteed while the Easypull has had mixed reviews due to quality issues. The Muller unit is 250 to the Easypull 150 - the quality is worth the difference. Not every penny saved is worth it. GT - JBOTDS! EZ | ||
Buellistic |
Being better built does off set other self induse'ed faults .. Have is service 2 Easy Pull Units for quite some time ... Improper installation does not constitute quality issues ... | ||
Ezblast |
Ahhh - so because yours are fine - everyone else must not know how to install them - that kind of thinking is just sad - I could easily install such a thing and so could anyone else - you know that - that has nothing to do with their past and possible present quality issues - an issue that the Muller never had - being a very similar thing says the Muller are quality and the other had/has? issues - period. Get over yourself. Just because your a mechanic does not mean you know everything - I have never claimed such, yet you make a habit of it with out ever backing it up - if your so clever then please enlighten us with your primary adjustment method - watch the silence ring out folks! - lol GT - JBOTDS! EZ | ||
Jimrich |
I took Swampy’s advice and followed EZ's primary chain adjustment today. My woes are gone! No more fighting at 65 and I can finally get to 75 and 80 at will. I had to back off a substantial amount to get the rocks sound, almost 4 full turns. The bike is a dream... a dream that needs better tires!!! Thanks for your suggestions. Hey EZ still feeding the troll?   --Jim | ||
Ezblast |
 | ||
Kustomklassix |
Hey guys, I come to you as winter draws near. Up here in ND it's already cold (high today was 28*) and now is about that time when the winter Blast projects begin surfacing. Originally plans were rear-sets, a custom tail, clip-ons, tachometer, new paint, usual maintenance, and a couple other random things. Unfortunately I have more now than previously thought...last night I was riding home from my girlfriends barn (she rides horses thank you  ) and as I was following her she drifted to the left. I simply thought she had dropped something but before I had time to react I saw that there were random pieces of broken cement all over the road!! I was doing 55~60 and didn't have nearly enough time to slow down and swerving would have been pointless. So, I ended up hitting a chunk of cement doing 55 launching me 4-5 feet off the road. Coming down I landed on my shins on my passenger pegs and my chest pounded on the tank. Landing on the front tire first induced horrible speed wobbles and I honestly don't know how I didn't go into the ditch or lay it down. I finally got straightened out and stopped falling off the Blast in pain. When I was able to stand again (or hobble really) I was shocked to find that I had come down so hard that the entire megaphone on my BUB pipe got crushed flat against the bottom of the trans and my rear tire came up so far it shattered my taillight and flattened my license plate!! (I chopped the tail this summer) She had to give me a ride home because even tho the Blast was rideable, I couldn't bear riding with my legs in the state they are in. I'm just extremely happy to be alive and well and to know that the Blast is a bike I feel even better about riding now! The couple pics I wanted to post tonight tho are of my new (old) seat that I finished tonight seeing as how I'm laid up. I would also like to thank Joey a ton for the idea for the Advance Auto filter idea, it works GREAT!! Anyways, happy Blasting all, and stay warm. ) and as I was following her she drifted to the left. I simply thought she had dropped something but before I had time to react I saw that there were random pieces of broken cement all over the road!! I was doing 55~60 and didn't have nearly enough time to slow down and swerving would have been pointless. So, I ended up hitting a chunk of cement doing 55 launching me 4-5 feet off the road. Coming down I landed on my shins on my passenger pegs and my chest pounded on the tank. Landing on the front tire first induced horrible speed wobbles and I honestly don't know how I didn't go into the ditch or lay it down. I finally got straightened out and stopped falling off the Blast in pain. When I was able to stand again (or hobble really) I was shocked to find that I had come down so hard that the entire megaphone on my BUB pipe got crushed flat against the bottom of the trans and my rear tire came up so far it shattered my taillight and flattened my license plate!! (I chopped the tail this summer) She had to give me a ride home because even tho the Blast was rideable, I couldn't bear riding with my legs in the state they are in. I'm just extremely happy to be alive and well and to know that the Blast is a bike I feel even better about riding now! The couple pics I wanted to post tonight tho are of my new (old) seat that I finished tonight seeing as how I'm laid up. I would also like to thank Joey a ton for the idea for the Advance Auto filter idea, it works GREAT!! Anyways, happy Blasting all, and stay warm. 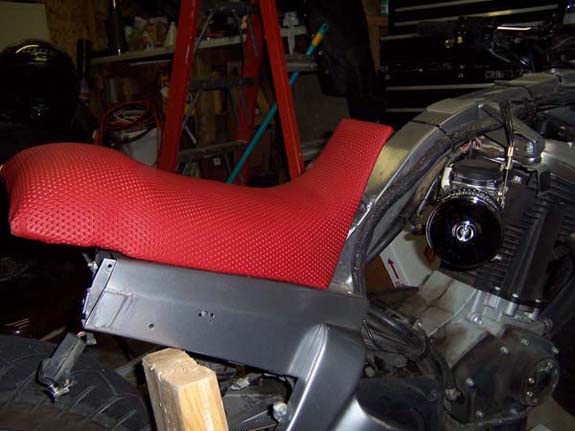 This started out as a regular Blast high seat, but after a bit of trimming with the electric carving knife (thanks Biker Build Off!) it took on it's new shape. 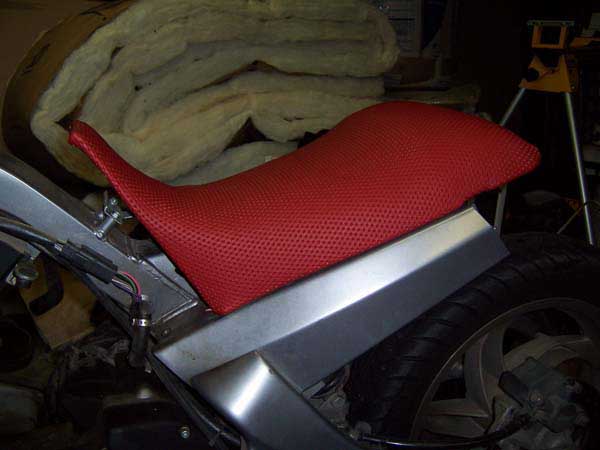 Other side. 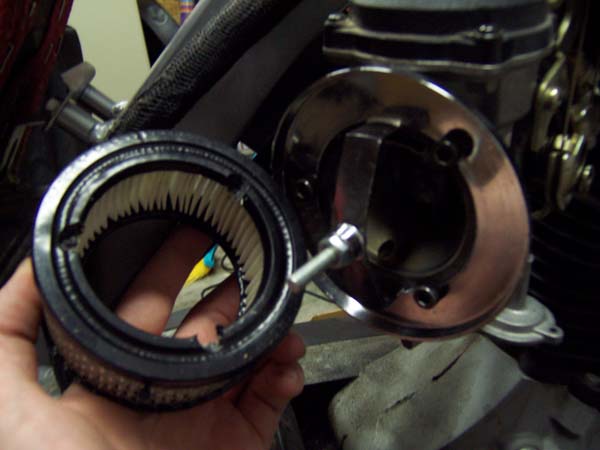 One note on Joey's directions on the filter if you get one, you don't need to buy gaskets and what not, all you need to do is dremel out 3 small circles just big enough to fit the screws in. It should just be into the rubber part and not the filter. And as for dremeling the filter housing you just have to dremel off the metal sleeve on the back. To dremel the screw holes simply take the carb gasket (front one) and use it as a template. 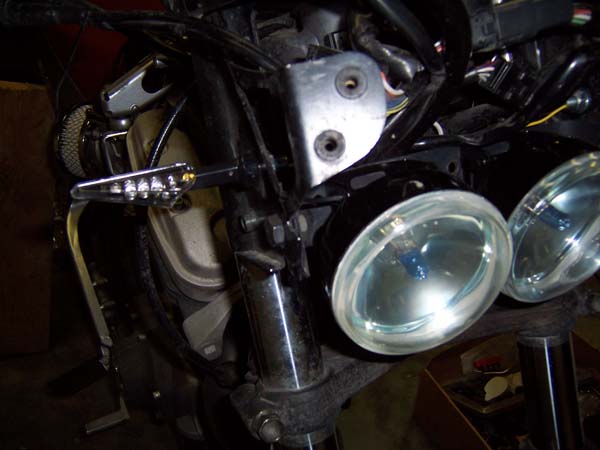 And finally I figured I'd throw up a pic of my new led turn signals. They are tiny, bright, and look great! | ||
Jimrich |
Ouch! | ||
Ezblast |
Glad your ok and can't wait to see the end result! GT - JBOTDS! EZ | ||
Twistedpixel |
Glad to hear you were able to get out of it all ok KK! I really like those stinger LED's I just got myself a pair. Happy to hear that they are nice and bright. What kind of headlights & bulbs are those? | ||
Swampy |
Great start, glad you are alright. I can't wait to see the finished tail section. | ||
Kustomklassix |
Thanks for the care and support guys! Twisted, the headlights are "Pro Burner's" fog lights from Advance Auto Parts. I think they were like 20 bucks or something? They are pretty well made, basically the perfect size, and REALLY bright. For mounting, I bent a strip of stainless steel for a plate to mount them on. It bolted to the stock headlight bolt holes. I used the mounting brackets from the pack to mount the lights to the strip. For wiring I cut off the headlight connector right at the old 7in. single and wired the new ones up to the connector so high and low beams are opposite lights (different angles) and the trigger on top of the controls activates both of them. They look pretty darn good and were inexpensive and quick to install/fab up. Thanks for the interest and I have/can take more pictures of them and the mount if you or anyone else would like!! | ||
Ezblast |
That would be cool! | ||
Styxnpicks |
alright ez the velocity stack and outerwears filter setup isnt working, with BRAND NEW turbo time boot, and its not my leg blocking the thing | ||
Ezblast |
Ditch the turbo-time boot - told you that - stick with the stock and use springs for support - did you shim your needle? - also if you don't install the intake as factory - aka a new intake gasket (perhaps a thin coat of gasket sealer on the dry side as well - nesc. for the red but not the black), all carb screw holes cleaned out and put back in torqued to max spec with blue loctite. Sounds like an intake leak. Mine work fine - test ridden by others who can testify - so I suggest reviewing your installation. GT - JBOTDS! EZ | ||
Styxnpicks |
I havnt shimmed the needle, and I havnt popped the top of the carb yet, just the bottom to rejet, the only thing I changed was going from the pro series to the velocity stack, and it ran fine with the pro series intake. I'm thinking about going to gutted or modded stock airbox and stock boot | ||
Swampy |
Is the vent hole covered for the vacuum port? Hey guys, I'm in Boston till tomorrow. I'm out visiting my sister and her family. | ||
Styxnpicks |
negative | ||
Ezblast |
The Turbo-time hose had the carb slipping out - needs a grade better clamp - which I had - just to stay in place if braced - if not will still pop out - slickery - James gave me 2 - tested them thoroughly - lasted less than the stock - have extras, takes no time and its been a while since I had the need lol - I change them with the oil. GT - JBOTDS! EZ | ||
Kustomklassix |
Ok, so a kind of, IDK, miniature tutorial for cheap, good looking, bright, functional headlights! Needed: 1.Pro Burner's Fog lights from Advance Auto Parts $19.95+tax 2.Metal strip of your choice, aluminum, steel, ect. Mine was free (scrap I had laying around) 3.Misc. things such as short nuts and bolts to mount the strip to the old bracket, wire stripper, soldering iron, shrink tubing/electrical tape (I used both), and a can of spray paint for your mount if you so choose Ok, first bend your strip of metal (should be about 12in. long, you could probably get by with less, but I wanted my lights to be at least a little bit back). Hold the strip up to your stock headlight fork mount area and mark about a half an inch to 3/4in. on each side from the mount. Then bend the ends of the strip so they complete the curve of the bend before your mark. Depending on the thickness of the metal it may be easier to heat it up while doing this, but I was outta butane in my torch so i just used a vice grip and it worked out fine. It may take a lil bit of trial and error or fixing to get it perfect, but if you can, try to bend it so it is snug when you put the bracket in the mount. With the bracket in, mark from the outside with a marker or sharpie, the bolt holes. Drill ur holes with a bit the same size as, or a little bit bigger than the headlight mount holes. Then take the small brackets from the fog lights and put them on the strip. Mark out as many of the mounting holes as you want (I just did the two on the sides) and then drill those out. For the wiring, if you are positive you aren't going back to the old 7in headlight, cut the wiring harness off right at the case. Then take the supplied wires from the kit, cut them to your desired length, and solder both negatives to the single wire from the harness negative, and one positive to each of the supply wires from the harness so you have high and low beams  . Then shrink tube or tape all of your connections (if using shrink tube, it has to be slid on the wires before you solder because the snap connections at the ends are too big to slide it over afterwords. Finally bolt up the brackets to the strip, and the strip to the headlight bracket on the bike, routing the wires down and under, or up and over, your choice. You will have to plug them in and then adjust the angle of the lights so your high and low beams are different and functional. When everything is where you want it, snug up all screws on the lights, brackets, and all bolts and everything else. For the screws on the lights, I had to slide the strip down to get the screwdriver straight. When everything is tightened up and where you want it, turn the key, step back, and enjoy your sweet new headlights! I hope this helps and gives Blasters and alternative dual-headlight setup other than the Dominator's, at a much more affordable price! . Then shrink tube or tape all of your connections (if using shrink tube, it has to be slid on the wires before you solder because the snap connections at the ends are too big to slide it over afterwords. Finally bolt up the brackets to the strip, and the strip to the headlight bracket on the bike, routing the wires down and under, or up and over, your choice. You will have to plug them in and then adjust the angle of the lights so your high and low beams are different and functional. When everything is where you want it, snug up all screws on the lights, brackets, and all bolts and everything else. For the screws on the lights, I had to slide the strip down to get the screwdriver straight. When everything is tightened up and where you want it, turn the key, step back, and enjoy your sweet new headlights! I hope this helps and gives Blasters and alternative dual-headlight setup other than the Dominator's, at a much more affordable price! 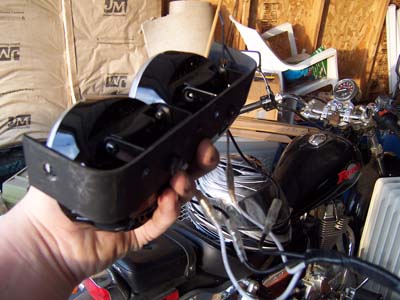 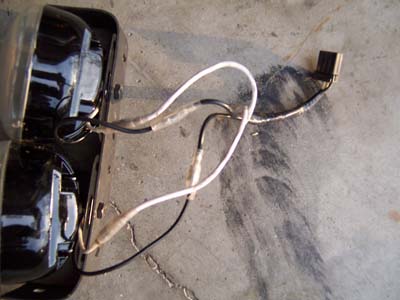  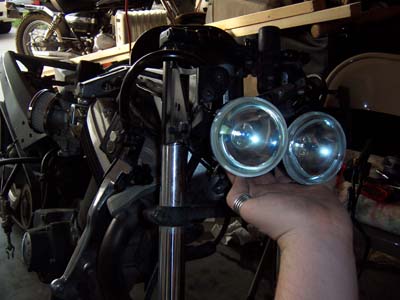 | ||
Ezblast |
THATS REALLY COOL! | ||
Gearheaderiko |
Looks cool, cheap and nice write up.  After it lingers here awhile, we can move it to an appropriate section where it can be found easier for future reference. Fine print: Check with local state laws. If you live in one of those states with a yearly state inspection, these may not pass. | ||
Styxnpicks |
I know its not the boot at this point, I've ruled that out since I replaced the old one with about 2000miles on it, but even with the old turbotime boot (that was starting to show wear) and pro series intake I could crank WOT and it would run like a dream up to redline, but now with the stack (only thing I changed) it dies and acts like its hitting the redline only about half way to the real redline, like a phantom brick wall, close the trottle a little bit and you can creep a little higher slowly but it seems like something aint working right, I'm beginning to wonder if the stack is too short for my stock motor. I'm almost 100% certain if I went back to the pro series or even stock I wouldn't be having the weird WOT issues I am with the stack | ||
Gearheaderiko |
Do you still have the PS filter or any part of it? Its easy to put back on? Can you put the stock box back on? Does it run bad in any gear or just at higher speeds? Realistically, even if you have problems with it, it shouldnt change things that much [ may not run well, but not to the extent your experiencing]. The stack is almost the same as just pulling off the air filter assembly and running without it. | ||
Styxnpicks |
I sold the PS air filter, doh! I ran awesome with it tho, I also don't have a stock airbox right now either, it runs bad in every gear, it seems like it stops at about 65ish in 5th not sure since I don't have the speedo in but I used to be able to get it up to 85ish easy. I KNOW its not the boot 100% it idles fine and lugs around fine but the top end just isn't there. stock engine only other mods are PS exhaust and a 46 or 48/175 rejet |