| Author | Message | ||
Ezblast |
40mm | ||
Gearheaderiko |
The Blast carb is unique to the Blast only. If you use any other generic carb, you'll need to do mods, will lose the TPS feature and the 'auto choke'. Almost (with very few exceptions) any HD/Buell 1989-up Big Twin/Sportster carb is the exact same 40mm carb without the Blast modifications. It will bolt on and work, but not without the necessary mods and deletions. Devitating from stock on an otherwise stock Blast is unwise, unless you plan to do some more serious modifications and the trouble that goes with it. Its possible that they use the Blast type carb on some other non HD/Buell motorcycle, but it is unknown. It would probably cost more if it was. A 2006 w/1600 miles, why do you think you need a new carb? | ||
Reactive |
Hey guys, I have read the crap out of the carb jetting instructions and I just want to run these steps by you before attempting this. I want to put on a LOUD pipe (D&D or V&H) just so that I am a little more noticeable on the road to other drivers. I have a 2002 P3. It is my understanding that the best jets I should install for my situation is the 45 slow and 175 main. Is this correct? So step one is to shut off the fuel to the carb. Remove the carb from the bike Remove the float bowl and replace the stock jets with the two larger jets. Replace bowl to carb. Remove the top cover of the carb and remove the needle assembly. Place a brass washer with a height of 0.050 inches under the needle, then replace the spring and and the diaphragm being very careful not to pinch the diaphragm. Next, drill out and remove the cover on the adjustment screw. Then screw the adjustment all the way in gently until it stops then backing off 2.5 turns. Re-attach the carb to the bike. Turn the fuel back on. Start the bike and get it to operating temperature. Adjust the screw to a smooth idle. This is where I am unsure of things. After the idle is smooth, I have no access to a dyno to fine tune it. Can someone give me an easy fool-proof way to fine tune after I have achieved a smooth idle at operating temp? This is the only part of the whole procedure I am nervous about because I don't want to ruin an engine due to a mixture that is too lean. I'm also not crazy about the idea of drilling the vacuum hole larger. Is this something that I can bypass since I'm not really doing anything to the intake? And lastly, do I need to purchase any gaskets for the carb for when I remove the top cover and the bowl? Do you lose the auto choke feature after jetting or is that just before the adjustment to the idle screw? Thanks in advance for taking the time to read this before I tackle this job. -Adam (Message edited by reactive on November 03, 2008) | ||
Imadreadhead |
you dont have to remove the carb from the bike..i never have..nor would i | ||
Ezblast |
First adjust your idle air screw 2 1/2 to 2 3/4 turns out, then if everything else is ok - das boot, no exhaust leaks, timings ok - then just a little bit turn the idle screw - a small fractional turn can make a big difference. EZ | ||
Reactive |
Am I correct in assuming that I don't need gaskets? Am I correct on the jet size? Can I get away with not drilling out the vacuum port? | ||
Imadreadhead |
you mean not drill out the idle adjustment screw? | ||
Imadreadhead |
This is all you need to do right here: Here is my usual carb work steps:Loosen Das boot, carefully remove float bowl and replace jets,put bowl back on, drill out Idle Mixture screw plug - go only 1/8th of an inch in with drill bit - its just solder blocking so careful check first also because plug has been known to fall out - turn in till bottomed - gently, then turn 2 2/3 turns out,look at the top of your carb - you'll see 4 screws - the right front corner screw (facing the front of the bike from the seat area)is also held in place with a bracket that is attached to the side of the carb - this screw is a real biatch - try penertrating oil and a #3 philips - what ever feels tightest, if nothing works, then take a dremel and a cutoff wheel and turn that puppy into a flat head screw, it will come out then, do not remove though just loosen, and reuse the screw(even if modified to loosen) - the screw on the side of the carb needs to be loosened enough to shift the bracket out of the way to remove the top of the carb off - do that carefully so you don't loose the spring that sits on a spacer that sits on the needle, pull the needle out add the 2 washers to the needle and put it back in(install washers/shims), reasemble rest and carefully put the lid back on so the diaphram doesn't tear, don't forget to tighten that side screw also. Carb done. | ||
Reactive |
Thanks Imadreadhead, The two washers you added add up to 0.050 together or does each washer measure 0.050? Is 45 for the slow jet, and 175 for the main jet sufficient for just adding an exhaust? | ||
Imadreadhead |
2 washers add up to .050 45/175 is great | ||
Reuel |
PB Breaker is the best stuff for stuck screws. I guess I was lucky--when I took mine apart, those screws were tight, but came unscrewed with a bit of muscle and nothing else. The screws on the bottom were a whole different story! | ||
Swampy |
Welcome to the Thumper Forum Reactive! If you get the chance change out the phillips head float bowl screws with hardware store varity allen head screws, you will appreciate that you did it in the future. The vacuum hole in the slide does not have to be enlarged. Good Luck! | ||
Ezblast |
Besides there is a company that already makes one for stock applications - http://scaryfastracing.net/harley.html and probably worth every penny! I usually have to launch my daily rider due to the Force exhaust dumping all the power into the mid-range and upper end. That means bringing it up to around 3000 rpms then taking off at the light - if I bring it up too high - instant wheel lift - lol. Not today though - today I pretended that it actually had some bottom end, and it did! I would take off from idle - no revving just a steady twist of the throttle and off I went - no bogging or terminal slowness, just brisk acceleration. This was a definite difference in performance, and I'm very happy with the results. In the weeks to follow, I'll take the time and make another one for my weekend toy - now that should be a trip, since it already launches damn quick! No problem getting to 95 either, so it didn't rob from the top to feed the bottom, as I was afraid it might do. A very nice mod indeed! 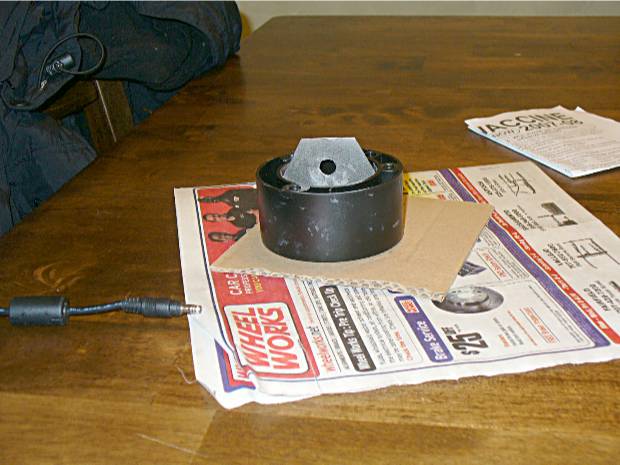 No welding involved - Buy this: http://www.americansportbike.com/shoponline/ccp0-prodshow/5637.html Call these guys -outerwears.com and buy three of these - "100 - 2651" - you have to call them because it is a custom part with extra air flow built in. Buy a 3 1/2" hose clamp and a carb intake gasket - you now have the making for my regular intake. part 2) Buy a small pack of JBWeld, and a small piece of 18 gauge - (16 to 24 would probably be fine), and break out the Dremel. make a cardboard template, to make sure the splitter doesn't touch the slide - barely, and that it is close to the side walls and that the 3/8" hole is 1/2" back from the edge facing the slide, also make sure the backside of the splitter is about 1/8" inside the stack, and that it is about 7/12ths - just a tad past 1/2 way up in the stacks height. When your mock up is done, cut out your metal splitter - it should fit snug in position - horizontal to the carb throat, test fit to make sure clearences are good, then put on cardboard - splitter side up and JBWeld both sides of the two edges touching the stack, then waite 5 hours, clean up any excess that is sliding off, then waite till its dry, test fit and trim anything that touches, sand, clean and smooth - voila - you now have a splitter stack intake. Now if you just want one for your stock set up - go to these guys and buy theirs! http://scaryfastracing.net/harley.html - bolt on and enjoy! EZ (Message edited by ezblast on November 10, 2008) | ||
Johnnymac |
Hey, Ed. Your first link to the modified splitter is broken. Sounds like an interesting mod. Can't wait to see what others think of it...LOL. I will be trying this out in the future.  | ||
Ezblast |
Fixed! So anyone else think to make one using the stock intake ring with it sticking partially out attached the same way I attached mine to my stack - looking just like the you know whos who are currently selling them - that would be cool. EZ (Message edited by ezblast on November 10, 2008) | ||
Reuel |
I'm trying to fathom how to do it on my setup without making the air cleaner stick out further. Does it really need the tube coming out, or can I get away with just attaching the vane? | ||
Ezblast |
Looks like the ones for the stock carbs are just the vanes. EZ | ||
Thumpe |
Reuel how about a pic of the inside of your intake setup? Did you use the stock intake ring? | ||
Reuel |
No intake ring for me! 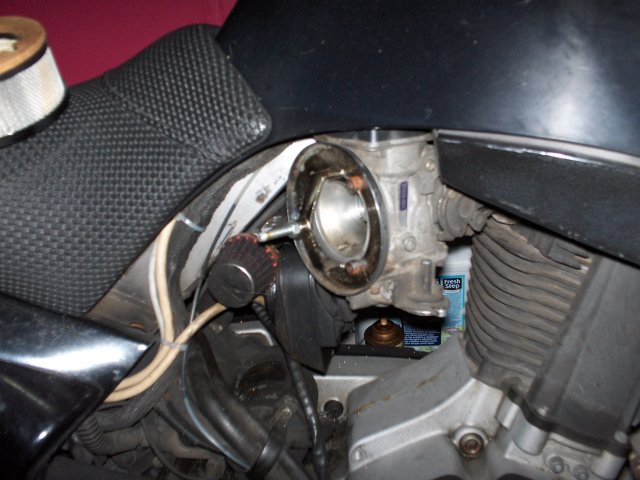 | ||
Thumpe |
Rueul if u take off the base of your air filter an turn it so the the cover mount is horizontal not vertical. Re-drill it an mount your splitter to your filter base on to the cover mounts on each side. You can weld it or even rivet it. Good Luck this mod is awesome  | ||
Ezblast |
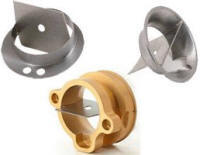 This is what the stock setups look like. EZ | ||
Thumpe |
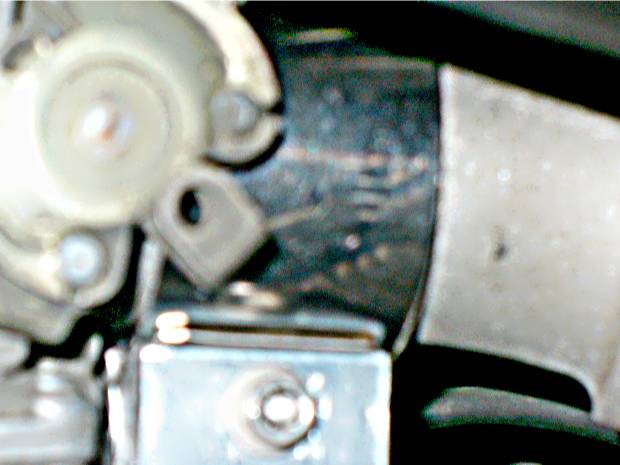
I was playing with the downstream yesterday here's what i got i'm going to try to get some mile on it today.   | ||
Ezblast |
How is that attached? EZ | ||
Thumpe |
See the 2 little tab on the splitter one's up & down the outside of the tabs is 45mm an about a 1/4inch behind it. The inside the carb is 40mm u push it in an the tab are between the carb an the ridge in the boot. When you clamp it the 1/4 behind the tab get squeezed into the ridge in the boot. I don't know if this will work without my clamp. | ||
Ezblast |
Very trick though and the racer/performance folk should take note! EZ | ||
Ezblast |
 Dan sent me one of these to test out - well its on tight and tomorrow it will begin its test - its on the 2000 Blast - which still vibrates more than the 2001 with the twin isolator - as a few folks who sat on the bikes testified - so I 'm wrong there - lol - this bike does go through more Boots though - so it should be the iron test - sans springs no less. Dan is pretty cool about this - I commented on the weight, and he said future couplings will have aluminum hardware - not steel - a good weight drop - Hopefully this is the last boot I have to put on this bike - we'll see - I do a minimum of a hundred a week - with errands to stores, etc. add 50 per week - in-city riding being much bumpier than highway - I'll know soon enough! Thanks Dan for the honor of checking this out - it would be nice to not have to worry about this any more. EZ | ||
Imadreadhead |
hey EZ whatcha think about this? 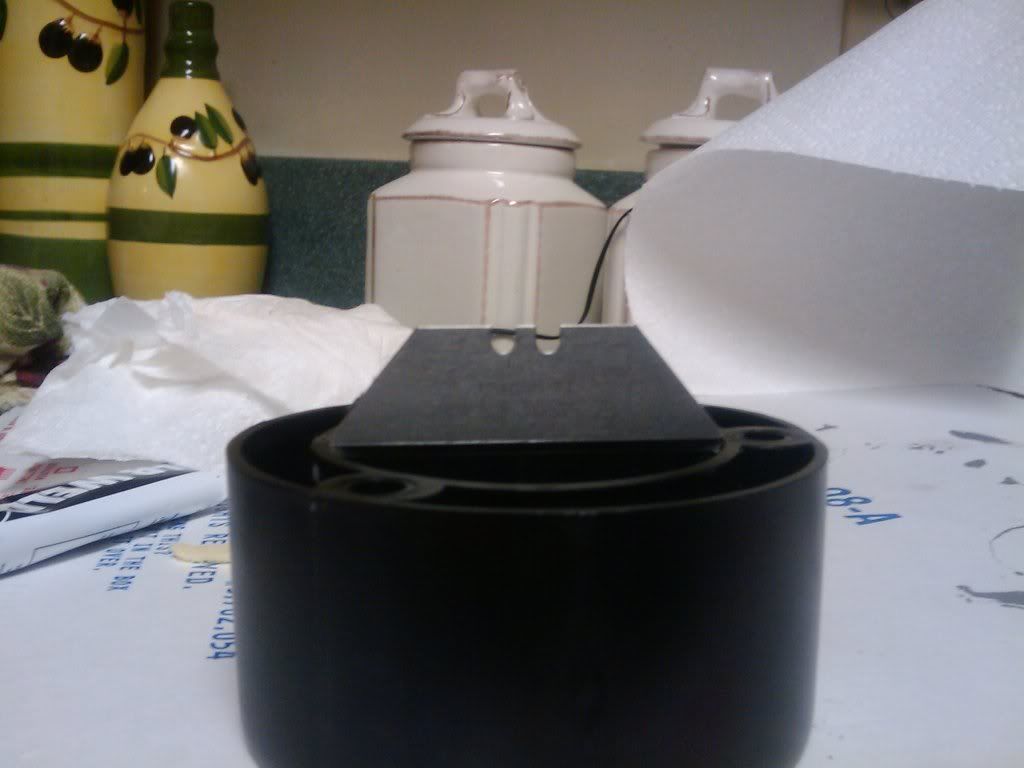   | ||
Ezblast |
Almost there - for flow equalization - 3/8" hole is 1/2" back from the edge facing the slide EZ | ||
Thumpe |
Is that a razor blade? Something a little longer mite be better. If it brakes loose it's small enough to get sucked down the intake not good!! Dan | ||
Imadreadhead |
just playing around Thumpe...who knows it could work like a charm!! (Message edited by imadreadhead on December 05, 2008) |