| Author | Message | ||
Oldog |
At just over 10K miles I have decided to check and set the valve clearences on my bike change brake and clutch fluids, oil ( with a screen cleaning )and some other minor work to be honest unlike my X1 the '25 being the technical monster that it is I have approached this with extreme caution, all parts are marked as I remove and disconnect things for engine rotation each step is carefully read thru and then done. Tonight I am looking at 3 screws in the left radiator outlet ( part that holds the fan ) that must have been red locktited in, unlike all of the others that my 1/4" drive and speeder zip right out these brass nutserts are turning in the plastic with no sign of coming loose from the bolt WTF!!! and to be honest the description of the work to be done makes little sense I think that A, remove the screws that secure the duct over each radiator. B, remove the 2 bolts holding the outlet duct and fan from the "K" bracket C remove the K bracket from the frame( the right one looks like its attached to the frame and motor ) cant see the left I understand that the 9-10 manuals are better written can some one please excerpt the radiator breakdown for engine rotation so I may study it Does any one have a good left inner duct they could part with? The thing that makes it worse is I refuse to believe that the Elves would have ever let this one out the door, the bike was serviced under warranty for a coolant/thermostat issue, I hate to think that my local guys did this $hit looks like I'm out the time and money to correct this BS thanks for reading, from some where in the state of FRUSTRATION 'oldog | ||
Pmjolly |
I did mine with a 2008 manual. It just takes time. Be careful when you rotate the engine. Make sure you have everything supported so it does not fall over. I had mine slung from the rafters in my garage. Watch this video I made to get an image in your mind of how it rotates out. The K brackets stay bolted to the engine. You just remove the bolt that holds them to the frame. Obviously, you don't need to take the forks off. I was servicing those too. Here's a link to the video. http://www.youtube.com/watch?v=uZGrxp09QhA | ||
Pmjolly |
Also, it's not hard to over tighten those bolts that go into the inserts on the plastics. I've had a couple spin on mine too. It takes creativity to fix them. I spun one till it came out of the plastic. I screwed a longer bolt of the same threads into the insert, heated the insert on the end of the long bolt, then melted the insert back into the plastic. I had to hold it till it cooled, but has been fine since. | ||
Oldog |
I cant get them to move at this point Glad that you reminded me about the video. looking at your pix you disassembled the K brackets and radiators as well, it seemed like extra work I have not had any trouble with any press nuts that I have disturbed except those, I caught one other thing there are some cable ties that should be removed to allow the wiring to move freely, I may try and salvage the nuts as you have ( I'm going to price a new part, I need the resistor plug too as I "De-Noided" the bike tonight. Thanks PMJ.. | ||
1313 |
Oldog, I've got a resistor plug for you. PM/Email me your mailing address, 1313 | ||
Zac4mac |
If you have a soldering iron with a pointy tip, you have an "insert installation tool". Put the insert on the tip for a few seconds to heat up and stick it in the plastic. Slide the iron off and hold the insert in place with a nail while the plastic cools. Good as new. Also, since you have an "R" and you're playing - Relieve some aluminum from the fairing stay on either side of the wiring harness. If you don't you WILL be fixing wires and/or the ignition switch. 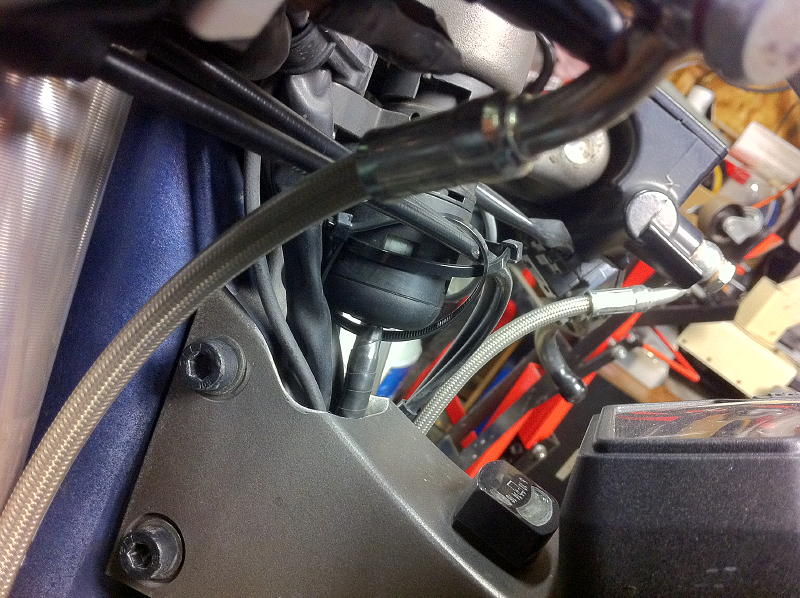 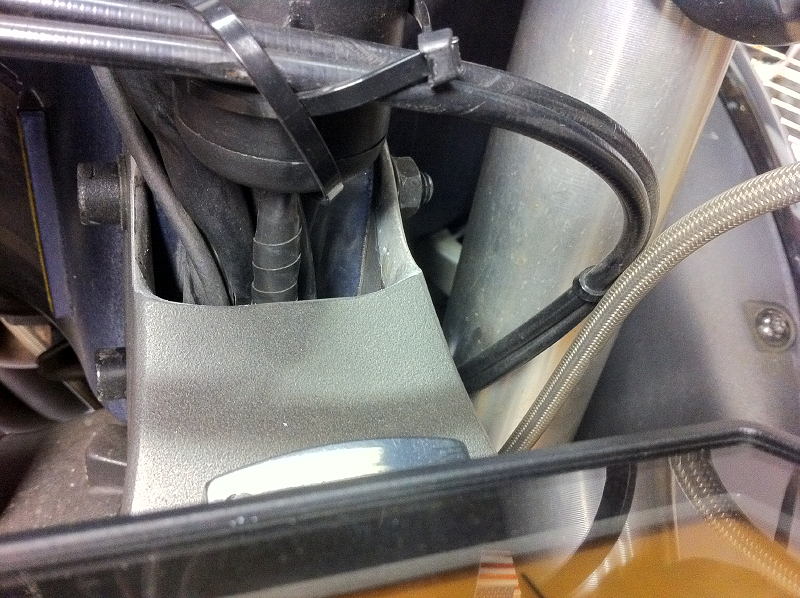 Z | ||
Cataract2 |
Thanks for the tip Zac. I will be checking mine once they arrive here in SC. | ||
Oldog |
well I have run into another problem the left foot rest bracket and idler do you remove the idler? to remove the bracket, I tried earlier to get the thing loose wow I cant budge it (the idler) so I could lift the bracket from the bike I may remove the muffler and clean the screens then remove the tension wheel ( I assume that I can get a socket on the nut to take it loose, BTW the brass nutserts were locktited I damaged the fan mount getting them out new part 40$ and now I have to open the cooling system  1313 I will pm you my addy as I have removed the "noid" does the left foot rest and idler assembly have to be removed? or just unbolted one of the holes in the motor was partially stripped where the bracket attaches this is turning into a mess | ||
Nuts4mc |
OD- the idler is a challenge to say the least - especially if the belt is still on the engine and wheel - if I remember correctly there is a "thru bolt" on the idler and the nut will spin ( need to get a wrench or socket on the nut) - once the nut is off and due to the belt tension the bolt will "unscrew" from the bracket releasing the idler....watch what we call in the aerospace world "Hardware stack up"...if you forget a washer - the belt may not "track" correctly once re-installed. hint -If the bike is on a rear stand - I built a "cradle" out of a 2x4 ( cut a semi- circle in it) and with a floor jack - counter'd the belt tension so I could R&R it - you need ballast ( it takes 2 people)on the bike to do this..one to sit on the bike ( as you jack up the cradle) and one to run the jack and do the wrenching... be careful if you try it alone. suggestion...maybe remove the rear wheel? = no belt tension | ||
Oldog |
thanks Nuts, I pulled the right side foot rest and muffler ( and checked the oil screen ) as part of the prep, I will put the left side rest bracket back on and loosen the nut from the back with a socket, I could not move the bolt and turn the front half of the bracket as the instructions SEEM to indicate, doing to remove the bracket. I am working by my self the bike is tied on a lift table with ratchet straps on the lower trees. I may tie the rear down once I get the idler off, I can drop the center engine mounts and loosen the rear ones. so lifting the rear is a problem if the front is tied down? I have to cover the Throttle Bodies well and blow the engine off and the radiators out, there is an amazing amount of trash trapped in the nooks and crannies BTW, there is a call out for cutting a tywrap up by the alternator connection for the speed sensor, there is a tywrap under the heat shield right side at the rear engine mount, I presume that this is the VSS tywrap? | ||
Nuts4mc |
OD a) if the front wheel is blocked and will not roll forward....you should be able to lift the rear with out any drama b) I use paper towels in my carbs to stuff/cover...if i forget and leave them in and start the engine...well.... they become carbon real quick AND do so with out any drama. c) Zac4Mac may have answer for you on the ty-wrap - never had a problem with my VSS (yet) - if I remember correctly Zac4mac is the "expert" on VSS and ign switches. stay cool - take your time - may want to do a search on those that removed the frame from the engine to complete the valve job - easier to clean the nooks and crannies. | ||
Oldog |
yeah next time the frame comes off, the rear head is open even after a brisk cleaning with compressed air grits have gotten in where they don't belong, the rear valve cover must be jockeyed out. Honestly I am dreading the front one...... I expect the K brackets to create problems ( with the front wheel ) Thanks for the moral support and advice, I need it.. stay tuned (Message edited by oldog on July 30, 2012) | ||
Rogue_biker |
OD, rotating the engine takes a lot of methodical care & patience especially if your first time. I would not attempt it without the Service manual but that�s just me. Removal and installation of certain parts need to come in exact sequence otherwise you�re in for a lot of frustration. If a fasteners is Loctited, even with red Loctite, it should come off with the proper length wrench. You may have to use a long breaker bar (about 15� long at least) to help get some leverage on certain stubborn screws. Another important thing I�ve discovered during the rotation process is the value of having the right tools for the job. Some of the fasteners are placed where you need articulating ratchet extensions, a 90 degree wrench, etc. Chock that front tire. Use a hydraulic jack (not a scissor) to lower/raise the engine. Loosen the wiring harness and disconnect that ones that look like they are getting pulled too much. You will have to cut a few zip ties to add some slack. Lower the engine slowly, I mean one inch at a time until you are confident no wires are getting stretched. Slow, methodical, in sequence. That�s the trick. When you find yourself frustrated, stop, have a cup of coffee, relax. Do it later when you�ve cleared your mind. It�s amazing how things go much better when you�re not rushed or irritated. | ||
Zac4mac |
Pretty sure you're spot on with the VSS, it's got some extra heat shielding IIRC, under/behind the right side cover. Clipped it, sure I never replaced it(ty-rap). I use a rear stand and 100+ lbs on the pass. pillion, auto-floor jack under motor. 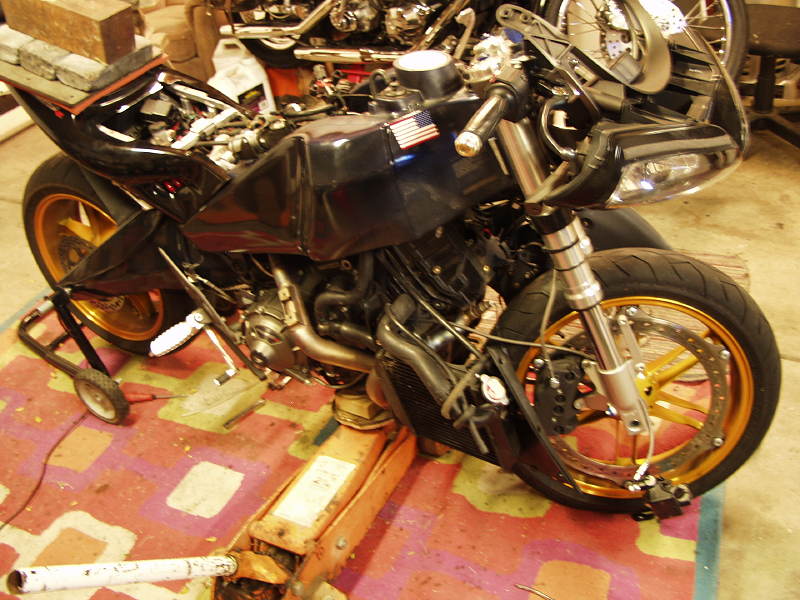 O.D. - IIRC, front's a breeze after the rear(total PITA). Rogue - best advice I have EVER seen.  Y'all hang in there! Z | ||
Duphuckincati |
Long long time ago I read "Quality takes time". Keep that as a zen type mantra for working on your beloved Buell. You're the one that will be riding it at 100+mph (I presume). Be sure all is right. | ||
Oldog |
Rogue, I have the FSM set and am following, it to the letter, I could not agree more I have about 3 days in it now. The fasteners were in the left fan mount ( plastic with brass inserts ) new part 38$ expedited shipping 66$ the dealer screwed it up I have coolant to clean up after wards my solution is no work for the service dpt Thanks Zac, the front right exhaust was .014" so I had to get one shim ( front of course ) you are absolutely right the front is easier than the rear to get the valve cover off and on, motor is buttoned up  rotated it up after opening the cooling system and replacing the " left outlet duct " NOW with the rear and mid bolts in not tite the K bracket bolts are 1/2 hole off I jacked on one side of the motor and got the right K bracket bolt in ( had to pry ) Im lost on this as I persumed that the mounts were all machined and with the rears acting as pivots I am puzzled why the K brackets dont line up any ideas ? I pried on the frame / motor a bit and got one bolt in and started the other one is still 1/2 hole off and I can find where its interfering with any thing inside the frame I quit for the night I'm 56 today, and other things besides the 1125 bike issues have been fun, the topper was the kid at the inspection station changing a brake light it did not work and this fails my inspection, so I go home check things out, the twit had not seated the bulb in the socket The good thing is I have Badweb for help thanks for the support keep it coming | ||
Zac4mac |
Doesn't sound right OD. Both times I've done this, they slipped right in. Getting everything lined up with the jack is the key, also something I remember, a long shallow-taper punch to line up the fine stuff. Once you get all lined up with the punch, spin the bolts in. ALWAYS start screws/bolts by hand, no tools, the first few threads. You'll never crossthread. Happy Birthday, I'll be 58 in a couple o' months.  Z |