| Author | Message | ||
Lynrd |
Good call on the nickel plating. Chrome plating a welded frame will cause something caused "Hydrogen Embrittlement" that will cause the welds to fail if vibrated. Nickel Plating does not introduce hydrogen. Your bikes look great. You build really nice looking stuff. | ||
Steveford |
Buff that nickel coated frame with WD40 every so often. One of my buddies bought a Commando that had a nickel coated frame and it eventually rusted through from neglect. | ||
Rocket_in_uk |
I had mine nickel plated in 1999. It's dulled off and yellowed over the years but with a good clean and polish it has a certain patina that tells a great bike building story of 14 years and counting!  Rocket in England | ||
General_ulysses |
Rocket your frame also looks good. The finish reminds me of my dad's old nickel plated S&W snub-nosed 38 revolver. It was an older gun with a lot of time in and out of the holster and it had this certain burnished patina as you mention yours having. That's a really cool look too. Old muscle cars with original chrome often have that same type of patina. Is there a way to get a shiny-silvery patina look like that with maybe anodizing? And also be cheaper than dropping $800 large on a nickel plate job? | ||
Rocket_in_uk |
$800 large is cheap! I paid �500 in 99. Can't remember the exchange rate exactly back then. Think it was around $2 to �1. I know if I were to use a reputable company today in the UK it could be as much as �2000 for a nickel plate Buell frame. No idea on any substitutes. Sorry. Rocket in England | ||
Serialk |
That Patina looks Awesome! I I use windex on my frame to keep her shiny! The guy at the platers told me to clean with alcohol or windex. never use any metal polish. Or do nothing and let it oxidze to a sweet dull patina. I original wanted to strip my frame and clear coat over the Chromoly. Too much negative feedback and fear of doing it over. I decided Nickle plating would be the best for the long run. Polished chromoly then clear coat was the idea of a raw shiny-silvery patina.... those frame welds look amazing polished raw! | ||
Serialk |
Progress on Duc tail   Just need to clean up the modified mounts install undertail and make my seat! | ||
Serialk |
Ducati/Buell Seat Pan creation  | ||
Serialk |
NO MORE BUBBLES!!!! S1 Tank Carbon Wrap in progress 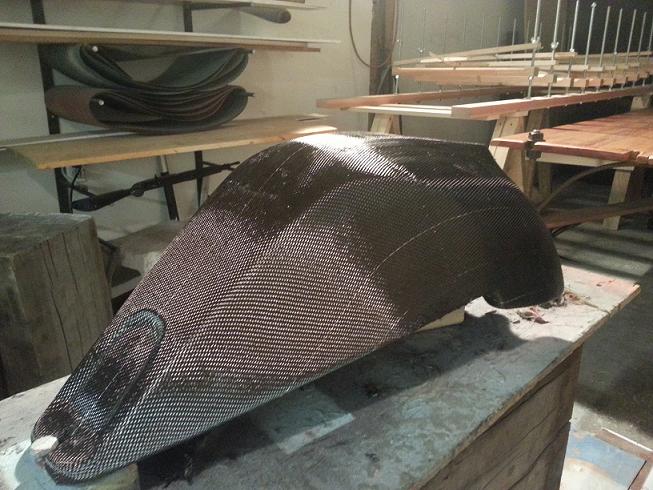 | ||
Jolly |
are you vacuum bagging the wrap or just laying it on, looks great in the photo!! what do you charge?  | ||
Serialk |
Not vacuum bagging. Just laying it and drenching it with resin... This has been a learning experience! I am on my second coat of resin right now. Its 10 degrees Celsius right now and is not the best conditions to be playing with fiber and resin... Heat gun and keeping wrinkles and air bubbles down is key. I was able to stretch 1 piece of carbon over the tank with only splicing it at the very front to eliminate wrinkles. I sprayed the tank and carbon with spray adhesive and then I Lay on the carbon and then the resin. Let it dry for 12 hours while keeping an eye on it for the first 3 hours. This is thick carbon and a very tight weave. Then sand and apply 2nd coat. I think I will do 3 coats of resin then shoot it with clear. I dont think I would want to do this again Jolly. But I am more then happy to show you what works and what doesnt. I got the carbon for free and the resin was $20. Its the TIME that is the biggest investment. If I were to do this again I would definitely use more resin on the first coat and hit it with heat lamps right away. While I had some carbon donated to me I made my seat pan out of carbon and fiberglass for the X1. Now its the waiting game. waiting on foam for the seat and waiting on this resin to cure for coat 3. 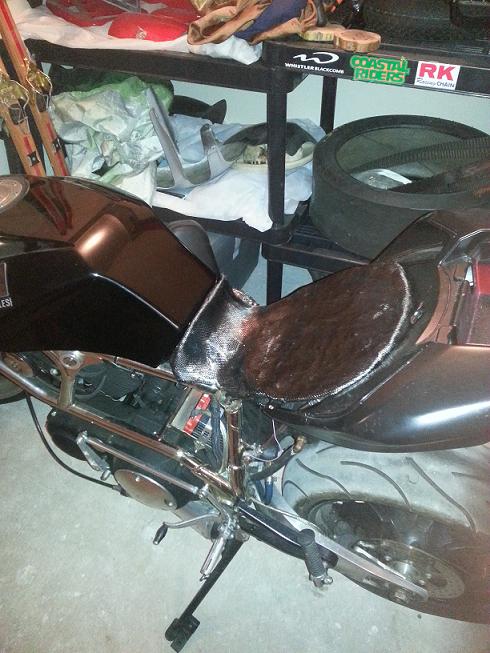 | ||
Serialk |
Okay so I have learned a lot from making my seat and tank... I learned so much that I am doing both again. so far I have re done my seat with a 1190 seat and a closed cell foam to shape the rest of the seat. I have aquired more carbon and I am wrapping the S1 tank again. Round one had some interesting results... I have decided that Ferrari red leather would be appropriate for the italian ass end. I will post some pictures on the S1 tank as they come. I have to weld up the final mounts to the subframe and then undertail.  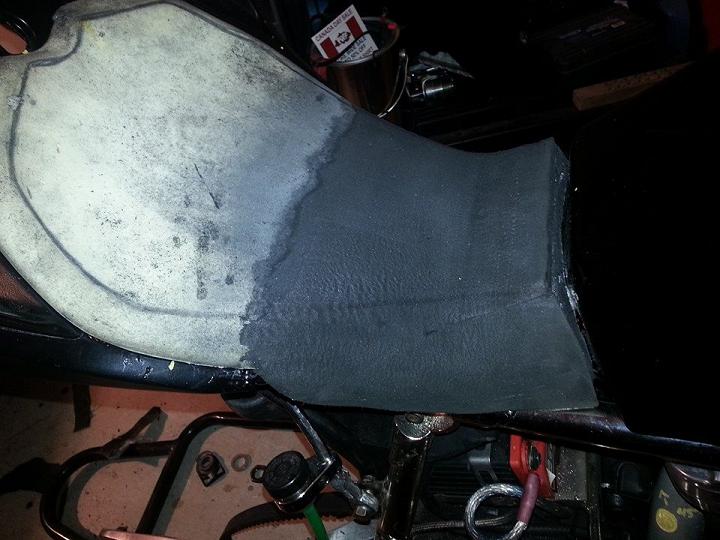 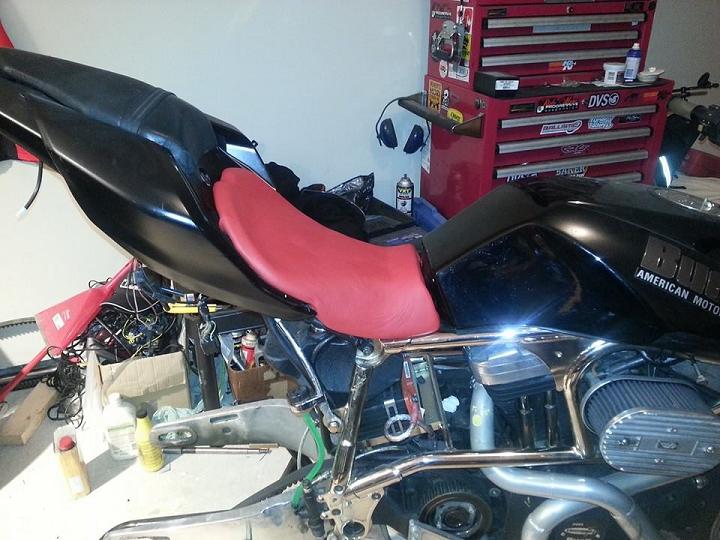 | ||
Serialk |
Ditching the green brake line. need to wire brake and turn signals. Setting the X1 aside to focus on S1 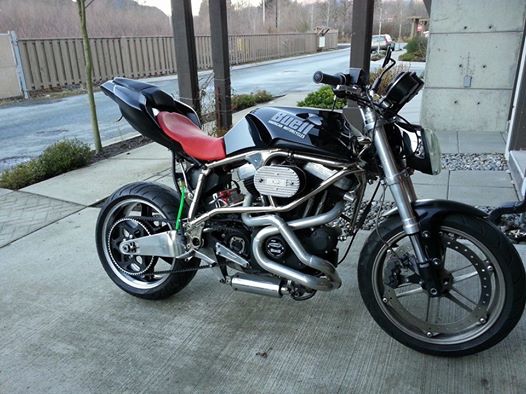 | ||
Rocket_in_uk |
I think the lack of comment sums up my thoughts too! That is pig ugly. What were you thinking? Sorry but you just ruined a nice looking Buell doing that to it! Rocket in England | ||
Rjn |
Think if you ditch the tacho and speedo, lower the ducati rear more in line with the gastank and shorten the seat ( pulling the whole thing forward ) that it will look better. And that high mirror needs to go. But that's just my idea, modifying a bike is a personal thing. As long as your happy with it. How's that S1 tank going? Is an option i'm also considering in regard to elimination off bubbles under my paint. | ||
General_ulysses |
 | ||
Rocket_in_uk |
Think if you ditch the tacho and speedo, lower the ducati rear more in line with the gastank and shorten the seat ( pulling the whole thing forward ) that it will look better. And that high mirror needs to go. They are the issues I believe spoil the bike too. And I agree with ditching the same, and the headlamp and mounts for something with a lot more style than a breeze block! But yes, it is a personal thing customizing anything. So if you like it, you're the one riding it! Rocket in England | ||
Rjn |
http://www.bikeexif.com/buell-lightning Comparison | ||
Serialk |
yes i Know shes a ugly one. I love it though. I just rode it as it is and there is a lot of room in that seat. I think I will bring it in closer to the tank as it does seem a bit long. That comparison S1 has the solo ducati seat on it. that is why it looks shorter. its also on an S1 which has a shorter wheel base then an X1. The S1 tank is in the works. will post up some pictures in a few days. | ||
Serialk |
Ditched the red, moved it almost 3" forward. Much better.  | ||
Serialk |
S1 Tank Carbon Fiber Overlay Yes I did it. I did it twice. Once the wrong way and this time is the right way of doing it. When this tank is done it will not/can not bubble and carbon will look like glass. I Epoxy layer till tacky then carefully laid down 1 piece of carbon twill on the tank. wait 24 hours. Then build up in layers and wet sand 320. Im on my 5th layer. 1 more Then shooting it with multiple layers of clear coat and some paint   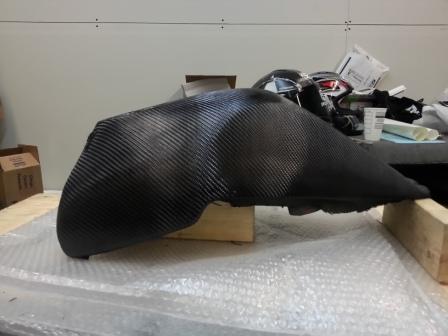  (Message edited by serialk on February 17, 2014) | ||
Jolly |
looks fantastic! so.......can you or are you willing to do this for others? | ||
Rocket_in_uk |
Everything about that bike looks great EXCEPT for the headlamp and seat unit. The black engine and X1 arm. Black fork bottoms, XB wheels with rim disc. What a great mix of stuff to go spoil with that dumb seat unit. Looks bloody orthopedic. Lowering the forks in the trees doesn't do the stance any good, and it makes the tank / cover look like it's sat wrong. If it were my bike I wouldn't be messing with it for the sake of trying to make it look so individual it looks unique just for the sake of doing so. That's what I see, and how I perceive what you're trying to do. If that's the case I'd have to ask why? There is 96% a stunning Buell there, and as I said earlier. It's a bit like putting tits on a bull what you're doing to it. But it's your Buell and my opinion is just like the saying goes. Everyone's got one! Rocket in England | ||
General_ulysses |
Awesome job on the tank cover serialk. How do you keep the first layer from sticking to the tank underneath it? And like Jolly said, do you plan making these and selling them? Also, there was a cool looking S1 on ebay that looked very similar to yours with the Duc tail... http://www.ebay.com/itm/1997-Buell-White-Lightning-Custom-Streetfighter-/390759663271?item=390759663271&forcerrptr=true&pt=US_motorcycles&hash=item5afb1746a7&nma=true&si=fhgxrUhofNKtuK0WXy7CIrrvRXI%253D&orig_cvip=true&rt=nc&_trksid=p2047675.l2557  | ||
Phelan |
General, that's quite an interesting bike there. He cut off the speedo mount because he had no way of utilizing the cable drive with the XB front end, he welded and redrilled the front mount to fit the '04-up Screamin Eagle heads (XB style heads), and he mounted an XB belt tensioner on the swingarm (something I've pondered myself). I like the stainless reverse cone megaphone he put on the end of the stock header; with the higher compression of those SE heads, I bet it sounds killer. | ||
Serialk |
Okay, The X1. The forks are lower in the triples because I used X1 triples with Xb Forks. Its just the way that works. next season I am working on cleaning the front end. I am aware of its cosmetic issues. the gauge and headlight mount need a different home. But for now it works. This winter I wanted to ditch the aluminum seat. I was getting bored of the stock seat. The Ducati tail section was given to me for free. So I said F it lets slap this on. I like how not everyone likes it. I build it for me. not for you. Besides I don't have to look at it when I ride hahaha. The S1. The Carbon Overlay Process is tedious and time consuming. each step takes 2-3 hours and once complete need to wait 24 hours before doing the next step in this process. The epoxy is expensive. I did not buy it. I pitched some money to a friend that had the epoxy at his shop. use the 105 with the 205 and some black epoxy tint. wait 3-5 hours till its tacky. then lay the carbon on carefully. once its on. its staying there. let it dry 24 hours. make sure the weave is consistent and splice in the middle up front. My splice was not the cleanest so I will have to do some body work and air brush to hide the mess up up front. once that is done you need to seal the top of the carbon weave so dust or dirt does not go in the weave. apply 105 and 207 together and coat carbon with a light coat. 24 hours. light sand apply next coat of epoxy. 24 hours sand and use a pin, compressed air and spray bottle of water to get the sand dust out of the pinholes. took me almost 4 hours picking out the dust after I wet sanded the tank. epoxy. 24 hours wet sand. inspect for pin holes and wet sand until it is smooth and no dimples or runs. if not smooth then apply another layer of epoxy and wet sand. each time you do a layer of epoxy make sure no hairs from the brush get stuck on the tank or air bubbles or runs. This epoxy is self leveling to an extent. Then clear coat. build up the clear and then wet sand. Then apply whatever paint job or pin striping you want. If I were to charge someone to do this I would have to charge too much. too much time invested. I would rather share my experience with you so you can do it for less. here are the tools. carbon twill is $50 a yard and thats more then enough. the west system resin and hardeners will run you around $400. Or find someone that already has some and pitch some cash. each coat is 2 pumps epoxy 2 pumps hardener. 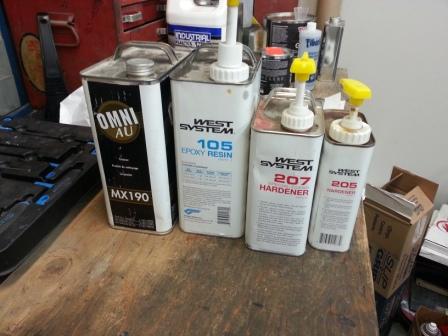 | ||
Serialk |
Oh and just to clarify. This is not a tank COVER. This is now apart of my tank. never to come off | ||
Haaken |
what bars are you running? I put cr low bars on my bike and I think I am ready for it to be raised up a bit, lol. Wrists and shoulders getting a little tired of that setup. | ||
Hootowl |
"Besides I don't have to look at it when I ride hahaha." That's how I feel about my Ventura rack  Yeah, it's un-sleek. Sure is handy though. Yeah, it's un-sleek. Sure is handy though. | ||
General_ulysses |
Serialk - Thanks for the great deets on the tank cover construction. Looks like you know what you're doing. Do you think this process could be performed successfully using fine weave fiberglass matte and much less expensive polyester resin? And I take it you're actually bonding the carbon fiber to the plastic tank itself? Are you sure it will stick to it over time with years of exposure to tank thermal cycling and vibration? I guess it wouldn't matter if it detached as long as the shell retained its shape/integrity and hugged the tank sufficiently. What about the interface between the gas cap receptacle and tank though? How does that all work out? Thanks again for sharing, looks like you're doing an awesome job! |