| Author | Message | ||
Matt87951 |
I posted these same questions over at BuellXB.com, but I know that board is mostly XB's (Which was my first bike / first Buell), but haven't had any response, so I was hoping I could get some help here. I apologize if this is already addresses somewhere, but I have searched, and haven't come up with everything answered yet. So here goes my questions: I've done some research, but still am a bit scared to tackle jetting the carbs on my 2002 M2 Cyclone myself, so hopefully someone here can assist. A little background, my bike has the Buell Race Air Cleaner from American Sport Bike, the Buell race ignition module, and the factory exhaust installed (I might be putting the V&H SS2R back on after fixing the baffle and re-packing it - not sure I want to spend the money on the V&H that will just break again). I've read a few places that I should not get a carburetor jet kit like the DynoJet kit or the like, but instead just buy the low speed and main jets themselves. From my research, I've found that I should be getting somewhere around the 45 low speed, and 195 main jet. Does that sound right? I am in NW Ohio, so at about 400-700 feet above sea level. What else should I order, to make sure I get everything done "while I'm in there"? I have read that the fuel line should be replaced at the same time? The last thing I want to do is have the bike torn apart, and find out that I'll need to order more parts and wait at least another week for them to come in, or pay a premium at HD on the off-chance they have what I need in-stock. I've rebuilt a twin carburetor on my old Jetski (SeaDoo XP), but that is the extent of my carburetor knowledge. There was quite an in-depth document on rebuilding those, so it was a piece of cake for me. Does anyone have a walk-through on jetting the carburetors on our bike? As well as anything that might help with the removal / reinstall of the carburetor itself? Would it be best to drain the fuel out of the tank before working on it, or any pointers in general would be helpful. Thanks! -Matt | ||
Buellistic |
Want to try my OEM CARB.Class 101, just PM me for a copy ... | ||
Jim2 |
Follow Buellistic's OEM CARB Class 101. 45 low, 195 main sounds right. You should already have a 195 or 200 main. I believe they were delivered with a 42 low. Before working on it, shut off the fuel at the petcock. Then start the bike and run it dry. Disconnect the negative batter cable and secure out of the way. Disconnect the fuel line from the tank so that you can pull the carb. This is a good time to change the carb to manifold seal and the intake seals with new ones. The intake wrench from American Sport Bike is a nice tool to have at this point. When re-assembling it is a good time to make sure that your throttle cables are actually opening the butterfly valve all the way and adjusted properly. You may/should replace the gasket seals between your air cleaner and your carb. when re-assembling. You should have and follow the Factory Service Manual (FSM), it will provide the fine details of assembly but follow Ballistics guide for carb tuning. | ||
Matt87951 |
Buellistic - You have a PM. Thanks! Jim2 - Thanks for the advice. I don't want to ask to much more without going through the CARB Class 101. However, can you confirm that the bike should already have the 195 OR 200 main? I have read a couple places that say I need to upgrade to the 195 or 200, I guess that is bad information? Would I want to go to a 200 or 205 instead, or stick with just replacing the low jet with a 45 and keep whatever main jet I have? Thanks again for all the advice, and I will plan to to order the gaskets and intake tool in the next day or two so I am ready to get the bike fixed up. I hate starting too many topics, and when I searched in the "Old School Buell" section I came up with nothing - so does anyone have the part number for front and rear wheel bearings for the M2's (Non PM Wheels)? I'm replacing tires also, and I want to have wheel bearings on-hand in case they are going out. I am planning to buy SKF bearings. Thanks, -Matt | ||
Jim2 |
I believe that 98' and earlier had something smaller than a 195. 99' and up had either a 195 or a 200, i've heard conflicting things. My 99' had a 200. The jets are not very expensive so you might want to get the 45 and either a 195 or 200 as a starting point. Worst case you'll end up with one extra jet but at least you'll have what you need when you open up the carb. Can't help with the wheel bearing numbers right now. | ||
Jayvee |
I'd second the suggestion on the #45 Low, and #195 Main, and the Idle Air screw 2.5 turns out. You can change all the jets with the carb on the bike, the only reason to remove it is to put in new intake seals. If it's been more than 5 years since they were changed, may as well I suppose. If you do, you'll need a couple of regular ol' carburetor gaskets too, they're like $1 each, need at least two, if you can afford it get your 'next' pair at the same time, just in case. I think they're close to $5 at the Dealer. Lube the throttle cables, if you do take the carb off, maybe oil the K&N air filter? Maybe consider putting stainless allen screws on both the carb top, and the float bowl, helpful. I just replaced the intake seals on my M2, trying to remember how I did it. I tried to replace the hex intake manifold bolts with regular bolts, but the side nearest the carb, the intake tube bends so much, I couldn't turn the hex heads. So the inside didn't work out, but I did change the 'outside' ones to grade 8 hex. Since one has to take the tank off sort of a lot, I put in a Tusk Quik-Disconnect fitting in the fuel line. It's intended for a motocross bike, so far it seems to work. The wheel bearing sizes are listed in a bunch of places here, do a search on 'wheel bearings' or similar, you should be able to find it fast. That's another project coming up for me too. | ||
Matt87951 |
Thanks Jim and Jayvee! Would it be worth while to buy a 195, 200 and 205, or would that be overkill? They are only $4 each at American Sport Bike. Would buying it be worth also buying both the 45 and 48 low jet, or is the 45 sufficient? My list right now for Carburetor related items at American Sport Bike is the following: 5993 - CV40 Bowl And Top Cover Screws 5029 - Tool, Intake Manifold Wrench 17027 - Intake Manifold Seal Kit, Carburetor Models 16078 - Gasket, Air Cleaner 5035 CV Low Speed 45 5045 CV Low Speed 48 (Maybe) 5046-195 195 CV Main Jet(Maybe) 5046-200 200 CV Main Jet(Maybe) 5046-205 205 CV Main Jet(Maybe) The bike has 5400 miles, and to my knowledge the intake seals have never been changed. I am the second owner, and the bike has essentially be sitting since 2006 before I bought it about a month ago. I plan to clean the K&N filter while I have everything apart as you mentioned. Where would I get the carburetor gaskets? Anything else I might need? The only 'bad' thing about American Sport Bike is their shipping price is crazy high, as the "starting" price is over $14 for every order I have purchased, so I'd like to get everything all at once to keep the shipping price down. Thanks again for all the good info! -Matt | ||
Jayvee |
The 16078-Gasket, Air Cleaner is what I was inaccurately calling the 'carburetor gasket'. I would suggest don't bother with the Main Jets, UNLESS you spend a lot of time over 5,000 rpm. High probability the one you have is 'close enough'. Likewise, if you are running the stock muffler, the #45 jet is likely as big as you'll need. JP Cycles sells a #44, and a #46, if you ever need to finer-tune it. Fuel line you can get from a local car parts store, unless you want to color-match or something fancy. I haven't found that special 'bent' Allen wrench useful. What I use is a 'cut-down' Allen wrench, and a long straight socket allen. I bought the $16 'special wrench' a long time ago; but Orchard Supply at that time had regular allens for $1 each. I just cut like 3/8" off the short end, and it works better, cheaper. I made a long socket from a 1/4 high speed screwdriver bit, cut off the screwdriver and JB-Welded the bit into a cheap 1/4" socket. Now its a 6" straight allen socket wrench, without having to buy the whole $40 set. You know, I think the best money spent on this bike is the $8 Tusk branded Fuel quick-disconnect. Ya have to take the gas tank off to get to about anything on the motor, so this is really cool, no mess, very trick. Oh yeah, pay attention to the marks on the intake flanges, F and R; and slots vs. holes! ("DAMHIK !") | ||
Matt87951 |
Thanks again everyone for all the good info. I do have a V&H pipe that I am hoping to put back on, but I have the factory installed currently due to the crappy build quality in the V&H (Broken baffle rattling around inside). If I ended up putting the V&H back on, would you then suggest a #48 jet? Since I haven't torn the bike apart yet, would a Allen wrench that is on a socket work for this, instead of the "intake manifold wrench", or not really? Allen wrenches are one of the few tools I don't have a lot of aside from my socket Allen wrench set, and a few miscellaneous ones. Harbor Freight isn't far if I need to buy some cheap wrenches, but I prefer getting Craftsman or Snap-On so I don't have to sweat it when they break, just exchange for new. Is that fuel disconnect stainless? I did a quick search and it appeared to be plastic. Any worry of that melting with all the heat these bikes put out? Thanks again! -Matt | ||
Matt87951 |
Based on some info I read while going through the information Buellistic sent me, I am also considering ordering the following from http://www.cv-performance.com, what do you think? CVP-SPR08 - CVP Slide Spring CVP-RPR89 - Carburetor Rebuild Kit - CV Carburetor CVP-EZ001 - EZ-Just Mixture Screw W/ the spring and washers Those items, plus what I have listed above should get me anything and everything needed to get my bike back together and running correctly, no? At least better than it is currently I would assume! Thanks! -Matt | ||
Jayvee |
Basic rule of thumb is, "Buellistic is always right" but there are execptions that prove the rule, like, when I disagree with him (not very often...) My heavily biased opinion is the EZ-Just is Just-Overpriced; and solid brass is too soft. (I bought one...don't use it.) Slide spring looks like a fairly cheap experiment, but if you don't know what the 'baseline' is, how will you know if it improved anything? The carburetor rebuild kit sounds reasonable, since you're going to replace most of that anyway. Worst case, you spent $7 on parts ($19-$12) you might not have needed. You still need at least another Gasket, Air Cleaner, from American Sport Bike. Might want to order the #44, and #46 slow Jet from CVP while you're at it. If you go to a louder muffler, a #48 might be called for. The first time I replaced the intake seals, I didn't use the 'Special Wrench' at all, felt a bit foolish about buying it. (About 99% of my tools are made is USA, by the way, even the cut-off ones.) Here's the Long Hex Bit Socket I'm talking about: 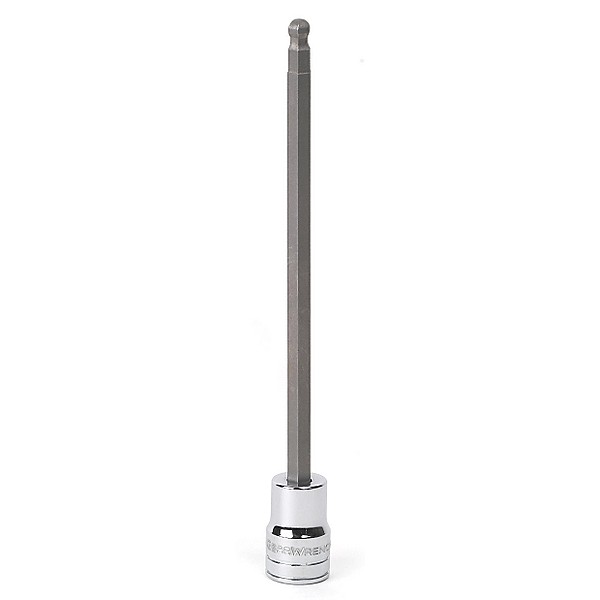 Of course there's other ways, like a regular 1/4 Hex bit, using a 1/4" open-end (or box-end) wrench as the driver. But the 'cut-down' is useful for a number of things, and easier to measure the torque on the long hex bit socket. | ||
M2marc |
Dont forget to shim your needle and drill out the slide | ||
Jim2 |
I think the angled wrench is useful and I have used it several times. You can get a similar and much cheaper version at most hardware stores in the plumbing department. It is a "garbage disposal" wrench. The one from American Sport Bike is better because it has a ball end on one side and I find that I use both ends when doing intake seals. Make sure you have some Sil-glyde, or High Temp O-ring lubricant. It makes installing intake and manifold seals much easier and it is said to make the rubber seal better and last longer. | ||
Jayvee |
The needle-shimming and slide-drilling steps are much less universally acclaimed. And the slide-drilling part is not inexpensively reversible. The new spring Matt mentioned is a different approach to the 'problem' that drilling the slide addresses. The problem with 'tuning' a carb is, can't really be done "all at once". You can get close, but near the end, you're purposely making a single change at a time. I tried Sil-glyde last time, that is some slippery stuff. | ||
Matt87951 |
I'm going to try out the spring, as I too thought for $8 - if it does the same thing that drilling the slide does, and is reversible, it's a no-brainer for me to try that method. I've got everything ordered, so I assume by late next week I should have everything in-hand ready to begin working on the bike. Thanks again for everyone's help! -Matt | ||
Goody |
Matt, I bought a 01 M2 this past spring and rejetted the carb and resealed the intake track. It is vital to a good running bike to make sure that there isn't a air leak. I have the CV carb, I rejetted to a 45 low and a 200 main. One of the things that I applied to the intake seals was brake caliper grease, its a high temp grease and it makes installation easy, its available at any auto parts store. I haven't had one problem since.. My point in all of this is "dont nuke it" its easy. I cannot over-emphasize the importance of sealing up the air intake track.  | ||
Matt87951 |
Goody, Thanks for the info! Just to confirm - did you have to 'upgrade' your main jet to a 200, or did your bike already have one installed from factory? It seems like the consensus is that my bike (a 2002) should have a 200 main jet already from factory. I guess I'll find out next weekend once I begin the carburetor work. I didn't buy a new main jet banking on the fact that a 200 was already installed from factory. I assume it'll have what size it is stamped on it somewhere? Since my bike has almost 5500 miles and the intake gaskets haven't been changed to my knowledge, I'm sure they are leaking and a partial cause to how my bike stutters. I will be replacing those along with the low jets in the carburetor. Hopefully those things combined will get it running like it should. I will pick up some of the Sil-Gyde or other sealant when doing the gaskets. Thanks! -Matt | ||
Bluzm2 |
Shimming the stock needle .050" helps off idle to mid. Start with a 45 pilot with the air screw out 2 1/2 turns. If you have to go over 3 1/4 turns go to a 48 (very doubtful). The a 190 main is a good place to start. 195 or 200 is too big for a stock M2. Some have even had to go down to a 185. Change all 3 intake seals and don't forget to use Silglyde, it's cheap and works fantastic. Only thing I use anymore. Don't over think this. It's REAL straight forward and us old timers have proven that the above works well. Don't bother with the drilling the slide. The replacement spring Buellistic suggests does the same thing without messing up your slide. When you replace the spring, be very careful to not hose up the slide diaphragm. Brad | ||
Daveswan |
You have to check everything in order to establish some sort of baseline. It's one thing to have a specific problem to solve for, then there's general tuning. I used this info from these folks below. I've had my carb off a dozen or so times experimenting trying to make it even better. To my surprise I ended up running a 48 and 200. I originally thought the 200 was too big and ended up working my way back up after going smaller. I went up in increments of 5 from 185. I used to use the NOKK needle with .050 shim but found the CVP thunderstorm needle to be even better during transition. No shims with that needle either. I'm using their spring, and slow speed adjuster. I like to be able to count the turns from looking at the slot. I have no hesitation, no farting and instant throttle response. What I'm using might be off here or there for someone else. Even though the bikes are technically the same they're differences in regional fuel formula, altitude, temp, or whatever that makes things interesting. There's close enough and then you can keep fiddling as much as you want to see what you can get. I was presently surprised with what these folks created as a guide. http://www.factorypro.com/ go to "products and support" "motorcycle tuning" top menu "carb tuning" the click "low rpm engine" on the left. The one in large print is a dead link and they don't provide a direct link that you can copy and paste. | ||
Jayvee |
Daveswan, did you mean the CVP Velocity, or the CVP N65 needle? Thanks | ||
Matt87951 |
Daveswan, I would also like to verify which needle you meant. Was it either the CVP Velocity, or the CVP N65 needle that you ended up purchasing and using? Also - could I safely assume we'd order the one for a "Sportster 1200 1989-2003"? Or which option would I choose? Just an update on my bike: Since I've gotten new tires installed I've put around 150 miles on the bike and I have to say, nearly all the bucking / surging is gone. I have a feeling most of the issues were either being caused by bad (old) gas, or maybe the carburetor was a bit gummed up after sitting in storage for so long. Since I did nothing except for put miles on it, and it now seems to be running like it should. I am still going to update the slow jet as recommended to the 45 or 48 depending on which it needs, as well and hopefully replacing the needle and spring with the CVP items. I have everything but the needle either in my position or on the way, but I would like to get the needle ordered for a cleaner install since no shims or anything would be needed. Thanks again everyone! -Matt | ||
Daveswan |
Matt, they changed the labeling since I got mine a couple of years ago. Back then it literally said "for thunderstorm heads" Definitely not the n65 which is essentially a copy of the older sportster needle. I only swapped out my shimmed nokk to try and correct a specific issue I was experiencing and that did it, and it was really close to the point were I probably could have left it but I obsess with little details so I gave it a shot. Be methodical so you know what each change is doing and that you're going in the right direction. | ||
Matt87951 |
"Be methodical so you know what each change is doing and that you're going in the right direction." That is going to be difficult for me. I've always had the mentality of work smarter not harder. So opening up the carburetor to add each part individually, and test the bike completely goes against that. I will definitely give it a shot, but it's going to be a painful process for me to say the least! I understand "why", but it seems everyone ends up in the same place so I figure why not do it all at once and save a few days of not being able to ride the bike due to downtime. I'll go ahead and order the CVP Velocity needle then, as based on the description on the website, it does what you said the one you purchased did for you. I assume I should get the option for the "Sportster 1200 1989-2003"? Thanks! -Matt | ||
Jayvee |
Matt, if you get a needle, maybe you could measure it? Like the XLForum guys show, they have a database of needles, they measure every 5 or 10 mm (forget which). I'm guessing the Thunderstorm needle was pretty much Buell-specific and has without fanfare been discontinued. But then, a few of the needles I tried to find, based on the dimension chart, turned out to be from an old big twin. So, if I didn't have to have an N65C that I haven't tried yet, I'd be tempted to get one of those Velocity needles myself. | ||
Buellistic |
If you have a M2 needle, it is the best OEM needle ... | ||
Jayvee |
Darn darn darn. Unexpectedly had to fix up a carb for my M2. Got a 49-state model, recycled some of my old parts. After reading about the Dakota Kid "Low Profile" accelerator pump pedestal on the CVP products web-site, I thought I'd try to smooth our my current pedestal to "increase the laminar flow." I also discovered, my M2 already had the 'weak' slide spring in it; and that my slide air bleed hole was already drilled out to 1/8". I used the new slide, with the smaller bleed hole, but kept the Spring I had. The spring is .001 thinner and about an inch shorter. Darn. Also smoothed the slide shoulders. Wound up with a 45 Slow, a 190 Main, and an N65C needle. Test drive for about 5 miles was very encouraging. But then started raining, so haven't yet commuted on it. (How about those Giants, eh?) Anyway, here's what it looks like now. 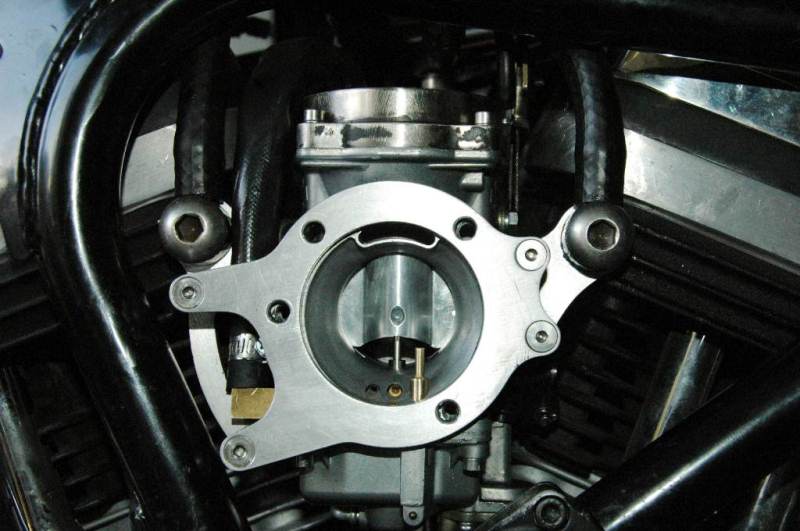 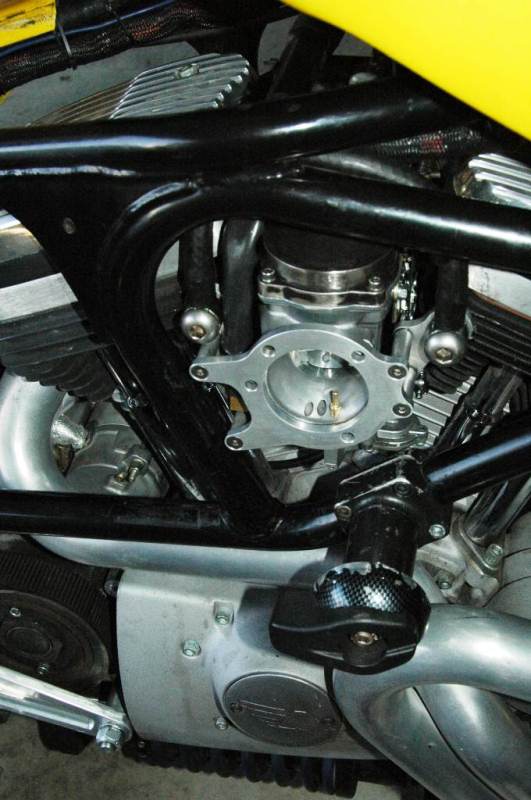 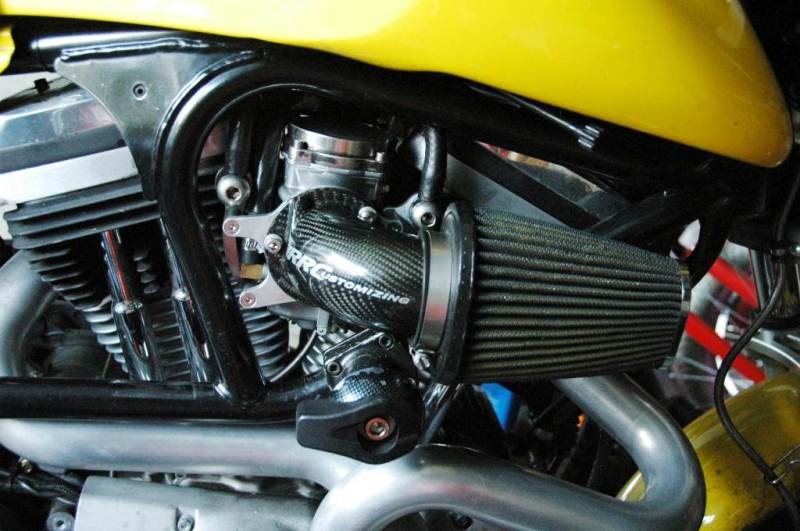 | ||
Littlebuggles |
Damn sexy intake there Jayvee, I really like the carb bracket a lot. Matt, have you gotten your bike sorted yet? My bike (Y2K) was a California model and came with a 195 main and needed to up-size to the 200 for my altitude and just general freeway riding as it would get hot and then the head temp sensor put it in safe mode until I pulled over and let it cool for a bit. Quick question, I just rebuilt my carb and reset the a/f screw to 2.5 turns out from lightly bottomed. Now popping on decel, this means too lean, correct? It was dialed out quite a ways, I'm already running a 45 so if it's lean I prolly ought to get a 46 from JP as mentioned above... it runs pretty good in general so I don't want to muff it up, just want to see if I understand it properly before I go spending anymore money on it this late in the season since the truck needs brake work and other stuff for better winter driving. | ||
Joevero |
I'm paying close attention to this thread. I just picked up an 2002 M2 . Was sitting for a couple of years. I new I was going to have to address the carb and am a total noob to buell . | ||
Jim2 |
Aloha. I bet the M2 and Hawaii and a great combination. | ||
Goody |
Sorry I didn't respond sooner, my 01 had a 195 main in it and I put a 200 in it. When I did all of this I also resealed the intake tract as well, so it's hard to say if the performance gains/good running were due to the jetting or the reseal on the intake. I'm betting on the intake reseal. Mine were leaking really bad and it's a easy job to do. If you bike sputters and coughs it is more than likely a intake issue and not the carb. These are what I have found out and even more since I did a complete rebuild of the bike. |