| Author | Message | ||
Ferocity02 |
So after washing my XB12Scg today, the header seems to now be the ugliest part on it and really screws up the looks from that side. The header has become dark and discolored, it's covered in water spots, and grinding marks from when the front O2 sensor was installed. I would like to clean it up to give it a nice polished or brushed look. I'm guessing I'm going to have to sand it down, and do some wet sanding on top of it. I plan on removing it to make the job easier. Anyone have a good method to do this? I searched the internet but only found out how to polish my stainless steel pots and pans. I searched here but couldn't find many step-by-step methods. So what's your method? Pics are good too  Thanks! | ||
Metalstorm |
I use Bads1's method on my 05. Apply Eagle One aluminum mag polish with a paper towel. The paper towel part is important as it has just the right amount of abrasiveness. Then buff it off with a clean soft rag. The first time takes a while but keeping it up is very quick and easy. I don't know if this will work on the 06 & newer pipes but works great on the 05 and older pipes. | ||
Geforce |
3M Metal Polish... red rag... elbow grease. It will take a couple of washes to get the super well polished look unless you go bananas on the first wash but all you need to do is apply it to the pipe, wrap the red rag around it, and zing it up and down, back and forth until it shines up. I just got the wife's new 09 SCG to start looking good. Here's my 1125r shined up. http://www.flickr.com/photos/orion328/2769685322/i n/set-72157601650254604/ Also, the 3M is almost like a wax, when you wash the bike and do your detailing it takes less time to get the luster back because you are keeping a bit of it on the exhaust. If you OVER do it, it will haze but you can still clean it up easy. | ||
Ferocity02 |
Hate to say it, but no polish and towel are going to clean this header unless it's sanded first. The grinder marks really need to come out too, which is going to require some hefty sand paper. | ||
Bads1 |
Depends what your after. My pipe looks very shiny and raw at the same time. If you want it shiny my method will work. If you want the grind marks out completely you'll have to sand. | ||
Spacecapsule1 |
Geforce, let's see that 09 scg header! | ||
Gentleman_jon |
Here is one of a number of previous useful threads on the subject: http://www.badweatherbikers.com/buell/messages/32777/410307.html?1226525797 I believe it is really important to get the tool marks out, otherwise they corrode quickly. I can't find the 3M finishing wheel on the net, but they have them in the hardware store. They are about 2" in diameter, and have flaps of fine sand paper interleaved with fine scotchbrite. They take out the tool marks quickly, and then the pipes are finished with 600, 800 , 1500 wet or dry and then the Luster Lace. Takes about an hour with the pipes on the bike. 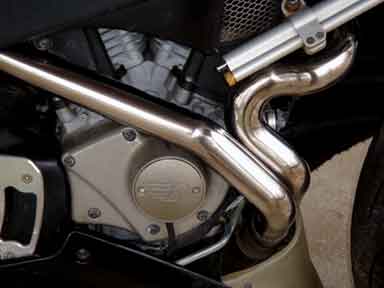 | ||
Hughlysses |
IIRC, Eagle One aluminum mag polish has been discontinued and whatever they replaced it with doesn't work nearly as well. Hoard it if you've got it. The 3M stuff works pretty well. | ||
Marko138 |
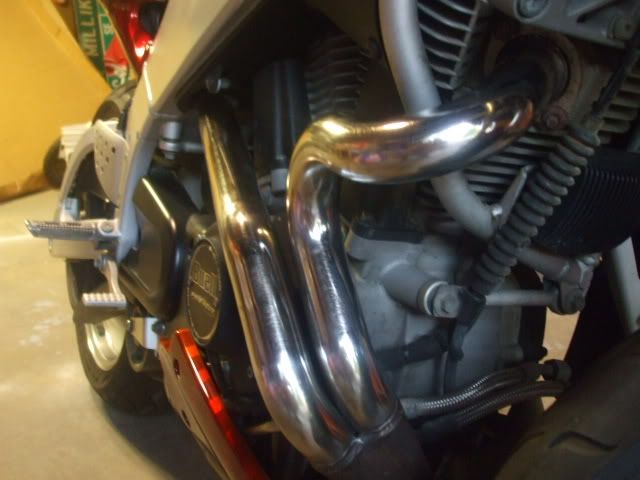
I wet sanded mine then applied Mothers Billet polish, first with paper towels then with a soft cloth. I put several coats of polish on the first time until it shined up really nice. 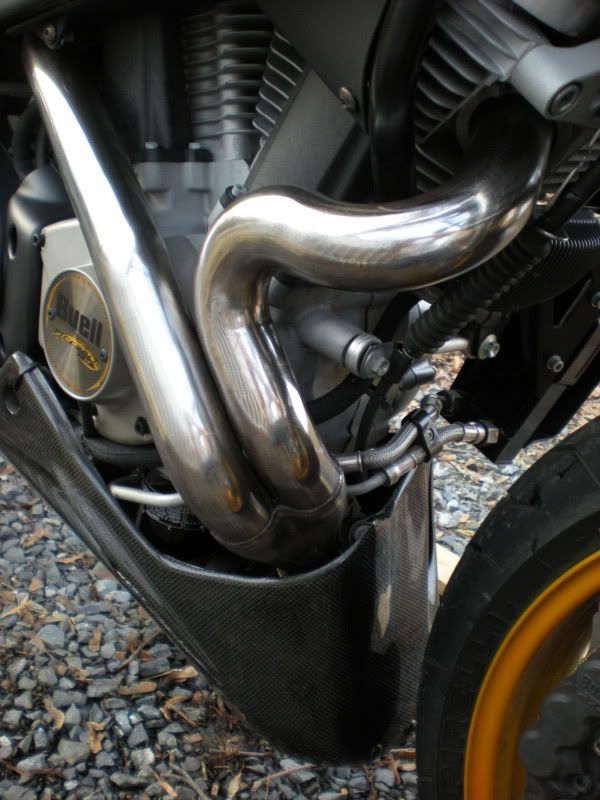 | ||
Geforce |
Man those all look great to! The SCG headers aren't as shiny as the 1125r's yet. I just don't ride/wash it as much. But they look very similar to the flickr link I posted above. ^ I love to see riders keeping a good clean set of pipes on these bikes, they look so damned good. It's shiny, but it's not chrome so that to me is perfect. | ||
J2blue |
You know, the subject line made me think this was a porn thread - the bike was just a metaphor. Then someone started talking about sanding it - OUCH! "So after washing my ... seems to now be the ugliest part on it and really screws" "My ... looks very shiny and raw at the same time" "The first time takes a while but keeping it up is very quick and easy." | ||
Teeps |
So how long do those shined up pipes stay that way? | ||
Gentleman_jon |
They start to turn gold as soon as the bike is ridden long enough for the pipes to get hot. If the pipes are smooth, with no tool marks, and no dirt on them, the gold can be very nice, and stay shiny too. If not, they get splotchy, and don't look that great: time to repolish. Here are mine after about four months. This is how they normally look on my bike. I only polish them every couple of months. 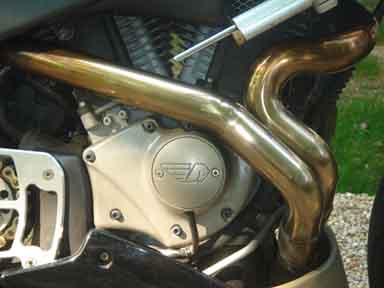 They would shine up silver with about ten minutes work with the Eagle One or Luster Lace from this point. | ||
Bads1 |
I believe it is really important to get the tool marks out, otherwise they corrode quickly. Mine haven't yet and its been six years. | ||
Gentleman_jon |
Perhaps the fact that I live between the sea and the bays, in salt laden air, accounts for the difference. | ||
Bads1 |
I can understand that for sure Jon. | ||
Dlg6c2 |
I used Mother's polish applied by Dremel tool. | ||
Klinc |
elbow grease, lots of sandpaper and eagle 1 polishing compound with a dremel. | ||
Nextcorner |
So,... 3-step sand paper? 300, 800, 1200? What about the purple coloring on the headers? Does that come out with polish? | ||
Zatco81 |
 I did a quick job to get me by until I get them coated this winter. I started with 320 to smooth them out then stepped up to 600, then polish. If I was trying to do a really good job and planned on keeping them like this I would take them off to do it for sure. I'd start with maybe 180 grit to get deep scratches out, then 320, 600, 1200 wet, then polish with a dremel or small buffer. If I had gone to all that trouble then I'd use the LusterLace every other month for upkeep due to ease of use. | ||
Marko138 |
I usually polish mine once a season. They stay shiny enough for me that way. But I also keep my bike very clean at all times. | ||
Bads1 |
Done with nothing more then Flitz,papertowel and buff of with a soft rag.  | ||
Gentleman_jon |
Now I see why you just need a quick polish. For some reason or other, your pipes are a whole helluva lot smoother than mine were before I sanded the tool marks out. Is there any chance that someone polished the tool marks out of your headers before you got the bike, Dana? | ||
Bads1 |
Jon, I bought the bike brand new in 03. First xb12s sold in Wisconsin. I never used any sandpaper. Just Eagle One and now Flitz. My wifes 9 is even starting to look fantastic. | ||
Nextcorner |
I've got an 03 XB9R, lots of tool marks. I did a very quick sand job last night along with Mothers Mag just to see if I'd like the look. Definitely!! This fall i will rotate the engine down, take the headers off, replace gaskets, and do a better job on the sanding. I'm surprised that you had no tool marks. Or did you? If so, surprising that you didn't need to use sand paper. | ||
Lighting |
Bought a 4" cloth polishing wheel a the local hardware and installed in a 5/16 threaded rod with double nuts and attached to a drill. Get some fine emery cloth and polish away until most of the marks have gone then use 1000 grain wet/dry sand paper and go to 2000 after you get a good uniform finish, pull the drill and fine polish it with polishing compound. By the way don't forget to purchase a 12 pack of your favorite brew and you will be done in about 2 hours. Good luck............... | ||
Hughlysses |
Eastwood (auto restoration supplies) sells buffing kits for polishing the stainless trim on classic cars. I used one of these kits to polish the stainless trim on an old car I have. There are three different wheels (each made differently) and three grades of compound in the kit. You mount the wheels on a stationary motor for polishing. I had a motor from an old table saw I used. http://www.eastwood.com/ew-buff-kit-stainless-stee l-6-inch.html With this kit, you start hand sanding with coarse enough paper to remove the deepest scratches. Once you've got the deepest scratches out, you start progressing upwards with finer sandpaper. Every time you switch grades, you change the direction you sand by 90 degrees. You mustn't skip any grades, because if you do the sanding marks will show up during the buffing process. The good thing about this method is you only have to go up to 400 grit paper, then you switch to the buffing wheels. You have to be very careful to wipe away all traces of compound before moving up to the next wheel. Same deal as sanding, you change buffing directions 90 degrees when you swap grades. When you get through with this system, the stainless is like a mirror. If you want the ultimate in shiny pipes, I'd recommend going this route. | ||
Metalstorm |
Eagle One is gone??? Somanabitch! I have maybe 1/8 of a jar left. Dana, since you are the man with the plan wrt header polishing, I'm going to try to find this Flitz stuff that you speak of  | ||
Phelan |
Mothers aluminum and metal polish works nicely too. | ||
Bads1 |
Metalstorm, Flitz is made in Waterford Wisconsin. The owner is a friend of the family and he is the one that showed me the papertowel trick. I just happened to have Eagle at home to use and it worked well. Flitz though works just as well. You can find it in automotive store and quite a bit in hardware stores. |