| Author | Message | ||
Buellsnbeer |
G'day all, Just thought I'd post a couple of pics of my 02' ma-deuce with the fatbars. I've owned this bike for over 4 years, yet every time I open my roller doors I still get the same rush like I got the first day I bought her. My ma-deuce still sizzles my jizzle.  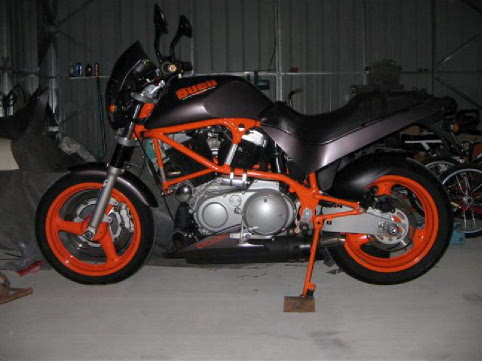 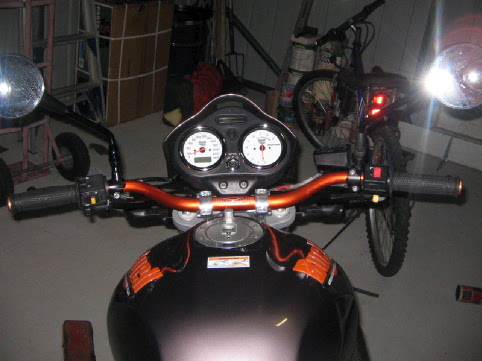 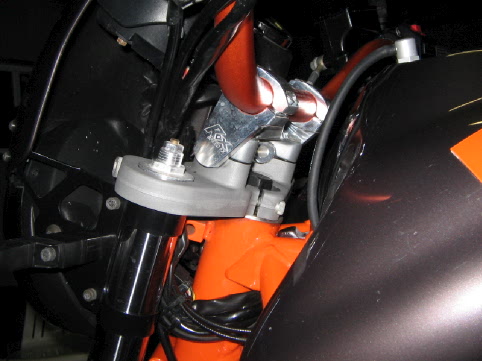 | ||
Billetmetallic |
how much were those fatbar adapters and where did you get em? | ||
Firebolt020283 |
if the bars are fatter how do you get the the controls to fit? Just curious. they look sweet by the way. | ||
Clrobins |
They're only fatter in the middle, usually 1 1/8'' then slim down to 7/8'' where the grips and mirrors bolt on...and they do look awesome by the way. | ||
Buellsnbeer |
Hey thanks for compliments guys!!!  THE SURGERY PROCEDURE  Okay, the fatbars are renthal brand and yes they are 1"1/8 in the middle and taper out to 7\8". The risers are from a company called Roxspeed. You've probably heard of them but if not, their website address is here www.roxspeedfx.com . They have a range of different types of risers and prices and I found them very helpful. The riser in the pics is part# 3r-p2sp, but double check with them. It's size is 2" x 7/8" stem clamp X 1"1/8 bar clamp. It has a stem clamp post which is 24.5mm long. This stem clamp post is a bit short to gain a full bite on the Buell's standard pidgeon toe design bar clamp. I took a gamble though and still bought them cos I wanted the 1"1/8 fatbar look. I clamped them up extra tight and so far for me they haven't moved at all!!. Now, they do make a buell friendly type riser which is 2" x 7/8" stem clamp x 7/8" bar clamp. It does have a longer stem clamp post which is 30.5mm. This means there's an extra 6.0mm of bite. Unfortunately at the time, they didn't have an 1"1/8 bar clamp buell friendly riser available. I asked if they will ever make a Buell friendly riser with the 1"1/8 bar clamp and they said "possibly" in the future. Therefore, the current set of risers shown in the previous pics will have to do for now. Now, I do get full lock side to side, however, the outer edge of the risers do run fairly close to the fuel tank, but it's sufficient (see pics). So essentially you will be very limited in back and forward movement of the risers themselves, especially with the fatbar pushing against the lower edge of the gauge's plastic mounting (see pics). (Please note- When you get to this stage and you put your fuel tank back on to test the side to side clearance, take care not to damage your paintwork on your tank. Perhaps put some masking tape on your tank as a precaution). Now, you still do have some minor adjustment with the fatbar itself. The fatbar can be rotated forward or back to help fine tune your preferred riding position. That's why I went with the tallest fatbar that Renthal had. My riding position is much more upright now and wider for my arms and I can now push the bike further down into the corners a bit more like a motard!!! Now the plastic gauge mounting is attached to a bracket I made up. The construction of the bracket is very simple. I used what I had in my workshop. Basically, it's just a piece of 25mmX25mmX60mm(L) aluminium angle, with a piece of 20mmX20mmX20mm(L) solid aluminium square bar attached or welded to it. The solid square bar is to provide extra strength to the angle bracket (See pics). Now the said bracket is centred to the 2 x front flat angled faces of the std buell top bar clamp (thanks Erik!). Note that the top flat of the bracket sits higher than the top of the stock top bar clamp where the plastic gauge mounting once sat on. The height is approx 6-6.5mm. This height is important so that the plastic gauge mounting will sit flush on the bracket(study pics!!). Take your time here and check everything first before you drill. Once the bracket is sitting true, drill and tap each flat face.I used a 1/4" UNC tap. Once the bracket is attached to the top bar clamp, the plastic gauge mounting's two holes should now be located over and sitting flush against the top flat of the attached bracket. Now, you will also need to true up the plastic gauge mounting itself to be as central as possible between the risers and your bikini fairing. Once your happy with it all, just mark the two holes and then drill and tap again with a 1'4" UNC tap. You'll see that once this is all done, the secured plastic gauge mounting now sits up and back from it's original position. Please note, that this relocation of the plastic gauge mounting will now put an upward pressure on the underside of the bikini fairing. As the bikini fairing is rubber mounted, with a bit of tweaking it all fits. (see pics)(of course you can remove the bikini fairing if you want). Finally, the switches and cables all fitted up with no extensions necessary. phew...!! I was told once that it would be very difficult to fit a fatbar to an m2 whilst keeping the std gauges and bikini fairing in essentially the stock arrangement. WRONG!!! Please note- all this work will take a little effort to hookup properly, but man it's worth it!!!! It finally gives me the streetfighter feel and look I've been after for ages. The pics don't do it justice compared to real life. The whole setup with the color coded orange fatbar and frame looks great( to me anyway)!!!. Hope this info helps. I'll try to answer any other questions as quick as I can. Cheers  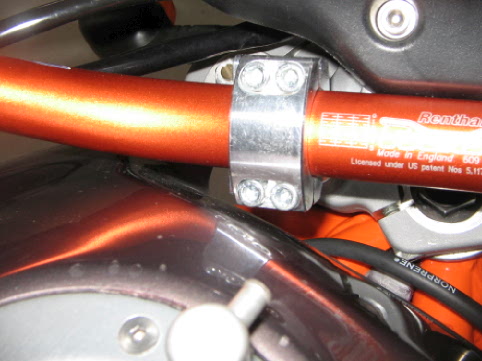 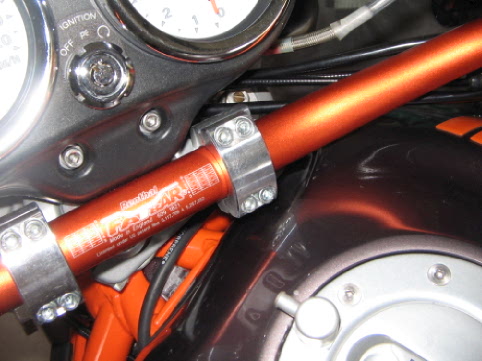 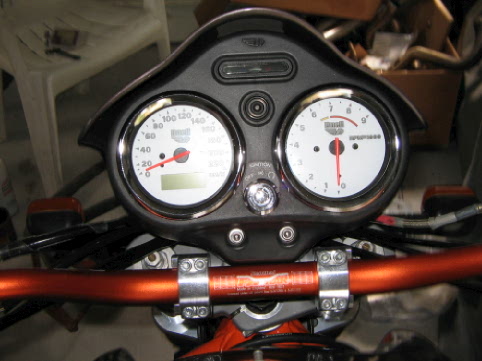 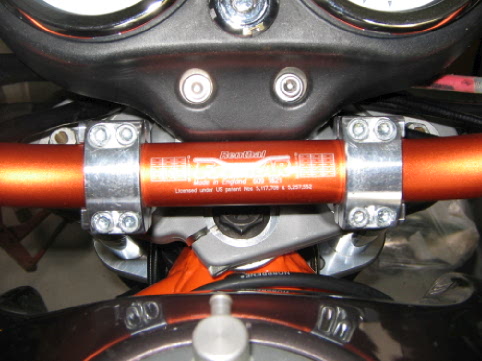 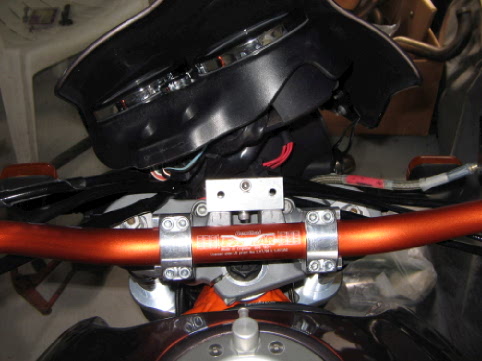 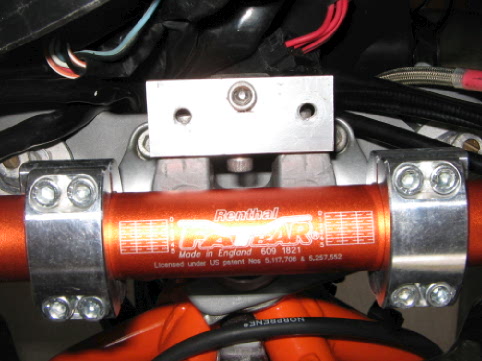 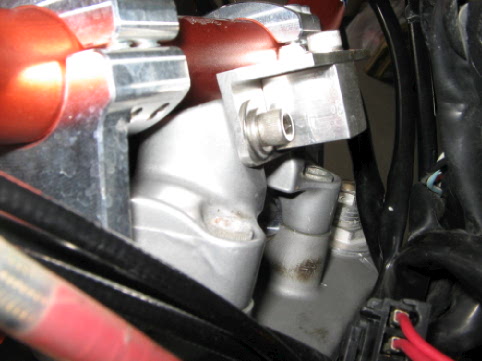 | ||
Billetmetallic |
indeed, it looks killer, thanks for your input! |