| Author | Message | ||
Skinstains |
Rattle cans rule ! If it doesn't last as long as a "real" paint job just do what I do. Touch it up as needed. It only takes a few minutes to do. | ||
Teddagreek |
You should take it to one of those ding removal guys... They have glue deal instead of welding tabs then they use a dent puller...  | ||
Gschuette |
Good idea with the pdr process. Wouldn't that get you a little extra fuel capacity as well? Might be worth looking into with an 03 since they have such a small tank. | ||
H2owerker |
"I wasn't saying anything bad about it. I was just curious."-Oxygen151 I know, and didn't take any offense. I'd love to have PDR done except that I'm afraid that the aluminum might crack. I could see it working on the right side where the dent isn't really bad. But that left side impact is deep enough that you can see the beginning of a crease. I'm just going to have to deal w/ the loss of a few ounces of fuel capacity. | ||
Nik |
and the only difference between "REAL paint" and spray paint is the applicator. Prep/technique/environment are where durability are built. I don't know if having a "flex" additive would help, but I did use a Plastic primer where appropriate. 'Real' paint has a catalyst added during prep, so that it chemically cures and hardens to be way more durable than any 1 part paint, including rattle cans. There is a HUUUUUUGGGEEE difference between professional quality automotive paint and hardware store spray paint. And the use of a single part paint basically makes it impossible to go back and respray with a good 2 part system later without completely stripping everything to the bare base material. Spray paint may be 'good enough' in this case but don't kid yourself into thinking that any amount of prep/technique or an ideal environment will make rustoleum as good as a 2 part automotive paint system. (Message edited by nik on December 14, 2008) | ||
H2owerker |
I always thought the catalyst just helped the paint cure faster. But if it's a 2 part system (I didn't know that) and chemically reacts to create a more durable substrate (like an epoxy) that's some cool isht. I'm glad I'm going to an autobody shop to have the important parts done. | ||
H2owerker |
Alright I'm going to get an estimate for PDR later this week. I'll let a professional tell me if it can be pulled or not. I got all the adhesive off the left side tonight, and after a bit of sanding to remove all the paint in the area. The aluminum seems to be in better condition than I first expected. Whatever epoxy the PO used to fill the gap between the frame and the frame protector was what made it appear so bad. Sorry there aren't any pics for y'all. I'll be taking more soon. | ||
H2owerker |
It seems nobody wants to try getting these dents out w/o welding metal rods to them. I think I'll be trying some Devcon aluminum putty and a slide hammer to pull them myself. The body shop hasn't gotten back to me yet so no news there. I ordered a sheet load of parts online tonight. | ||
Ourdee |
Doesn't the tank/frame have a plastic lining in it? | ||
H2owerker |
I don't know about any of that. But I'm not having anything to do w/ paying someone to weld pulling wires onto my frame. I'm going to try to get the dent on the left side to pull out a little w/ epoxy. The protrusion on the tip of the concave section kinda irks me, and Id like to try minimizing it. I'll probably have to take a few swings w/ the soft face hammer as well. | ||
Brazenbuck |
H2oworker, Maybe something like this would work for you. http://www.eastwoodco.com/jump.jsp?itemID=2603&ite mType=PRODUCT | ||
Aptbldr |
Aluminum, generally, seems to bend once without cracking. When I attempt to bend it back, cold, it cracks. This is levers and brackets, I've never bent an aluminum motorcycle frame. : ) I understand that first bend 'work hardens' aluminum, making it less flexible than before. Consider filling aluminum frame damage and/or applying heat while re-shaping it. | ||
H2owerker |
I'm really not interested in heating the frame up enough to anneal the aluminum. I'm doing all the work in my basement cause it's -3 degrees and I'm not going to try heating the garage up today...I don't want to fill my house w/ gasoline vapors either. So I rounded up my 'redneck dent pulling kit' and set to work this morning. 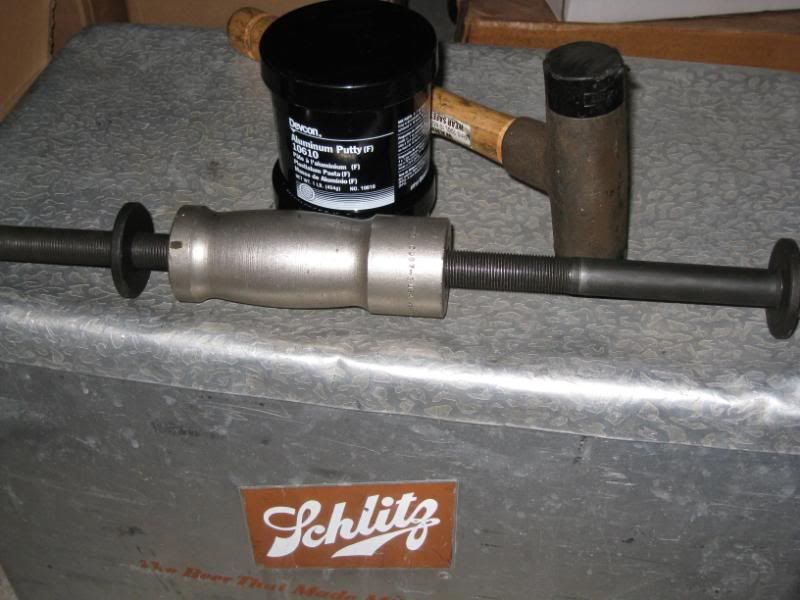 I used a heat gun to get things set-up quicker. I didn't want to wait till tomorrow to start hammering.  That didn't work so well...  I figured that might happen w/ the direct approach. So I've set things up a little different for 'round 2'. I'm hoping that it may work better starting from the edges of the dent.  If this doesn't make any noticeable difference I'll begin filling them in. | ||
Ochoa0042 |
good luck with that there, you're going to need gorilla strength to pulll that back into order  off topic: how much is a frame cost from the dealershit? | ||
H2owerker |
"you're going to need gorilla strength to pulll that back into order" Notice the Schlitz cooler...I've got 'beer musclez'.  "how much is a frame cost from the dealershit?" lol. More than I care to spend I'm sure. | ||
H2owerker |
I'm done w/ the 'redneck dent puller', and started filling the dent on the right side w/ Devcon Aluminum Putty. I brought in the ball-peen hammer and shaped things up to a point that I think will give a decent appearance before I filled it. I can say that the putty took quite a beating before it gave out. However it wasn't durable enough to make a noticeable difference. For reference Loc-Tite 5min epoxy blew-out immediately...so don't bother w/ that product for structural work. I wish I could spend more time on this part of the build, but I have to move on. After shaping the filler and painting I'll be moving on to 'badge removal'. I'm hoping the years haven't hardened the adhesive to a point that cutting them w/ floss or fishing line isn't possible. I'll be polishing the lips on the wheels about the same time. So if you've been following along, and have any tips on 'badge removal' or polishing aluminum I like to hear them. Anyone know if the stickers on the frame are 'required by law' or is it legal to run w/o them??? | ||
Bishopjb1124 |
Were did you pick up the devcon at? I am looking to fix a dent in my wifes frame and this is just what I have been looking for. Jimmy | ||
H2owerker |
I got it at Grainger Industrial Supply...I had to use the account # from work though. You can get it from http://www.mcmaster.com/ just type Devcon into the search box and check the 'Metal repair epoxy adhesives'. I used 10610, and some 40grit to scuff the frame. If you use a heat-gun to help cure it faster take it easy...If the frame is getting to hot to touch back off. | ||
H2owerker |
Merry Christmas! I awoke this morning to find that Santa had stopped by during the night... Here's what he left for me! 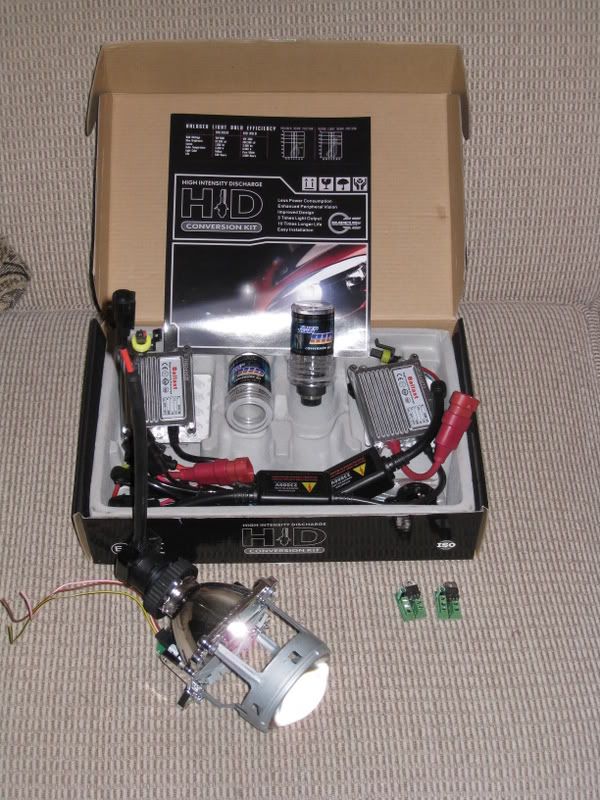 Bi-Xenon projectors (E46 BMW), solenoid timers, and digital slim ballasts w/ 5,000k bulbs. There was a note inside the box explaining that the other projector had been given to a fabrication shop, and they will call me when the headlight housing is finished! I guess being a 'good boy' all year was worth it. (Message edited by h2owerker on December 25, 2008) | ||
H2owerker |
After a few hours of work I've got another update... I gave up on the idea of pulling the dents, and started filling them in. That began w/ the left side using a ball-peen hammer. I tapped the concave segment back as far as I thought prudent, and filled the dent w/ Devcon Aluminum Putty. 1st fill  Sanded to desired shape  2nd filling sanded   I checked the old frame puck against the patch and the portions that aren't completely filled will be covered. This will be just fine for my intentions. Time to flip her over and sand the paint off the right side dent...Doh! While becoming intimate w/ this part of her I discovered that it's worse than I remembered...and the pictures don't do justice to the depth. Right side dent sanded   Filled and sanded twice   I checked this side w/ the old frame puck as well. So the unfilled portions here will be covered as well. | ||
Ourdee |
Side Note: If using a flat file, Put some chalk board chalk on it to help check the loading up. | ||
Ducxl |
.....Oooorrrrrr,have a "File Card" handy We absolutely dread the day our XB develops that kind of dent.We're procrastinating over the use of the pucks.The frame just looks so much better without the pucks.Oh well,we'll just treat the XB like a bike we cannot push limits with  (Message edited by ducxl on December 27, 2008) | ||
H2owerker |
I'd highly recommend the frame pucks. I wish the PO had put them on as a preventive measure instead of as a disguise. The appearance of the frame pucks may not be as flattering as the naked frame, but they can be painted or capped w/ carbon fiber puck covers...and you'll probably never have to go through the work of filling dents... I didn't use a file on this, a sanding block w/ 50 grit paper seemed appropriate to remove the epoxy evenly. My next project on the other hand will require a couple different files. I use a brass or stainless wire brush to clean the teeth of my files. Then store them in oiled rags. I'd like to have a file card in my tool box, but I don't mind making due w/ whatever is at hand. While I'm thinking of cheap tool solutions. I'll mention that I used disposable plastic knives to mix/apply the putty. I wish I'd had some real tools for it, or an old ice cream bucket to cut plastic from. It would have made the application much easier. Not to mention save loads of work sanding. For my mixing pallet I put some aluminum duct sealing tape on the bottom of a Becks mini-keg. The tape pulled off easily between applications and I put a fresh layer on before mixing more. | ||
Xb12mel |
'Dat derr som good ad'vis son! keep 'em comin!  My 07 Scg, didn't come with pucks from the factory, I had to order them from the dealer the day I signed for the bike. Funny thing is I dropped it on the right side before I completed the first 50 miles. (well that's not the funny thing) the funny thing is, the dealer called me to tell me the pucks were in 2 days later. So yeah, mine is as a disguise. Your PO may not have had a choice either. (depending on how bad a rider he/she was) If I ever decide to sell mine, I'll probably go through the hassle of filling the dent myself first. But it will have sooo many miles on it, the new owner will be more impressed that it still runs! But for now it just helps me to identify which Buell is mine when I go out to the local Bike Night! (cause you know there's a sea of Buells every where you turn now!)  | ||
Skinstains |
I have been using Devcon products for a long long time both at work and in my garage (I get a real good deal on the stuff I use at home). The only thing I do different is I scrape or gouge (not stupid deep)the surface I want the epoxy to stick to. | ||
H2owerker |
I got a new part project started over Christmas weekend. I was inspired by an image I saw, and decided to give it a whirl. So I cut a good chunk off the tail section eliminating the "Grater" 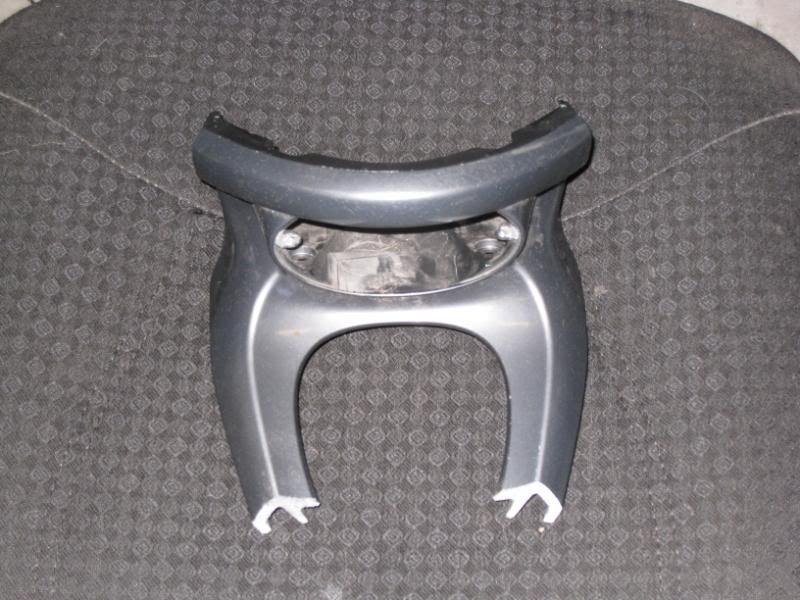 And began shaping it using a 4" angle grinder w/ a 'flapper wheel'. That thing really removes aluminum quick! I'll probably have to fill same small areas to achieve the shape I want. 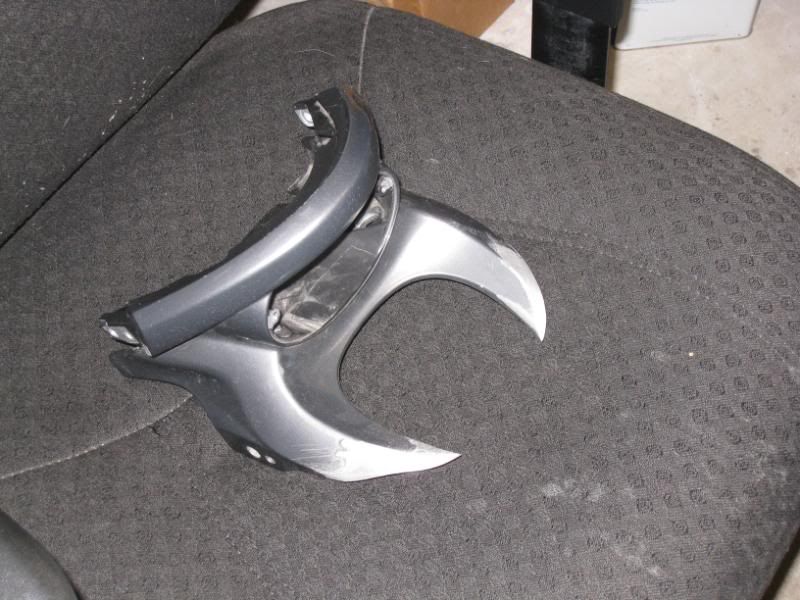 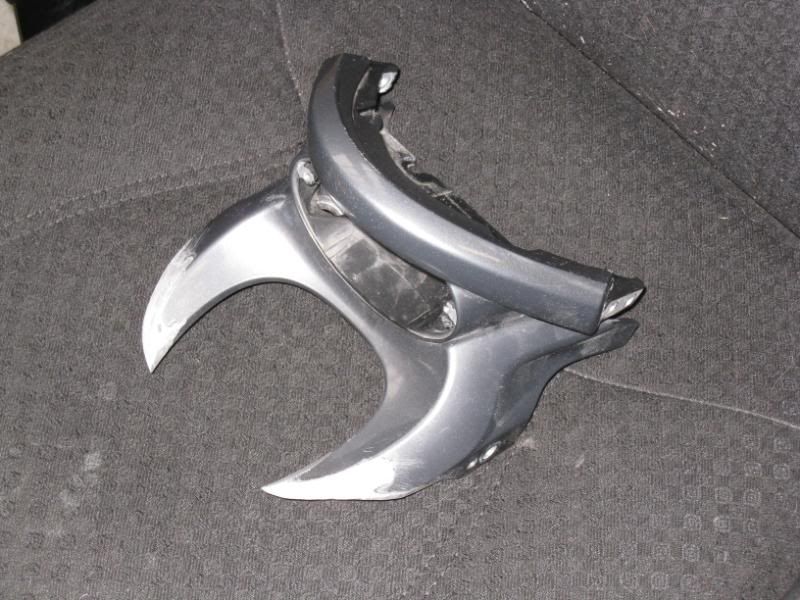 I'll try to get some pics of the bottom to show how much material I've removed there. Unfortunately I left the part at work and wont see it again till next year. | ||
H2owerker |
Happy New Year! I started it out recovering from a little too much...everything! I still found the time yesterday to prep the frame for paint. I put the rattle can to it this afternoon and the results are about what I expected. It's quite difficult to get even coverage from one of these spray cans and as a result of that direct sunlight will show a couple 'lines'. I can live w/ them. Left side: 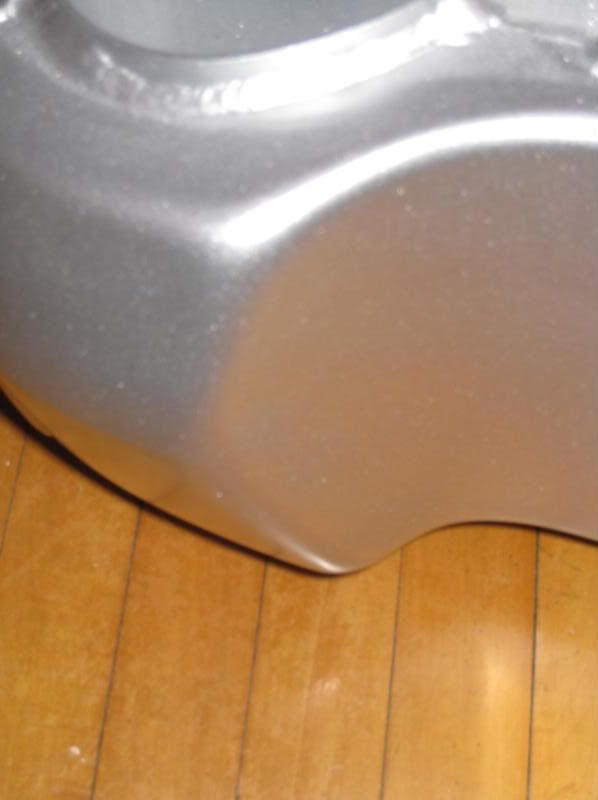 Right side:  Whole: 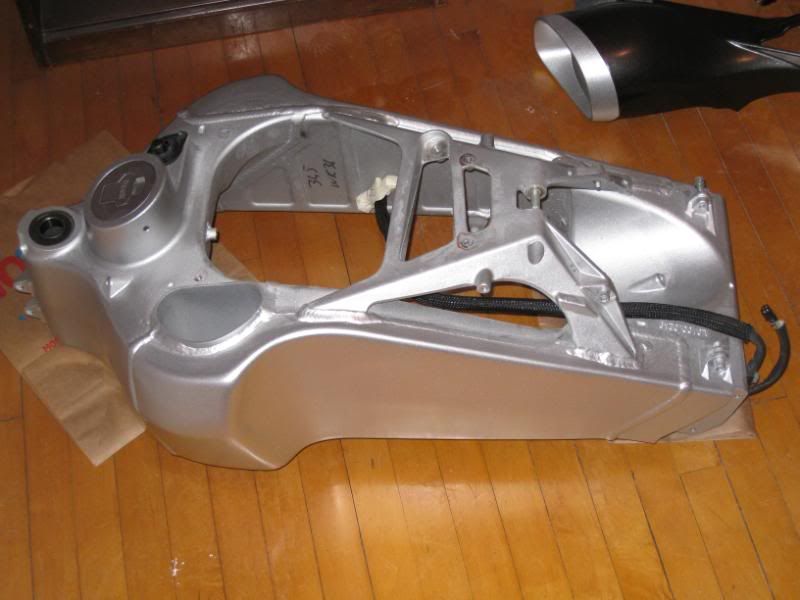 Lets get back to the tail section I started sculpting...I mentioned posting pictures of what the underside looks like. 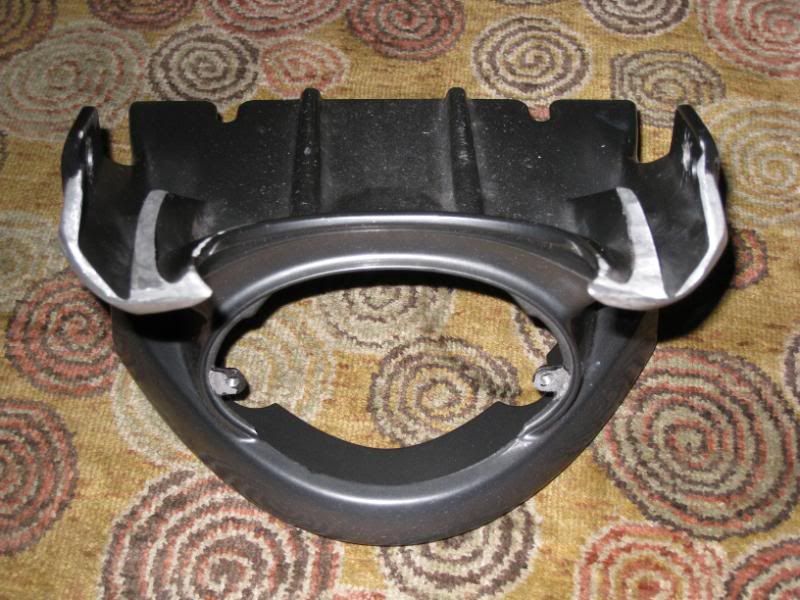 I'm not exactly sure how I'm going to mount the license plate under this. There is one bracket available on the internet that I know works w/ a "Tidy Tail" modification. I just don't know if it will be low enough for the "Horned Unit". I guess I'll have to contact them and see what they have to say. | ||
Ochoa0042 |
good job  the frame look spot on the frame look spot on | ||
Rpm4x4 |
I love the horned tail piece! | ||
Ulynut |
If you buff the frame with rubbing compound, would you still see the "lines"? |