| Author | Message | ||
Pwillikers |
I am reasonably experienced mechanically. For example, I've replaced a clutch on a BMW R1100S which was quite involved. I've adjusted many valves but none with shims that require cam removal. I've got the manual and have read the pertinent sections, but I've found that there's no substitute for experience, even if it's someone else's. I'm coming up on my 12K valve check and would really appreciate it if those who've done this procedure contribute to this instructional thread with pics and tips for the process start to finish. Pointers to other threads are acceptable and encouraged but I though a consolidated, how-to thread would benefit a lot of folks. For those who've gone before, please weigh in. | ||
Luisemilio25r |
You do not have to remove the cams. Just move the follower to a side. Do 1 by 1. Is fairly simple. The tedious work is rotating the engine. What I did is I just removed the frame from the engine and it was pretty easy. | ||
Rt_performance |
Biggest thing is pay attention how the locks for the followers go in the 09 and 10 manuals have errors in them and if you install the back wards the valve covers won't fit. I honed down my old shims since my dealer was talking a week or more to get the correct ones. if you do order shims you have to check them with a micrometer where they are dimpled. cailpers can not measure that dimple. | ||
Zac4mac |
IF you have to change shims - Plug all the holes in the valve cover you can. Go slow with lots of light, use a magnet or better yet, suction, to hold the shims. Do not drop a shim in the motor!!! If you do, find it before turning the motor. no exceptions. I dropped one and it took me 3 days to find it. At the first 12k, all were tight, but in spec, 25k required changing 6 of 8. magnet tools for fishing and shim-insertion  optical tools for hunting 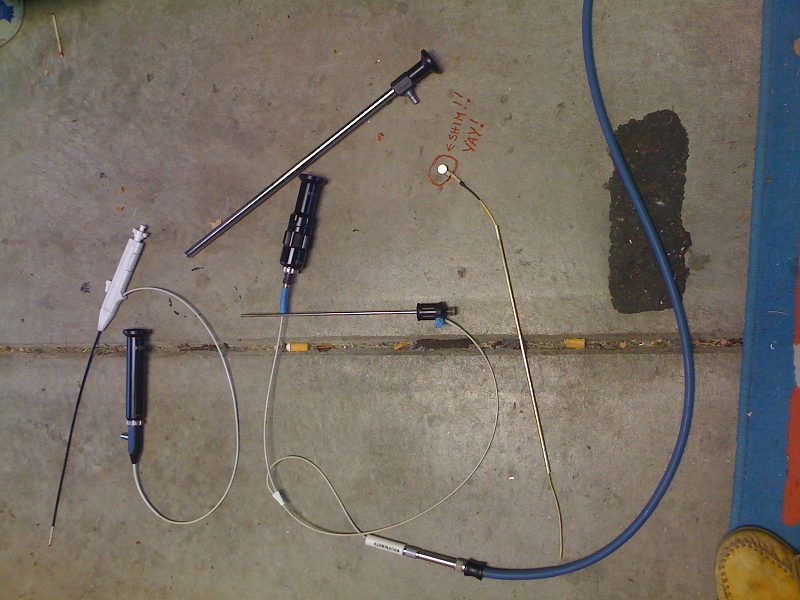 where I found my shim(pic is a motor at the shop getting a new water pump)  Z | ||
1125rcya |
I am still waiting for someone to make a step by step video on how to do engine rotation, check valve clearance and replace shims | ||
Tpoppa |
Are any parts (other than shims) needed? Gaskets? | ||
Juniorkirk |
If someone would make a step-by-step of the engine rotation and the check, I think I would have found my new god......cause that would also help with getting at that damn front spark plug. So, to my future god, please make a step-by-step to help all your hooligan Buell children out there, whoever you may be | ||
Daggar |
Just get a service manual. The step-by-step is there already. | ||
Juniorkirk |
I do have the service manual, but it isn't nearly as good as some of the how-to videos I've seen on here. | ||
Freezerburn840 |
I have found a good mechanic here in Ca. in Mission Viejo that has done the plugs without rotating the motor. He has told me he will try to do the valves without rotating the motor I dont see how he can without. But he is good enough to know what he can and cant do so if he needs to turn engine he will do so. He has mastered the front plug it is not easy but he works from the side of the bike with both hands. He does remove everything. The air box covers and gasket and the snorkel just in front that holds everything in place. | ||
Juniorkirk |
Sorry for diverting this thread a little, but i'm still perplexed at how you can change that front plug. I took everything off to see just how much room there was. And i dont see any way at getting that long coil out of that little spot, THEN getting a tool long enough down in there to unscrew the spark plug. I just turned over 10,000 miles on my bike and want to put new plugs in her, but dread the engine rotation. It would be nice to have a tool list of getting it out, or a good video on how to rotate the engine to ease my mind | ||
Freezerburn840 |
Juniorkirk the hard part is over you just need the right tools. I believe he dropped the socket down the spark plug hole but he had a very long extension to do so. I will try to contact him if he can give me the tool list I believe it was 2 or 3 after everything was removed to get to it. Unfortunately I dont have a video recorder if I did I would have recorded the procedure he came up with to do it. | ||
Juniorkirk |
Freezerburn, if you could get that parts list that would be awesome! The only reason i really havent dove into it to change the plugs is cause i wouldnt know where to start with that front plug, but a tool list would be just the start i need. I'm pretty good at figuring something out if you put all the stuff in front of me, or i get frustrated after a long time and would probably pull the entire engine out so i could do a TON of stuff i've been wanting to do (ceramic coat the headers, spark plugs, valve clearance check, heat shield the inside of the tank, etc...) but i'm trying to hold off on that until i get back to Iowa and it can be a winter project. | ||
Milezero5 |
There really isnt a parts list, its just patience is what works the best, spark plug socket, two short extensions( easiest to do measurements on the rear), medium length to long length ratchet, and the most important piece is a flexible telescoping magnet. It can be done, considering im a nissan mech. and tight spaces are common. There are other tools that can be used but these are the most common. Oh and silicone spray helps as well. Im in the middle of doing my valve adj., ceramic coating the headers, lining the inside of the frame, and whatever else that peaks my interest. It took about 2 hours to tear every nut and bolt apart to get to the rotational section. Unfortunately I dont have a camera good enough so I cant help on that part. (Message edited by milezero5 on July 05, 2011) | ||
Freezerburn840 |
Well this guy was pretty nuts. He pretty much did it from the right side of the bike right hand through the front and left hand through the air box side. I held my breath when he dropped the socket down the hole. He told me "dont worry we will both piss on the service manual after we are done". lol! I was pretty impressed since he is a guy that has never done plugs on any Buell. He likes working on sport Twins escpecially Ducati's. He owns a Honda Superhawk. The RC51 motor. I pm'd him on the tool list he is on www.ocmoto.com independent mechanic. (Message edited by freezerburn840 on July 05, 2011) | ||
Avalaugh |
Here is my VIDEO on how to change front spark plug. 1 minute method... http://www.badweatherbikers.com/buell/messages/290 431/593186.html?1284853306 I will also do a valve check one this winter, if you want to subscribe to my youtube for further videos my user name in avalaugh1980 | ||
Freezerburn840 |
there! Avalaugh has got it down. | ||
Juniorkirk |
alright, avalaugh, you just made me jump off the cliff. I looked at my tools i had, and sure enough, i had what i needed to go change the spark plugs. I'm uploading the video's to youtube right now, and once thats done i'm gonna post all my info on doing this in the knowledge vault and put the link in here for you guys to see. If anyone knows how to put a youtube video into the post and only have to click on it to play, that would be a lot of help so its easy to follow the instructions. | ||
Jimustanguitar |
"I honed down my old shims since my dealer was talking a week or more to get the correct ones." Valve shims are case hardened, so honing them thinner is not an advisable practice unless you can heat treat them again afterwards. |