| Author | Message | ||
Tbowdre |
Holy s#it! there are a lot of wires to route when I reassemble. LOL otherwise pretty simple. | ||
Finedaddy1 |
I'm looking at this as well, just a few minor scratches......I just want to do it right. Is this a two man job? | ||
Milezero5 |
Two people makes it easier, beer makes it take way longer than it should, lol  | ||
Jdugger |
You can do it one man easily enough, in particular if you pull the front end off the bike. You will be shocked how light the frame/tank is. Run it down to reserve to make your life a bit easier. | ||
Tbowdre |
one man job,... having a decent lift and stands is required. I have a 4 year old and a one year old "helping" so I also have tie downs from the ceiling making sure no one is crushed  | ||
1_mike |
How about two come-a-longs...straight up into the rafters...? Wheel removal only. Mike | ||
Yugi |
Can you describe the process,preferably with pictures? | ||
Jcjohnson33 |
I just started my frame off valve check today. I have been taking lots of pics both for everyone's eyes and for my own so when I go to put it all back together. I'm only half done on removing so I'll post pics later on the removal. Yes there ARE a lot of wires lol | ||
Jcjohnson33 |
Oh yea I'm going at it solo and I don't drink beer but I love diet Dr pepper and my low carb Monsters  | ||
Jdugger |
Smooth sippin' while working on the bike is bliss. I used to hate wrenching. I've come to really enjoy it as part of racing. | ||
Stirz007 |
Wrench therapy is cheaper than a shrink and at the end of a 'session' you can actually see that you made progress.... | ||
Jcjohnson33 |
Ok I have the frame off and was adjusting the front exhaust valves. Drop a shim so unfortunately I had to remove the cam gear fasteners. Well trying to torq back to specs I broke one bolt. I think my torq wrench might be bad. Any way any one know the part # so I can order one or two or three? Or if you know of a good replacement that I can go to lowes or home depot or the auto store and get one? HELP please TY | ||
Yugi |
The bolts which hold both cam gears are CA0036.1AM | ||
Jcjohnson33 |
Thanks yugi | ||
Jcjohnson33 |
So when I pulled my frame I went ahead and completely removed the harness upgrade. Question should I reinstall it or leave it out. My bike is an '09 1125R with 17500 miles with original battery & r/r and on my 2nd stator that's been in there for approx 10000 miles. And no more warranty. What is your thoughts | ||
Jcjohnson33 |
ok so im putting things back together with out the harness fro the stator im trying to figure out where this wire goes. I think it goes to the black connector by the stator wire connector but not exactly sure.Hint to everyone take lots of photos and get some close ups and you wont have to go through this like me. 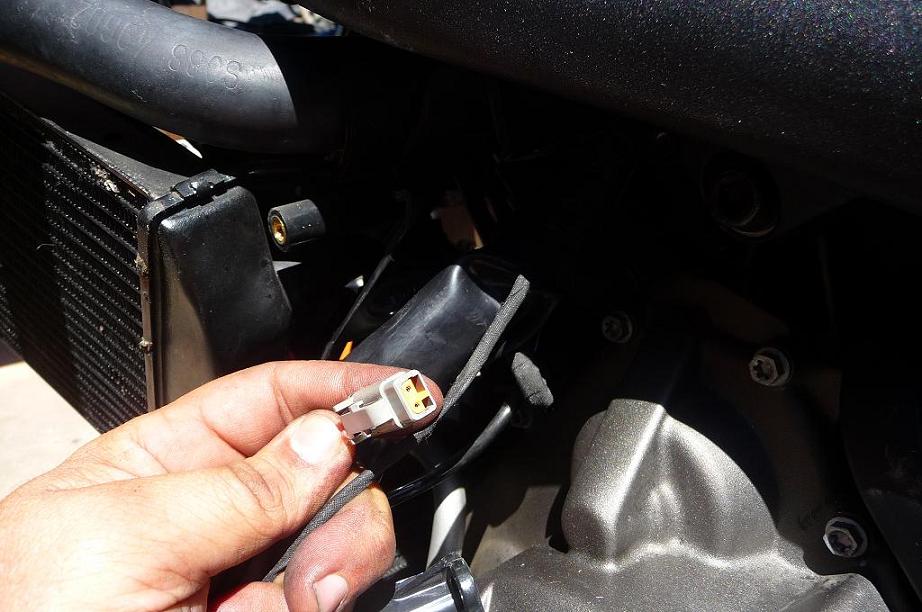 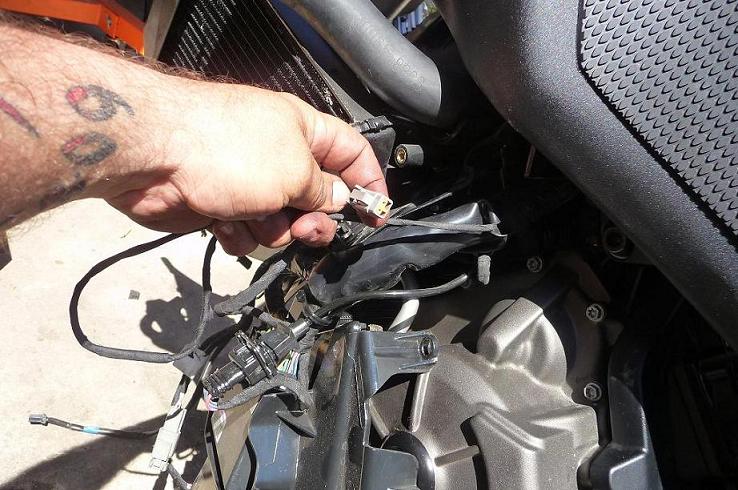 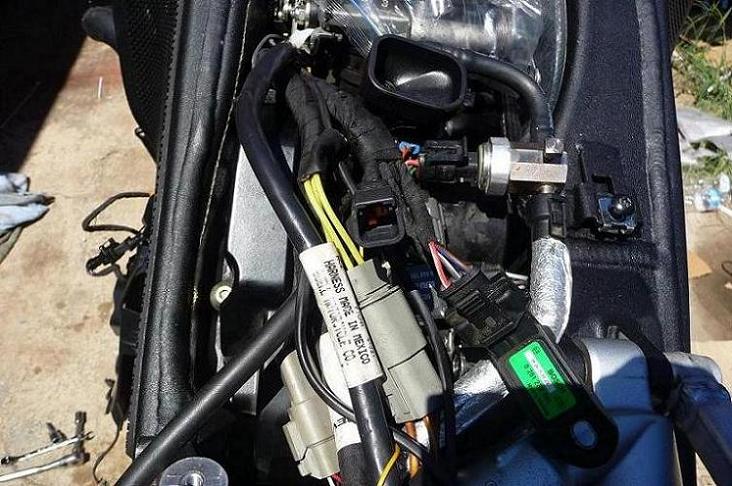 | ||
Jcjohnson33 |
http://s1119.photobucket.com/albums/k640/jcjohnson 33/ link to photos of disassembly | ||
Yugi |
Can you remove rear subframe, attached to the frame? | ||
Tbowdre |
That is part of the harness upgrade that goes to the ECM connector... it does nothing if you have removed the harness. FWIW if you have a stock stator you may consider leaving the harness installed as it is supposed to shut off one leg/part of the stator at low RPM. I just pulled my ignition cover after running a custom rewind stator for 4000mi, with out the harness. There definitely looks like a heat issue with the upper part of the stator. the lower 1/2, that is likely in oil, looks way happier. fu@k who knows. my 0.02 anyway | ||
Jcjohnson33 |
Yugi do you mean the sub frame that you sit on and holds the battery and stuff? If so than yes there are 4 screws 6mm allen one is 8mm that goes thru the rear shock. Or do you meen the swing arm? I didn't remove that but looks like just 2 bolts for that. Tbowdre. Thanks lol I guess I'll reinstall it. I am thinking about pulling the stator just to have a look see at it's state of coating and color | ||
Finedaddy1 |
Jcjohnson33 - Great pics, thanks for posting! I'm getting ready to do the same to mine. So how was the total experience for you? Not bad Sucked P.I.T.A. Nightmare Enlightening | ||
Jcjohnson33 |
Finedaddy... All of the above. But over all not to bad really. There are a few things I wish I had the money to do like get my pipes ceramic coated. And also take ALOT of pics. Close ups of connectors and wire routing. I have mine back together now except for the front facia and things seem a little tight now that were not before and my charcoal canister doesn't seem to have as much room as before. But now that I have done it I know I can do it again and faster since I know what needs to be done. I may or may not have done everything by the book, acutually I know I didn't cuz I didn't look at it much.  I kept all the screws to the fairings in one Lil bowl since there all the same, the rest I reinstalled in there place after removing what needed to be removed. I did everything by myself so I can't blame anything on anyone else (bummer). But I learned alot about my bike and now I know I should be able to keep it running for a long time. Happy wrenching I kept all the screws to the fairings in one Lil bowl since there all the same, the rest I reinstalled in there place after removing what needed to be removed. I did everything by myself so I can't blame anything on anyone else (bummer). But I learned alot about my bike and now I know I should be able to keep it running for a long time. Happy wrenching (Message edited by jcjohnson33 on August 20, 2011) | ||
Father_of_an_era |
Thanks for all of the pic JC. I was thinking about doing my own but after seeing your pics, I think I'm better off taking the $1000 hit to my pocketbook! YIKES!!! LMAO. that job may be too much for a novice like my self. | ||
Father_of_an_era |
How did those shims look by the way? Were they still in good shape. I am wondering because I have 12000 on my R now and I want to wait until I hit the 15000 mark before I pay to have the valve adjustment. | ||
Tbowdre |
at 13,500 miles one exhaust valve too tight on rear cylinder and one exhaust valve on front too tight as well. all others in spec | ||
Zac4mac |
At 12.5k, mine were tight but in spec. At 25k, 6 valves were just out of spec and got new shims. DO NOT DROP SHIMS in MOTOR. If you do, find it before turning the motor over. Zack | ||
Duphuckincati |
I presume there's ample room to stuff rags around the areas a shim may drop? | ||
Jcjohnson33 |
not to much really 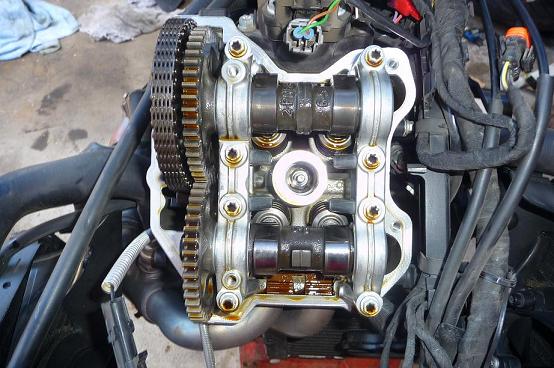 | ||
Jcjohnson33 |
valve shims 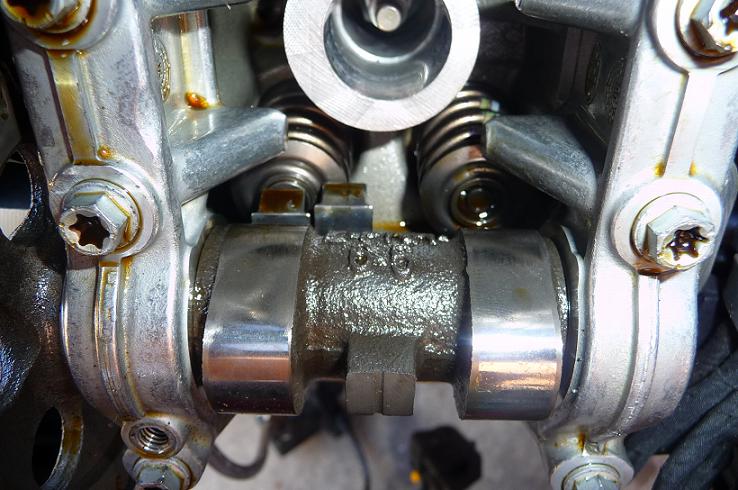 left side is shim still under follower the right side has the follower slid to the right and shim removed (Message edited by jcjohnson33 on August 21, 2011) | ||
Jcjohnson33 |
here are pics of one of my shims removed all were pretty close to spec only about 2 or 3 were tight so i removed and installed thinner shims. I did use the shims I bought from procycle there made by hot cams.  top view of shim (follower side) 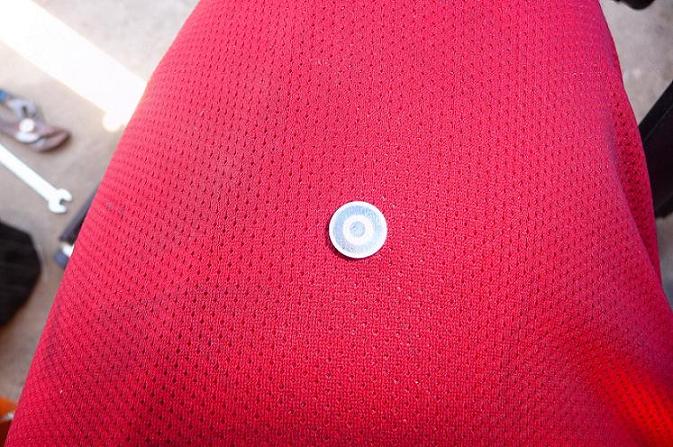 Bottom side (valve spring side) | ||
Zac4mac |
Best IMO would be a vacuum probe to handle the shims. I didn't really want to magnetize the shims so I tried a pair of hemostats. Bad idea. Spent the next 3 days, on and off, with 3 laparoscopic optical probes looking for the shim.  I made a couple of magnet tools during the 3 days also. Fishing tool has a small Nd-Co magnet, heat-shrinked to a curved spring held straight by a brass tube. Push it out of the tube and it will go around a corner.  The insertion tool has another Nd-Co magnet on a stick that slides inside the brass tube. Push the magnet to the end of the brass tube and hold the shim. Pull back on the magnet using the brass tube to position the shim and release once the magnet is far enough back. Very smooth. Have fun. Zack | ||
Jcjohnson33 |
Well I figured out what the black plug I was asking about in an earlier post with pics. Yes the first grey one went to the harness upgrade the black one in the third pic went to the noid. Duh now I know well most everything is back together just the rear plastic, seat and airbox need to be put on. I already bleed the coolant (changed it) and topped off the oil. Started it let it run for a bit. Everything sounds nice and smooth no ticks or clicks and very smooth running. Just need to give her a bath and go scrub in the new rear tire I had put on today. |