| Author | Message | |||
F_skinner |
Judging by what you have done and how you are doing it I doubt you doing anything half a$$. The pipes are going to come out great. I did my 95 S2 and also said never again but having a feeling I will be doing another set of pipes soon. It just looks so darn good! Sleez, I also wanted to thank you for posting the pics and words. Many of us have been overseas in some bad places and I can tell you for a fact that we really appreciate not only reading about Buells but seeing some pics. Looks like I need to go pull the exhaust off of a bike or two and start polishing.  | |||
Sleez |
F_skinner; you and anyone following along are quite welcome!! ok, here is what i did today so far. i decided to build my own breather overflow canister. i bought one 1.5" abs coupler, two 1.5" end caps, and two 1.75" long pieces of 1.5" abs pipe, luckily my HW Store sells partial feet! i then got two 3/8" barb x 1/8" MIP fittings and one 1/8" Drain ••••. i also had to get a 1/8"-27 pipe tap and an 11/32 drill bit, since i didn't have those already. coupler; .59 cap (2); 3.98 pipe (.25'); .20 hose barb (2); 3.78 drain ••••; 2.29 total; 10.84, plus the tap and drill bit, which i won't count, since they are tools that can be used again. the pipe fits really tight in the end caps, so i didn't worry about gluing those in, just tapped in all the way with a hammer. then i used some red rtv to seal the nipple into the coupler. then i hammered the other nipple into the other end cap. i then drilled two small pilot holes in one end cap, making sure to leave enough room for the fittings. then i drilled the 11/32" holes for the 1/8" tap. i actually did this by hand, the abs is soft enough, and the bit was new enough, it only took like 30 seconds per hole. then tapped each hole. then i did the same for the one hole on the bottom. then i used some more rtv to seal the two assemblies together, sweet!! i used teflon tape to seal the fittings in the canister. of course i had to check the volume...just under 4 oz. canister measures 3.75" long x 2.25" diam. overall length including the fittings is 5 3/8". plastic parts;  fittings/tools;  the bottom, cap/nipple/coupler;   11/32" holes;  tapped holes;   top and bottom assemblies with fittings installed;  completed assembly;  volume test;  size;  i plan on routing my head breather into here and routing a hose to the rear with a filter. the tranny vent is already run back there. | |||
Blazin_buell |
You go Lee, I LOVE alternative thinking. | |||
Sleez |
well, spent another 2 hours polishing the pipe, mostly spent on the collector, trying to get some of the deeper gouges smoothed out, compare to the pic from yesterday;  collector;   | |||
Tripp |
wow, nice work man!!! thanks for all the pics too! | |||
Littlebuggles |
Maybe you should have your welder fill those gouges for you, they look pretty deep. Got one of these for removing the machined lines in my SuperTrapp, same as what I used to polish my header in a similar series of sand grits. 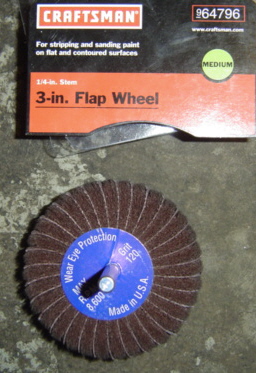 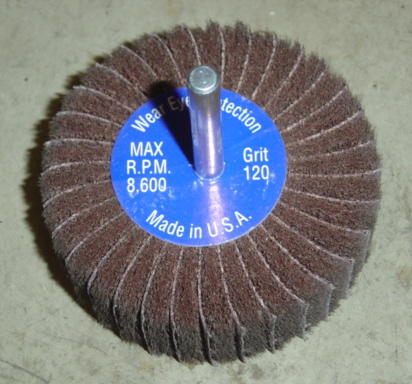 | |||
Sleez |
Littlebuggles; i thought of having him fill those in, i might. i may have to try one of those flap wheels. i did 2 old style trapps and 1 new style just with emery cloth and sandpaper, the same as i described above. the flap wheel would probably help with the rough sanding a bit, might get one tomorrow. thanks. | |||
Littlebuggles |
You betcha. Are we crazy because we polish, or do we polish because we are crazy? A co-worker told me he put buffing wheels on his bench grinder and just runs it on the floor since he doesn't have a work bench for it. I'm prolly gonna do the same... | |||
Nevrenuf |
looking great and how much longer before you fire it up lee. | |||
Sleez |
hey neil, thanks. i'd say a couple more weeks, depending on how the OPDG inspection goes. | |||
Nevrenuf |
oh yeah, i do have an extra axle if you run into that problem also. sorry i couldn't be of more help earlier but if i can, don't hesitate. | |||
Nevrenuf |
hey lee. just thought i'd show you the pipe that the daughter's fiance put on the bike that he bought from my buddy. it's a d&d race header supposedly. the guy he got it from wasn't sure what it was or what it went to. just thought i'd show ya seeing what you had to go through to get your pipe that good. more than likely someone had to do the same thing unless it came that way. 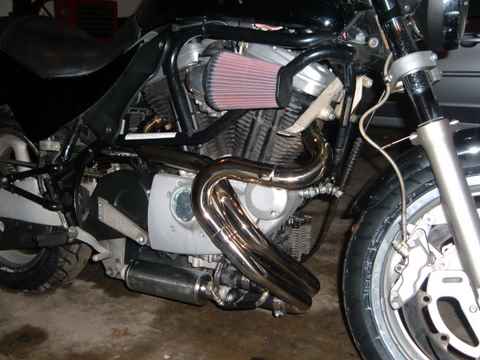 | |||
Sleez |
shiny!!!! i like!!!! | |||
Nevrenuf |
my buddy bought it up in n ga a couple years ago for 3500, didn't do any mods at all to it and turned around and sold it to him for 3500 two years later. barely had 5k on the speedo when future son inlaw bought it. in fact he put more miles on it in the two days taking it home than my buddy did in a year. and for the most part, this bike was kept very clean. although he did let it fall off his trailer when he got back from mbv last year. | |||
Sleez |
i received the orange screaming eagle wires from shane, thank you. i may cut them down some. yesterday i did a minor change. i plugged the holes in the air filter backing plate, didn't want to use duct tape. i found some axle caps, like for lawn mower wheels, that fit nicely, and epoxied them in from the back side. i used a metal putty called "Magnum Steel", sets in 5 minutes. as you can see, i tried a couple different methods. one i used extra epoxy to make sure there was full coverage and the other i tried a minimalist approach. i figured if i liked one better than the other, i could re-do it. this stuff cures and sticks very well! i think it is fine as is!    | |||
Sleez |
got some bad news today, the front muffler mount isolators are no longer available, someone either bought the rest or they scrapped them. no more to be made ever! good news, i have the drawing of the part, so we could come up with a suitable sub. at least my two samples came in before they were all gone!
| |||
Reepicheep |
Is the whole bracket still available? Odd that those new style isolators even wore out... are you sure the part number was right? The old style bracket isolators were doomed from birth anyway, so I am sure those are gone. | |||
Sleez |
AFAIK yes, these are the new ones, only available with the whole bracket assy, AFAIK. they don't usually wear out, but when someone doesn't mount the exhaust correctly they can FALL out! | |||
Court |
Send me a pic and detailed description of what you need. | |||
F_skinner |
I talked to Al about the muffler mount isolators and from what I remember he did not have a source for them. I have had no luck through my local dealership but that does not mean they are not still out there. Court, I think more than a few of us are in the same boat so if you discover an updated part number or source please post it. Thanks, Frank | |||
Brinnutz |
I need two as well. | |||
Sleez |
court, thankfully i currently don't need any, i got two as a sample from Lord. the Lord p/n is J-3830-122, haven't discovered if there is a Buell p/n for it or not, of course there SHOULD be. the parts books i have seen (mine is in the mail to me) don't show this part separately. here are the pics of my old one;   if nothing else, maybe we can find out the Buell p/n and if it is available separately??? if not for me, for others who may need some in the future. | |||
F_skinner |
Sleez, thanks for the idea on the back plate. I will be doing the same thing soon. Frank | |||
Brinnutz |
No part number in my 2002 M2 Parts Catalog...It's all one piece with the Y hanger. | |||
Gowindward |
The Y bracket assy. is still available. I just bought one from the dealer for my S2. | |||
Court |
Help me out folks . . . this is the BUSHING that goes IN the "Y" Bracket? There are one or two of them? 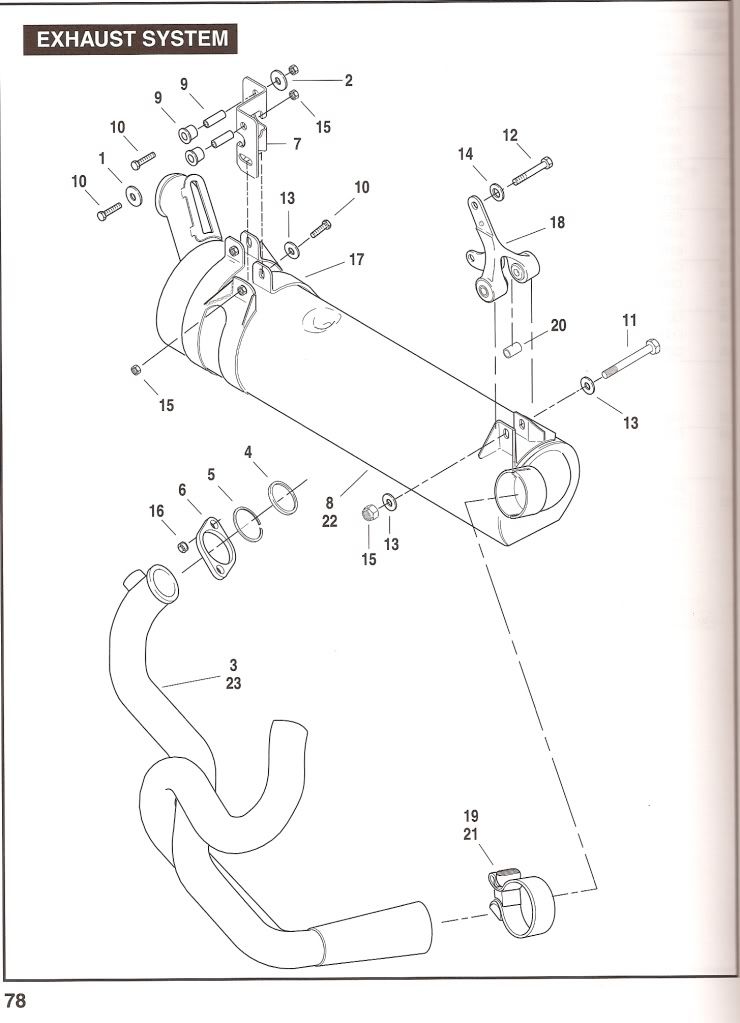 | |||
Gowindward |
Two bushing on the outside of spacer (20) with bolt (11) going through them. (Message edited by gowindward on March 27, 2009) | |||
F_skinner |
Well, re-reading the post I am not sure we are all talking about the same thing. Here is the one I was talking about. http://www.americansportbike.com/shoponline/ccp0-p rodshow/5929.html I think I will order the Y bracket for the S2 like I did for the S1. | |||
Gowindward |
Yep...I think you are on the same page, but different book. LOL I ordered the newer Y bracket and the Z bracket (7) and hardware to update the hanger system on my S2 because from what I have read the older system was a source for fatigue cracking of the exhaust system. | |||
Sleez |
F_skinner; that one is for the older front hanger/rear hanger maybe, not the one we are talking about now. Gowindward: you are correct, they seem to come as part of the bracket #18, there are two bushing/isolators thanks court |