| Author | Message | ||
Aaomy |
alright guys, sorry it took so long for me to start posting projects, just been busy with the bike and modifying a new paint ball marker. ok so i guess ill start by saying hi and letting you guys know who your chatting with.  my name is aaron, and im a single guy who lives in western ny. i work for a small electronics manufacture, called gowanda electronics. i design and make the machines that make the components they sell. im an active type of guy with a motorcycle addiction. have a million hobbies, kayaking, rock climbing, basket ball, guitar, paint ball, roller blading, but motorcycles has to be the main consumption of my time. i love any type of bike, started restoring old japanese bike because it was all i could afford. gotta love a old rabid chain saw, 500cc two stroke. when i could finally afford it i got a 62, xlch basket case. and when my fianc'ee left, i bought my totaled 96 s2t. yes originally it was going to be a chopper project. it had to be saved!! | ||
Aaomy |
couple of questions, should i list each project separately under a different thread name, or just keep one supper long running thread? and as i name these off, please let me know if their is one you want to see more that another. 1. billet xb to tuber front motor mount, 2. xb9 head prep, start of custom breather set up 3. billet foot pegs, to go with billet controls, and new longer billet shift control leaver 4. al swing arm conversion, and polishing 5. front sprocket lightening 6. rear sprocket cutting. 7. new al air cleaner assembly, with velocity and low pressure controlling cone. 8. new billet catch can and rest of custom breather set up. these are only some of the projects, but some of the others i dont have good pictures for. thanks guys, | ||
Aaomy |
guess ill start with the al swing arm conversion. i had to steal pictures from e-bay for the stock images. P.S. 1313- think you are the one that really liked the flamed exhaust idea,, thought you might appreciate this one.. purchased a 2001 m2 swing arm and mounting block, also a newer axle and adjusters off of e-bay.  so basically this was my starting point, i was going to use my stock mounting block so i didnt need the new one. another paper weight. i needed to purchase new swing arm bearing seals and the new shock mounting bolt and washers from the local dealer. while you have it down you may as well check and repack the bearings. | ||
Aaomy |
if your going to polish the swing arm, get ready it will take a little bit of time and prepare to get dirty.  the first thing i did was use a long threaded rod a couple stacked washers and some rubber to seal the bearing area. i would recommend removing the bearings and degreasing the area also. then i used a 3" beartex wheel in a die grinder to remove the powder coating. (P.S. use a dust mask, dont be retarded like me and think just because im by a huge dust fan this stuff isnt going into my lungs!!!!) 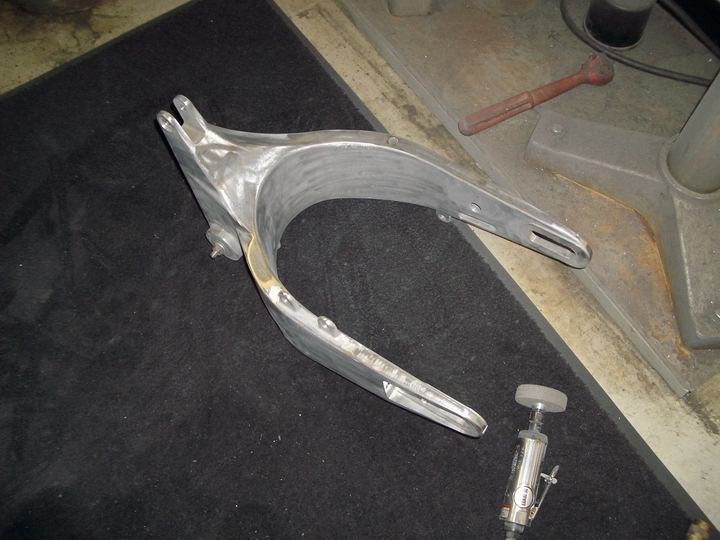 | ||
Ezetobebad__uk |
5. front sprocket lightening 6. rear sprocket cutting. What is the purpose of doing the above? Thanks for the swing arm photos , i will be doing same next year so the project is of great interest to me. eze  | ||
Aaomy |
humm,, couple things,, less weight is always good. less weight = better acceleration, some one once said 10 lbs.=1 horse power. you lighten the rear sprocket for two reasons, if you are going to remove weight their are three kind 1 general weight,, includes you ,, is sprung weight.. 2 unsprung weight,, wheels, rear pulley, fender 3 rotating weight,, rotational mass,, it is better to remove unsprung and rotational mass than sprung weight, removing unsprung weight,, rear pulley ,, helps the suspension keep you in better contact with the road. your suspension can react quicker and better with less momentum. the front and rear pulleys both fall under rotational mass, helps your engine rev quicker. and deceleration quicker to match your shifts. dose any of this make a major difference,, yes and no,, besides i like the looks better,, and all of that is enough reason for me.. look at my profile pick, you can see threw the rear sprocket,, i like that. | ||
Aaomy |
ok back to the swing arm,, you now are pretty much down to bear al.. 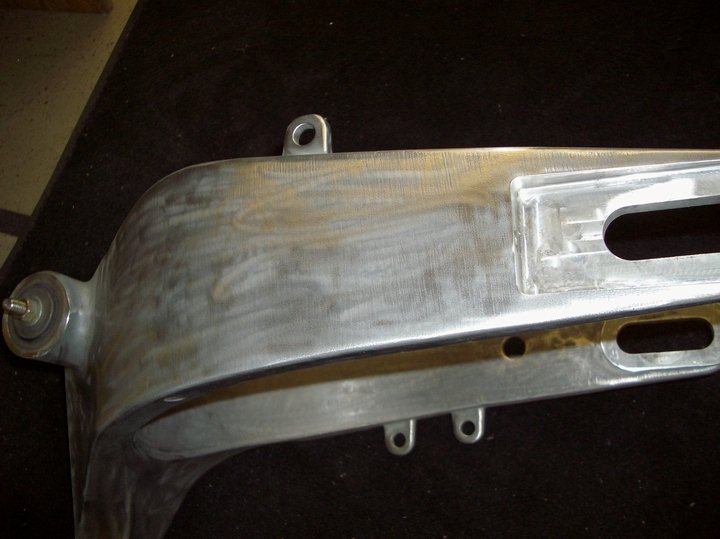 you can see how ruff the cast al arm is, now it all need to be sanded down. i followed spider mans advice, thanks dude, and bought a couple flap wheels from the local hardware store, i wasnt offered a choice of girts by # so i bought a medium and a fine. think they are around 80 grit to start and 150 to finish. prepare to get a mess. 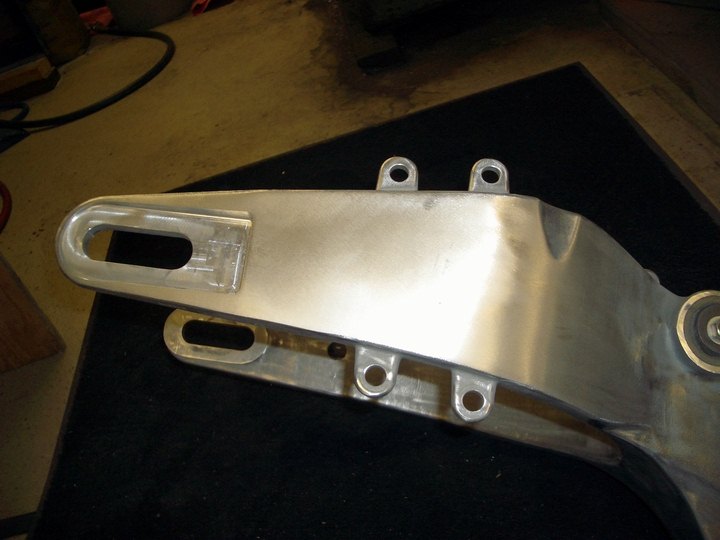 i just put the flap wheels in a cordless drill and started going to town,, this process takes time, think i spent two days after work to get to this point, be patient,, its worth it. 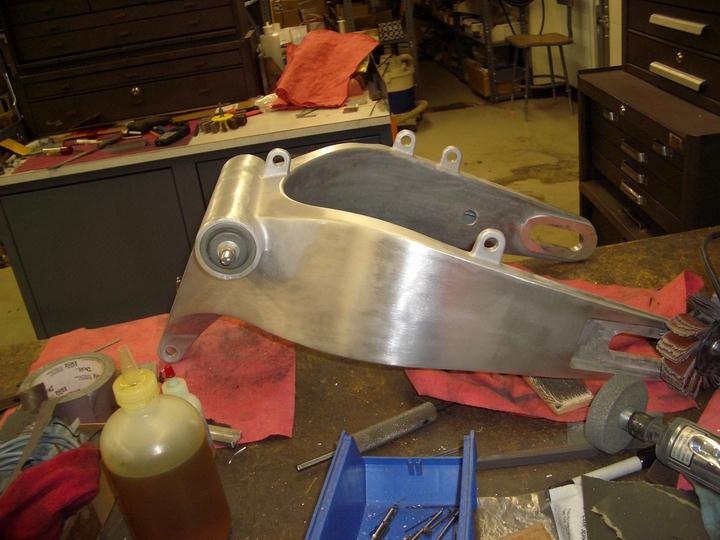 after you get all the groves and pits out with the 80 grit start with the 150,, it should be starting to look pretty sweet compared to what you started with,,dont worry it still gets better. | ||
Ezetobebad__uk |
Aaomy Thanks for the input eze | ||
Aaomy |
ok now that you got your swing arm starting to take shape. its time you should test fit. you want to do this now before you start all our finish sanding (saves doing it twice) for the s2 brothers, you have to check 2 places. for everyone else, i think you only have to check the mounting block. 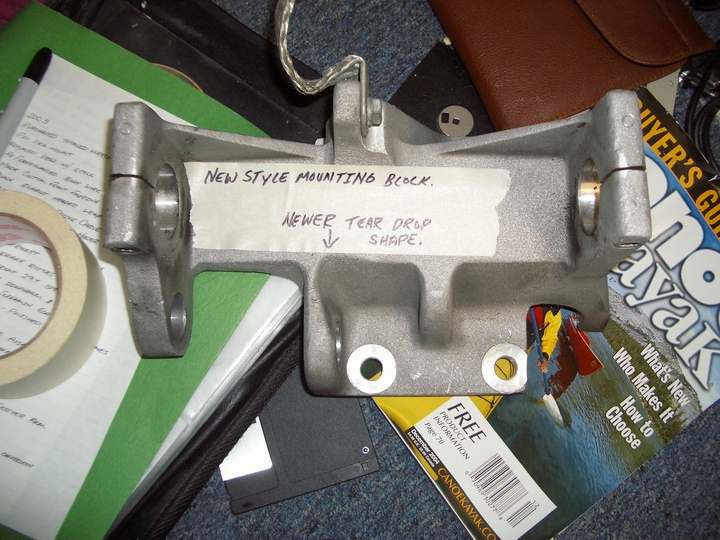 ok this image is looking directly from the rear, the two lowest bolt holes mount to the rear of the motor. just to the left of those holes the "tear dropped shaped piece" sticks down and holds the exhaust hanger. on the steal swing arm mounting blocks this piece is square. the two side wall both go straight up. this is where you have to remove some al. you will probably only have to remove a slight amount. i did it with a hand file and it only took a couple minutes. your goal hear is to allow the shock to fully "extend" or relax and not for the swingarm to contact anything while its attached to the shock. mount the swing arm and allow it to rest on the "stop" or area we are going to grind off. if you have to lift the rear of the swing arm to get the bolt threw the shock. you are already good to go. if not start removing metal until you do have to lift the swing arm to install the shock mounting bolt. after everyone has done this the s2 guys still have contact points. | ||
Aaomy |
ok s2 brothers. now here is where we have issues, the two bars angeling down to support our buts will collied with the top of the swing arm. this only gives us partial swing arm travel. though many have run this way with no problems. to some it may present an issue. 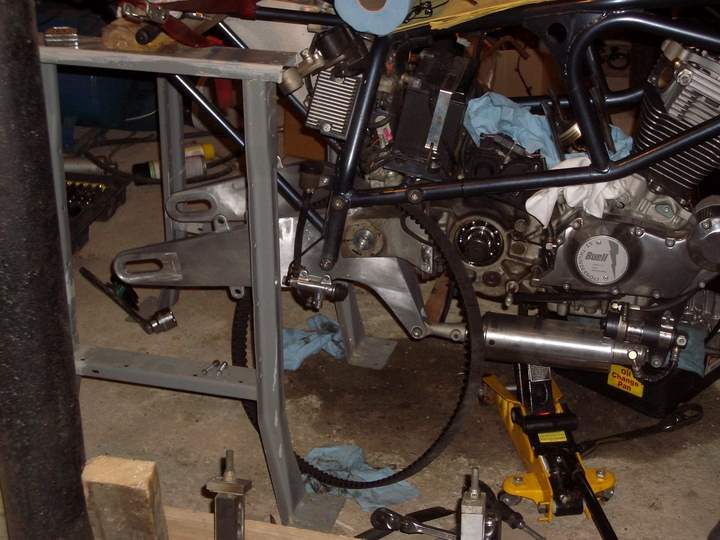 so this is what i did, if you notice on the right side of the swing arm is a small indent cast into the swing arm. this allows brake line clearance on the newer models. carefully i extended this area rearward, and also created a indentation on the left side to extend the travel. this was a long process, mounting and un-mounting the swing arm several times. ALSO MAKE SURE YOUR MOUNTING BLOCK IS IN THE CORRECT POSITION AS IF HELD BY YOUR ISOLATORS!! if not you will be filing in the wrong place. if you are going to attempt this. PLEASE TAKE YOUR TIME! you are removing material directly form your swing arm witch is hollow. dont break threw. i have a slight gift with metal and can pretty accurately determine thickness threw sound. but all swing arms may not be the same thickness in this area so be careful. 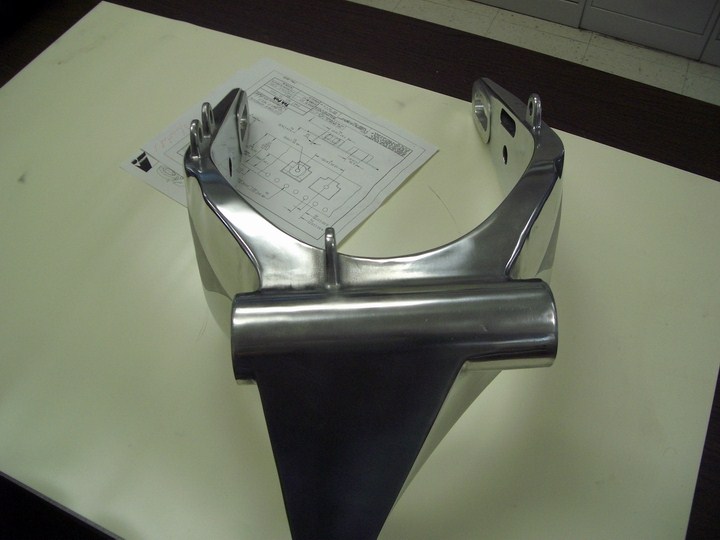 you can see the removed material in this picture, this is only for s2 buells. this gave me an extra 1" of swing arm travel. but this is one of those do at your own risk things. like i said many people just slap them on and are happy. | ||
Ezetobebad__uk |
Very indepth, how much metal can be safely removed then? eze ps - I will be fitting X1 arm & block to S1.....will i encounter the same problems? | ||
Aaomy |
ok now that we got it to fit your bike and all our filing is done, smooth out any filed surfaces, or scrapes from putting it on and off a million times. all cleaned up. now for the wet sanding. 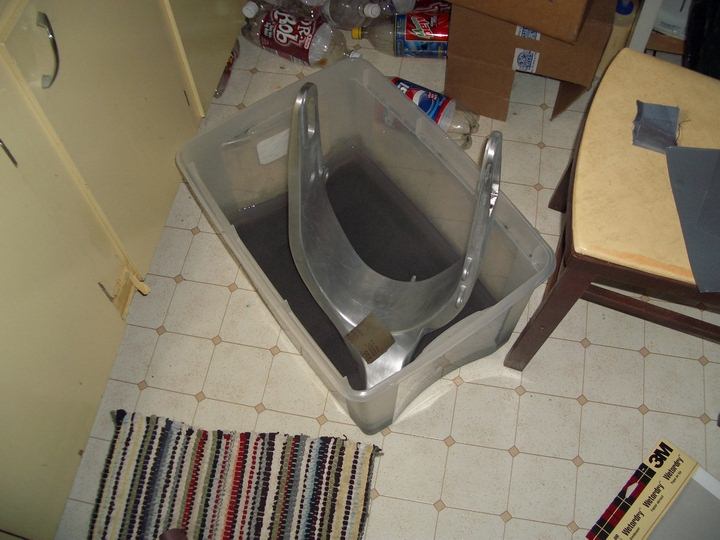 i use a plastic tub, warm water and, and a chair. like everything else, be patient, its gonna take a while. i started with a package of 220,320,400 assorted sand paper, 1 package did me fine, may have had a couple extra sheets of 400-maybe a 600 too. ok start with the 220 and sand with a circular motion until you have an even finish and all the dents, scrapes, or gouges are gone. then switch to the 320, repeat. switch to the 400 repeat. and no it should be looking sweet. carefully wipe it down and have it inspected.  inspection by a certified wabbit! igor, from my underground lab.,P.S. dont forget to inspect those bearing races really well at this point. 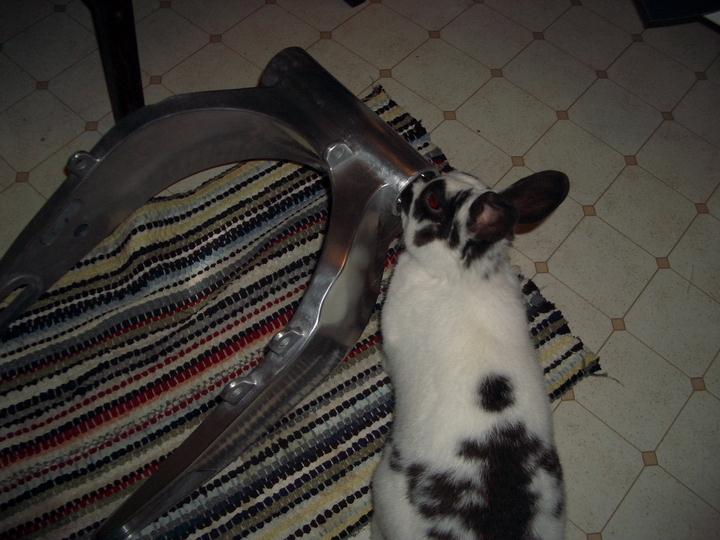 | ||
Aaomy |
eze- if you are replacing the mounting block and putting this on a s1, dont worry dude, you should be all good to go! you only have to remove metal from the swing arm on the s2. personally i didnt want to remove my mounting block form the engine. either way is fine. keep watching. it isnt done yet.. | ||
Ezetobebad__uk |
Cheers fella, are you going to put a protective finish on swing arm? ps - what dog is that in the swing arm pic? lol - eze | ||
Aaomy |
yeah i spray the arm but ill get to that latter.. now the dog on the other hand??? you mean the rabbit! bugs bunny style.. he thinks hes a dog, comes when i whistle and everything, but with out the barking. | ||
Aaomy |
now on to the buffing, i have a small 6" buffer. payed around $100 for it. you can make one out of a motor and arbors for probably $50 but the actual buffer has a little longer shafts for getting around stuff better. was worth the extra for me. either way works, have even seen nice results from hand polishing but i like my buffer!! i use a sewn wheel and emery compound , then switch to a loose sewn wheel and polishing rouse. because i ride the hell out of my bike i wasnt worried about a perfect buffing job, 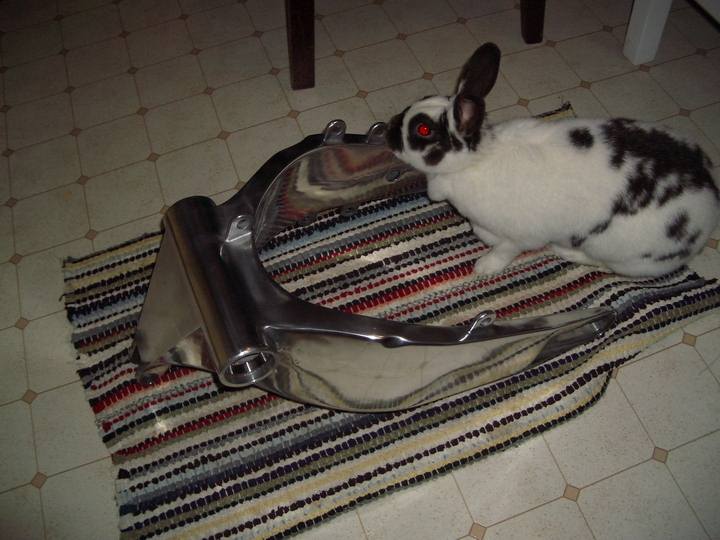 once again i let igor do her inspection.. always let the smarter one make the decisions.. | ||
Aaomy |
now here is where most call it quits, and they slap that baby on the bike and ride. so hear is where i mummified it!! 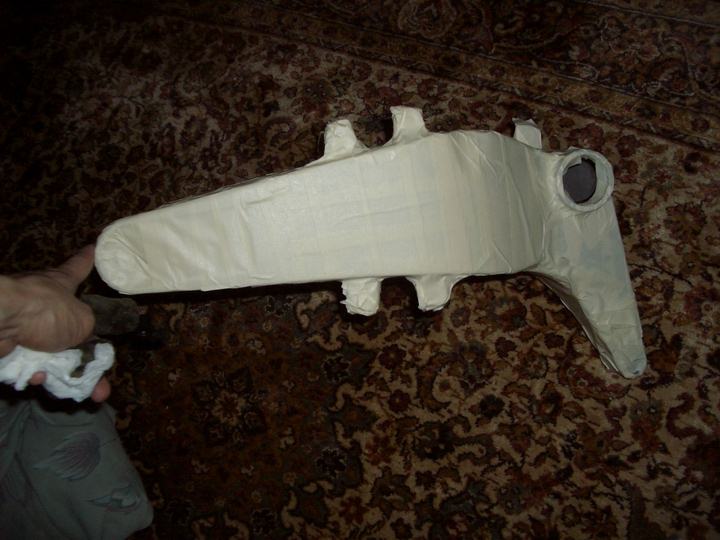 two layers of 3 day masking tape. most people never notice the difference in masking tape. they usually just buy by price. the difference in price is usually dependent on the # of days it can be on an item and removed with out leaving residue. thus 3day tape is safe to leave on for 3 days.. you can get up to 60 day or some times even more, but you may as well only buy what you are going to use.. | ||
Court |
You took the rabbit out before taping? | ||
S2pengy |
Could a XB oiltank/swingarm be used???? | ||
Mikej |
S2, Several tube framers are currently looking into that very process, might be awhile before results are posted. | ||
Aaomy |
personally i think that the al tuber arm follows the lines of the tube frame bikes better. but yes i think it is possible. this is by far a much easier conversion. that topic opens several bags of worms i dont want to start on hear. things like axle adjusters, or a belt tensioner, also shock placement. if you are really interested in it start a thread and im sure several others,, including me,, will chime in with any help they can offer..hope some of this helps. | ||
Road_thing |
Aaron: Why did you mask the swingarm? rt | ||
Rick_a |
The steel arm is actually a couple pounds lighter, too. I used to live in your area. Talk about a short riding season. | ||
Aaomy |
rick a, where did you live? the thing about the swing arm weight "i" think is kinda a myth.. think the original sand cast arm were extra heavy due to hard to control varying thickness. originally sand cast, then they went to a permanent mold, and i think they changed molds again later. the 2001 swing arm i used after removal of powder coating, cleaning up all exterior surfaces, and polishing. weighed only an ounce more that my original steel swing arm. because of everything i heard i thought their was going to be a big difference. thats why i weighed them. but after the work it just wasnt. i didnt get to weigh it before the sanding. it would be interesting to see how much that actually changes the weight. | ||
Aaomy |
why mask the swing arm???? why not.. and court,, the rabbit still hasent forgiven me yet,, but the flames on him look really cool!!! 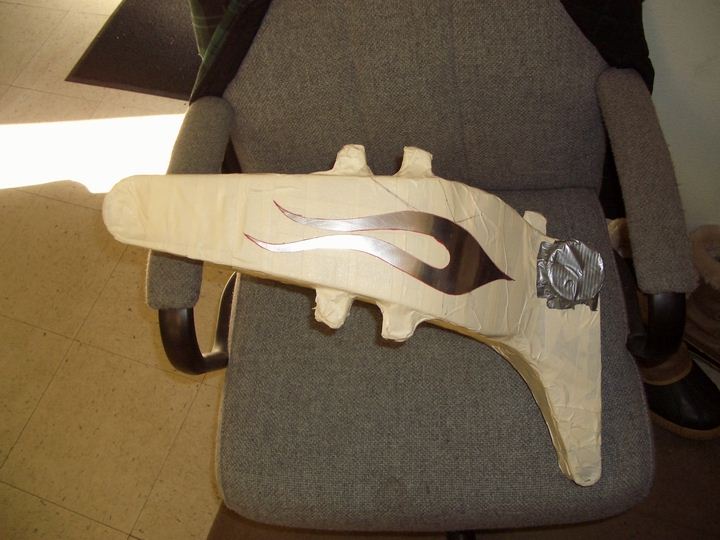 due to the plates on the sides of s2. you kinda get a blocked view of the swing arm, i thought this suttle flame design might play in nicely. 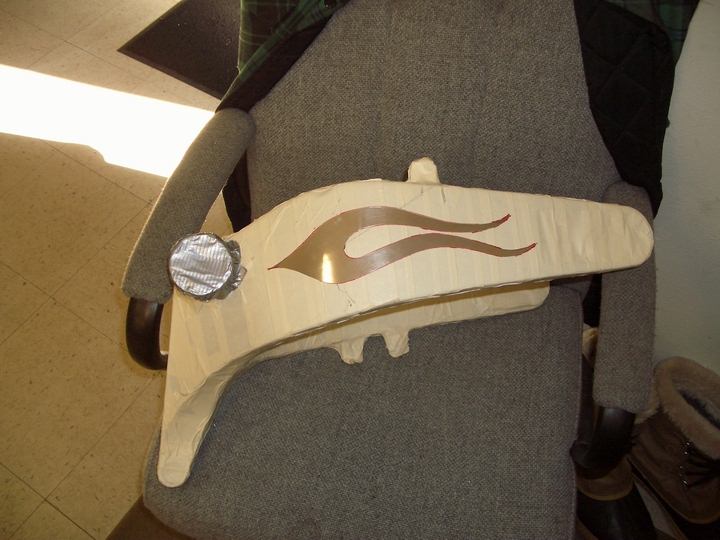 do yours self a favor and play with the sand blaster for a while before attempting this.!! | ||
Aaomy |
carefully unwrap so not to scratch your finish with media imbedded into the tape. 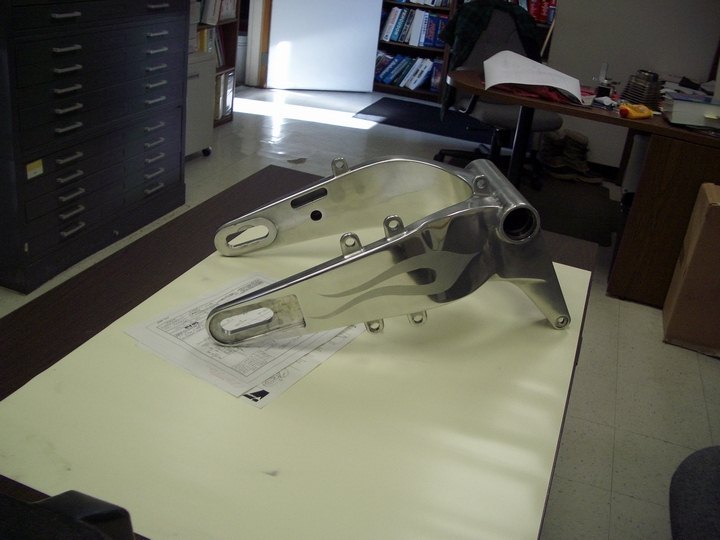 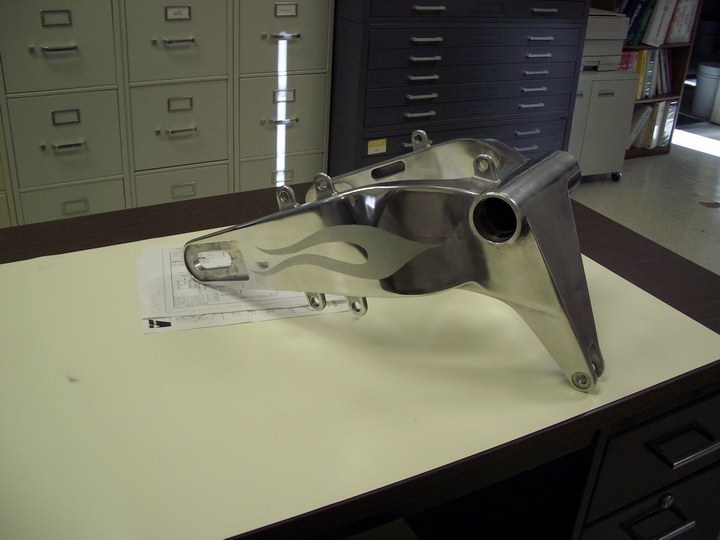 | ||
Aaomy |
after that make sure you clean that baby out completely. ok so hear is a on the bike teaser. 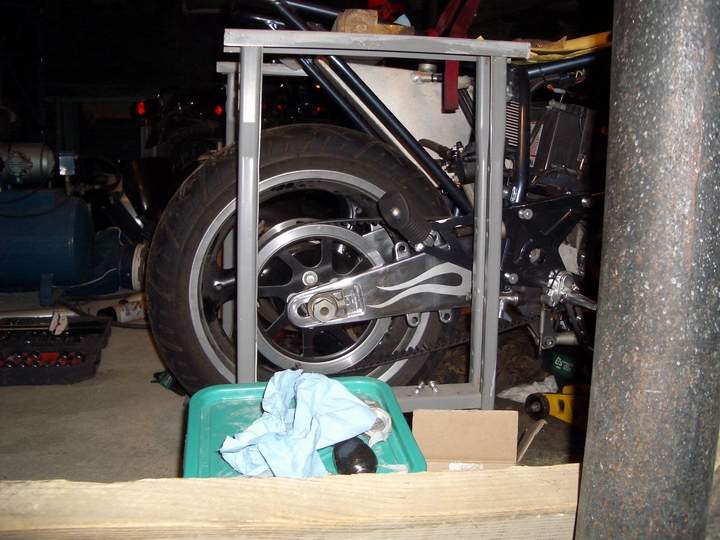 | ||
Oldog |
Nice touch Aaron Looks like Igor was equipped with a "flame job" from birth.  | ||
Jersey_thunder |
SHARP SWING ARM!! | ||
Phat_j |
dude, that swing arm rox....... i hope u dont mind if i copy it (flame job) i just gotta have one of them... |