| Author | Message | ||
Bads1 |
You guys seem to be going through to much hassel. | ||
Jomartijr |
The Scotchbrite pads can be had in buffer style, various diameters and grades from McMaster Carr which makes the header cleaning much easier. I use a 1/4 drill with arbor, specific to these pads, and it works a treat. | ||
Motorbike |
After reading all the replies, I'm still not sure if the header can be polished on my 08 XT. What do you guys think? I would really like to try to make the pipes look better as they are very spotty looking right now. Thanks! | ||
Brightbuell |
Get some green scotch bright pads and some WD40 and get stroking that pipe!!! It is well worth the 30min. The longer you wait to polish your headers the first time the harder it is to get a perfect silver header. | ||
Xbmacon |
I found a hidden place to start and see how I liked it...I quickly figured out Im a lazy B*st*rd. Im going to finish by the end of the weekend (I think I can! I think I can! I think I can!)) | ||
Brightbuell |
LOL! You can do it! Post some pics when your done. | ||
Valiant_duke |
This procedure of WD40 and rubbed with a scotch pad will work on the 2005 headers correct? Thanks | ||
Gunut75 |
Valiant_duke. Yes, mine is the 05 in the pics. Just a little more scrubbing because the belt sander finish takes a little more work to break the finish, and get to smooth metal. I worked on mine for a total of 45min..........Try it, you'll like it!  I broke the finish on mine with wet sand paper. Went to a scotch brite pad, and VIOLA! The header is still on the bike. I broke the finish on mine with wet sand paper. Went to a scotch brite pad, and VIOLA! The header is still on the bike. | ||
Valiant_duke |
what course pad is everyone using? the finer the better... thanks | ||
Iman501 |
i've tried blue sctoch bright pads and green ones now, they both worked fine (i've only done one pipe on mine so far, i need to finish the other one sometime...) just keep on scrubbing at it! | ||
Xenox |
Here is mine after polishing,it was wrapped previously, 220- 2000 I wet sanded all the grades and green scotched in between sanding up to 800 and very wet sanded up to 2000 , wiping with clean wet towel frequently and keeping paper clean. I wasn't planning on going this far........ ....... but under the wrap there was some heavy staining and I found that I had hurt the factory finish trying to remove the stains. I almost found myself in a oh oh what have I got myself into situation. I just kept at it and by the time I got to 2000 it was already popping, the Mothers with paper towel and soft cloth wipe off really put it beyond my wildest. Thanks Brightbuell for starting this motivational thread !  | ||
Brightbuell |
That looks insane! I cant believe that it looks just like chrome. Nice job!!! It changes the whole look, and brings it to a higher lever. Bad Ass!! | ||
Roysbuell |
Wow! That does look like chrome. Here is a silly question. Does polishing the headers like this make the metal any thinner? | ||
Firebolt020283 |
I am too lazy for all of this. I am going to try that flitz stuff bads1 said he did his in. Sounds a lot easier. | ||
Gentleman_jon |
Totally awesome, Xenox! | ||
Glitch |
Post up another pic as the heat starts to change the color. I love the color of the stainless steel after it's been heated up. | ||
Gunut75 |
Does polishing the headers like this make the metal any thinner? I would guess it takes off .002-.003" max. On either finish (blasted or "sandbelt"), the features of the finish are less than .001 deep, unless ya dented yers like I did.  Xenox, THAT LOOKS AWESOME!!! I'm already half way there, and may have to get there! | ||
Motorbike |
I spent a few hours polishing the headers on my 08 XT on Saturday and was really proud of how they looked when I was done. Then I looked at what Xenox did with his bike and now I wonder why I even tried! That is absolutely awesome! I cannot imagine the amount of effort that must have taken to get that chrome-like finish. Mine ended up being more like a brushed stainless finish. I am hoping mine turn to a nice even bronze color after they heat up. They were so uneven and spotty looking when I started this project and now they are very uniform in color. Nice work Xenox! | ||
Roysbuell |
Xenox, how long did it take you for that? +1 Post pictures after it gets heated up. | ||
Xenox |
I finally did something right =). Thanks to all. Oh wait a minute I hope I don't get a rep for being a major pipe stroker, could be some confusion =). Excruciating details and answers follow... Originally I wanted a stock belt sanded finish as well mostly because of keeping in line with stock aesthetics , and less work. My pipe was so stained though , I ruined the stock finish and had to go for broke. I don't regret anything and am more than happy with the results. This is within reach of everyone I believe. Method and patience is key! Glitch I too will like to see what a few heat cycles will do, I have a pretty good map though, it's running cooler and may be a while for it to turn, it could be a while before the streets are clean enough for me to take it out again. I'll post a pic here. Major thanks to Brightbuell for starting this thread which moved me to unwrap my headers and go for it, I was on the fence for a long time and thinking about getting a new header or ceramic coating or re wrapping, I have to say this is the most cost effective solution by far and appears to be easily maintainable . Extremely inexpensive and done on bike. Gentleman jon ( a living BW treasure to be sure , a little info http://badweatherbikers.com/buell/messages/4062/534991.html?1265298447 ) gave me a couple of pointers , specifically to polish along the length of the pipes , which saved me a lot of possible experimenting, cross sanding and wasted movements. Jons lil blackie also was a source of inspiration as lil blackie also has a highly polished pipe on it among other very tasty units. I followed his tip closely, special care was used around the bends. Jonathan also mentioned that the material was soft, hard to believe for me when I first started but as I was finishing was made a believer. The finished surface is durable but I can see it scratching moderately easily,even though there shouldn't be much reason for it to scratch, unlike chrome however it can be restored easily . Also as the grades were getting finer , and the surface was getting smoother, the sanding and finishing was getting easier . Is this for you ? I don't know maybe you can make a decision based on the following paragraphs .( If the later years are only blasted finished and not coated with anything the results should be the same. I haven't seen one in person yet)There may be easier ways to achieve the same results but these are the ones I used . This will take a long time , maybe 7-10 hours or so, maybe less. I spent a couple one hour a day sessions on it , and a couple 3+/- hour a day sessions. The actual polishing took 15 to 20 minutes, I used old school Mothers mag and aluminum, I tried metal gloss another fine polish which is abrasive free, but felt the Mothers actually got more of a clean mirror thing going it may be abrasive as well I don't know for sure though. I think any polish will work, others seem to get good results with Eagle One Mag , or Flitz ,it's the prep work that's mostly critical. When I was done the time spent on it was all but completely erased from my memory. I don't know if it was short term memory loss or the the results , I'm leaning towards results....=)(After some minor experimenting, I found the mothers with paper towel application, and soft cloth removal, then moving to mothers soft cloth application, and soft cloth removal got it to a point and stopped .That point being a mirror like surface with barely perceptible swirls . Following this mothers stage I used a non abrasive metal polish , Metal Gloss, with paper towel application and soft cloth removal and then soft cloth application and soft cloth removal and this removed any remaining traces of any imperfections. I'm pretty sure any non abrasive will have similar results.So I correct myself there is significant results to be had with different polishes, but methods seem to play a role as well. It helps to make sure the polishing cloths are clean and all cotton to begin with.} Some of my observations : It's important to situate your self comfortably , you will need an excellent lighting source preferably a halogen work light to act like the sun for light refraction/reflection purposes , cardboard under the bike and right side of the bike to catch all ss slurry and scotch detrius, a linen bed sheet over the plastics of the bike to keep abrasives off , your favorite music, a trash can , water pail,latex or nitrile gloves are a must , keeps your fingers from getting a black stain! Of course all the sandpaper in the range ,Green Scotch ,and a roll of paper towels preferably select a size The cleaner the workplace the better psychologically ! Clean = happy =) This should be able to be accomplished without using a full 8 x 11 (?size) of any of the grades, the 120, 220 or 240 may require 2 sheets. Folding the paper backing to backing cut a full sheet in half and that half into 6 to 8 rectangular/square pieces using the same method with a letter opener or similar. Then fold those pieces in half and sand keeping track of the sides as one side wears away use the other. About 3 or 4 full size 8 x 11 green Scotch will be used , it's important to know when the Scotch has stopped cutting and move to an area on the same Scotch piece that is cutting, sharper pressure points work well with the Scotch in areas that need attention. Use all grades in between 120-220 - 2000 and do not skip grades, ENSURE ALL the previous scratches have been removed by the current grade or you will see them when you are done. At the end of 220 or 240 all the factory finish/ belt sanding marks should have been removed at this point! I felt that green scotch brighting between grades helped the paper do it's job better. Wet sanding with wide spread even pressure on the paper seemed to provide the best results. Do this along the length of the pipe as linearly as possible. If the paper falls on dirt or something more abrasive than it is rinse it off or start with a new piece. Keep the paper very wet and wipe the pipe with a wet paper towel once in a while to keep sanding efficient. As a matter of course keeping everything efficient will result in less work and stellar results, almost mind over brawn , except for the elbow grease part =). @ 2000 the pipe will already look polished if everything went properly. As the process moves along tool marks may get more noticeable it is important to address these before continuing sanding for the effect of polishing, 120 (or appropriate and then work back down to current grade) or a scotch flapper wheel or scotch disk should knock these out. Very careful use of these tools should be observed or the pipe may end up with gouges that are too deep to remove. Best use as light a pressure as necessary. At about 400 - 600 one may consider abandoning or removing the header and have a professional do it , or other alternative, this is normal ,well at least for me it was, but I just kept doing the same thing and stroking away =) , around 800 I was starting to see real progress , and I got re inspired (not rushed), very minor tool marks were coming up which were taken care of , but I knew the results were becoming a reality. As the grades were getting finer , and the surface was getting smoother, the sanding and finishing was getting easier as well. Try to get as much of the pipe as thoroughly as possible the greater the effort the greater the reward. Pay special attention between the 2 pipes near the y, Scotch and sand until the scratches in this crevis are gone, keep cramming fresh Scotch in that crevis and sand as needed. Keep the finer grades very wet as you sand using a wide pressure , as most of your hand as possible, you'll see some black frothing of the water, were on the right track here. Wipe with a clean wet paper towel occasionally to gauge progress and for efficiency . The paper should feel smooth if it feels rough or scratchy investigate at once. Try to get as much of the pipe as possible , most important areas are the backside of the front header tube and collector visible from the other side of the bike, the back pipe coming out of the frame near that pesky tab to name a couple, don't be in a rush and you'll be golden! Pics look a little cloudy, in person the surfaces are very reflective ,like a mirror. 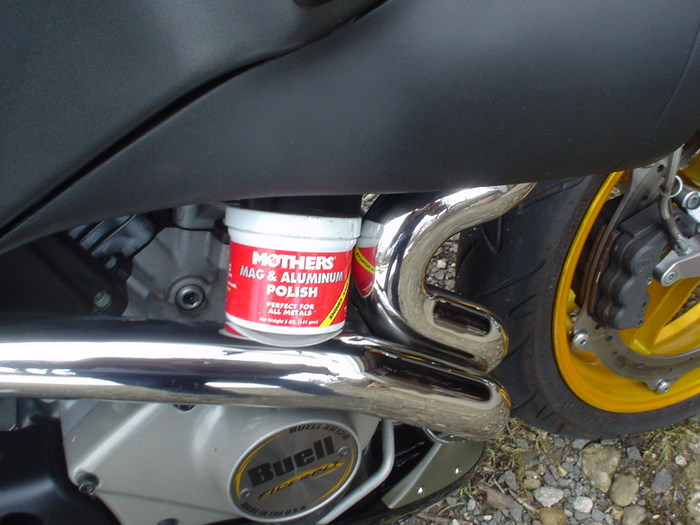 (Message edited by xenox on March 02, 2010) | ||
Rangeridn |
All the pics look great. I was inspired enough to take a green Scotch Brite pad and WD 40 to the headers on the 06 Uly. Completely took the crud off the pipes and they have close to a brushed nickel look. I like the look - this is a great thread. Question before I get completely obsessed with this - what are the pipes made of I've heard both steel and not. Is there a factory finish or is this just the finished texture of the raw pipes. I can't see a Scotch Brite pad taking off the factory finish but 200 - 2000 would do the job. There seem to be two different processes the Scotch Brite and WD40 more a clean and buff and the 200 - 2000 approach would be a true polish down to a mirror like surface. | ||
Nadz |
Ten second rhetorical threadjack/comment: Is it just me, or do XB's have the damn sexiest pipes of any production bike? Clean, simple, functional, industrial artwork; and just a tiny bit of work makes 'em either meaner or blingy. That is all. Thanks for the tips. -Nadz | ||
Gentleman_jon |
Outstanding write up, Xenox. They just don't get any better. Going to have to take another look at Lil Blackie, if the snow stays away.  | ||
Roysbuell |
I picked up some Scotch Brite pads last night and started stroking my pipe  . It really made a big difference in just a few minutes. I will finish it up this weekend. Thanks for all the tips. I think I am going to leave it somewhere between matte and mirror finish. . It really made a big difference in just a few minutes. I will finish it up this weekend. Thanks for all the tips. I think I am going to leave it somewhere between matte and mirror finish. | ||
Odar |
XB12s -07 matte finish on the header, one hours work with red and green scotsh brite and WD40 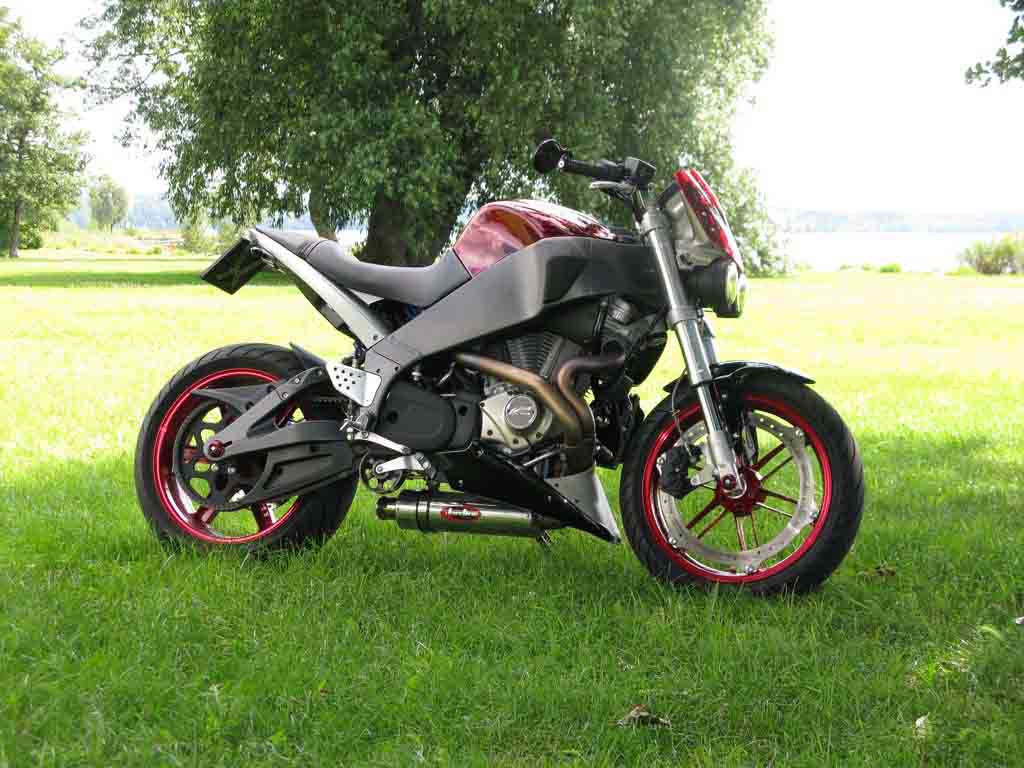 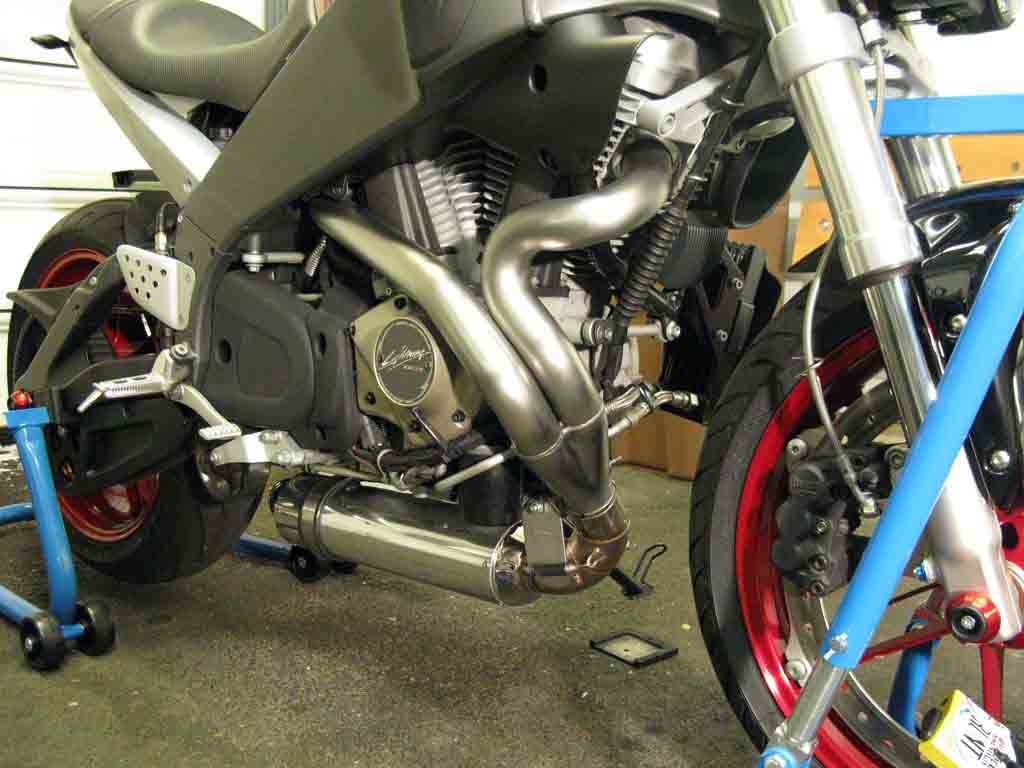 Odar | ||
Brightbuell |
Looks great! This is what mine look like. Im completely happy with them. | ||
Xenox |
All the pics of the cleaned stock finishes look superb ! Good job you all. | ||
Xenox |
As promised a couple of pics of when the pipe turned. I rode (spirited) a few hours within this past day. Some extended almost wfo , hwy cruiising and pretty much everything else.. Over 125 miles 3 complete heat cycles. The color of the pipe stabilized early within the first 40 miles, not much if any color change since then. We'll see what summer brings......... I'm diggin it. 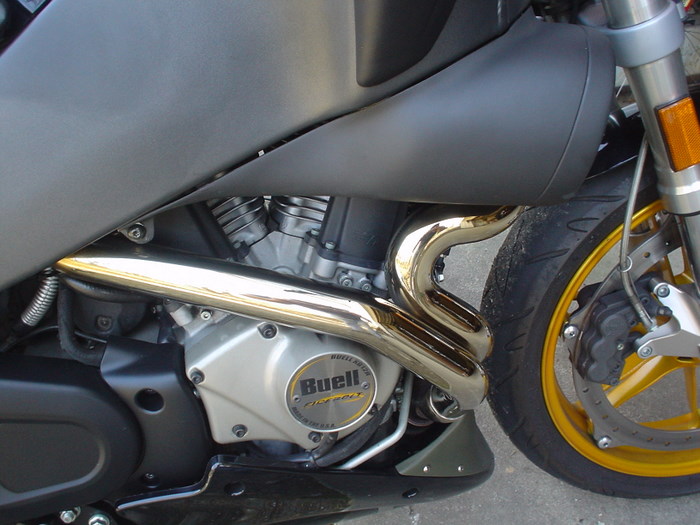 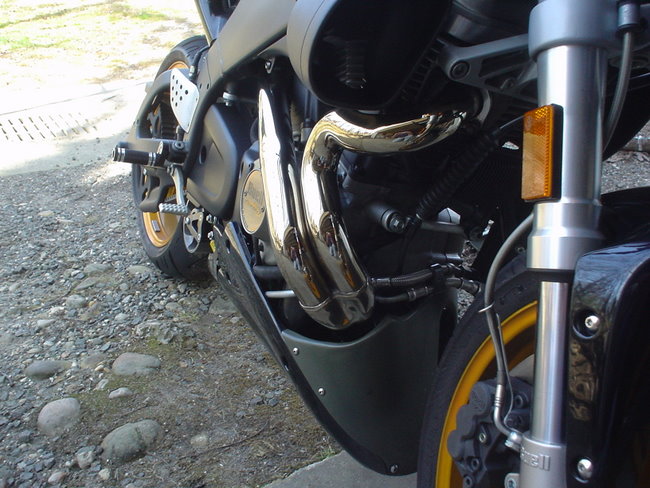 | ||
Pwnzor |
Wow, those are super shiny. I put in about 30 minutes of work every few months on mine, and they pretty consistently looked like this:  Starting with 600, then 1200, then wet sand 1800 and finish with a soft cloth and some Eagle One Nanopolish. | ||
Buewulf |
Great job on those pipes, guys. I wish I weren't so lazy. Such shiny pipes would look out of place on a bike that has never been washed anyway. |