| Author | Message | ||
Big_island_rider |
While I wander my way through my ECM issue I decided to tackle a few other issues as well. My neutral light has been blinking at me for a while. Started back at the neutral switch and it tested fine. Pulled the instrument cluster and the bulb was good and seated well. So on to the steering head looking for pinched wires. Sure enough, checked the Neutral light [TN/Y] wire and it is the issue. Also found the Oil Pressure light [GN/Y] wire has the same issue. The wires are not stripped. The insulation appears intact, as far as I ran up and down the loom. So the wires are broken internal to the insulation. Here are my questions: What is the best way to find the internal break? How far up / down the loom should I go to find the break? What is the best way to repair the break? What should be used to re-wrap the loom? Thanks in advance. | ||
Rayycc1 |
This is one of our Uly problems I'm dreading.Any good way to prevent this from happening? | ||
Big_island_rider |
My only thought would be to re-route the throttle cables as that is what the wires are rubbing on under the cover. | ||
Reepicheep |
Exactly what you did to find them, just run each indvidual wire through your fingers under tension putting a slight bend on them, the internally cracked ones are plain as day. Instead of copper strands resisting flex (hard), you have just the plastic insulation resisting flex (easy). And it wants to bend at a sharp angle instead of a radius. To fix them, just cut at the break, and splice in about an inch of a similar sized stranded insulated wire. I soldered mine. That's durable in terms of staying connected, but it's a little brittle. A quality crimp tool with crimped butt connectors would be good also, but it would make that bundle bigger if you have several stacked up on top of each other. To insulate, you could get fancy and do it with silicone rescue tape (a tape-epoxy combo). Or you could just do each individually with electrical tape (good stuff). Then I put the whole bundle back together with split loom plastic cable armor (generally at your local auto parts store) held closed with zip ties. I went as far up and down the loom as I could get without rotating the engine. If I thought to do it while the engine was rotated, I could have gotten even further. | ||
Etennuly |
Open up the harness wrap. When you get in there you will find where the wiring engineers decided to allow a mistake to happen. There are three triple splicers in the harness where it has to bend. These are metal cold crimp splicers that tie three wires together with a wax filling inside each insulation cover. You can feel them on the outside of the individual insulation cover and never feel where it is broken. They must be cut open to see it. I removed these splicers from the steering neck area by going to a single splice wire extension, moving the triple splice up behind the fly screen where they won't have to flex. This also cut down by six, the number of wires that have to move and bend in that wire bundle. | ||
Tootal |
I removed my plastic loom holder completely and just zip tied them loosely to the hole for a fairing that doesn't exist! | ||
Big_island_rider |
Found where the two were broken and found another as well thanks to Reepicheep's advise.  The new broken wire is the Low fuel light [Y/R]. I am going to add wire and solder, cover with shrink wrap, tape the loom together and surround with cable armor. I will ditch the OEM loom holder and zip tie the throttle cables to the upper mount hole and zip tie the loom to the lower mount hole. Will post pictures when complete. Oh well, I did buy this bike to have something to wrench on. Careful what you ask for. | ||
Arry |
You might be better with crimp (staycon) connectors (butt splice), instead of solder. Solder wicks into the strands and makes the wire less flexible. | ||
Callawegian |
Solder on the crimp connectors and they won't corrode on you. | ||
Reepicheep |
That's true about solder joints being more brittle, but if they aren't at a flex point they will probably last forever. And any solder joint is better than a crimp joint made with a crappy crimp tool. So unless your crimp tool weighs about a pound and has a ratchet mechanism, you should solder. | ||
Tootal |
I think the most broken wires ever on a motorcycle are the horn wires on a Harley dresser. That horn shakes back and forth so much they are constantly breaking. I tried crimp only, crimped and soldered, soldered not crimped. I even tried shrink wrap and the wires broke at the end of the wrap. Nothing worked until one day, when I only had enough wire left to make one more repair, I finally figured it out. Figure out how much shrink wrap you will need to cover the joint and double it. Slip it up one of the wires. Do a light crimp on a connector, if using one. Now solder the connector or wires. Now slide that shrink wrap over the joint equally or up over the small part of a connector. Take your heat source and only shrink the area over the connector or only in the middle of a joint. Leave the outer ends "unshrunk". This "unshrunk" part becomes a shock absorber, keeping the wire from bending at the soldered area. Since doing those wires in that manner they have never broke again. | ||
Big_island_rider |
Finally got all the broken wire issues straightened out. Final total was six broken wires: Neutral light, Oil pressure light, Low fuel light, a Turn signal wire and two ground wires. Had a buddy who is really good at soldering come over and we ran all the wires and added about an inch to all the breaks then covered with shrink wrap. Took about four hours with no cuts, burns or abrasions  . . Then got some 3/4" split poly loom from NAPA and covered it all up. Here are a few pics: After repairs and before loom covering. 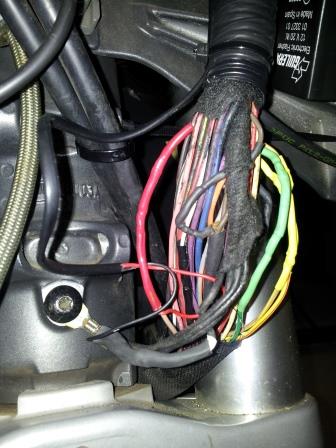 Straight on view after loom cover. Notice the throttle cables are cable tied loosely to the steering head. 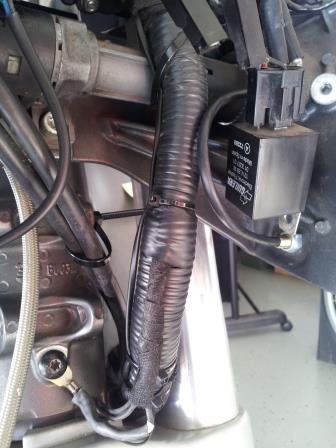 Side view of the same. 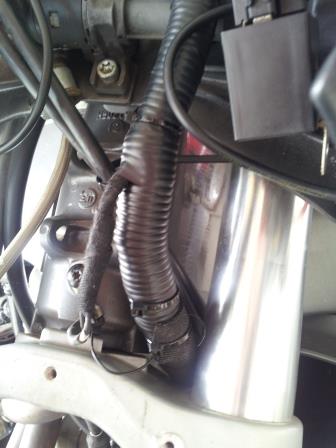 That is how I left it since turning the forks does not cause any binding or pinching and with the throttle cables out of the way, it should not break again. Since I was in there I also decided to put my KOSO volt meter in as well. Wired into the Instrument lighting and a broken ground. It is the wires coming in from the left in the first picture. Here are a few pics of the meter installed: 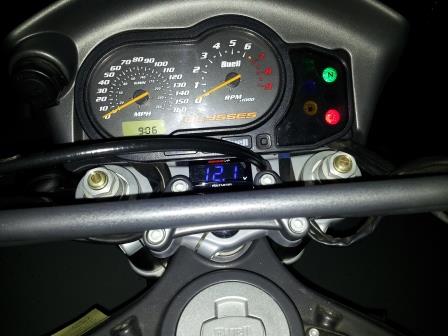 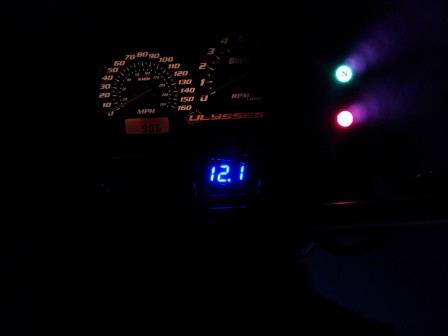 All totaled the cost was 4 hours work time, $4.07 for the loom, 2 glasses of Jim Beam Devil's Cut and 6 ice cubes. |