| Author | Message | |||
Henrik |
Some of us have experienced how the oil level in the primary suddenly goes up, often causing oil to blow from the crank case breather. This is caused by the sprocket shaft seal going south allowing engine oil to enter the primary case around the main shaft. In this first picture you see the old seal in place. At the 6-o'clock position on the seal you'll notice oil leaking. I'm not sure if a new seal will hold a tight seal until the sprocket is back in place. 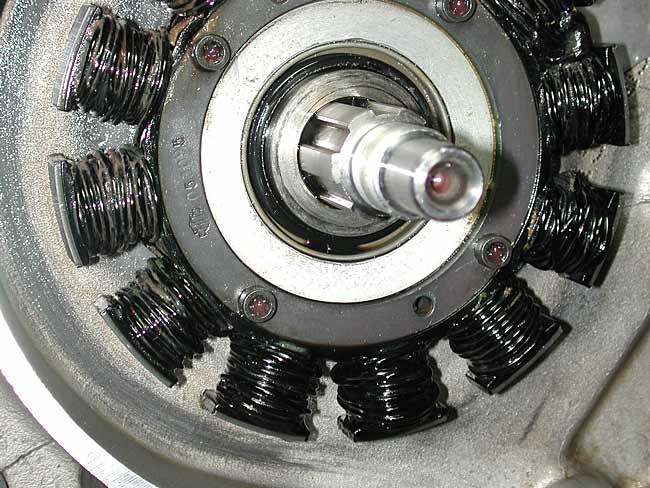 When I first tried installing the new style seals, which have double lip sealing, I attempted to bang it in place using 1 1/2" PVC pipe and a rubber mallet. That didn't work out so well for me. As you can see in the following picture, I buggered up the outer sealing lip: 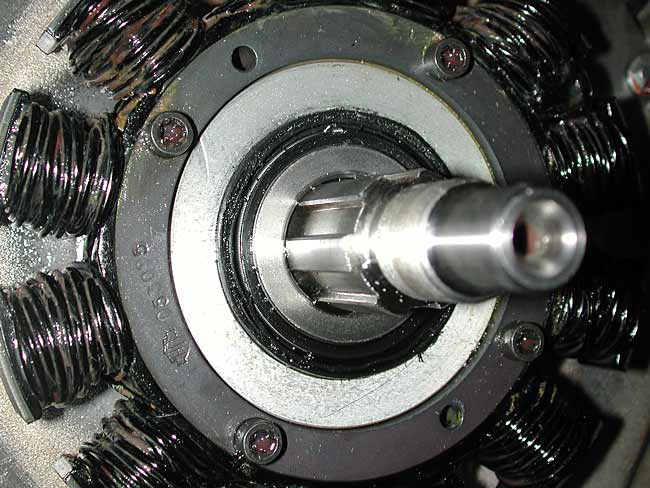 And here's a close up: 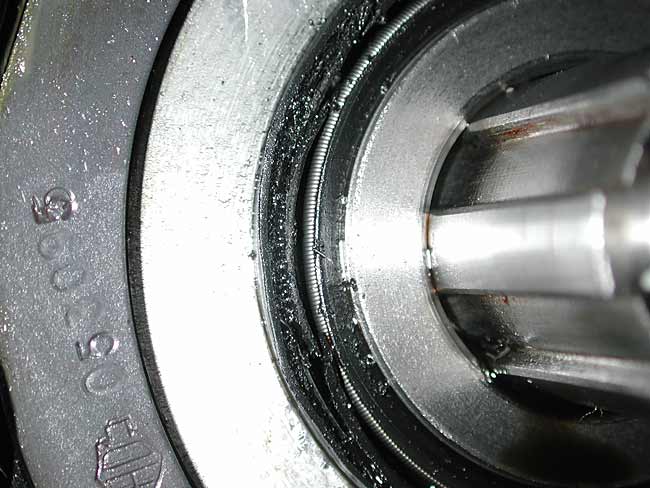 So I went ahead and bought the "official" seal installer tool. Here's the instruction sheet that came with the seal installer: Kent-Moore tool # HD-45206; $17. As you can see, the expensive part, the handle, is really just a threaded piece of pipe that twist onto the threads of the engine shaft and pushes the installer pit down to seat the seal. That got me thinking... 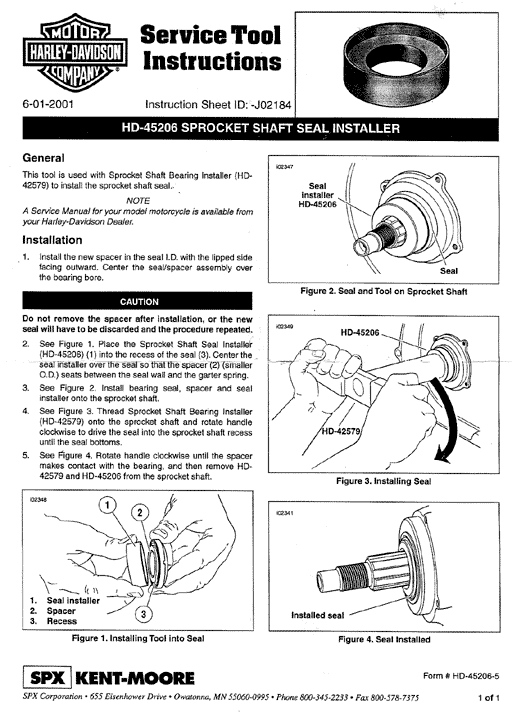 Here is the installer on top of the new style, double lip seal. You'll notice the thin ridge on the installer that fits into the groove you see in the seal. It fits on the outside of the garter spring you can see in the picture. 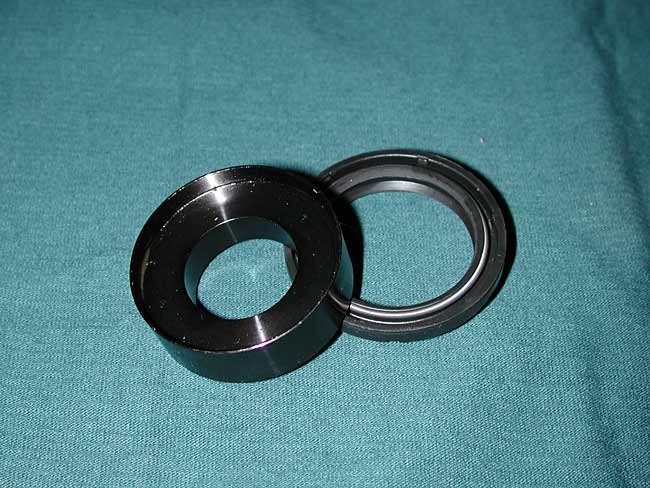 And here's a different shot of the installer and seal. You can see how the seal have two lips sealing against the engine shaft. 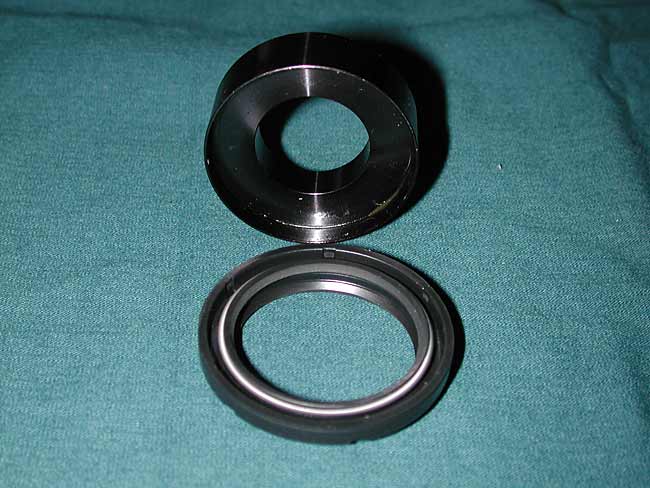 In this picture the installer is mounted in the seal. Next to it is a 1" long piece of 1" "black" pipe (water pipe?). This fits nicely over the engine shaft to rest on top of the installer/seal assembly. 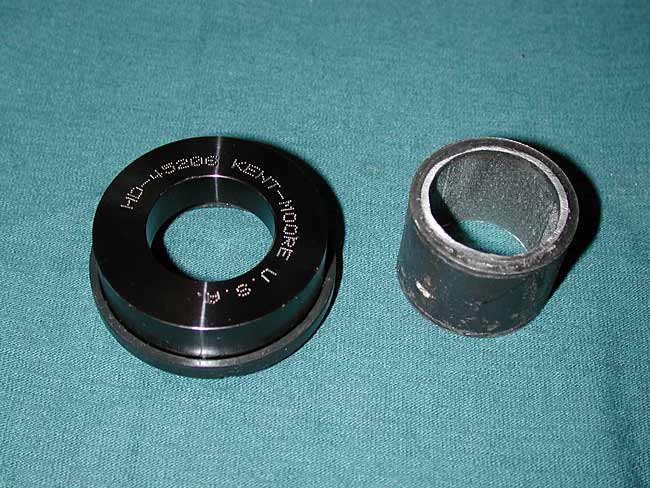 So here's what I did: I put the installer/seal/spacer assembly on the engine shaft first, gently seating the seal against the seat. The 1" pipe goes on top of the installer and provides a seat for the alternator rotor nut. Now, when I tighten down the nut with a regular wrench, it presses against the pipe, which in turn presses the installer/seal into place. When you feel the installer seat against the spacer, the seal is where it needs to be. Now remove nut, pipe and installer (careful it doesn't take the spacer out with it.) and the job is done. 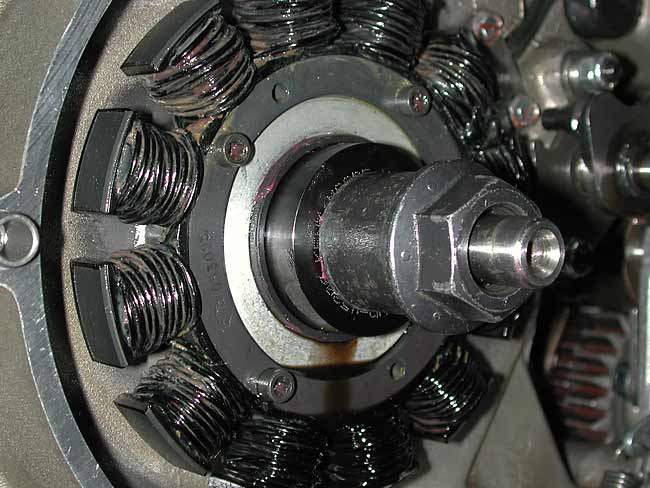 And here finally is the new seal installed in place. 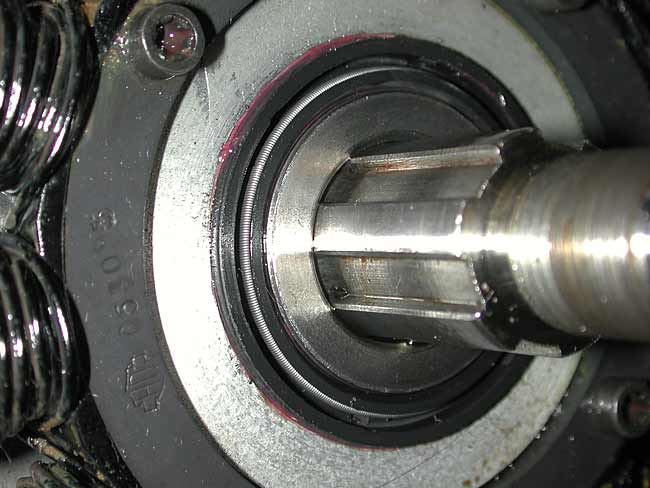 Others have managed installing the seal using a variety of shade tree tools, but at least one of them later had to replace the seal again - most likely because the seal was seated to deeply, causing it to wear down on the back side. Good luck - hope this helps Henrik | |||
Pammy |
Henrik, that was excellent. Best tutorial I have seen in awhile. Good job | |||
Henrik |
Thanks Pammy. I really appreciate that. Henrik | |||
Reepicheep |
Just for the record, a seal that is seated too deeply will go for 2,357 miles before it gets cut through by the spinning bearings it is resting against, and needs to be replaced again. Or so I hear  Bill "does kent-moore make green tinker toys?" Kilgallon | |||
Deltacruiser |
Henrik, You are the Man! That will make this a lot easier for me to do. Thank you. | |||
Bluzm2 |
Henrik, I didn't realize the tool was so cheap! Where did you get yours? For that amount, I'm going to have one on hand. With 3 of these beasts in the garage, I'm bound ot need it again. For those that are a bit uneasy about doing this seal change, it really is about that easy with the tool! Brad | |||
Xldevil |
Very good job,Henrik.  Thank you. Ralph | |||
Henrik |
Thanks guys, you're very welcome. I had a dealer order the tool for me. I believe at the time it was Dave King. But I'm sure any of our excellent sponsors will be able to help you out. Henrik | |||
Rocketman |
Henrik, you did exactly what I did, or I did what you did LOL. Rocket | |||
Patrickh |
Kent Moore makes many the "special tools" for HD. they won't sell to the masses though | |||
Buellistic |
Make your own "SPECIAL TOOLS" !!! | |||
Deltacruiser |
The one piece of info I think we all need so we can make our own installer tools is the depth the seal should be installed. The way I'm looking at it, the diameter is pretty easy to do. If we had the depth measurement from the front edge of the installer tool (part against the seal) to how deep it is supposed to go, it would be pretty easy to just put a piece of tape around the right size piece of pipe, etc. to gage depth of install using a homemade tool. (Hopefully that makes sense!) Does anyone have a measurement of how deep this should go in? | |||
Bluzm2 |
Delta, For $17 it's not worth the hassle! The Kent-Moore tool cannot over insert as it bottoms out on the crankshaft spacer. Also, remember this is a double lip seal. The outer rim of the insertion tool goes between the outer lip of the seal and the inner lip/compression spring. It extends all the way to the "back side" and presses against the metal "L" lip of the seal. It's the depth of the rim of the insertion tool that sets the insertion depth. | |||
Deltacruiser |
I agree. I just haven't been able to get a dealer to order one for me around here. I'm still looking. Delta | |||
Bluzm2 |
I think we need to check with Dave S. If he can get them, I'm definitely in for one. Brad | |||
Rocketman |
I don't know if I was lucky but the crank spacer had marks on it from where the replaced seal had sat previously. It made it easy to get the depth as the replacement seal was identical to the one removed, so I knew the 'wear' marks would be good for alignment. This might not be the case for YOU though. Rocket | |||
Henrik |
I'll be happy to provide measurements - likely not 'till the weekend though. However, Brad is correct. For $17 it may not be worth it. Wait until Daves gets back in the shop and see if he can't swing a tool or two. Henrik | |||
Deltacruiser |
Henrik, That would be cool if you could measure this weekend. I talked to 4 dealers here in my area today and nobody could get the Kent Moore tool. Everyone was willing to order the Jims tool, but that is $70 compared to $17 for the one you have. That thing is gold. I think all of you are right. I'll hit up Dave when he gets back. In the meantime, my bike is only spewing about 2 ounces of fluid every 100 miles or so. As long as I keep the oil at acceptable levels I shouldn't hurt anything riding it right? Thanks, Brett | |||
Patrickh |
I am not trying to worry you but mine failed dramatically, I was lucky to limp 5mi to my friend's house. lost the seal at 70mph on the highway...dumped oil all over my rear tire. needed new undershorts. | |||
Buellistic |
Patrickh: TWO CHOICES, run TRANS. breather hose to rear of tail section to a catch container and /or put a PVC VALVE in hose !!! "i" have both !!! In BUELLing LaFayette | |||
Patrickh |
oh it's fixed now...that happened back in the Buelligans days. Kent-Moore part number is HD-45206 They can get the Kent Moore part, most likely would rather sell the Jims piece (which I am sure is very high quality) with better margin. I normally make my own "specials" too, just not this one. Overall depth 14mm, depth of "lip" is 5mm. Overall width 46mm, width of hole through which crankshaft passes 25mm. BTW I only have a set of $25 calipers | |||
Xldevil |
Btw, Henrik. What is the magenta colored "stuff" around the seal? | |||
Henrik |
Ralph, I gave the seal and the opening a smear of Mobil 1 grease. That's what you see squeezing out around the seal. Henrik | |||
Xldevil |
Hey. I got my tool today. Now I'm dying to use it. Ralph | |||
Patrickh |
Happy installing! | |||
Steve_mackay |
For those of you that WANT to make your own, since it seems the seal install tool is virtually unavailable. I've attached a PDF of the sizes you need. I ordered one from Hals, and after waiting 4 weeks, I said screw it, and asked Dan Bilanski at Hals to borrow one for about 5 minutes to measure it, and make my own.
| |||
Reepicheep |
There are 3d printer model plans kicking around for this as well. | |||
89rs1200 |
I found and purchased the 3D printed HD45206 / HD-45206 / 45206 Sprocket Shaft Seal Installer. * Only $16 for two, and yes, it is plastic, but it worked great without deforming! * The taller tool is just the right height as no spacer washers were needed. * It worked! Could not have properly installed the seal without the tool. The seal sits out a bit from flush with the opening. I would have seated the seal too deep without this tool. https://www.thingiverse.com/thing:1784320 This taller one will not need spacers as it is just tall enough to use the stock nut to press the seal in; 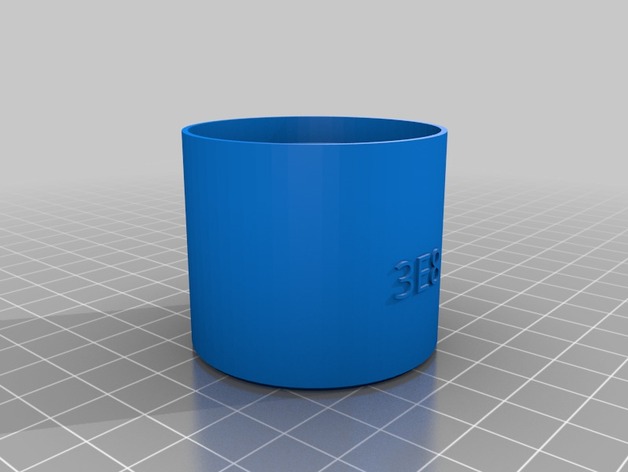 Copy of the Harley tool HD45206 / HD-45206 / 45206 Sprocket Shaft Seal Installer; 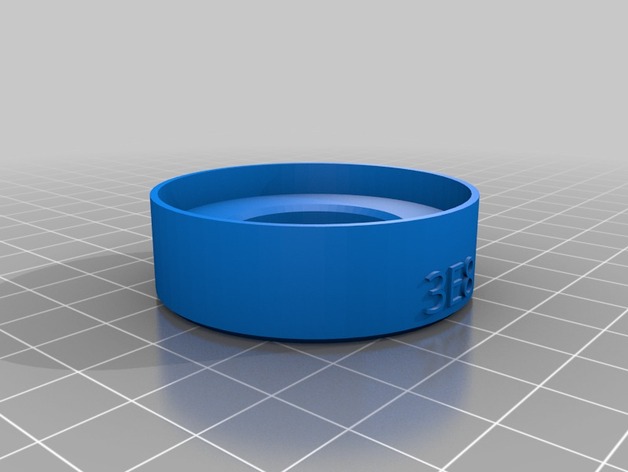 | |||
89rs1200 |
To complete the discussion as to how to get this part printed: 1) Download the file from the above link. I recommend printing the extended tool, (HD45206_ext.stl). 2) Go to this site to upload the file and select someone to print it; https://www.treatstock.com/my/print-model3d |