| Author |
Message |
    
Jbarron
| | Posted on Saturday, September 04, 2010 - 07:54 pm: | 


|
Finished up with the new regulator install. Took out the upgrade harness while I was at it.
Went for a test ride ~100 miles. The new regulator held 14.3-14.4 at speed. It never dropped below 13.9 when stopped idling. I even got stuck waiting for a train and let it idle. Popped the seat off to check the regulator temp and it was only mildly warm. I put it in the original regulator location so it gets some air flow.
I've got a rode trip coming up in a couple weeks and will see how it holds up.
This is on the original stator. |
Parrick
| | Posted on Sunday, September 05, 2010 - 03:56 pm: |
|
Interesting. I didn't think it looked like you could get it to fit in the stock location. Pics? |
Jbarron
| | Posted on Sunday, September 05, 2010 - 10:20 pm: |
|
It fits in the original location, but only by one bolt and it sits on the other one at an angle. You need to do some rerouting of the battery leads. I'll post some pictures tomorrow. |
Al_lighton
| | Posted on Monday, September 06, 2010 - 02:38 pm: |
|
FYI, a caution for those doing this repair.
In this picture:
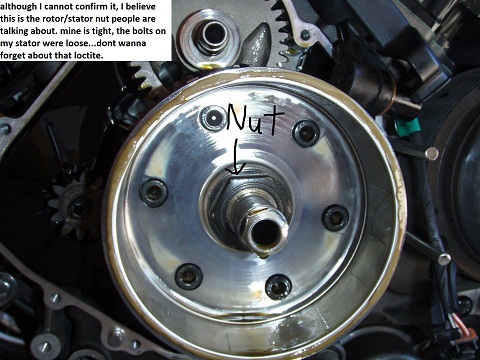
you can see some oil puddled in the back of the rotor. There is a full circle ridge right in front of that puddle, or at least there was on the bike we worked on saturday, that is RAZOR sharp. I'm not exaggerating when I say RAZOR sharp either. I went to wipe the oil out of there and sliced my thumb badly, bled like a stuck pig. But at least it was a perfect slice, so I was able to superglue the cut closed. Be careful wiping that oil out.
Al |
Jbarron
| | Posted on Monday, September 06, 2010 - 07:49 pm: |
|
Picture of new regulator in old location
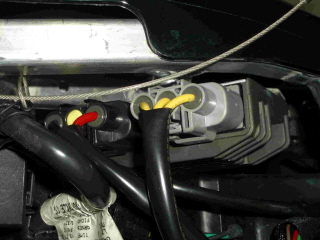
|
Zac4mac
| | Posted on Tuesday, September 07, 2010 - 07:07 am: |
|
Side-note FYI -
Some research I did a few years ago pointed to Superglue being "discovered" and shelved by 3M in the 40s or 50s.
It got re-discovered during Viet Nam and used in the MASH units to close wounds.
If you can stop the bleeding it makes a VERY good seal.
Be careful Al, we need you!
Zack |
Parrick
| | Posted on Tuesday, September 07, 2010 - 07:39 am: |
|
Oh yeah! Good tip! That thing got me pretty good too. Right through a shop rag!
Even after you find out it's there it is hard to see what got you. |
Al_lighton
| | Posted on Tuesday, September 07, 2010 - 08:07 pm: |
|
Just an FYI for folks that follow my lead and use superglue to suture a wound....there are different cyanoacrylate compounds, and the common superglue is METHYL cyanoacrylate, not generally recommended for use on wounds because of necrosis of the adjacent tissue. If you do this, use it on the SURFACE of the cut to close it only, NOT down in the wound. There are other non-methyl cyanoacrylates that don't have the same tissue toxicity, but I didn't know the difference and needed to stop the bleeding. It worked well. Be careful, I'm not a doctor and don't play one on TV, and haven't stayed at a Holiday Inn recently. I looked it up on the internet AFTER I played doctor and zipped myself closed. All that said, it's healing nicely, much nicer than the gaping wound in my finger tip from jamming it hard into the industrial belt sander a week ago. |
Craigsmoney
| | Posted on Sunday, September 11, 2011 - 11:35 pm: |
|
does this voltage reg solve the stator overheating problem? |
Timebandit
| | Posted on Friday, February 03, 2012 - 03:11 pm: |
|
Here are a couple of tips that might be helpful to people tackling the rotor cover removal.
Don't remove the hex fittings on the oil lines. The lines are assembled using special snap-in clamps. It's easier to just remove the green clamps that hold the lines in place, and then unplug the lines from the hex fittings that are on the oil cooler and the engine case.
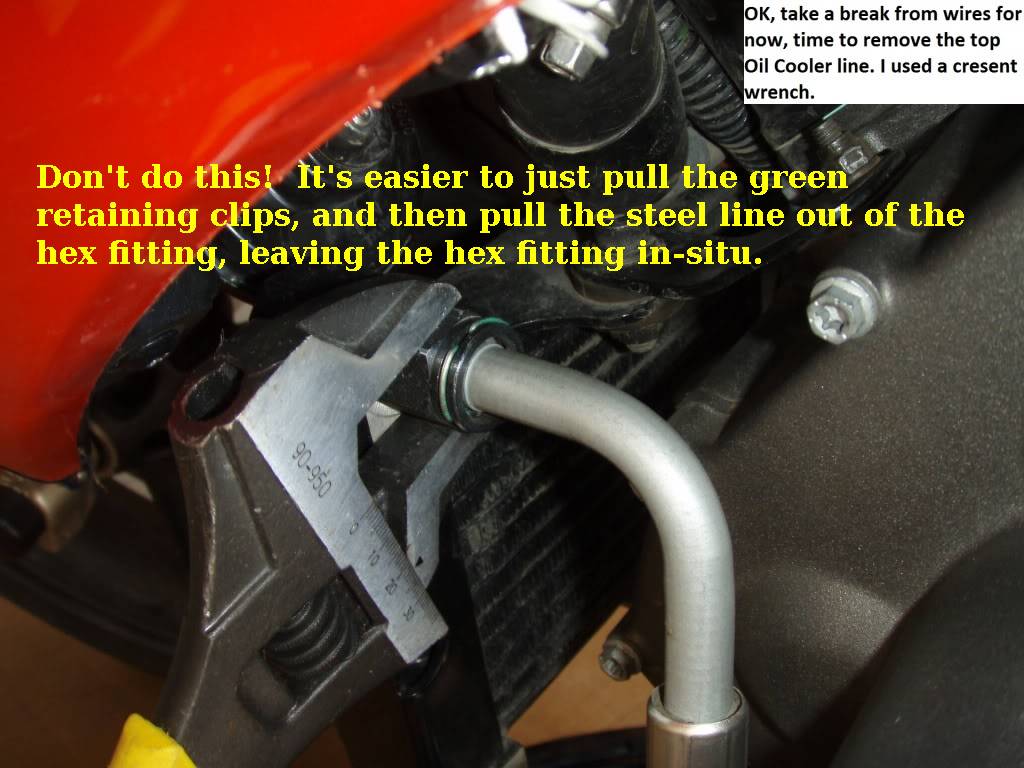
Use a fine-point pick to remove the two green retaining clamps from the hex fittings. Once the clips are out you can just pull the line out of the hex fitting by unplugging it. Then snap the green clips right back into place so you don't lose them. When it's time to reassemble the lines, just plug them into the hex fittings with the snap clamps already in place. You want the snap clamps back in place before you plug in the lines, so that the snaps will retain the oil lines in the hex fitting.
(Message edited by timebandit on February 03, 2012) |
Timebandit
| | Posted on Friday, February 03, 2012 - 03:17 pm: |
|
So you know what you're trying to remove with the pick, this is what the snap rings look like:
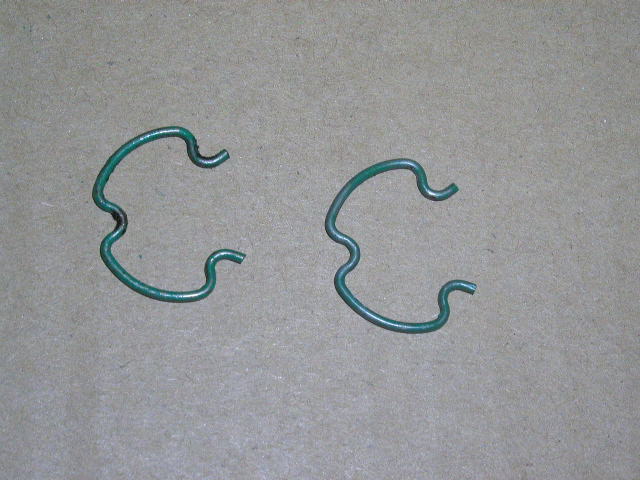
|
|