| Author | Message | ||
Jackbequick |
That is a great looking bike Chris. Nice work. The lower bars and bigger headlight really give that a nice look. I like standard controls over forward controls and I'll bet that is going to be be a joy for day tripping and running errands. Jack | ||
Cereal |
Please tell me you are using that Mustang in the garage for something more than a shelving unit! | ||
Matty |
Here's a little more eye candy along the lines of your project. They do look nice! 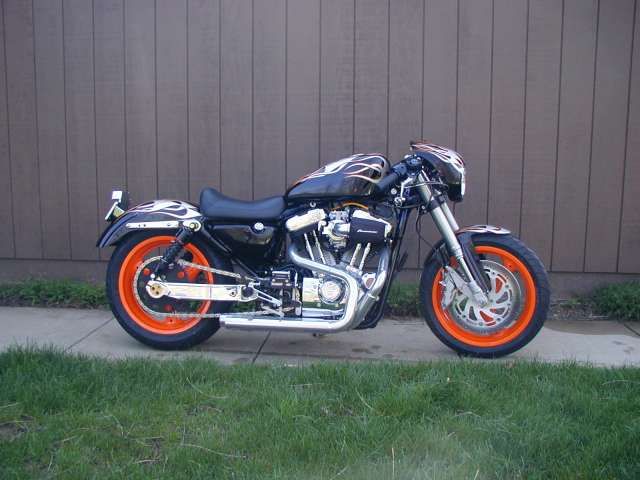 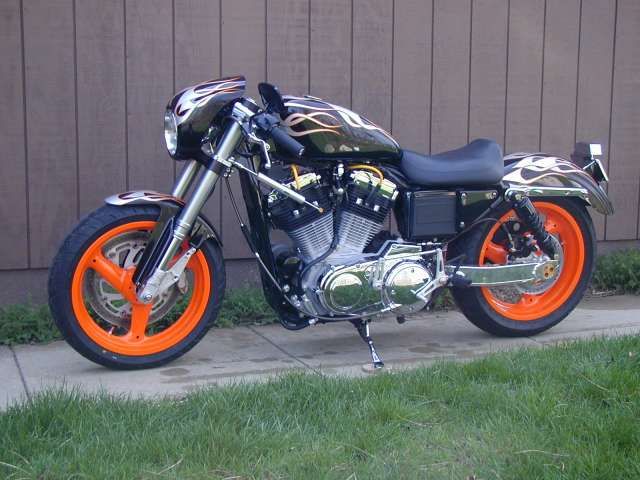 | ||
Sportymark |
Well gives me hope  and is that a 69 or a 70 fastback in teh garage? | ||
Cjburr |
Sportymark and cereal, it's a 70 fastback with the shaker hood that I've played with for many years. However I recently sold it to a guy who lost 41 mustangs in a barn fire. He lost 2 Boss 429's, several Shelbys and the rest were all K code fastbacks and convertibles, all triple black. I has recently gone through the whole body and was ready to put my 347 stroker with a 6 speed in it when he made me an offer I couldn't refuse. Court, that looks like STS 1 to me, if I'm not mistaken that's Crippen coming down the stairs. Thanks for those pics, Columbia was the first shuttle I powered up by myself many moons ago when I first became a certified Spacecraft Operator. It brings tears to my eyes to see her again, I spent thousands of hours in her cockpit. People who don't work on these birds will never understand how much we love these absolutely amazing machines. What is your uncles name ?? I'll say Hi to him for you if he's on the runway for the landing of Atlantis as I'll be in the white room truck in your pics(well we got a new truck, but you know what I mean) Matty, that bike is the one I saw on the net that inspired me to do this project. Thanks for the pic as I had never seen the other side of the bike. Does it belong to someone here ?? Henrik, I called Traxxion and the guy I talked to didn't think the forks would be any longer with different springs, and he recommended 1.1 springs for my application. Do you guys have a guide to replacing the springs in the WP cartridge forks ?? I'll look in the online manual that is posted here perhaps that will be enough. Thanks to everyone else for the compliments, I still have quite a lot of little things to complete the bike and I will continue to post my progress. | ||
Cjburr |
Looked up the fork servicing in the online manual here, thanks a million to whoever posted that. Here is the link to the exploded view of the fork, #6 is the shim I would like to make thicker http://www.badweatherbikers.com/buell/Manuals/S1_1996-1997_Service/BU2b.pdf It looks like you might be able to increase the thickness of the preload shim and perhaps gain some length in the fork. All I really want is a .5" and I'd be happy. Has anyone ever done this, and will it prevent me from getting the sag right ?? or is the sag measurement only for the rear shock ?? I'm thinking that perhaps you could adjust out any stiffness in the suspension you would gain from increasing the thickness of the preload shim with the compression adjustment of the cartridge. Haven't played with cartridge forks before so if I'm barking up the wrong tree, please feel free to point out my error. (Message edited by cjburr on September 02, 2006) (Message edited by cjburr on September 02, 2006) | ||
Court |
>>>>I'll be in the white room truck He likely will be as well, Dr. Craig L. Fischer. I'll not hijack the thread, but suffice to say, and you may know this, he's an amazing guy. I thank him for starting my interest in science and engineering by providing me with an endless series of NASA technical bulletins weekly when I was in grade school. Back to your project. . . I am impressed by not only what you are doing but how meticulously and precisely you are doing it. Both Aaron and Henrik would welcome you to their worlds. Keep'em coming! | ||
Cjburr |
I will tell him hello for you Court. Thanks for the compliment on my project. I know that sometimes I might read more into a problem than is really there, but when I am finished I like to think that I have thought through any problems and absolved them to my satisfaction. After all it is my butt that will be on the bike  | ||
Blake |
How did I miss all this? Really wonderful stuff Chris. Thank you so much for sharing this with us. Very cool. I've always wanted a bare bones Sportster Drag type looking bike, but one that would handle fairly well too. Will you be leaving the brake caliper bracket on the left side fork? | ||
Cjburr |
Thank you Blake, this forum has been a great source of info for all the Buell related things I have had to consider for this mod. The online manual has helped me to get my 98 S1W running great and I believe it has all the info needed for the spring upgrade to my Sportster/Buell. Although I would appreciate anyones experiences with changing out the springs in a cartridge fork. I will leave the bracket on as the engine mods I have in mind might call for a dual disc set up in my future. Do you have an opinion on increasing the thickness of the preload shim to gain some fork length?? I also noticed that the link I posted for the manual page for the fork isn't an active link, I must have done this wrong so any help there would also be appreciated. Thanks again and I will try to be a help where I can on this forum, I am new to Buells and Harleys though so I will most likely have more questions than answers. | ||
Blake |
How much front end rider sag do you have? That would be the determining factor for whether shimming the spring would be prudent or not. You don't really want to have less than 1.25" of total (rider + static) sag in the suspension, maybe as low as an inch but that would be pushing it for a street bike. Consider a higher series front tire? The difference in a 70 to 80 series 120mm wide front tire will be 12mm or right about 1/2" added height from rim to road. | ||
Cjburr |
Thanks Blake, I sit here laughing at myself.  That is the most simple and elegant solution to my problem. Sometimes I can't see the forest for the trees. That is the most simple and elegant solution to my problem. Sometimes I can't see the forest for the trees. I will check my static sag and see what I have. I believe that the online manual has the directions to do this. I am currently adapting my Sportster speedometer to the Buell instrument pod. The new speedometer does not work with the Buell cup on the backside and H/D doesn't make a cup for it. However with a small amount of dremel work and $3 worth of hardware from ACE, I believe I can make it work. I will post pics as I go along. | ||
Cjburr |
Today I had a chance to complete the mods needed to fit the 06 Speedometer to the Buell instrument pod. The pod uses a large cup to seal the speedo from the elements and the 06 speedo's and tach's use the housing that they slide into to cover the body of the instrument with a flat cover on the back. After a little head scratching and napkin drawing engineering, I went to ACE hardware and purchased everything I needed for under $5. Unfortunately I also had to spend $9 at the dealer for the extra rubber seal needed on the backside of the speedo. Still not a bad price tag to make it work. Here are all the parts needed to complete the mod, 1 instrument pod, 1 extra rubber seal, 2 8-32 stainless screws, 4 washers, 4 lockwashers, 2 plastic spacers, 2 nickel plated acorn nuts, and a cap to seal the hole where the speedo cable used to go to the old Buell spdeedometer. The only special tool needed is a dremel to slot the holes and lop off the heads of the screws. 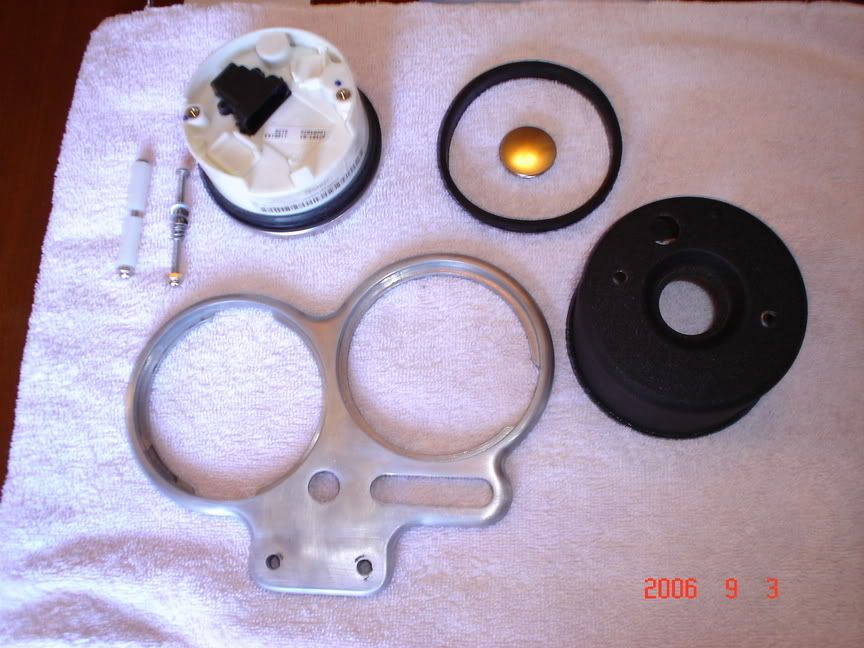 First lop off the heads of the 8-32 screws and put them into the speedo as studs, place the cover over them to see how far the holes need to be slotted. 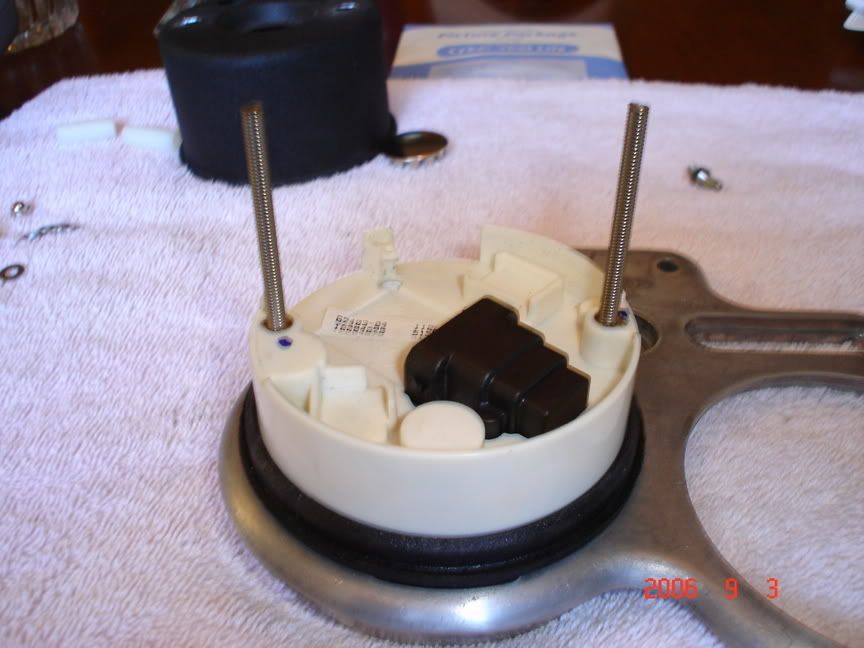 Slotting complete, check the distance between the cover and the threaded insert on the instrument, this will give you the length of the spacers. Take into account that you will need to compress the rubber seal.  Install 2 washers, 2 lockwashers, and the spacer. Reinstall the cover and mark the screw where it needs to be cut off.  This plug is used to seal the hole where the speedometer cable used to go for the old Buell speedometer. 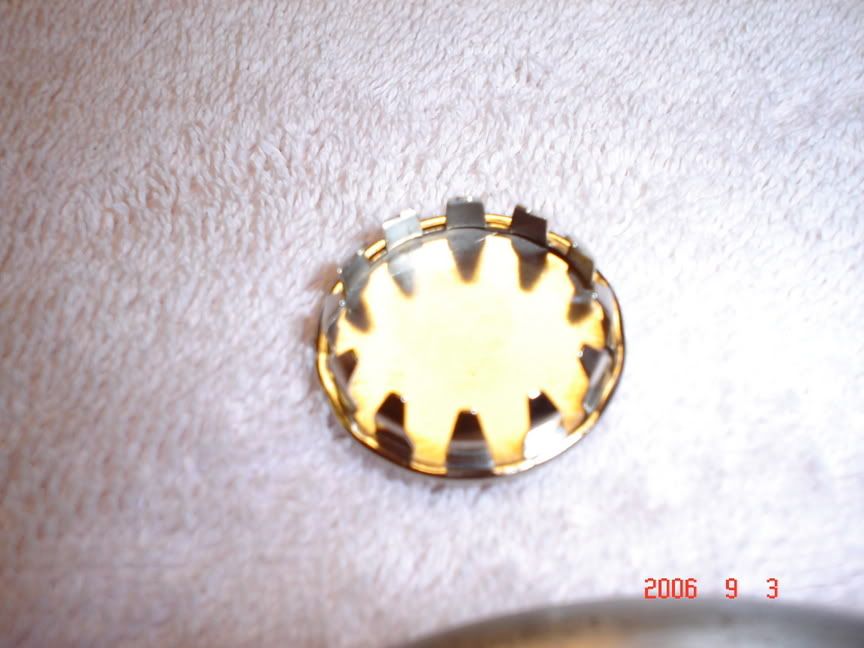 Here it is installed, a perfect fit 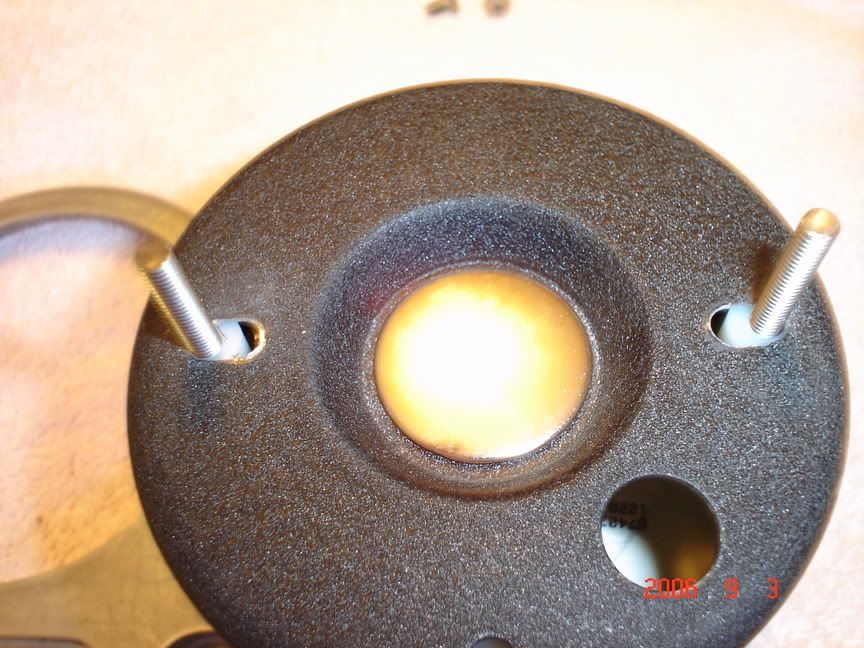 Mark where to cut off the screw so the acorn nuts will tighten down and properly crush the lockwashers, I only left about 2 threads showing with the washer and lockwasher sitting on the screw. Install acorn nuts. 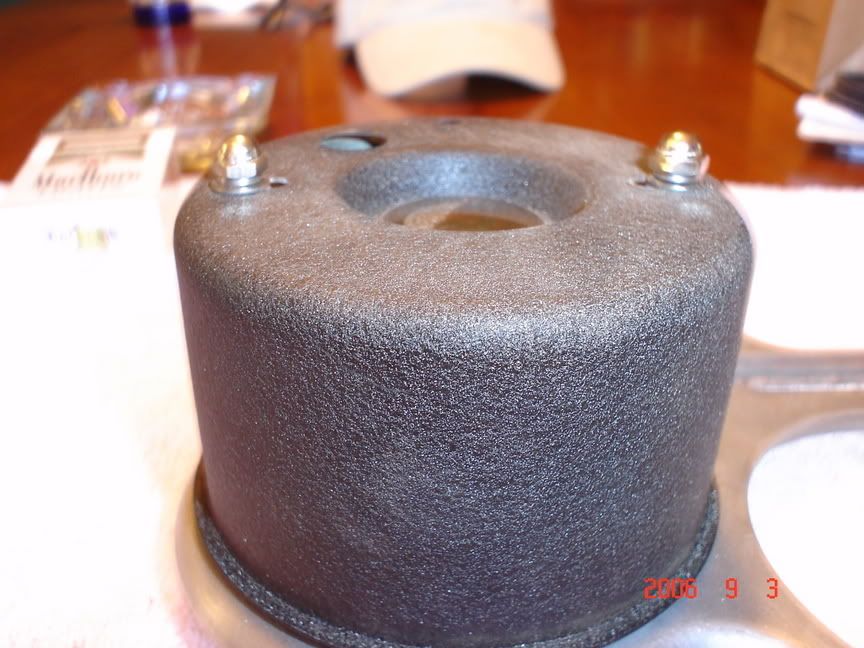 This pic shows the extra rubber gasket used on the back side under the old style cup, every thing appears sealed nicely and the speedo doesn't move at all  The finished product 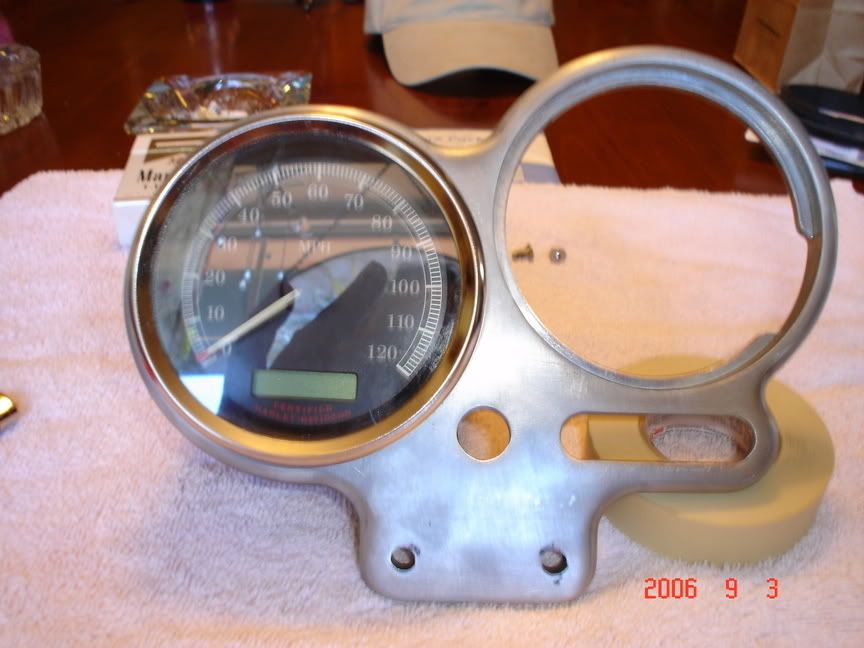 My helpers doing the final torque check. 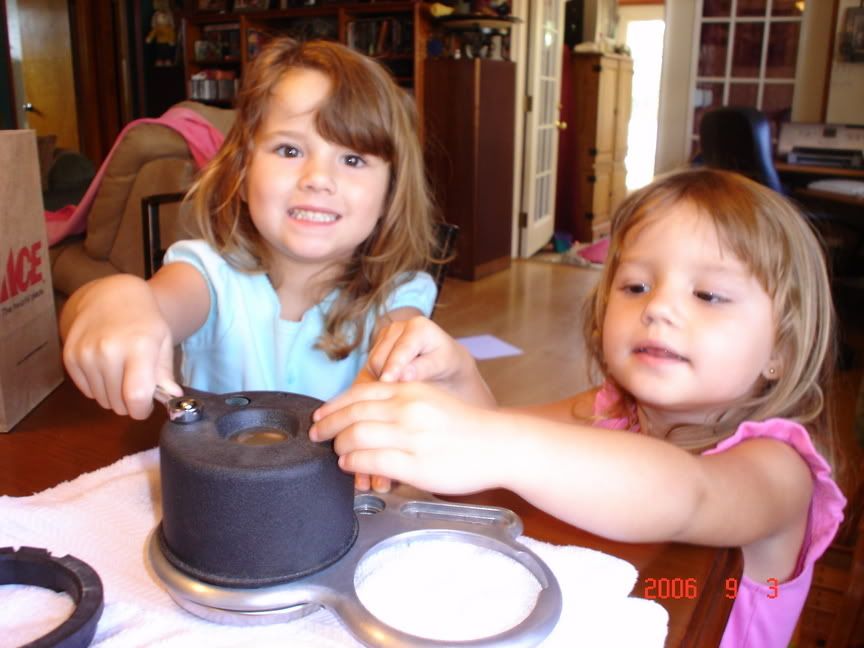 The trip reset button will fit in the hole on the back and be readily accessible, all that is left is to paint the pod Vivid Black and install it on the bike. | ||
Blake |
Hope you took your helpers out for an ice cream treat afterwards. Good help is hard to find these days.  | ||
Cjburr |
Painted the pod today, not too pleased with my first attempt Heres a pic to show how it will look anyway 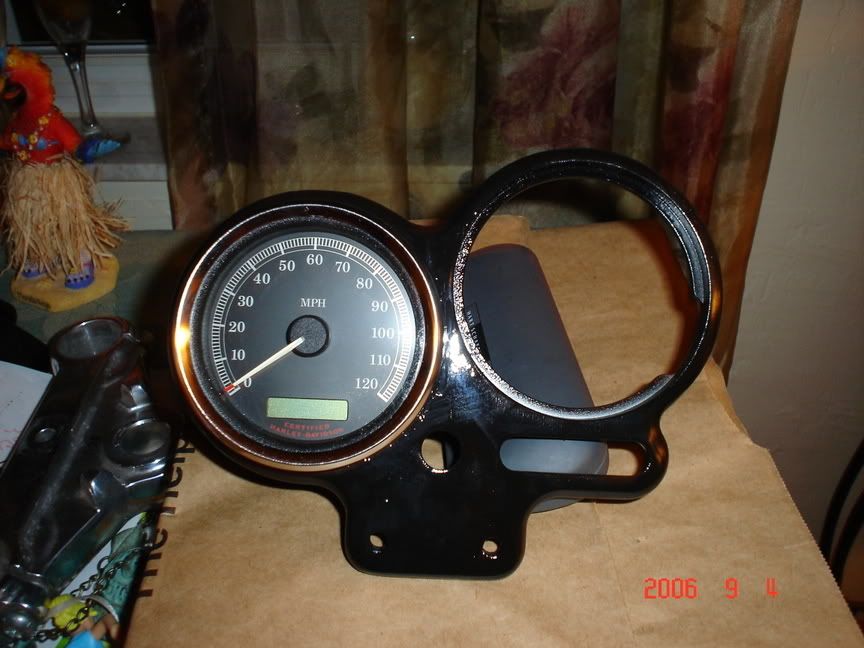 My master cylinder should be here on the 7th, and I ordered my black fly screen today. I am going to blast the pod back down and shoot it again because I will have to look at it all the time so I want it right Almost there, I can taste it......... | ||
Sportymark |
CJ, just a quick Question is the Buell Rotor have the same bolt pattern as the Harley Rotor? just a thought? | ||
Bomber |
what a great lookin scoot! very true to the sportster roots good for you, CJ! | ||
Ceejay |
well done...looks as if they should have been built that way. | ||
Cjburr |
Sportymark, I have a spare rotor and put it up against the H/D rim and the bolt pattern appears the same. However the Buell disc is not straight across, it is bowl shaped, for lack of a better term. I can try to get a pic if you don't understand what I'm saying........I'm not sure if I do. Thanks Bomber and Ceejay, I don't know why H/D doesn't build a bike like this. I'm sure they would sell every one they built. It's not quite a sportbike yet it has a great look and will handle so much better than the bone stock Sportster. It's not like they don't have the parts to do it. (Message edited by cjburr on September 05, 2006) | ||
Sportymark |
Yeah like a dished? I jsut figured if I could score a buell rotor, it woudl look cool with the buell front end and since I already have the 6 piston calper... | ||
Cjburr |
Shakedown complete, not one problem noted. The bike handles great, stops even better, and gathers stares and compliments everywhere you go. All that is left is the tach and the flyscreen to complete the transformation. I mentioned that the front master cylinder had a small surprise in store for me today, heres the scoop. I semimounted the Buell master cylinder to get the old fluid out of it and while I was performing this task I noticed something......................................... The damn thing had a 1/2" cast in the side of it.... All my worries about the brakes were for naught, the bore for the Buell is the same as the Sportster single disc master cylinder. I then removed the banjo bolt and tried it on the dual disc master cylinder I had bought to see if perhaps the orifice was bigger than the single disc m/c.. negative on that. It fit the single disc perfectly, although the head on the banjo bolt for the Buell is bigger than the banjo bolt on the single disc m/c for the Sportster. This is what led me to believe that the single disc m/c from the Sportster wouldn't work with the Buell 6 piston brake. So I bolted on the original m/c and bled the brakes. Mounted my modified speedometer, put in the dummy lights, put the turn signals on the handlebars for now, double checked my torques, fired it up and went for a ride. Took it easy on a side street to test the brake, lever action is great, the bike slows in a hurry with hardly any dive. Tried a few panic stops that were completely controlled and found that the bike will now stop on a dime and give you 9 cents change. Cruised around for a while in town then went to the old highway and took it up to around 75 mph, no hint of a wobble, the bike was very stable. Took a time out to get some water and see if anything was coming loose, everything looked good. So on to a curvy road to check the handling some more. The bike holds a line very well and the "flickability" is vastly improved. The only snag was a slow speed turn that I leaned into a little too much and caught the kickstand a touch. Hopefully when I redo the spacers on the tree , put on my new shocks, and go to a front tire with one size taller sidewall this will be no issue. Here are of few pics of the bike as it is now, the fly screen and tach will complete the front end 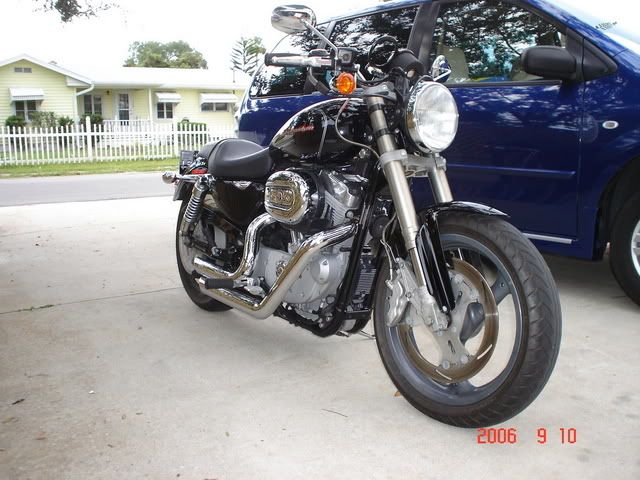 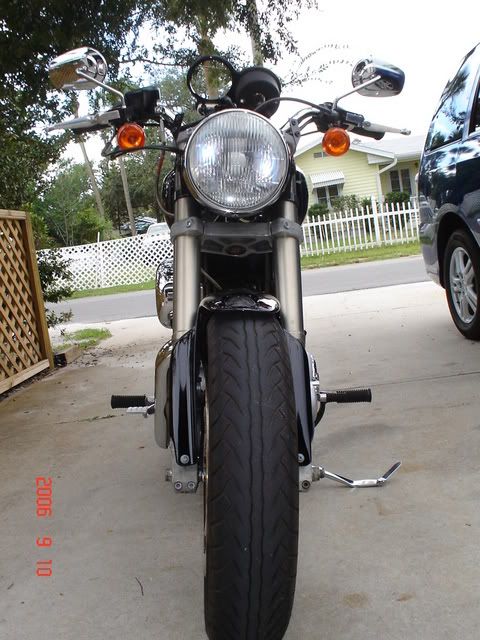 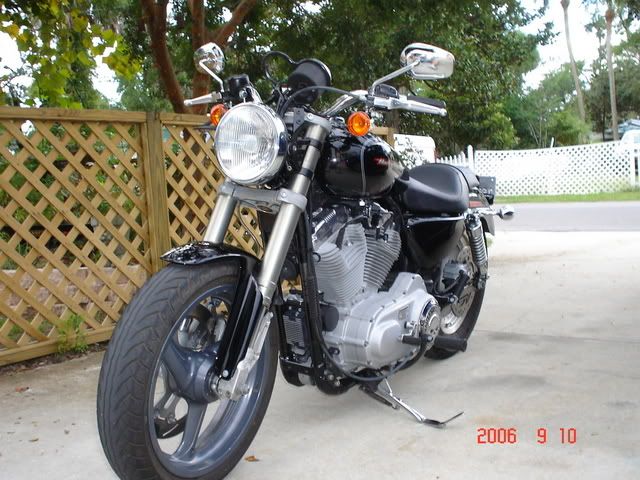 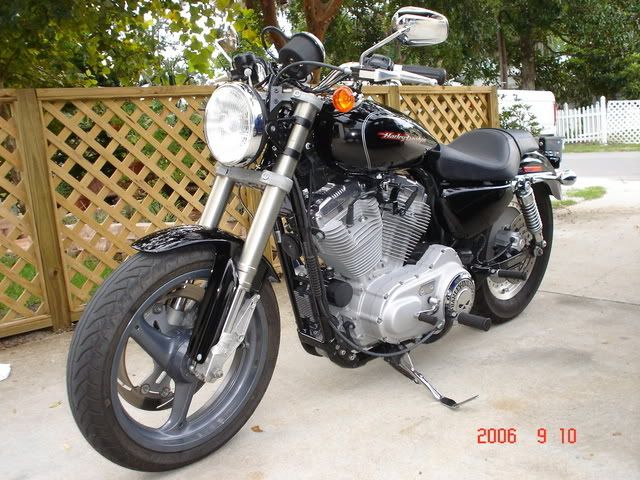 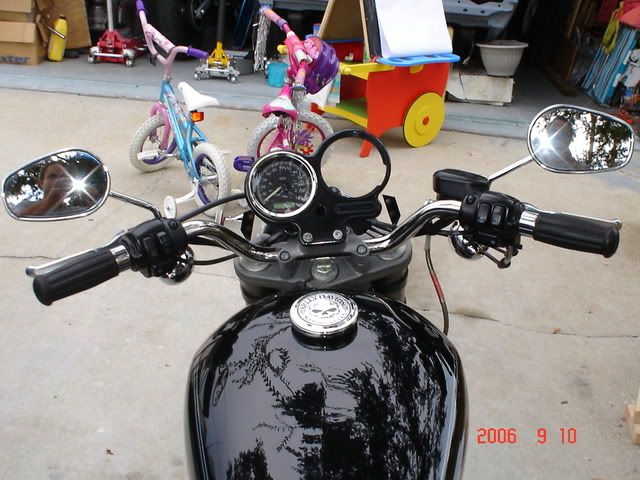  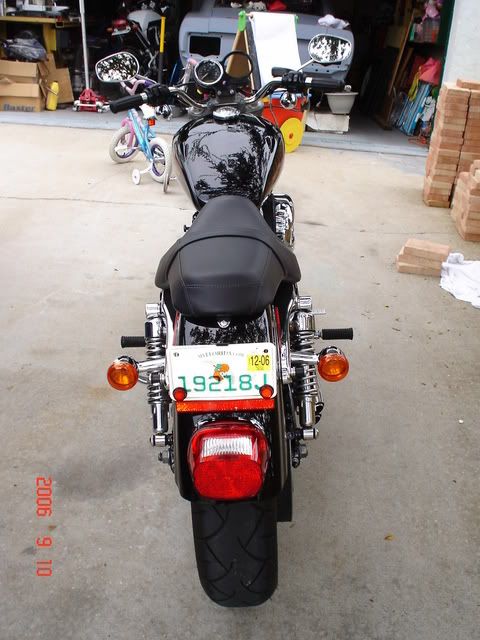 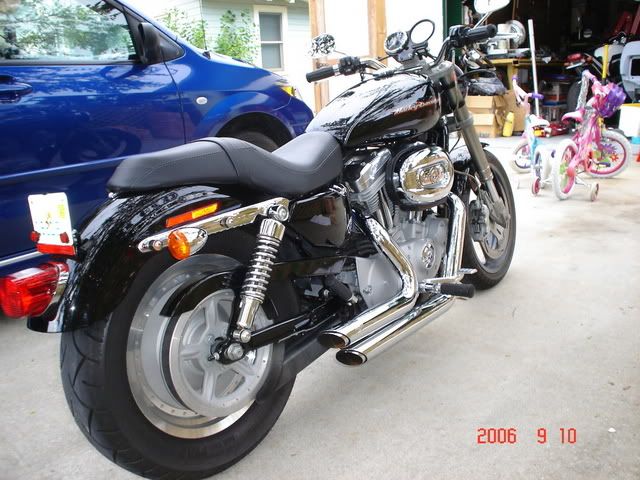 My fly screen should be here next week, I hope sooner, and perhaps I can talk the wife into getting me my xmas early in the form of the tach. I will be putting together a summary of the parts, services, and cash outlay it took to do this mod. It really wasn't that difficult to do, if you can turn a wrench you could do this. | ||
Sportymark |
so far the only things I have had come up are the need to make myself some fork stops, and how to modify the trees to accept stock style risers and or a bottom mount headlight. On the pre 04 sportys there are no required spacers, just bolt on the trees with the buell stem(no head lock) | ||
Road_thing |
Beautiful work, Chris! Thanks for walking us through it. rt | ||
Cyclonemick |
Great info thanks for sharing. Oh! and the bike looks tough! | ||
Henrik |
Boy, I like it. No reason HD shouldn't make them like that. Job well done. Henrik | ||
Court |
Meticulously done and, from a style perspective, I think it's much more "business like" looking than the stock Sportster forks. Henrik's gotta be purring like a kitten over the job you did! Court | ||
Henrik |
Henrik's gotta be purring like a kitten over the job you did You betcha ...  Henrik | ||
Cjburr |
Thanks all, I've had a lot of fun doing this. The bike handles and stops so much better it's hard to believe. Went to the dealer for an oil filter today and when I came out the salesmen and about 5 customers were all looking the bike over. Nothing but compliments and lots of questions, rode away smiling all the way home. Really only made one dumb mistake in the build and that was not looking closer at the Buell master cylinder, could have saved a week in the build right there if I had seen that 1/2" cast in the side of it. Oh well, at least we all know how big the bore is on a 98 S1W now for future reference. Relocated the brake line today and need to tweek the fender as its not quite centered. The wheel spins freely but the disc is not quite centered in the caliper so I'll put a couple of washers between the caliper and the mounting ear to get it perfect. Once I can afford to get the swingarm I'll fit it with the Buell rear wheel, and then tear everything down and powdercoat the trees, lower legs, calipers, swingarm, and the wheels gloss black. Toying with the idea of hard anodizing the upper fork tubes black also, but I'm on the fence about it right now. I have a lot of little things like putting the wires inside the handlebars and mounting the turn signals next to the headlight a'la Buell, and modding a dyna tach for the pod to keep me busy so I'll check back in as I get these things done. Court I should see the Doc next Wednesday on the runway and I'll tell him hello for you. Take care and talk to you all soon, Chris | ||
Court |
>>>>Court I should see the Doc next Wednesday on the runway and I'll tell him hello for you. Please do and tell him I intend to seize the opportunity to visit JSC and see a launch before he retires! He was "astronauting" before it was cool. Likely one of the smartest people I have ever known. Let the rest of your group know that many of us in the construction business are really enjoying watching "Construction in Space (recently featured in Engineering News-Record). All the best and I hope HD steals your idea for the Sportster front end! Court | ||
Cjburr |
I had a long and wonderful day last Thursday. 4 years of hard work culminated with the safe return of Atlantis. I had the honor of opening the hatch when she landed in the early morning. Everything went smoothly and she is safely back in the Highbay where we are currently getting her ready for her next mission. Heres some pics you don't see every day. Some of these are shaky as the truck is moving and the camera didn't take it very well.  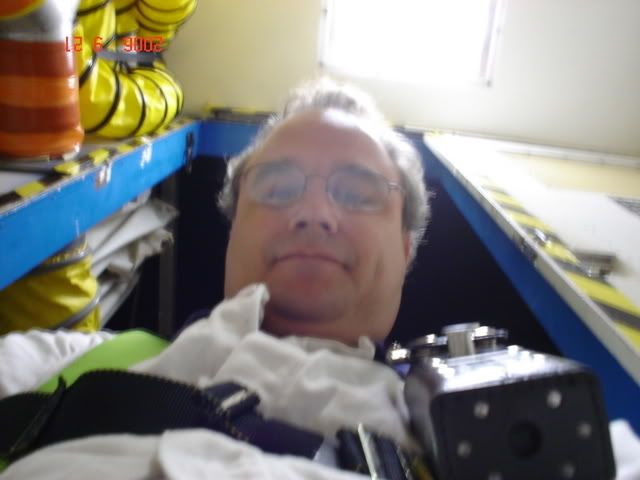 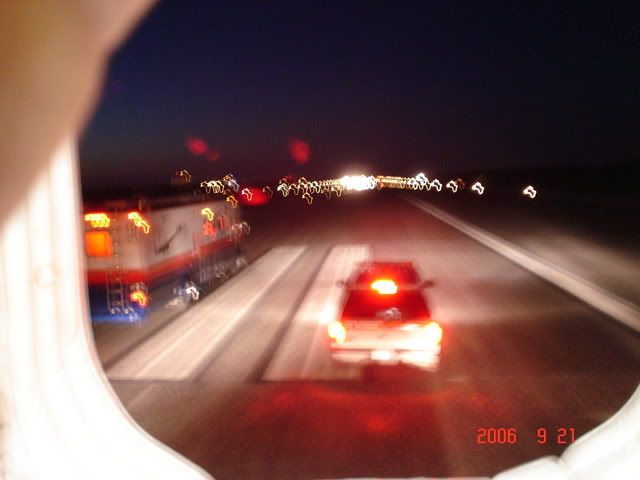 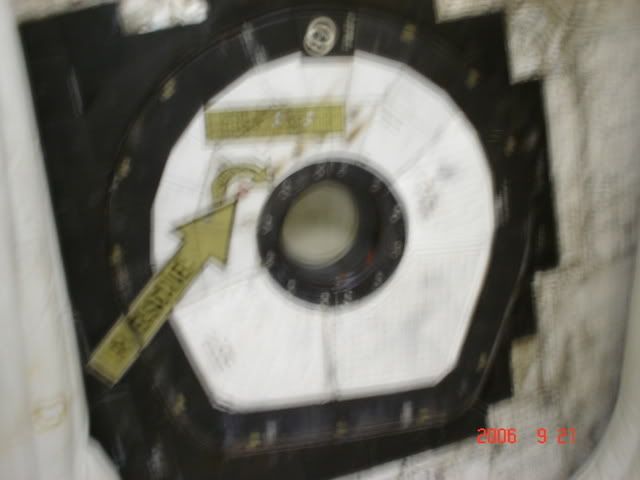 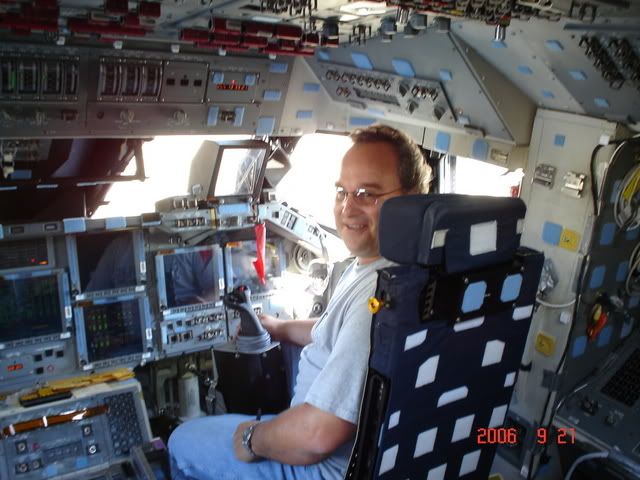 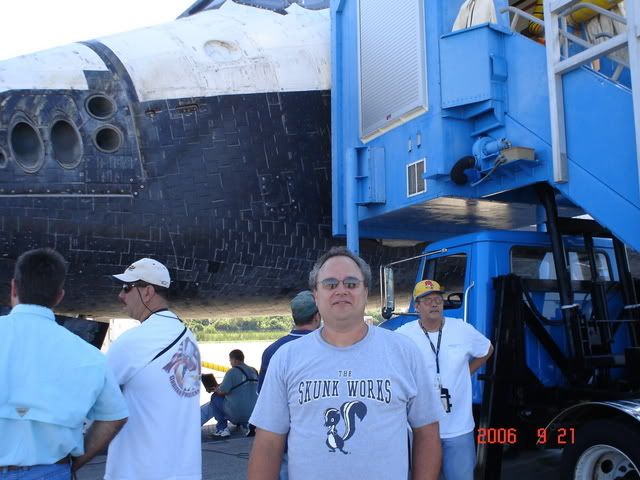 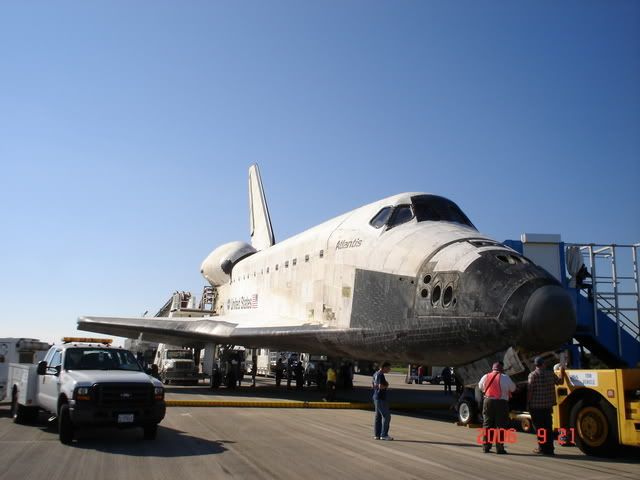 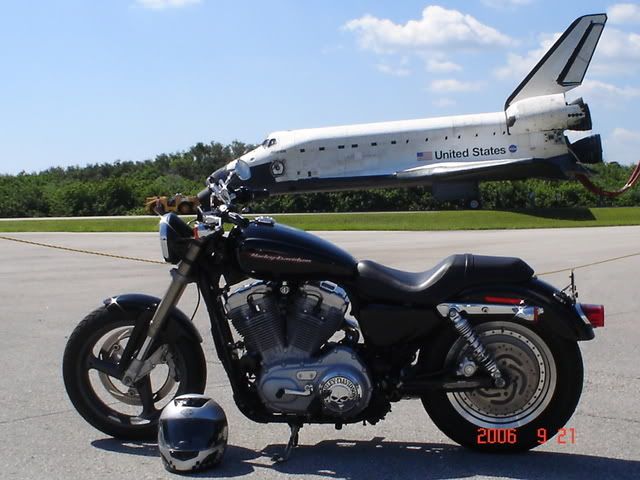  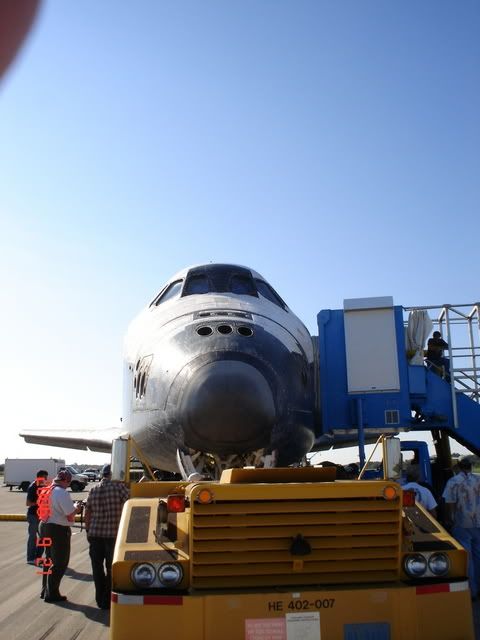 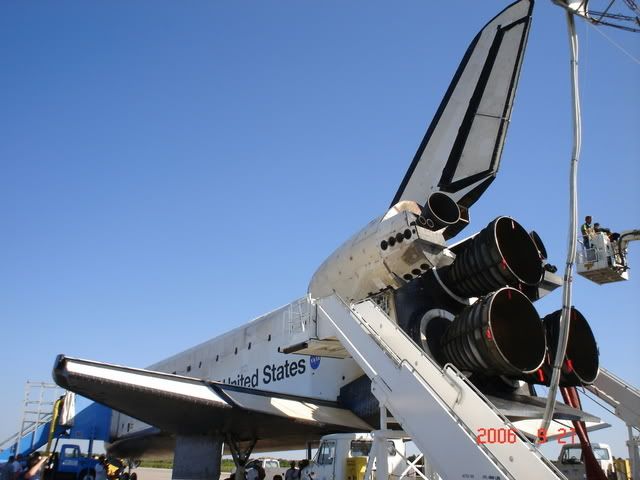 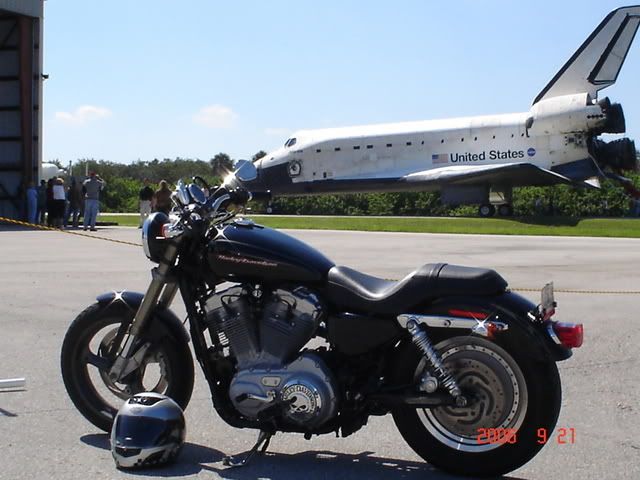   Sorry your uncle wasn't on this one Court, the flight surgeons there, and the astronauts, all speak very highly of him and they said they will tell him hello for you when they get back to Houston. |