| Author | Message | ||
Hillis3 |
I'm in for 1. | ||
Guell |
put me down for one | ||
Brother_in_buells |
Thanks Matrim ,no problem about the extra shipping costs | ||
Matrim |
It looks like the part is down to 16.25 a piece! Thanks everyone. | ||
Weatherbyman |
add 1 for me!  TY! TY! | ||
Blks1l |
I'm in for 2. | ||
Froggy |
2 for me please!  One for my Blast which occasionally is stubborn with the cap, one for my X1 if I ever get one. | ||
Whitex102 |
Put me down for one. | ||
Bertsdirt |
I'm in for one as well. | ||
Tainted |
i'd like one also | ||
Robertl |
What is the total up to now? I am in for 2. If we are close to 100, I can go an additional 1 or 2 to get the price down to 11.00. Robert | ||
Sleez |
i'll be in for 4 if we get to the 11.00 price! S3, S1W, M2, P3 | ||
Matrim |
Thanks for the generosity Robertl, but I don't think we will make it to 100. Sorry Sleez, I'm fairly certain we wont make it to the 11.00 price.  BTW, I'll be posting instructions shortly | ||
Matrim |
Instructions 1.Remove your gas cap and make sure the lock tab is in the closed position (down.) 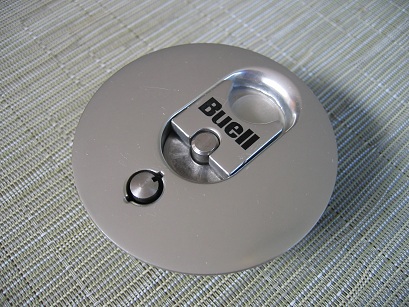 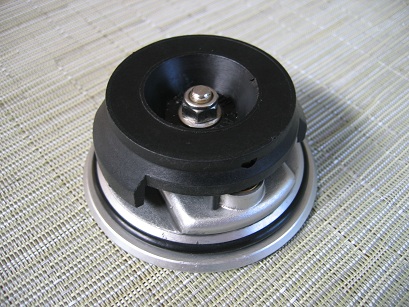 2.Remove the bolt from the bottom of the cap with a 10mm socket, slide the black plastic part off the bolt, and set the rest aside. 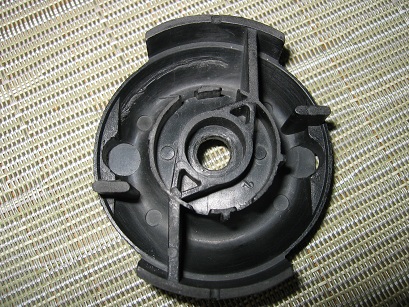 3.Place the black plastic part – as shown in the picture – in a vice or something to keep it stationary. 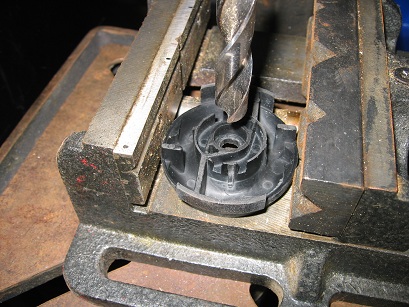 4.Using a ½ inch drill bit, drill through the center of the piece (it will just barely fit.) I used a drill press but I’m sure you can do it with a normal drill if you’re careful. WARNING – This plastic is very soft and the drill bit will grab onto it and tear it up if you aren’t careful so take your time and make sure the piece is secured. 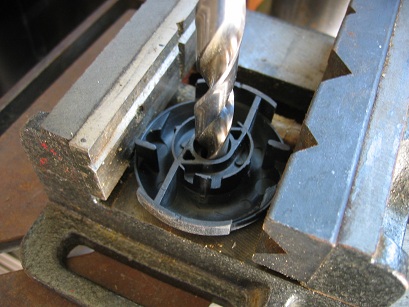 5.When you flip the piece over you’ll see the plastic has kind of folded over to this side from the drilling. Use a chisel, razor blade, sandpaper or whatever works best for you to clean up the hole. 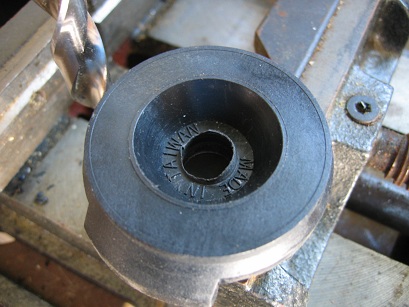 6.You’ll also notice the words “MADE IN TAIWAN” raised in the plastic. I used a chisel to remove the letters so the new part would lay flat against the plastic but again, use whatever works best for you. 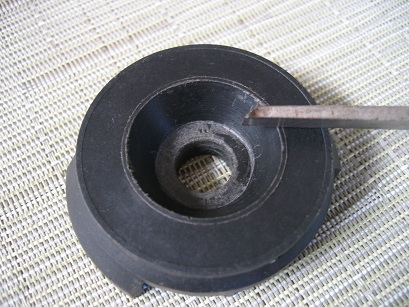 7.Fit check. Place the new part, boss side down, into the black plastic piece to make sure it seats well. Trim plastic parts as needed (even though it was a snug fit pushing it in, I didn’t find it necessary to trim any excess). 8.Assemble the gas cap (without the spring) in the fully latched position (this is very key – see picture). Then insert the new part and install the nut. Note: Assembled in this way, the new part will be held in the correct position as you drill pilot holes. 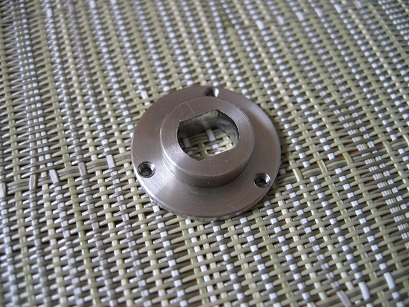 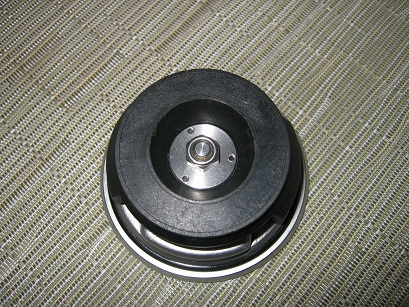 9.Carefully use the 1/16th inch drill bit to make pilot holes in the plastic (be careful to not damage the threads on the new part.) 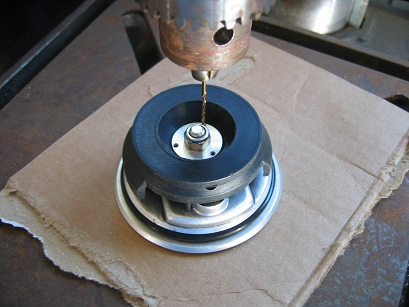 10.Take the gas cap apart again and remove the new part. Now use the 5/64th inch drill bit to enlarge the pilot holes. 11.Put the new part back in place, apply a dab of Loctite to the screws and evenly screw them in place with a 5/64th inch allen. (The Loctite may or may not be necessary.) 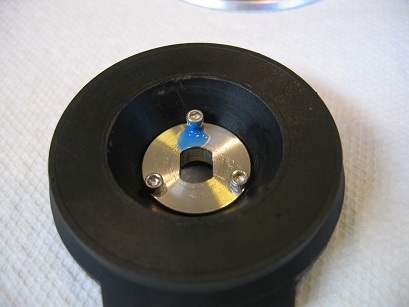 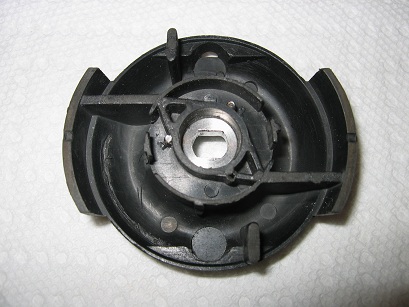 12.Reassemble your gas cap – using the included nut if yours is damaged or worn – and enjoy. 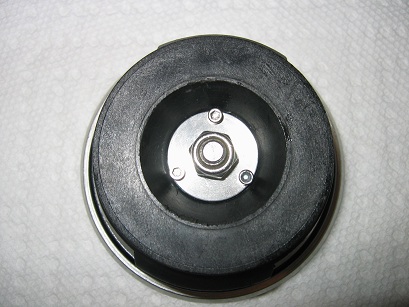 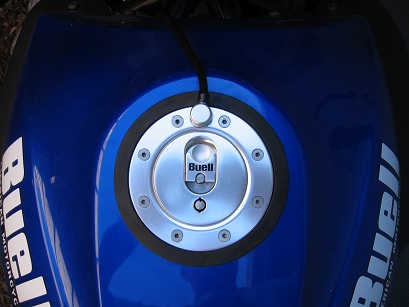 Note: Prior to ordering a batch of parts, I may move one of the holes to avoid drilling though the web (see photos). Also, I plan to use high strength black oxide steel screws to avoid the possibility of stainless on stainless galling. | ||
Matrim |
If this looks like too much work for anyone who has already requested some - or just isn't up your alley - I'll understand. Please just email me or post on the forum if you want to alter your quantity ASAP. That goes for everybody (altering orders) as I plan to order the parts early next week. So if you want one, let me know as soon as you can. Sorry for all the pics and the long instructions... I did my best to make it clear but let me know if anything needs extra explanation (Message edited by matrim on September 15, 2011) | ||
Matrim |
One more thing... I feel bad doing this because everyone here seems to be very mature and knowledgeable but here it goes: I assume zero responsibility for any damage you may inflict upon you or your property in the modification of this part. That said, if a problem does arise (seems very unlikely to me) I will be happy to help you work it out. | ||
Froggy |
Would it be possible (for a few extra monies) be able to do the modifications? I know it would make my life easier and get rid of the guesswork chances that I'd screw it up. Obviously I would still have to dismantle my cap, but at least it would be plug and play. Edit, never mind, I just realized why that wouldn't be doable. :facepalm: (Message edited by froggy on September 15, 2011) | ||
Prototech |
Put me in for 2 one for Bro's blast and 2 for my s1, (Two Tanks). Thanks | ||
Edv |
Put me down for 3 I haven`t had a problem but it looks like a nice update | ||
Whistler |
Need two please. | ||
Blks1l |
So the allan screws are just being screwed into the plastic? Are they self tapping or are you just using the screws to make new threads? | ||
Matrim |
I am just using the screws to make the new threads. I had originally bought a tap to thread the plastic, but after drilling the holes i decided against it (I think it works better this way.) | ||
Outdoors |
I'll take 2 in far away Canada! Shipping is easy with USPS. | ||
Mmcustoms |
whats the number at so far ? and if we are close to 100 , id buy a extra one im already in for 3 of them | ||
Froggy |
Total is about 50 in this thread alone, I don't know if he posted it elsewhere. | ||
Matrim |
Yea, I think the total is about 55 give or take. It's a good idea to post elsewhere but that would be too much for me to deal with. | ||
Bluesboy |
I`m in for 1 LMKB.B. | ||
Motomedic |
I'm in for one... | ||
Jvv |
Matrim........excellent "how to".......looks idiot proof.........(just what I need).  Thanks for doing this. I just replaced my 15 years old cap a few months ago.........so this will be the last time. Ride safe........Jack | ||
Matrim |
No problem JW. Just an unemployed engineer at the moment, so this'll keep me busy while I'm searching for a job.  |