| Author | Message | ||
Oldog |
This is one item that the FSM is not clear at all about you can find the X1 front iso data in the engine removal and re install in the ENGINE section, OOPS! heres my attempt to clairfy NOTE: My bike is stripped for other services You may not have to strip yours as far. You will likely need help for this Data front bolt through the iso to the Front head hanger 110 Ft-Lb iso mount bolts 14 Ft-Lbs the basic description support cycle, remove tank, handle bar control rings, instruments, indicators, key switch [ the dash ] the bars are in the way too. I would place a bottle jack under the engine to push up and hold the motor while the bolt is out, get paper and pencil for tags and to list order of removal of the connectors on the wiring the connectors are tight through the hole and must be pulled back out of the way to get the left side bolts 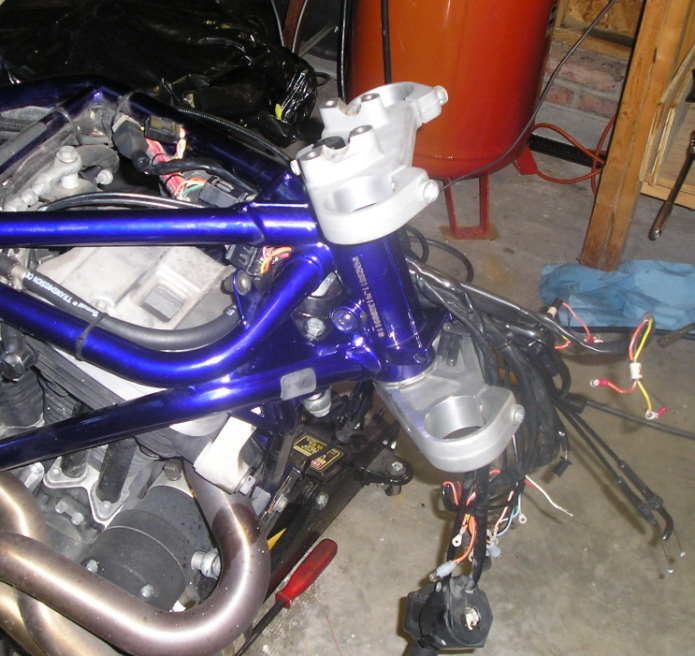 nearly all of the wires and cables are in the way to remove the iso bolt on that side 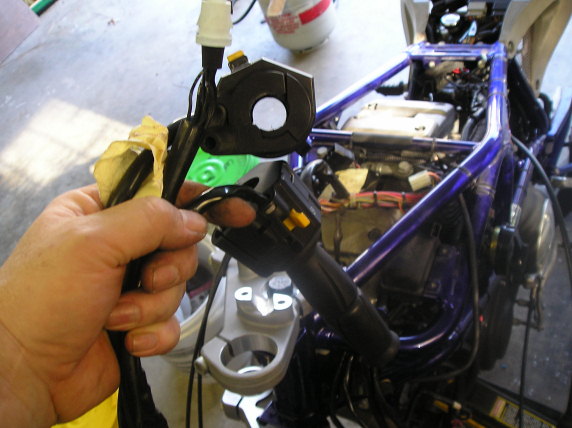 with these out of the way you can get a wrench on the iso mount bolt. The Iso to head is 3/4"(head size) and is TIGHT get some one to hold the bike if it moves at all, My 1/2" air impact could not budge the hanger bolt, With a socket for the bolt and an box end on the nut remove the nut and D washer note the flat faces front, place pressure if needed on the motor or frame / pry the bolt fron the iso there is a washer between the iso and the head hanger and a washer under the head of the BOLT at the head hanger. With the main bolt out remove the 2 iso mount bolts you will want a ratcheting box end and an open end 9/16" size I could not get a socket on but one bolt, clean the bolts up well I used a wire brush and brake clean on them, blue lock tite and torqued them to the above specs. 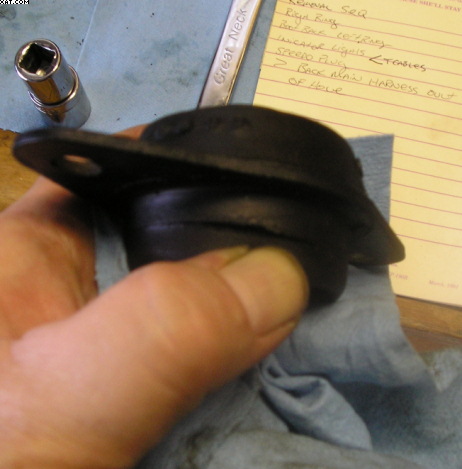 its about to go with the rip in it. make notes on wire removal I started with the control rings then the indicator lamps then pulled the key switch back through the hole, I have 2 extra cable sets for oil press and temp gages when you re assemble the isolator is marked for top install the mounting bolts loose place the main hanger bolt loose in the iso then tighten the mount bolts check the washers too it was simple but fiddly (Message edited by oldog on January 02, 2007) (Message edited by oldog on January 02, 2007) | ||
Court |
Excellent material to print and place in the FSM. | ||
Oldog |
An electronic manual with subscription, updates and a submission feature would be a cool customer service item, and limited access to mechanics and engineers at BMC, would too. if not a badwebb membership is the next best thing  | ||
Oldog |
bump | ||
Oldog |
More fun, mid summer with less than 15k and or 18 months on the "new replacement" the front iso is terminal, it has been about to die for about 4 months now I today closely inspected it IN PLACE Honestly I realy did not clearly understand the failure mode here the rubber cushion has come loose from the steel mount the entire rubber cushion is beginning to go, my earlier iso was just starting to come loose and crack around the insert this one is terminal BTW a big thanks to 1313 for spotting it, IN hind site the vibe levels had been creeping up as the bond failed please see the pictures  Seen from bottom left side. top left side of iso  (Message edited by oldog on July 27, 2008) | ||
Oldog |
errata in service about 18 months, baaah! | ||
Naustin |
Cross Link to similar issures: http://www.badweatherbikers.com/cgibin/discus/show .cgi?tpc=47623&post=1211820#POST1211820 You are 100% spot-on with your deduction with respect to the realatonship between weak and failing isolators and eventual head bolt/bracket failures as far and I'm concerned. The whole uni-planer system places way too much emphasis on that front isolator. Its an inherently flawed design if you ask me. Engine mounts should be good for the life of the vehicle. Especially when failure could lead lead to serious injury or death. There is no excuse for the weakness of this part/design/system. | ||
Oldog |
Update on procedure for replacement it is not required to remove the front forks or control rings from the bars, place bike on stands, as above place jack under the engine at the front ( windage tray ? ) I removed the seat & tank fly screen, head light housing, SOME cables to the rear on the left side ( as seated on bike ) to allow access to the left bolt head, Remove 3/4" bolt nut and washers from mount, remove d ring, use ratched between f-legs use jack to assist adjusting the motor position the bolt can be pushed out. remove right bolt using close swivel socket on top open end on nut below. remove left bolt with open end on bolt and a deep socket on nut from below blue locktite, assemble loose tighten outer mounts first, then torque center. | ||
Oldog |
Nic, I read that link sorry to hear about your problems on that mount / iso there is very definately something amiss with your S3 | ||
Mmmi_grad |
There really needs to be some detailed information about chassis alignment here for these bikes. Heres someone who thinks its important too. http://www.true-track.com/1_2006_004.htm | ||
Oldog |
Further update the replacement Iso posted in the july 08 note appears to have detatched and may be failing Pics soonest the rubber is clearly seprated as in the above photo although the part is not ripping this sucks ...  | ||
Kalali |
I'm just wondering if the life expectancy of the front isolator is directly correlated to how and where the bike is ridden. For example, the folks who do wheelies/stoppies on a regular basis and/or folks who ride through rotted roads with pot holes, etc., vs. folks who ride the bike "gently" mostly on highway, etc. I personally have been accused of babying my X1 and don't even know how to do a wheelie and/or stoppie. I know I am probably missing a lot of fun but after almost 14K miles my front iso looks brand new. But then again I got the bike with 9500 miles so I can't speak about its previous life... Just wondering... | ||
Oldog |
Kalali My original iso lasted about 4 years the replacements have not held up so well there may be other issues I dont know. I do know that the second one lasted about 18k miles the third one ( current not so ) | ||
5liter |
Just checked mine. Guess what????? It's the original iso, so I think I got a break.  (Message edited by 5liter on February 26, 2009) | ||
5liter |
Ordered the front iso from American Sport Bike. | ||
Oldog |
bump |