| Author | Message | ||
14d |
That pulley looks awesome, how hard was it to make it fit? The stock pulley is pretty ugly IMO and something more one-off than a chrome cover would be nice. | ||
Purpony |
here are a couple things I made for my X1- needed a new bushing for my exhaust (i have not upgraded to the new hanger yet) so I made a mold and injected my own bushings-    Also, here is a pic of my bike with my XB light conversion. I made the mounts and spacers to adapt it to my stock XB triple. I made the bar end mirrors in the picture and the adapters to bolt XB heel guards on my bike. The dash and gauge cups are also custom made pieces made by me, to hold my stock gauges and fit the XB mount which was also cut with new dash mounts welded on. | ||
Texastechx1 |
Yeah hey Nick, ever get around to making another set of them bars? as of now they are on a "by the order" basis, you have to prepay. (so i can have some money to make them  ) ) Phelan, How is that caliper bracket fabbed and what material? The last thing you need is a fatigue frature in the brake caliper mount. this is true, even with 1/2" 6061-T6 i went though a couple designs... don't want failure on the front brakes at speed.  | ||
Phelan |
My bracket is built out of steel, and is solid behind the original bracket. I have the same thought as everyone else; I plan to thoroughly test it at slow speeds and take it easy a bit. Really, though, it's just a temporary measure until I get some '03/'04 XB forks. Still debating on how I wanna manage the triple tree issue though. I don't want to have to use XB triples because I don't want to lose any turning radius. | ||
Skntpig |
Hey Purpony... You don't have a spare set of those bushings you want to sell do you? Nice work. I like the rear pulley, matches nicely. Ebutches hitches are the winner for me so far (not like I'm the judge) | ||
Blazin_buell |
Good thread! Several older pics ,first of the previously mentioned flattened Clubman bars and the dual halo headlight setup and the last pic you can see my butchering of the stock shifter to the under Banke style.    There's also the window pulley cover so you can see my lightning cover spinin'  You might also see the reshaped hand levers that scare the shit out of track day techs if I forget to remove them before getting there.  blacked out PMs ,reshaped passenger pegs and then chromed  relocated ignition barrel  Oh and how about the still untested handmade waveerrr cutting rotor for the "PILE PROJECT BIKE"  | ||
Rickie_d |
Purpony � Cool injection mold! Something to think about - you will not need the new bracket if you replace the urethane bushing with aluminum and follow factory header installation proceedures. I never understood the need to utilize isolators on an exhaust system that is mounted solely to the engine. Isolators are usually only necessary when you bridge an exhaust system between an isolated object (engine) and the structure that it is isolated from (the frame). For whatever the reason that Buell initially utilized them, they abandoned the practice with the XB series; the exhausts are solid mounted to an isolated engine. | ||
Skntpig |
I love the pulley cover. Nice S1 with the Killer levers. I'm gonna have to take some pics | ||
Phelan |
Ricke, I wondered that as well. I think I'm gonna ditch the bushings myself for some aluminum. | ||
Rickie_d |
Here is another simple modification Did you ever here of a Sportster puking out of the trans vent (rhetorical)? Highly unlikely! Why? Because unlike Buell the trans vent tube on a sporty is routed immediately down to the bottom of the frame. The only reason a Buell trans pukes (even with 32 oz) is because water was introduced through the vertical (S2) or horizontal incline hose to the rear on all other models. I immediately recognized this problem the first time I removed my S2 body back in 94. The solution is simple if you choose to keep the routing stock. For a vertical vent on a S2, you add a common differential vent cap (right) or route the hose like all other models�then install a capped vacuum hose tee as pictured on the left with the opening pointed down.  | ||
Rickie_d |
Back in 94 when I bought my S2, I saw the potential for speedo cable breakage due to the length & big loop in the routing. Also the cable would tear the retainers out of the fender, even on later models when there we two. So late in 94, I developed this solution!!!    | ||
Rickie_d |
Then at a later date when I bored the cases for 3 5/8 cylinders, I machined them to accept the magnetic pickup and eliminate the cable. This pic was before surfacing the case for the sensor. It worked perfectly, however, I now have Ol�34 slated for restoration to original.  | ||
Cobraman |
On the exhaust mount subject. At least on the X1, the rear mount point for the muffler is mounted to the swingarm. Not all mount points are on the engine. | ||
Benm2 |
 This is the CAD rendering of my last prototype, its on the M2 now. The primary sprocket has been cut away on the ID, and the alternator is my own design. The rotor weighs 225 grams. Here's a picture of the rotor:  Here it is installed:  That's the coolest part, but no one can see it. The bike also has home-made rearsets, and an S1 tail welded on. | ||
Oldog |
At least on the X1, the rear mount point for the muffler is mounted to the swingarm. err NO on the swing arm Carrier [ engine mount ] Not all mount points are on the engine. Yes that is correct Ben that alternator bell is ART what effect does it have on performance? (Message edited by oldog on December 17, 2009) | ||
Phelan |
I'm presuming it's designed For less rotating mass, For less parasitic loss by drivetrain weight. It would allow it to rev up quicker. Ben, is that a "total loss" charging system? | ||
Rickie_d |
Cobra � Just to clarify the swingarm pivots on bearings in a block that is solidly mounted to the engine; the rear muffler hanger is attached to that block. Ben � That rotor would look really cool behind a open belt primary! I know the feeling of making really nice parts that do not see the light of day. | ||
Benm2 |
Oldog - thanks. I sunk way too much money trying to get it as finished product to the Buell racing market, but got effectively sunk by attorneys & insurance companies. The whole assembly (sprocket & new rotor) weigh less than a stock primary sprocket BARE, by a significant margin. The reduction in rotating mass is quite noticeable when revving the bike, it ramps up & down very quickly. A total-loss system would be NO alternator, just running from the battery. This will still charge the battery, but it doesn't produce charging voltage till about 3000 rpm. I made stronger ones (charged at idle) but they made so much power that they blew regulators. I had a whole wicked-cool setup just about done, there was an electronics pack that combined this alternator with some trick Lithium-phosphate batteries. I have a battery pack that weighs 2 lbs and still starts the M2 (it has 11:1 compression). I have dreams of unlimited wealth & my own CNC shop. I'd love to build a 340-lb XB9 for endurance racing. | ||
V74 |
hi benm2,i am sooooooo jealous, (1)how many miles have you done with that mod and is it up to street use? (2)how easy is it to get the rotor and sprocket apart and back together? (3)what was the total weight saving? thanks for the inspiration,steve | ||
Rickie_d |
This is the first pulley guard/brace I made for a friend�s 95 Custom S2.  Since then I have made a couple variations for another friend�s M2 and my S&M-2 project bike   Installation of the M2 guard required some clearancing of the frame and safety style Isolator  | ||
Brinnutz |
I've always been looking for one of those front pulley covers that covers the nut and such. So hard to find. nice guards! I dig the first one. Let me know if you do another run of them, lol | ||
Rickie_d |
Mark Trebold originally made the pulley covers; but not sure if he still does or if he sold the rights with his buell parts line. http://www.crossroadsperformance.com/cp/ | ||
Blazin_buell |
Skntpig, where's the pics?? RickD ,very nice work ,cool cable brace and that pulley cover is nice. How about one shaped like a trident or pitchfork. I love seeing other peoples ingenuity and finding ways of solving problems. Even with the pro cure in my rockers I still had problems with puking on track days while twisting her tits off. So I tried running seperate breathing tubes run to the back capped with filters and presto no more puke.  Wanting a smaller fender I adapted an XB on the front.  And needing more ground clearance to quit grinding toe pegs I found some german helmet spikes and now those are grind free and look meaner.  Keep the good stuff coming people. | ||
Phelan |
BB, I love your shifter setup. If you don't mind, I'm gonna copy it. I ain't got the funds for a banke setup, and yours looks equally cool. Eventually, I'll probably go opposite of your fender route, adaptIng my American Sport Bike fender to some '03 XB forks to make my conversion more structurally unquestionable. I need to rebuild the forks anyway. | ||
Blazin_buell |
Please, by all means ,take all that slop out of the over set up. I was in the same position, no dough and this was before they changed to the newer style and I wanted to keep the custom look of the stock levers. This was my cheap solution and worked much better than I'd imagined. | ||
Purpony |
blazin- what is your shift lever off of? | ||
Rickie_d |
I built these risers for tapered Brutale bars with a lower rise than stock. I can raise or lower them 3� with the S2 WP inverted cartridges on my lowered M2. In addition the risers can be rotated 180 degrees to move the bars forward about 3�. These shots show the mockup without the cartridges installed I also used MV Butale clutch and brake master cylinders to test a Mugura clutch slave cylinder and duel progressive bore calipers in 4 and 6 pot configurations. The mirrors are off the Brutale also, but I drilled the front of the housings for clear to amber LED�s. They are fitted into individual bores then epoxy filled and the housing refinished so you do not see the lights unless they are lit.    | ||
Joesbuell |
I wouldn't know were to start for my coolest parts on my Buell! there's soo many  Here's my latest just finished this afternoon. Stock rear brake pedal sticks out to much and is to heavy, so I knocked this one up. Stock old steel pedal 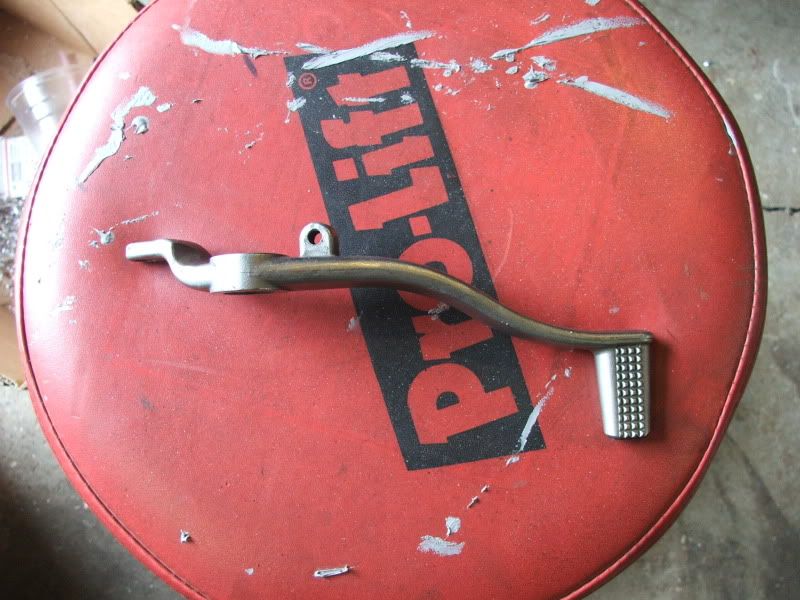 New light ally one 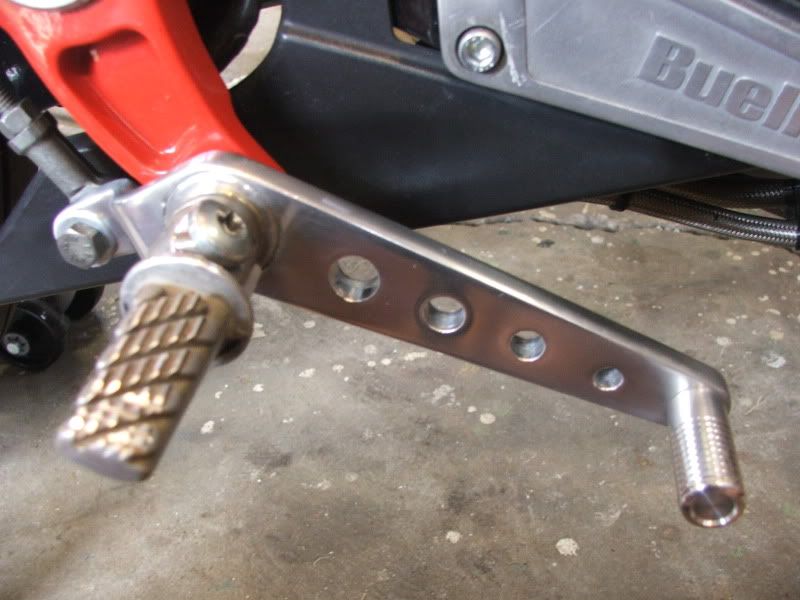 Crossroad style bars not finished in this picture. Have made them with a 7 degree downward bend. 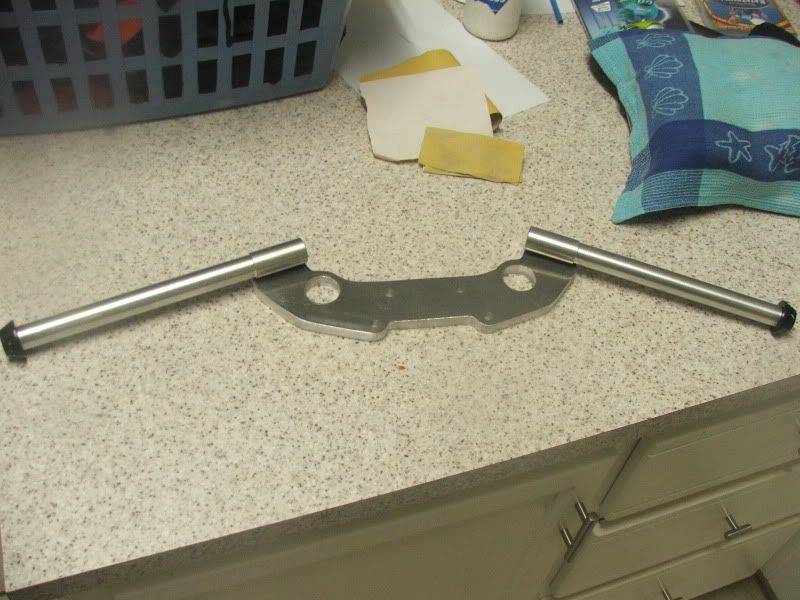 Custom oil line fittings and home made cone silencer.  Custom Corbin seat  XBS front end and an XB12S/R rear swingarm custom made side stand custom dash, fabricated battery box top shock mount, custom made heel guards, frame plugs at swingarm pivot, custom made speedo sensor on rear caliper bracket, XB oil cooler, custom made catch can. 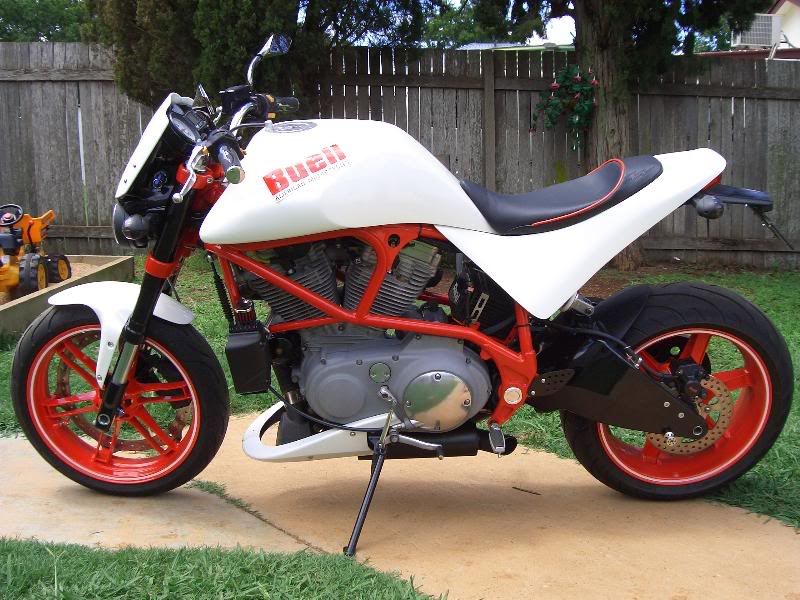 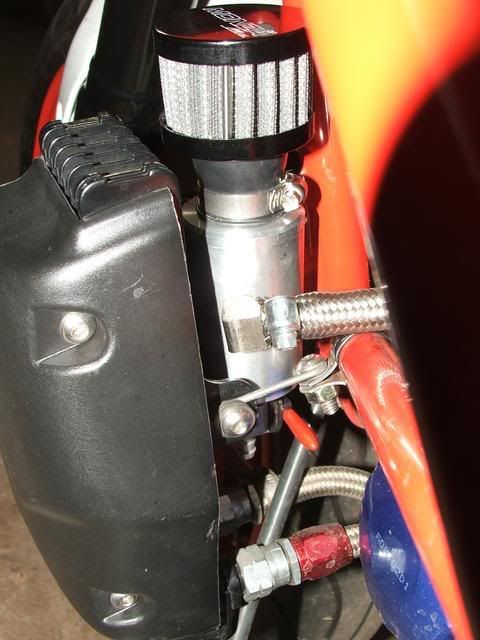 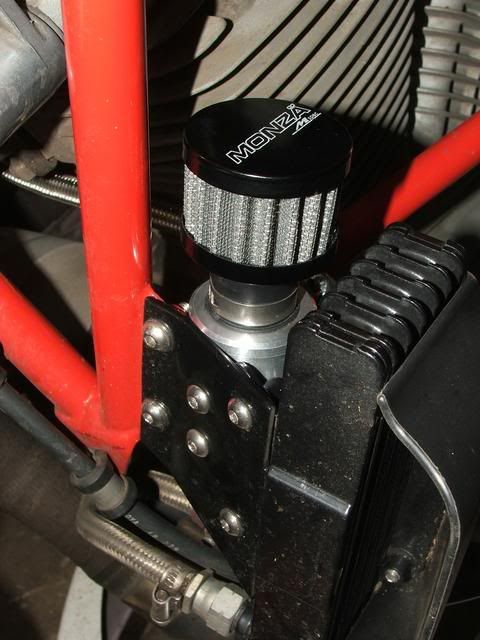 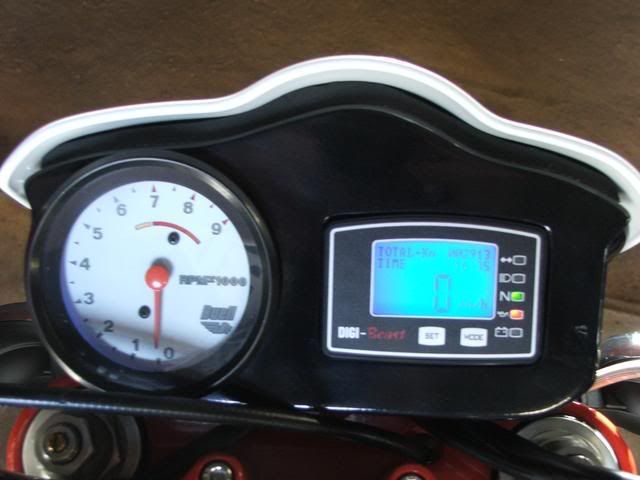 Frame plugs 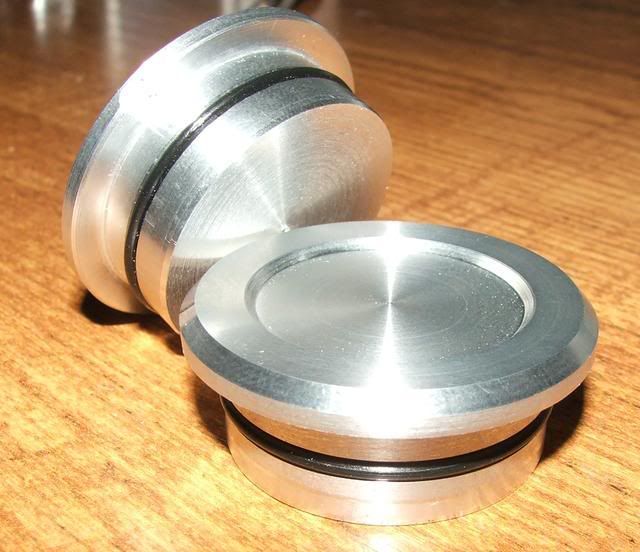 Speedo sensor 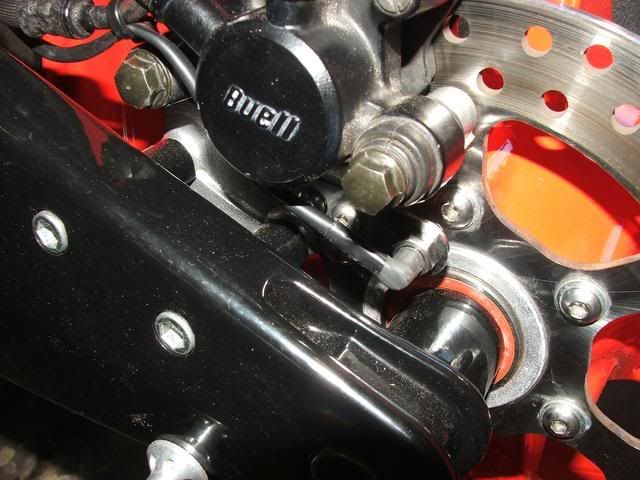 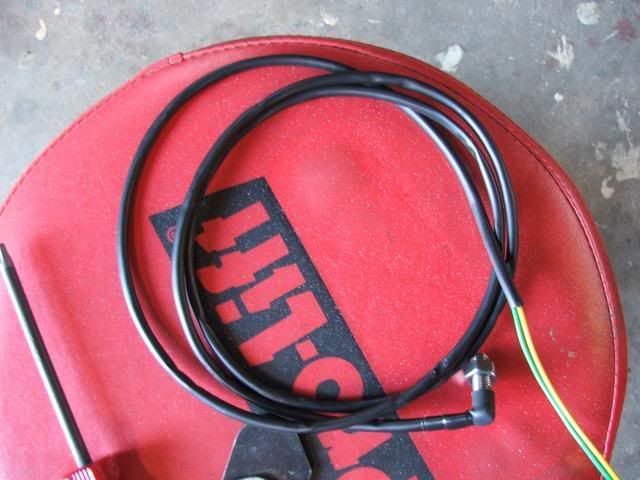 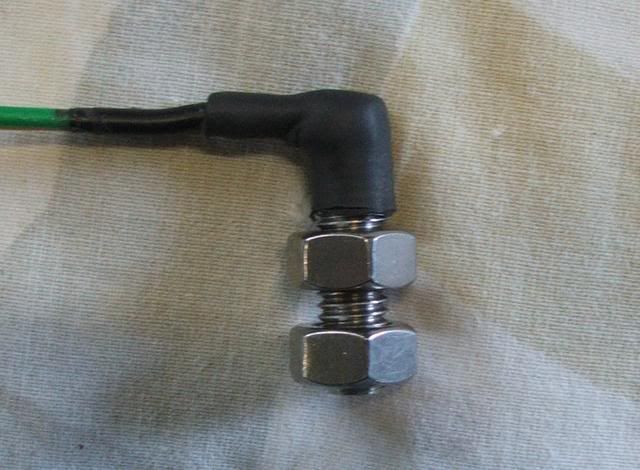 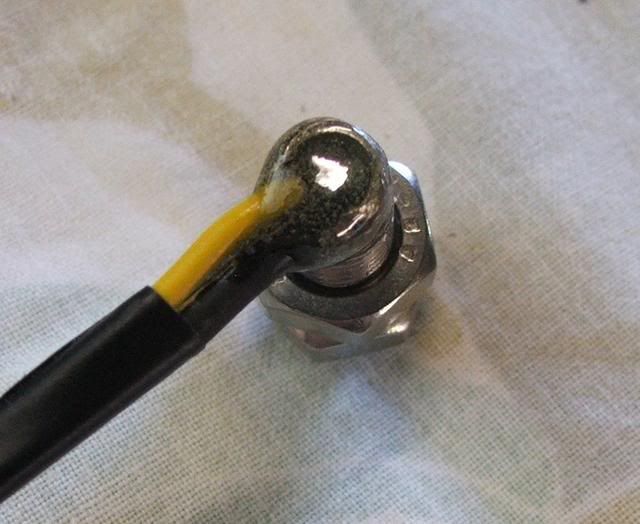 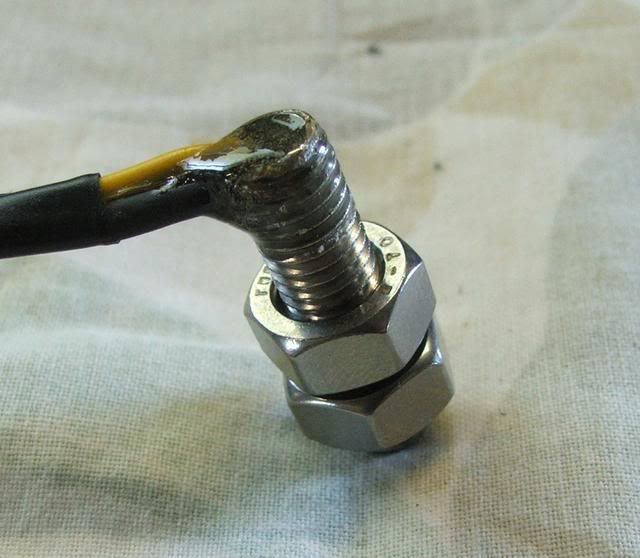 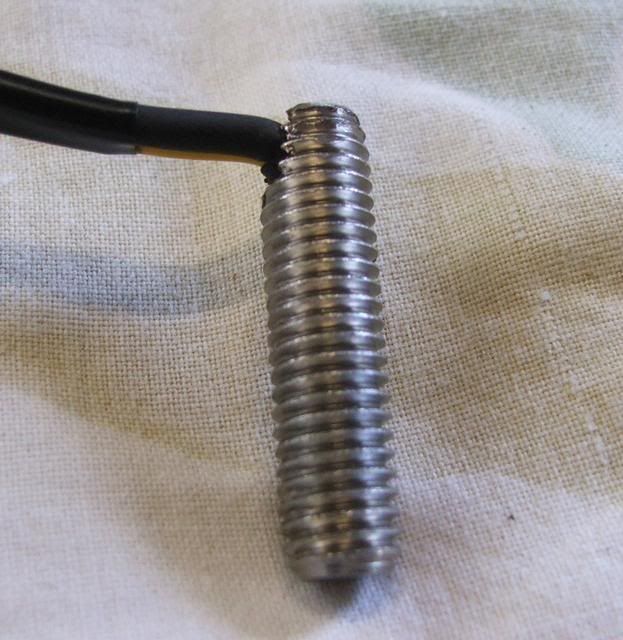 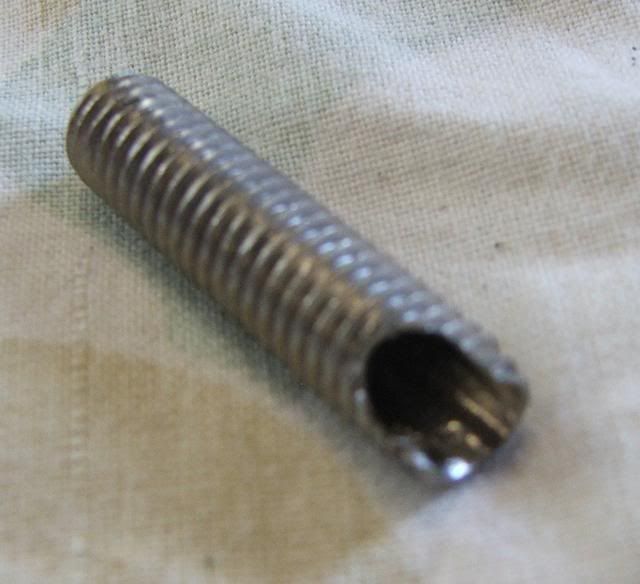 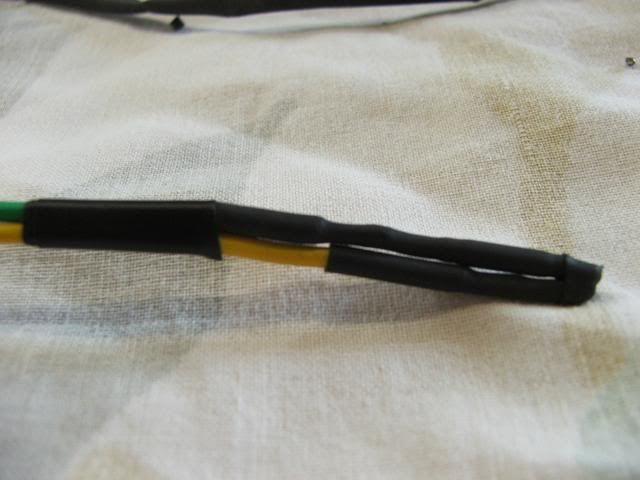 Custom powder coated front end 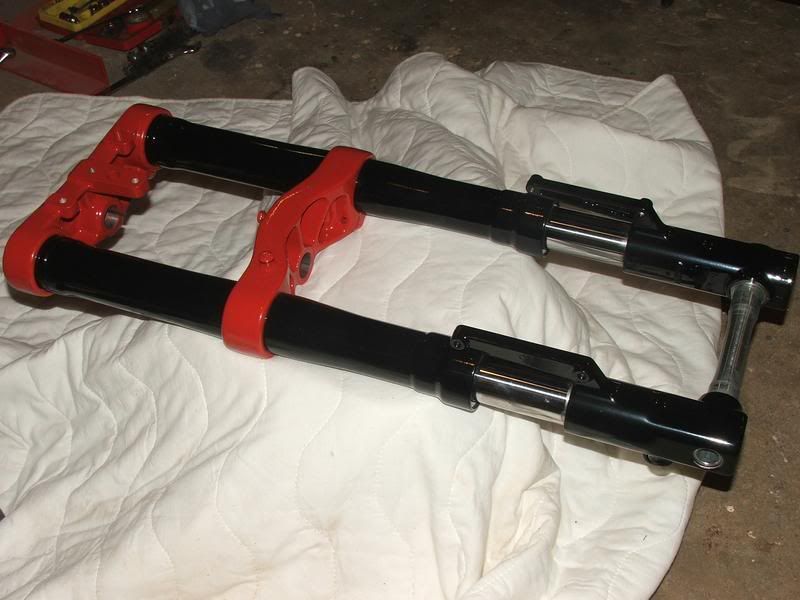 Custom dash 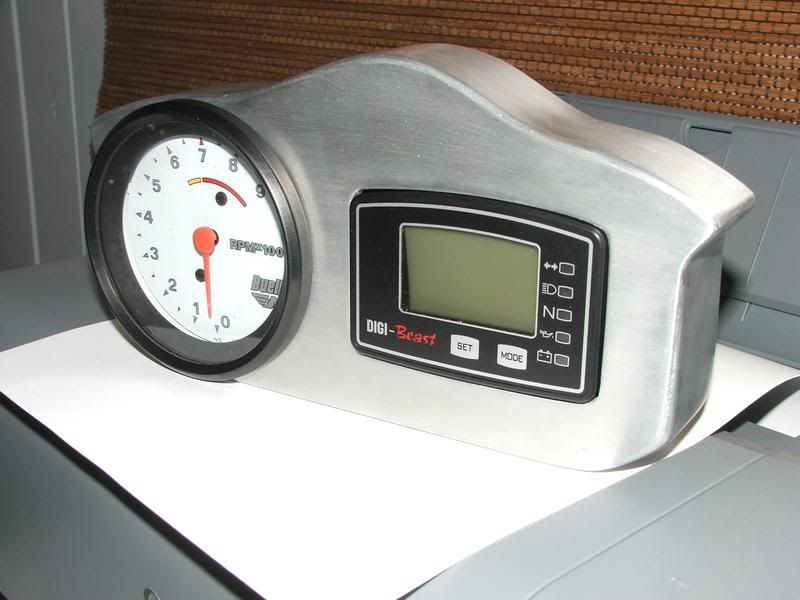 Custom exhaust #1 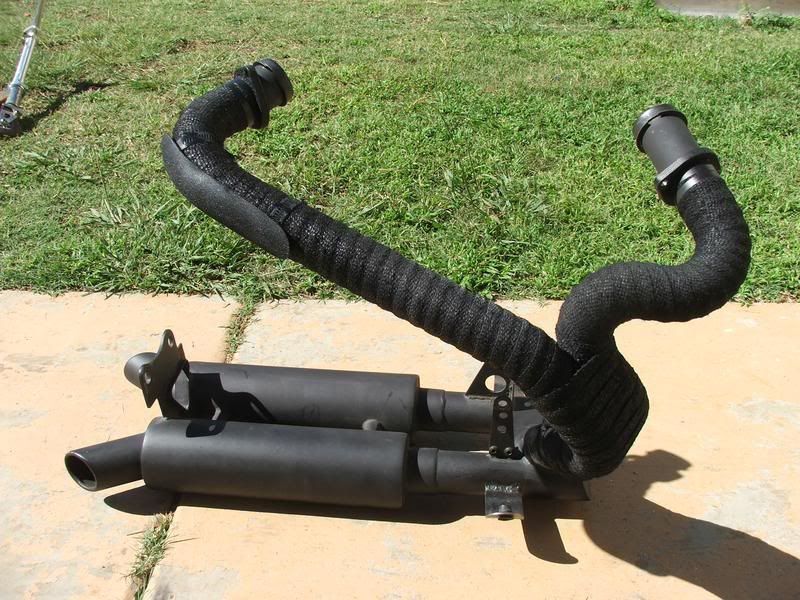 Custom side stand 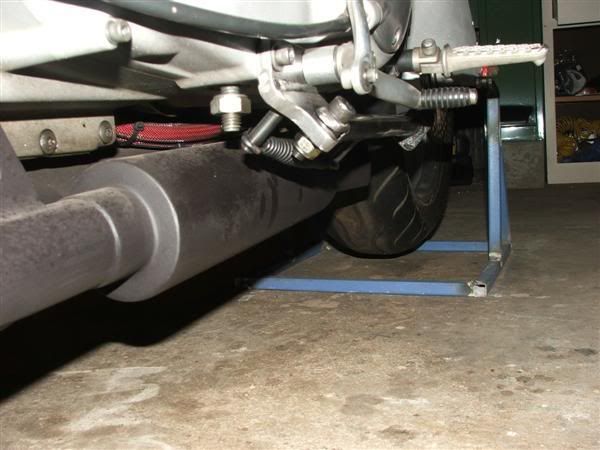 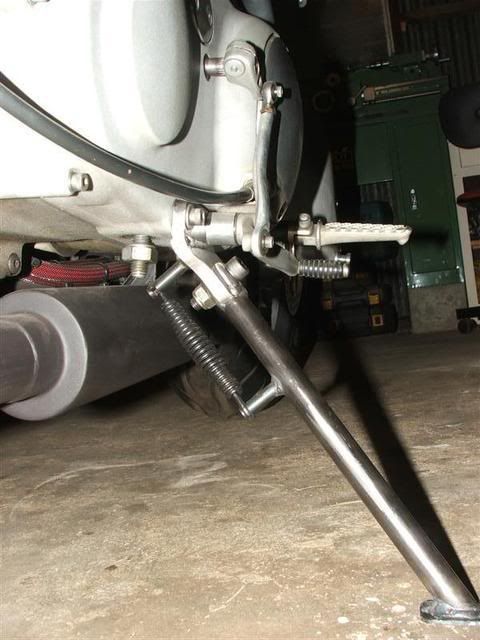 My XB swing arm to tuber adapters 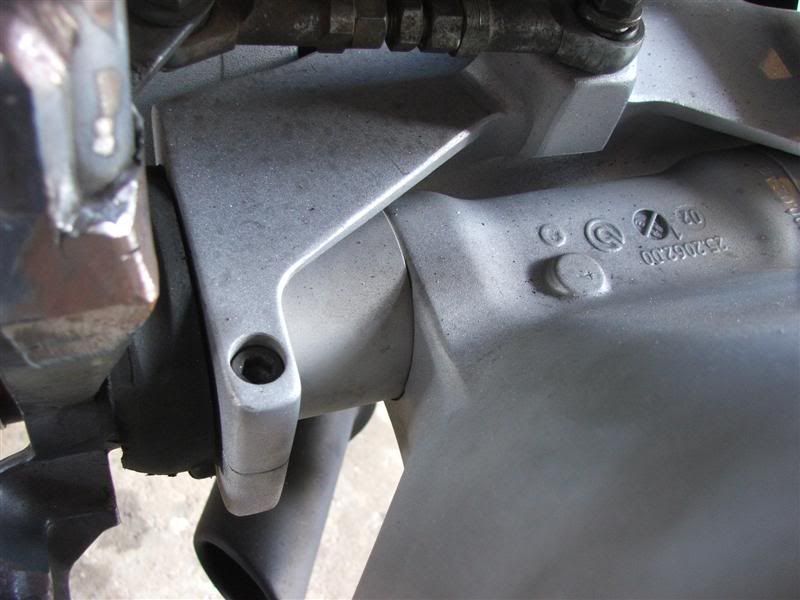 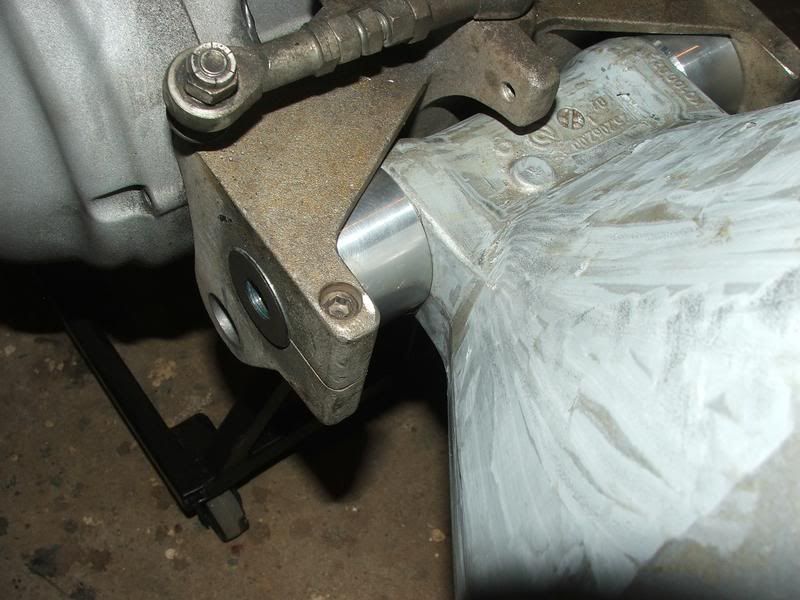 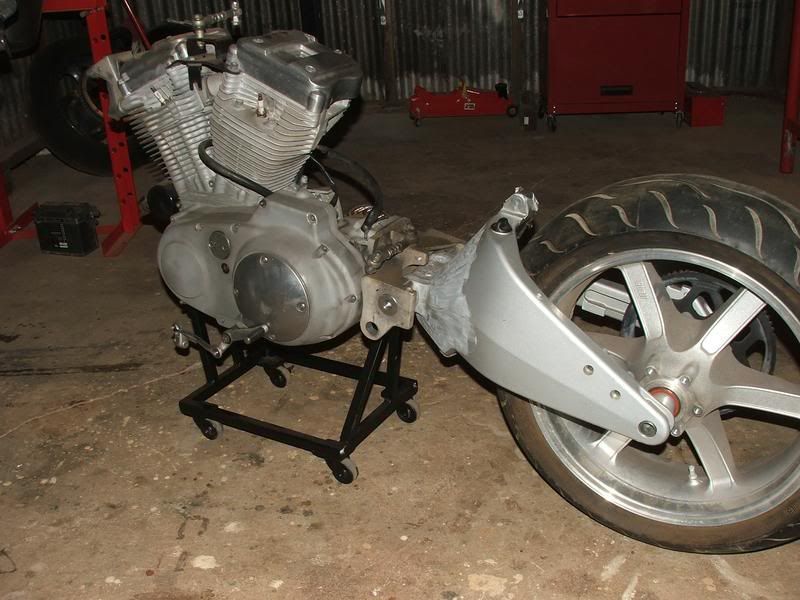 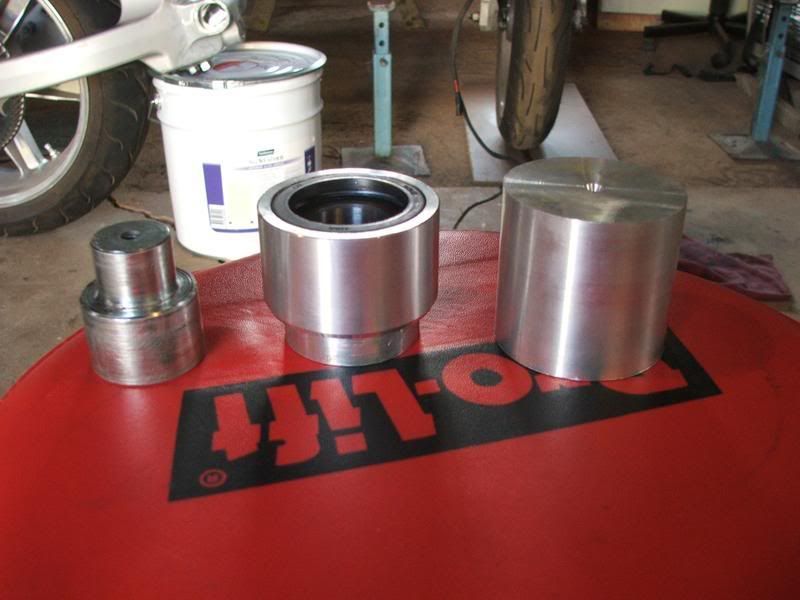 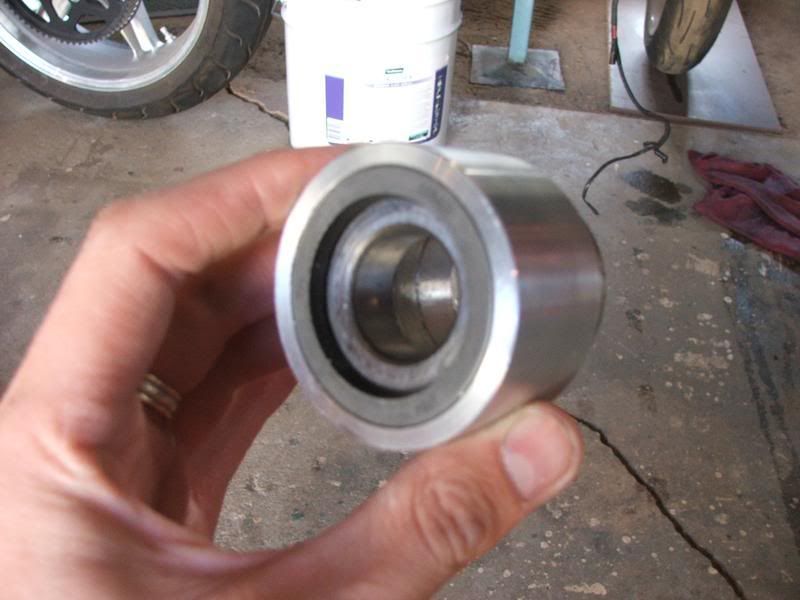 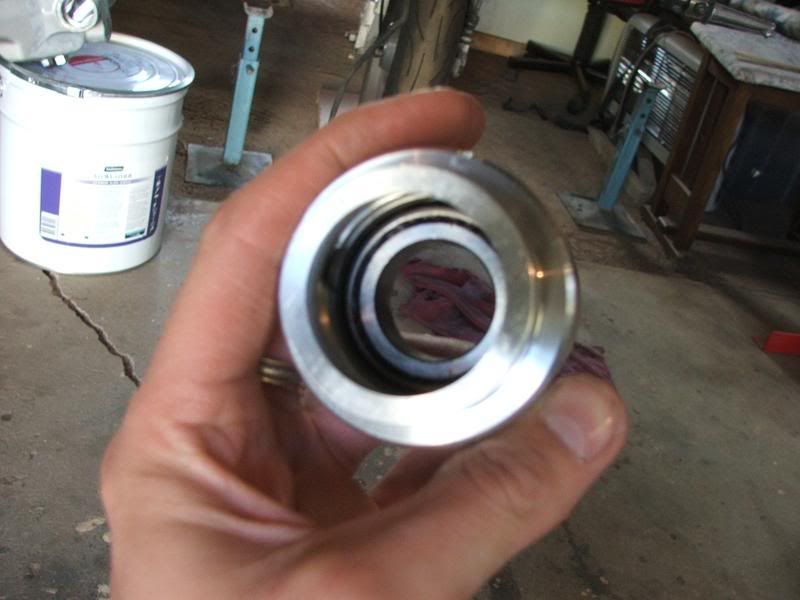 There's a few  Cheers Jodie | ||
Rickie_d |
Jodie � Nice stuff, I always admired your XB swing arm conversion. Based on my experience building various styles of side stands, I would suggest an addition to yours. Weld a horizontal bracket under the primary cover to your existing base bracket; utilizing the chain shoe adjuster stud as a triangulated support effectively relieving some of the shear stress on the two 3/8 primary cover bolts. If you do this, add an o-ring or Stat-o-wash over the chain adjuster stud large enough to bridge the relief in primary and the side stand bracket. This should also reduce some of the torsion stress on the primary cover. | ||
Rickie_d |
Headlights are KTM Duke set up for both lights to illuminate on high. I built them up on my M2 with S2 forks for testing. These pics are prior to moving the signals to the mirrors. They will end up on my S&M-2 project with a horizontally split fairing exposing the trelliswork between the lights.   |