| Author | Message | ||
Staindus |
I am interested. Keep posting!  But you can leave out the dead pests though. LOL | ||
Interex2050 |
Here is a shot of post cleaning of the "rats nest": 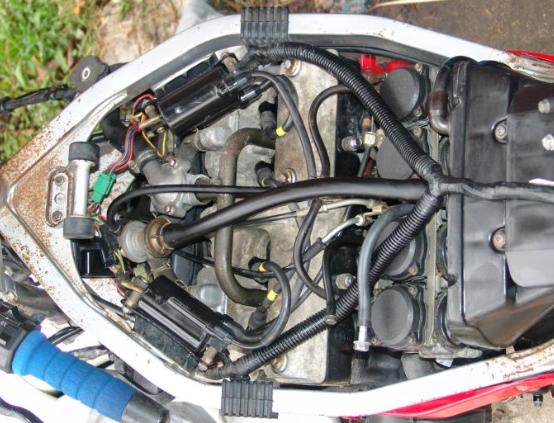 I really do hope that I do not find anymore surprises like that one, and I am glad to report that nothing has made a home in the airbox... Also, I did not know that spiders poo so much... It almost looked like there was a flock of VERY small birds living in there... (Message edited by interex2050 on May 31, 2007) | ||
Interex2050 |
This I just find impressive... They made actual ducts, not just cut-outs, to cool the alternator and the clutch:  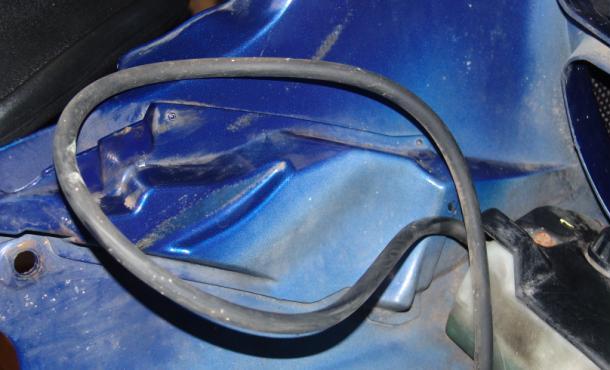 | ||
Sshbsn |
Ah, they don't make them like they used to.  | ||
Blackbelt |
You can take the gas cap lock off the top of the gas tank.. using the allen screws, and see if he can get a code for that. I had the same problem.. | ||
Interex2050 |
Blackbelt, I tried to do that yesterday, but was unsure if it came off in the locked position. In other words it did not come off easily so I did not want to force it... So I should just go ahead and pull it out without being too concerned? Update: I just tried again and it did not want to come off, it appears as though the lock is preventing it from coming off (Message edited by interex2050 on May 31, 2007) | ||
Natexlh1000 |
I am loving these updates! My friend had one of those when we were 17 or so. It had a "muffler" not a muffler. It was so deafening that if he was behind me on my little KLR250, it would make me jump off of my seat when we went under a bridge. (I rode in front since his spedo was broken) His was a real mutt. I think it had a 1984 frame and a 1986 engine. It was painted yellow so we called it the banana-bike. | ||
Ft_bstrd |
How fun! Congrats on your "project"! It doesn't matter if it's rare. It has a story, a history, and every single part restored and repaired make it worth more and more to you. Keep us apprised! | ||
Interex2050 |
There is surely more to come... I am getting a bit eager to get this thing going So I sneaked a peak into one of the carbs and well as usual good news and bad news Well they are clean and not corroded and the rubber diaphragm is in tip-top shape but there is drying gasoline (varnish stuff), but luckily it is still "wet" so I am hoping that it will wash out rather easily. So I do not think that I will have to do a lot heavy duty scraping... The only downside of this project is that it may cut into my "big" project's time/funds unless Buell beats me to it... (more on this later) (Message edited by interex2050 on May 31, 2007) | ||
Interex2050 |
So I got the carbs out today... Overall the carbs are in fantastic shape: 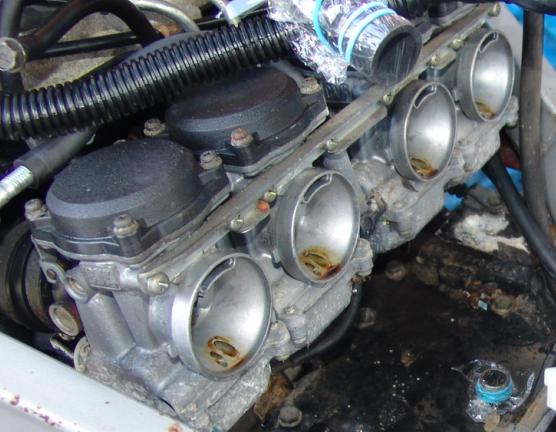 Here is some of the varnishing that I was talking about:  Luckily it is only on one side:  And it was a relief to see that the intakes are nice and clean: 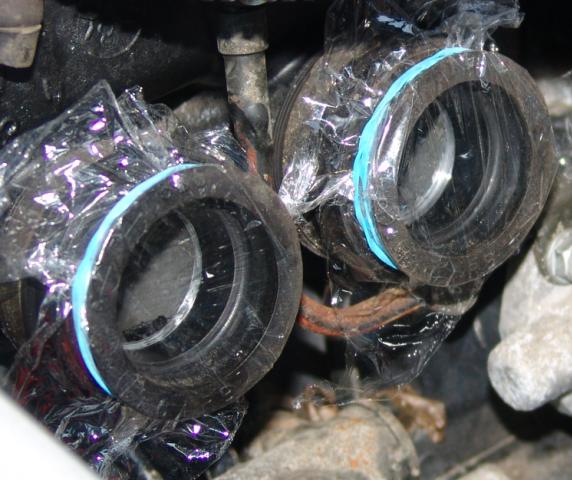 It was very interesting to find that the first carb I opened up was very clean and just needs a minor rinsing: 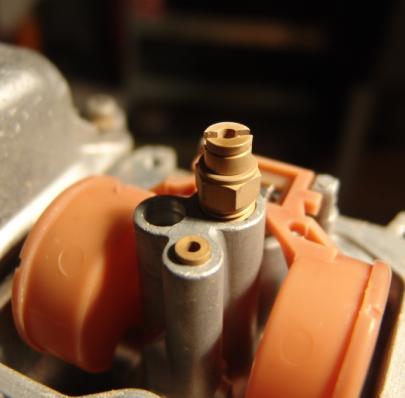 The bowl is just as clean 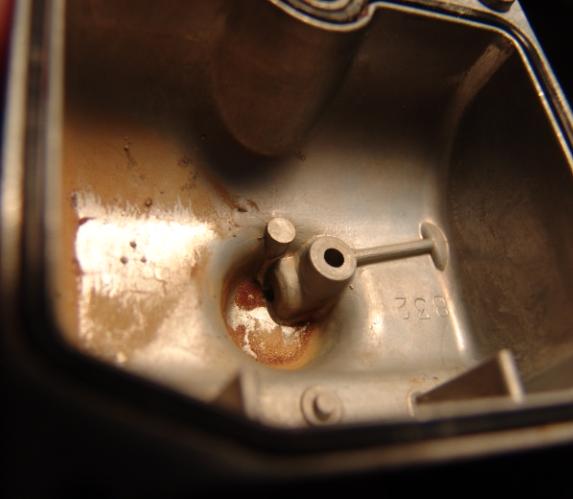 This is the worst carb, the one on the side the bike was leaned on: 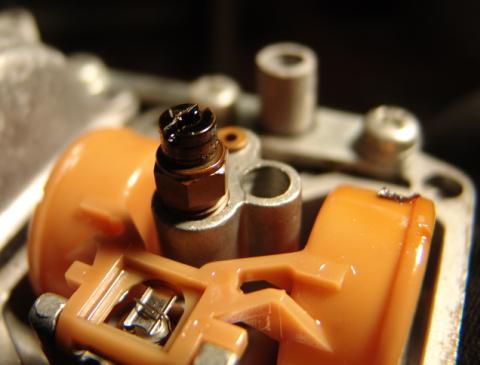 The bowl is quite filthy as well:  Luckily the varnish has not hardened, and I am hoping that a little bit of kerosene will wash it away. Surely this one will take a bit more time... Quick question: Those carb "rebuild" kits that they sell... are they worth it and if so, why? Should I not do what I usually do, make a new gasket and just clean everything up? | ||
Diablobrian |
make sure you clean out the holes in the jets and the internal passages too. A an air compressor with a rubber tipped blow gun, a can of compressed air with a small tube or even a can of carb cleaner (imagine that  ) will work well. ) will work well. Also be sure to clean the float bowl seats, the fill tubing and the valve stem/center piece too. I wouldn't mess with the diaphragms on the slides if I didn't have too, assuming they are soft and pliable. Carb re-build kits are good if you have eroded main jet tubes or worn/flattened o-rings. Most of the time it isn't really absolutely needed. Have you ever synchronized carbs before? To get the most out of the bike you need to do it, and it can be a pain to get it right. | ||
Interex2050 |
Thanks for the advice! I SUPPOSE I could get some carb cleaner This one shouldn't be so bad... I hope well tomorrow will tell I will have to synchronize the carbs, eventually I have done it before, I never fancied doing it on I4s though... I just need to borrow the sync tubes/rack from my friend I also placed an order for some plugs/oil filter/fork seals (one of them is leaking pretty bad) and some grips (the ones currently on there a foam and are shedding all over the place faster then I can get rid of it... | ||
Blackbelt |
I had that same problem w/ my bike when I got it. i found my diaphrams were ripped on two of the inner carbs.. those ain't cheap either. I had a shop do the synch-ing for me.. cause I didn't even want to attempt it. do a check on the points (it is on the right side of the lower engine case, off the crank) mine when bad.. just a rotating magnito, and the right side went out so I only had 1/2 my spark plugs firing.. that SUCKED!!! that is a $90.00 part too..bahh. I am so jealous, I have started to look for older Ninja's in my area to buy.. YOU SUCK!! | ||
Staindus |
You have inspired me to do some work on my Wifes beat up (dropped by previous owner) 2000 EX500R. The bike runs fine it just has some cosmetic problems the paint (powder coating?) flaked off the lower forks, and some off of the engine cases. The plastics are in OK condition. I plan on getting it looking as good as I can and sell it next year towards a 650R for her (and me as a second toy). I was going to spray paint the lower forks, is that a bad idea? Any advice? | ||
Interex2050 |
Blackbelt, Thanks for the heads up about the possible points/ignition issue. I also checked the other diaphragms and they all check out fine. I wish you the best of luck finding one! Staindus, I am glad that I have been an inspiration. The fork lowers are typically just painted, so if you strip them down repainting them should not be too big of an issue. If I recall correctly the EX500R has black fork legs? If so I have always had better luck with silver engine paint, because its much thinner thus does not tend to chip. | ||
Staindus |
Thanks Interex. I will give it a go. | ||
Interex2050 |
No problem Good luck with that one Let me know how it turns out | ||
Interex2050 |
Diablobrian, You are a genius... for the first time I tried the carb cleaner stuff and oh my goodness that stuff is so much more potent then kerosene! Much thanks! | ||
Interex2050 |
the japanese should never be allowed near a drawing board again! | ||
Interex2050 |
Well today has been an interesting day... The buell showed its dislike in the ninja and all the attention it is getting (the cover and all the work) So it decided to spit out the shifter linkage bolt... Any whom I rebuilt the carbs, and the carburetor cleaner made the job infinitely easier: 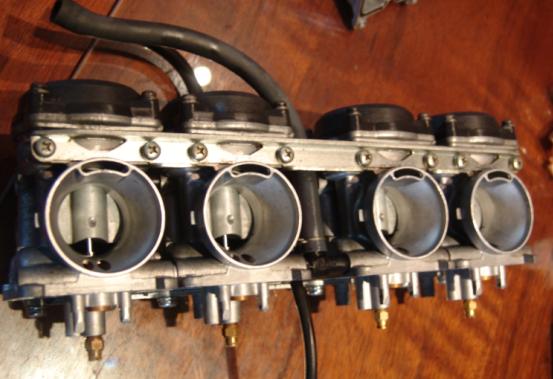 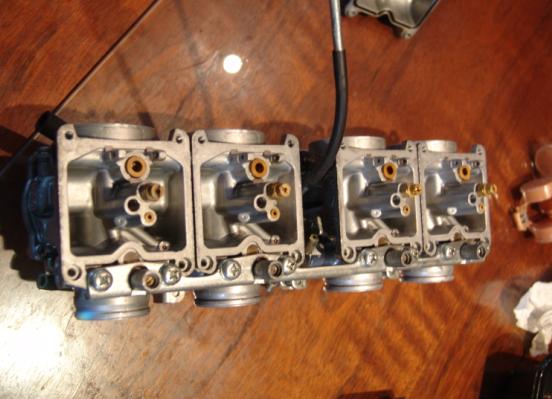 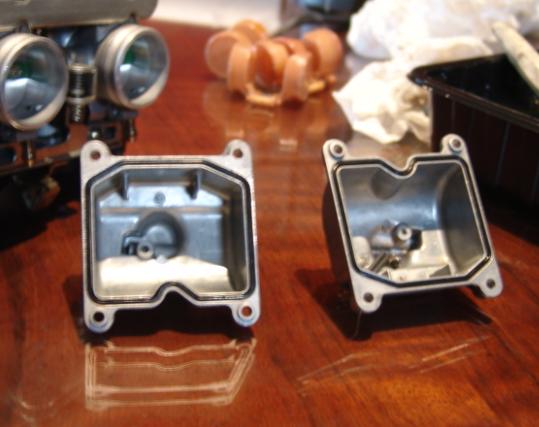 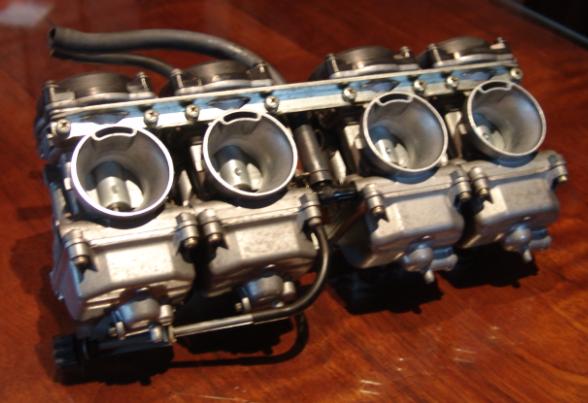 So everything was going smoothly, too smoothly... One would figure that of all things the airbox should not pose to be an issue Oh boy could I have been any more wrong! Lets put it this way, It took me roughly 3 hours to rebuild the carburetor bank. It took 4 hours of futile attempts by an ever increasing crowed of people to try to get the airbox in! Is there some sort of magical trick, or a special kawasaki tool? Its like trying to put 3lbs in a 2lb bag, there is just no room. I tried: -to put in the carbs then the airbox with the sleeves attached to it. -put the carbs in with the sleeves attached to them and then the airbox (this was the most successful) -attach the carbs to the airbox and then try to put it in the bike... and still nothing! The only way I think it can be done is by rotating the engine, and that is just silly! 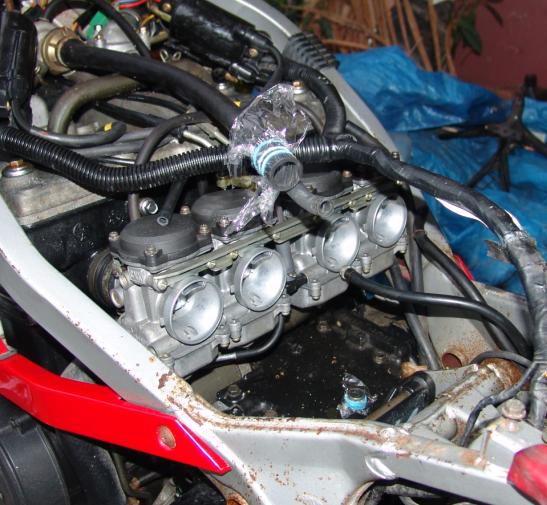 On a lighter note the key blank came in the mail today: 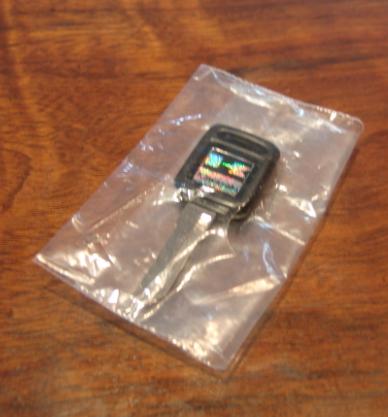 So after spending countless hours trying to do what should have been a simple procedure, I just gave up. So instead I decided to try something much easier, Start her up! So after stealing the battery out of the Buell and siphoning some gas out (boy is the XB mad now) The following arrangement was established: -Putting jumpers over the appropriate leads on the ignition -Removed upper triple with ignition switch and steering lock, to easily roll it away from anything flammable -Buell battery sitting in the back -An empty bottle of Mobil 1 gear oil with its bottom cut off and the tip wedged into the fuel line filled with gas -And a friend with a fire extinguisher on stand by... It was exciting to see the gauges light up and playing with the voltage indicator on the dash was fun as well So the moment of truth... Flip the switch to run and click the starter button... NOTHING I figured that I should not be surprised, look on the dash and notice that the kick stand light is on, but it was surely not down Upon closer inspection it turned out that the switch was stuck in the on position. Some WD40 and a little bit of wiggling it popped back out. So try again... This time a buzzing sound It was coming from the started solenoid A little tap with the end of a screwdriver should break it free Well third attempt not much hope at this point Success it cranked over! And before I had the chance to finish enjoying the partial success the thing ROARED to life! This thing is one hell of a beastie Its really loud, and it revs incredibly fast without any hesitation. I have never seen a bike that has just been woken up after years of sitting just spring back into action without much hesitation! 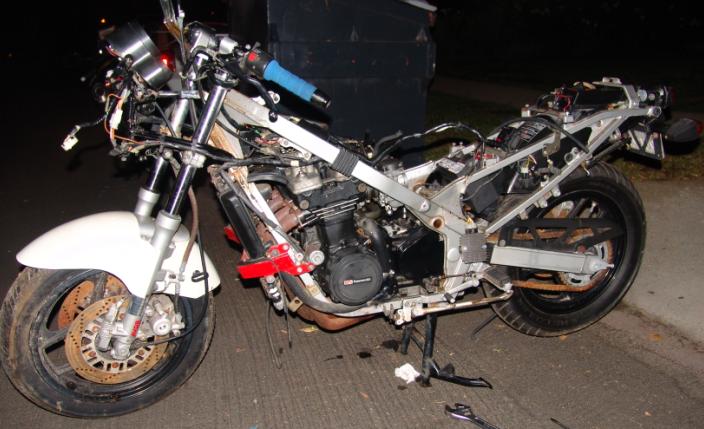 And the charging system is working, because the voltage indicator jumped up to 14V once the thing was running. Tomorrow should be an interesting day. It is funny how it was easier to get it started then to attempt to install the airbox Any advice on the topic would be greatly appreciated! | ||
Tdiddy |
Thats the nicest finish I've seen on a workbench. This bike will shine up really nice. | ||
Tom_b |
good to see some success! those airboxes can either go back in fairly easy or a REAL pain. i spent 4 hrs with a cb 900f just putting the airbox back on. the only advise i can give is try to fold the rubberboots in half an unfold them with much swearing after box is mounted. or loosen crb manifolds to be able to tilt carbs. good luck. sometimes jusy walkig away and trying after a good rest helps too. | ||
Tom_b |
good to see some success! those airboxes can either go back in fairly easy or a REAL pain. i spent 4 hrs with a cb 900f just putting the airbox back on. the only advise i can give is persistence and good luck. sometimes jusy walkig away and trying after a good rest helps too. can you reach inside the airbox with he filter out? Try mounting the carbs, and box and going from inside the airbox to attach boots. if the are rubber, try folding them and then straighten with a paint stir stick (Message edited by tom_b on June 02, 2007) | ||
Mbsween |
Ever wonder why you see so many Kawasakis with pod filters ? Now you know, welcome to the world of 4 cylinder Kawasakis. They're a hoot I don't remember that particular airbox, but if it connects via short rubber hoses, they're usually the problem. They stiffen with age making it difficult, if not impossible to get the airbox in the "generous" amount of space you have there  New ones aren't that hard to source, Kawasaki resuses lots non-engine of parts between model years | ||
Slaughter |
Peter! Took a while for me to get to this thread... Sunny and I have a couple VF500 Honda Inteceptors - '84 (track only) and an '85 (Street legal - Sunny's daily rider) I would bet that bike has a great user group or two online and if it's anything like the VF500, there's going to be a few folks who make conversion kits for 17-inch wheels. I think the interceptors have similar sizes to the old Ninjas - but the 17 inch wheels give you good choices in compounds and better geometry - but you'll have to re-set your ride height to compensate. Simple stuff. You going to have that beastie out for the track day on the 25th??? (kinda soon, I know) (Message edited by slaughter on June 02, 2007) | ||
Pammy |
There is a company in California(K&L) that sells carb rebuild kits. These kit are invaluable, if only for the gaskets, but they usually come with the needle and/or seat as well. They usually run about $21 or $22 dollars a piece. K&L also sell the rubber intake boots as well. The installation of the carb bank/air box is a bit easier with fresh rubber. It will also eliminate the need to remove the units again if an old boot should leak(air). You may be able to get your local independent shop to order the parts for you. Kawasaki was also known for rusting gas tanks. Make sure you clean the tank good before you continue. A good radiator shop would be able to clean and seal the tank for you if it is bad. That is a nice find and I admire your tenacity and patience in restoring the old girl. I applaude you sir. | ||
Pammy |
Oh, also, copious amounts of the universal lube(called spit) will help with the re-seating of the carbs...eeeeew! | ||
Blackbelt |
to install the airbox. just I used a small screwdriver and slowly put it in... take your time.. and have fun | ||
Scott_in_nh |
On my 84 GPz-550 I would have the carbs off and the airbox in with the boots on it. Then use a paint stick and place across all 4 boots. Push the carbs in between the stick and engine and the paint stick compresses the boots and keeps them in position. Once the carbs are in gently work the paint stick out. Work the boots onto the carb with a small flat screwdriver. Might take an hour. | ||
Interex2050 |
Tdiddy, I wish it was my workbench, I used the living room table for the final assembly. The key is to just put a sheet of glass down, that keeps all the chemicals off the table. I find that if I do it there I can really concentrate and make sure everything is where and how it should be. The trouble is that the there are two chambers in the airbox and although I can fit my hand in there its extremely painful and does not leave me room to do anything productive. Mbsween, Luckily all the rubber stuff is really soft, if anything too soft. They get pinched in the would get pinched in the most frustrating of places (down toward the bottom where reaching is nearly impossible). I may eventually consider going for the ultra fancy dual pod setup. Slaughter, As of yet I have not had much luck finding a any such user groups. Speaking of Interceptors, Dan (he was at the track with the yellow monster) not only does he no longer have the monster but now he has a RC51 and an 85 interceptor... I think I will be able to pull that off, but in either case the Buell is coming too. Yesterday I was looking at the EX500 (I think that is what its called) but I looked like the axle/hub arrangement is the same, but uses 17 inch tires. At this point I think I will keep those wheels and try the Continental Conti-Ultra Sport/Classic tires. Pammy, Much thanks for the encouragement. I will certainly have to look into the rebuild kits in the future, as one of the gaskets is shot so I made one using Copperall. Once I get the key set made, I will finally be able to explore the innards of the gas tank. Either way it needs to be flushed and a inline fuel filter will be run. I did not quite use spit but there was liberal use of fresh oil to aid in the installation of the airbox. Blackbelt, Multiple screwdrivers were my best friends while getting the airbox back in. Scott_in_nh, I will really have to try the paintstick trick the next time I will attempt this. So yesterdays news: Finally got the airbox in, I guess the trick really was just to get some rest. I just covered everything is plenty of oil slipped the airbox in and after lots of fiddling with screwdrivers and with the aid of zip-ties to compress the boots I finally got everything in place. I also charged the battery, and put that back in the bike. Aside from that I spent most of the day cleaning everything up. I did make the mistake of accidentally polishing the muffler, so may have to scuff it up a little then apply the mothers polish again. I took of the triple clamp with the ignition attached, so I can take it to the locksmith tomorrow morning. I thought about drilling out the mounting bolts but then decided against it and just installed the upper triple from the 750 ninja. So I started it up again this morning, under its own power. It runs really well, especially since it is using the old plugs and wires. I have a suspicion that I did not adjust the low speed needle quite right, so I will have to try to get to the adjustment screws. 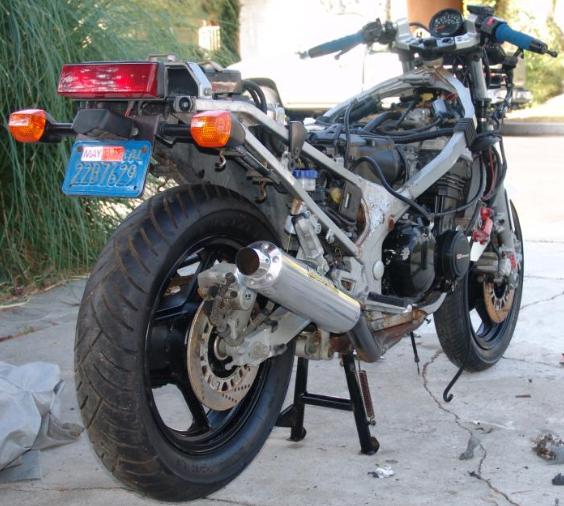 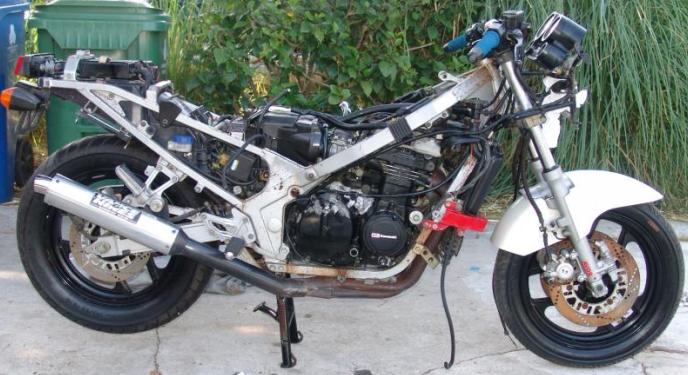 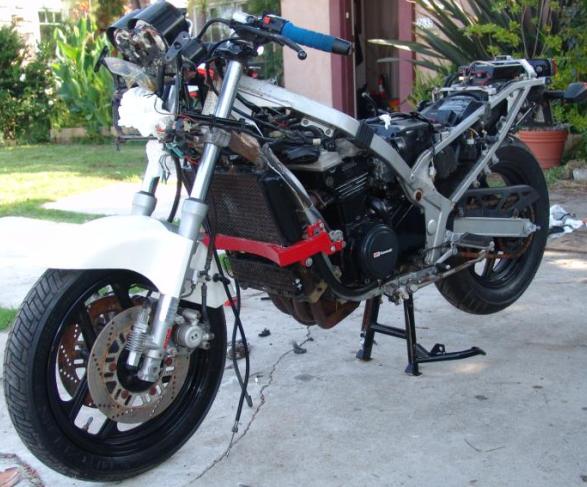 The plan for today: -Change the brake fluid with 5.1 -reattach the body work. -buy some coolant, or perhaps just run distilled water through it to wash the system out. |