| Author | Message | ||
Peter |
Jim, I finally got those pics for you. The cad plated stuff is original and unmodified. I just made the black bits to bolt straight on. 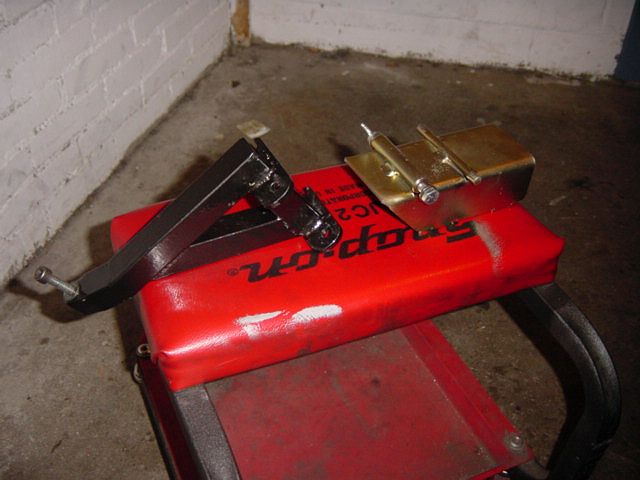 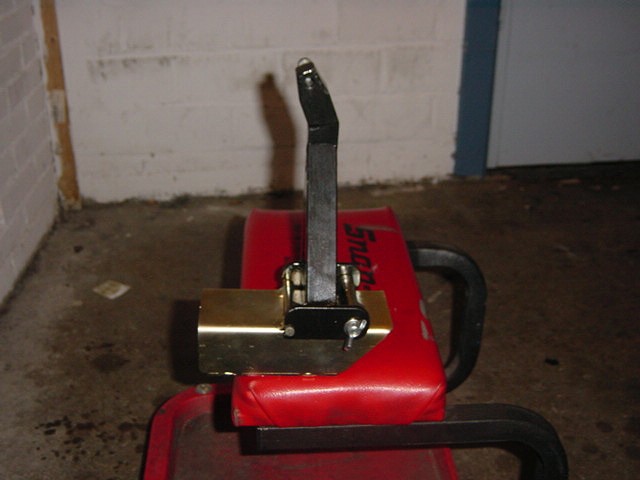 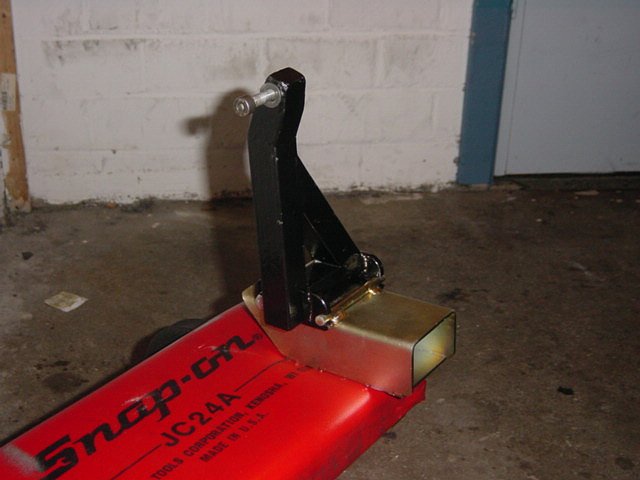 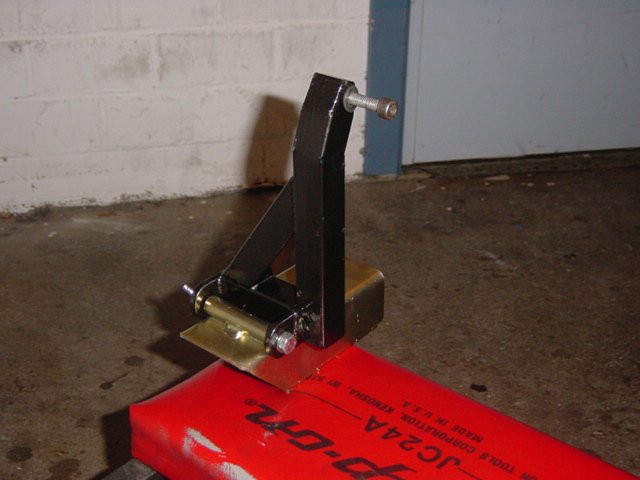 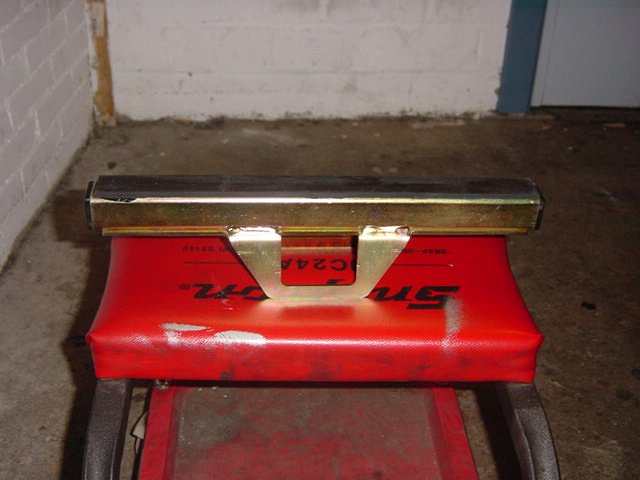 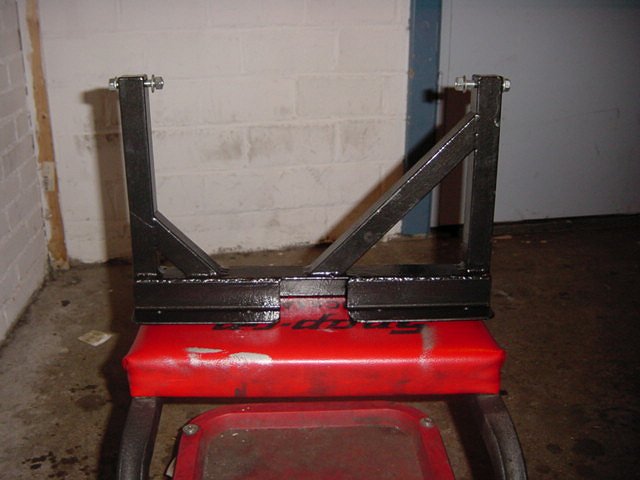 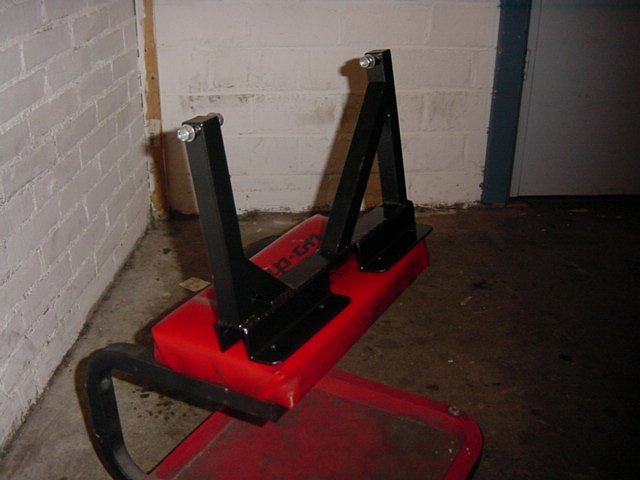 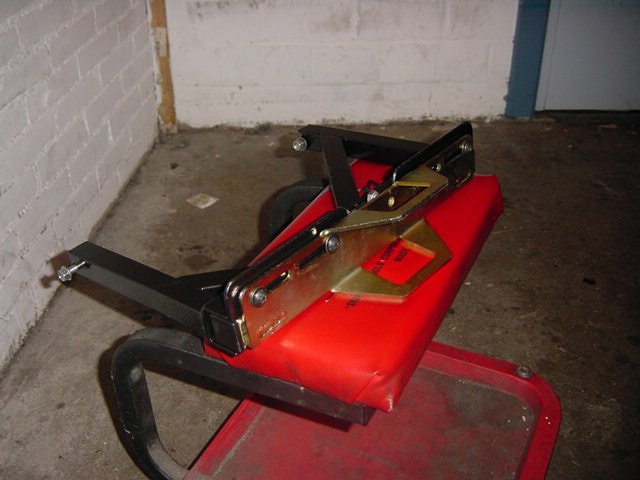 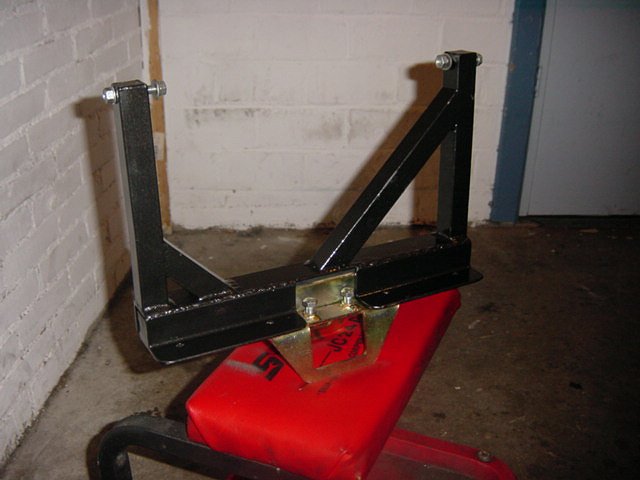 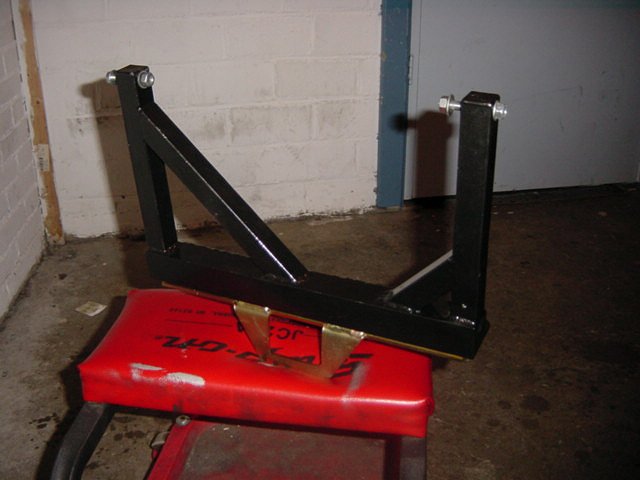 | ||
Jim_Witt |
Pete, Thanks for all the super images. -JW:>  | ||
Johnc |
I used some ideas from some of the different bike lifts I've seen on the market to build my own. All the material is very common stock except the platform. I bent this up in the metal break at our race shop. The rest is mostly 1"X2" tubing and 2" angle iron. I used a 6 ton bottle jack for the lifting and made a 5 to 1 linkage to get a 30" lift height. It lifts the Buell with very little effort and the back 16 inches folds down to allow rear wheel removal, or front if you put the bike on backwards. All the pivot pins are made from 3/4" round steel bar. The bottom braces are 1/4" by 6" flat steel. I added square tube receivers to allow wheels to be plugged in so it can be stored on edge against the wall. When I put it against the wall and my dirt bike against it, it's no wider than the Buell. 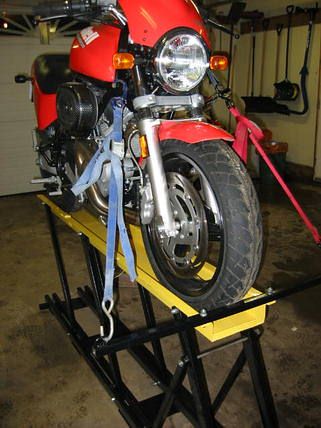 | ||
Johnc |
More pics. 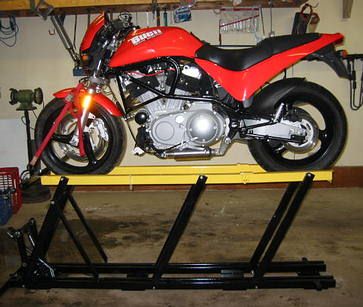  | ||
Johnc |
And some more.  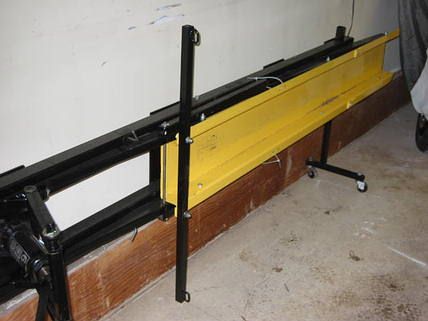 | ||
Johnc |
It takes up very little space. 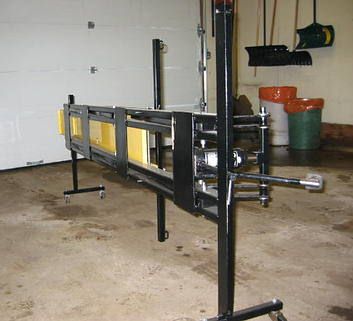 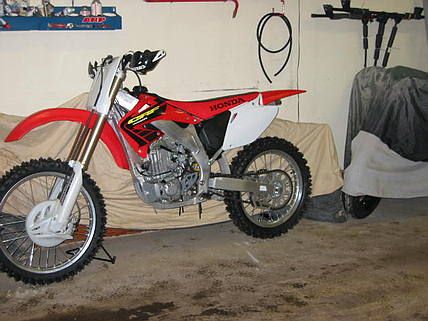 | ||
Bykergeek |
Awesome Job! That looks like my next welding project. What model is the CRF ? I've also been considering a 230 for the trails | ||
Johnc |
It's a CRF 450. After being away from dirt bikes for a few years it's almost too much bike. If that's possible! | ||
Bluzm2 |
John, Did you draw up any plans for that lift? I want a lift, that one looks PERFECT!!! Fire up the wirefeed and start making sparks!!! Brad | ||
Johnc |
Brad, I only did rough drawings but I'll put some plans together and post them here with a materials list. John | ||
Bluzm2 |
John, That would be GREAT! I'll bet a few others around here would appreciate it also. Very nice work. Brad | ||
Johnc |
Well here we go, I used my wonderful artistic skills to draw up some simple plans for the bike lift. Ok, not so wonderful artistic skills! I'll put as much info here as I can think of but if anyone has any questions you can e-mail me at jconroy@canada.com. The drawings did not scan too well, probably because I did them in pencil but I think they should be readable. 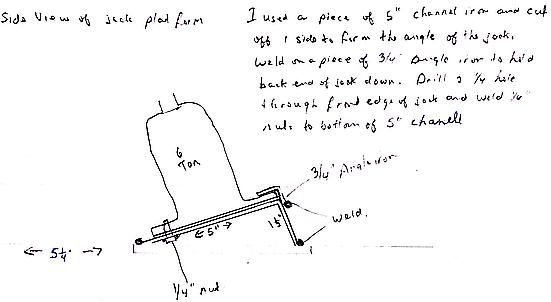 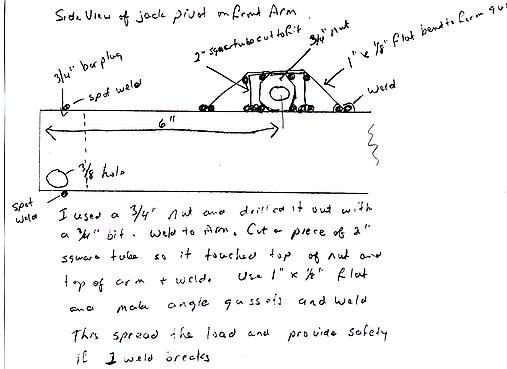 | ||
Johnc |
Here's another drawing of the main platform and frame work. I could only make the platform 6 feet long because thats the maximum that will fit in our metal break. 8" wide is just wide enough for a 180 rear tire and 6 feet is long enough for most sport bikes and dirt bikes but would be too short for most cruisers. The plans should be easily adaptable to a longer or wider platform should you need it. to make the platform I started with a 16" by 6 foot long of .065" sheet metal that a friend liberated from the scrap bin at the aviation repair company where he works. 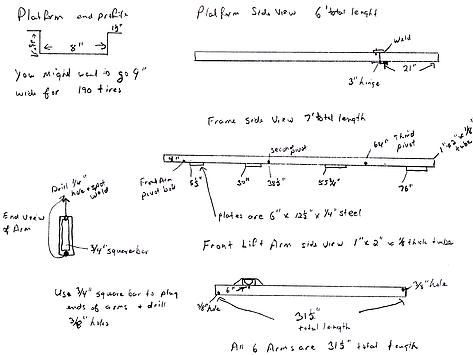 | ||
Johnc |
Here's a pic of the wheels I made up. Just some cheap casters and some 1" square tubing that plugs into 1 1/4" X 1/8" wall thickness tube. 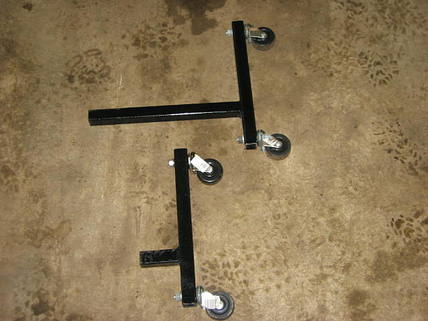 | ||
Johnc |
Here's a close pic of the front arm lift pivot. I started by taking a 3/4" grade 5 nut and drilling out the threads with a 3/4" bit. Then welded the nut 6" on center from the front of the arm. Then I cut a piece of 2" square tube so it would lay over the nut and touch the top of the arm. I welded this in place and then added a piece of 1" by 1/8" flat steel bent to form a gusset over the top of the square tube and bent down to touch the top or the arm. I wanted to be sure that if any 1 weld should break it wouldn't cause me to wear my bike. 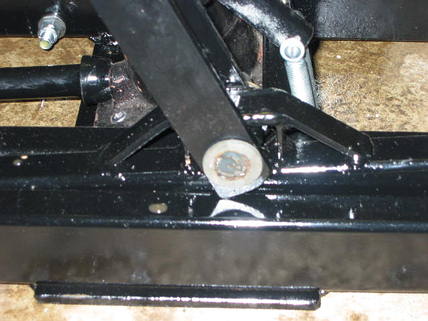 | ||
Johnc |
I made the lower pivot pins in the last pic from 3/4" round soild steel bar and welded a washer on 1 end. The other end is drilled for a cotter pin. 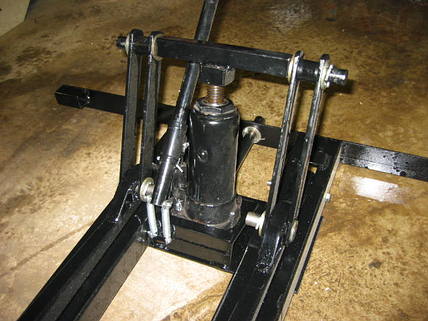 I made the lift links from the lift arms to the top of the jack from 1 1/4" by 1/4" flat steel with a 3/4" hole at each end to accept the pivot pins. They are 10 inches long but this may vary depending on the jack you use. The bar across the top of the jack is made from 1" square tube with a length of 3/4" round solid steel through the center. It has a 1 1/4" square reciever welded on in the center to accept the head of the jack. This could also vary with your jack choice. 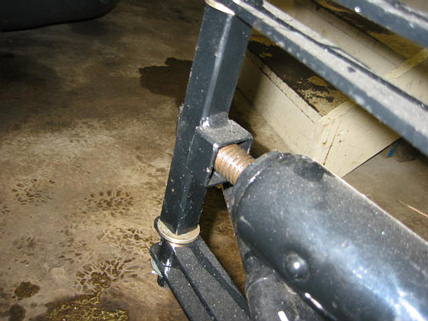 | ||
Johnc |
I made the jack platform from a piece of 5" channel. I cut off 1 side to form an "L" shape 1 1/2" by 5" to allow the jack to tilt forward. This angle is perfect as it allows the release valve of the jack to be parrallel to the floor so the tube to turn it could be extended through the front of the frame. 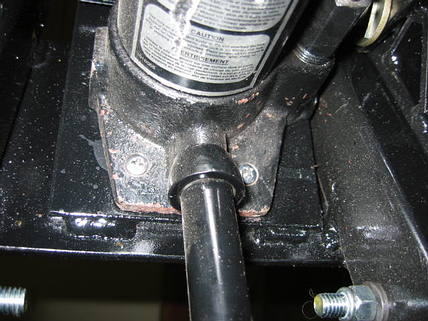 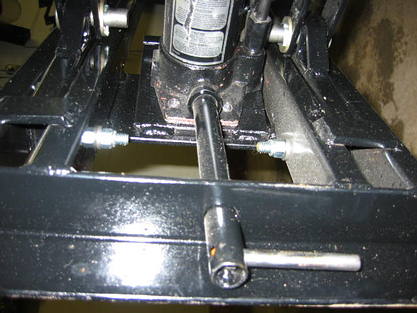 I fastened the jack to the platform by welding a piece of 3/4" angle iron to the back of the platform to make a ledge for the back of the jack to slide under and I welded two 1/4" nuts to the bottom of the platform after drilling holes though the front of the jack base and platform. I used 2 counter sunk head 1/4" screws through the jack and platform into these nuts to hold down the front of the jack. | ||
Johnc |
This is the safety system I used so the jack isn't holding the bike after it's lifted. I used a piece of 3/8 steel rod through both front lift arms and cut pieces of 1" square tube for supports. I drilled 1/4" holes a various places vertically down through the frame to accept stop pins. 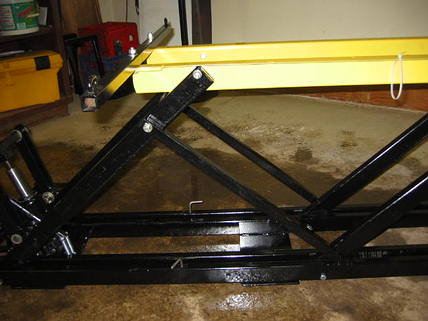 | ||
Johnc |
The platform was made in one 6 foot long piece and then cut with a plasma cutter to make sure both pieces fit together exactly. I welded a 3" gate hinge to the bottom to allow the back 21" to pivot down after removing two 5/16" from the top of the platform. I haven't made my lifting system for the back of the bike yet, but it will fit to the platform under the rear shock mount to lift the wheel up so the rear of the platform can be lowered after removing the 2 rear lift arm upper bolts. 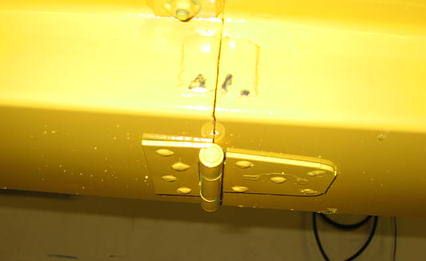 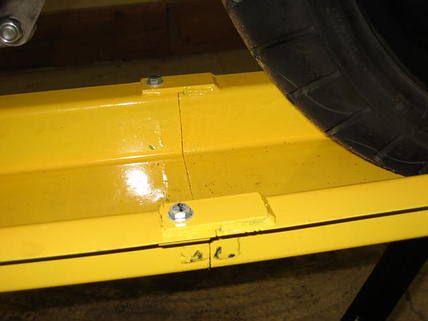 | ||
Johnc |
I made a simple foot operated jack handle by welding part of an old park brake pedal from a car to the jack handle. I pushed the jack handle through the handle reciever far enough to allow me to attatch 2 springs for pedal return. 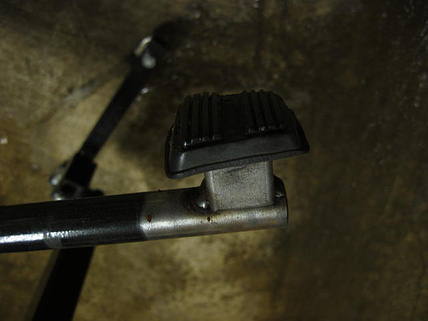 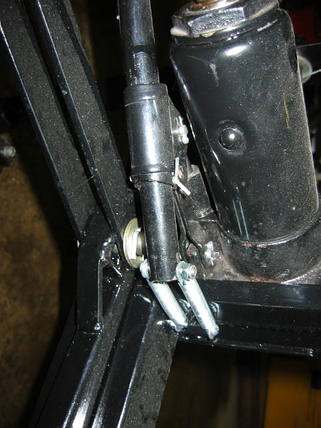 | ||
Johnc |
The cross brace on the front is a 3 foot long piece of 2" angle iron welded across the front of the frame. I put a leveling bolt at each end. The cross brace on the front of the platform is a 3 foot long piece of 1" square tube with 1/8" wall thickness. I welded a 1/2" chain link to each end for the tie downs. 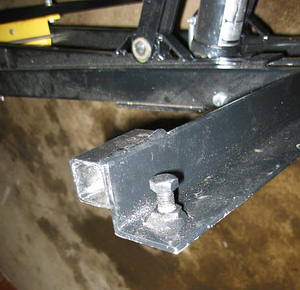 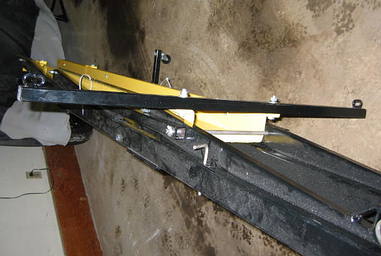 | ||
Johnc |
Here's a couple more pics of the jack and linkage. This was the hardest part to get right so the jack would be fully extended at full lift but still be able to go fully down when released. 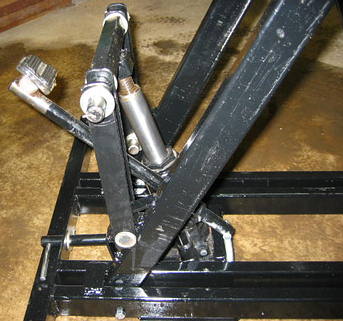  | ||
Johnc |
Don't forget to put on the 2 stops so the frame can't go over center when pushed from the rear. These set the maximum forwrd travel of the front arms. 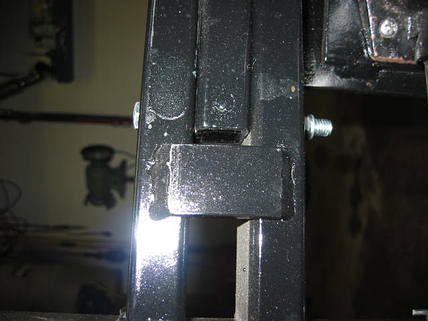 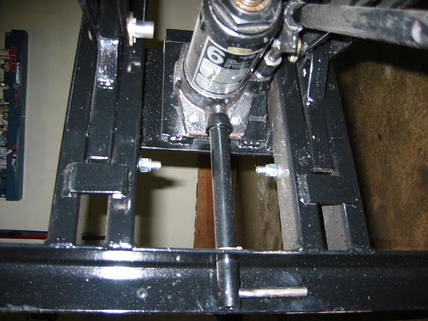 | ||
Johnc |
I welded a piece of 3/4"square bar into each end of the lift arms to provide a bushing area for the bolts to pivot on. This should reduce wear on the bolts and the holes. 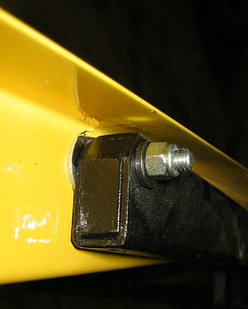 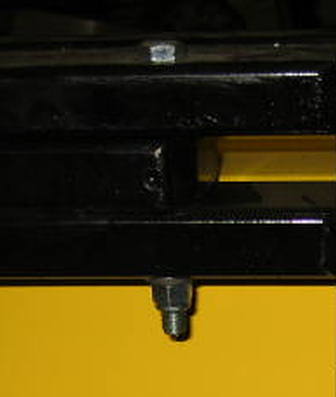 | ||
Johnc |
A couple more pics with the Buell on the lift. 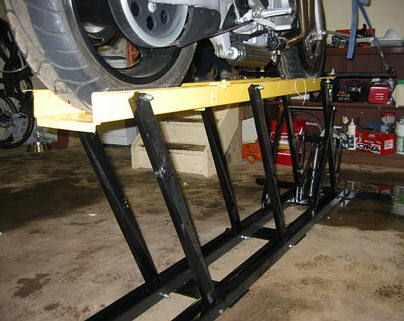  | ||
Johnc |
I also made this wheel stand to allow the Buell to be stored vertical against the wall to take up less space in the garage. 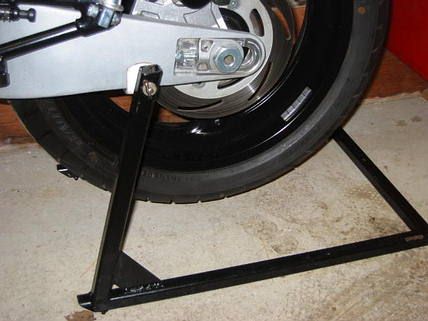 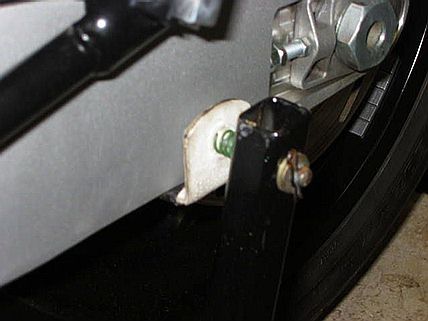 I've probably missed some things but my fat finger tell me it's time for bed. | ||
Johnc |
I decided to do my steering head bearings and change oil in the forks. I put the bike on the lift backward and used a scissor jack to lift the front wheel off the lift. Works great! | ||
Johnc |
Oops forgot to attch the pics. 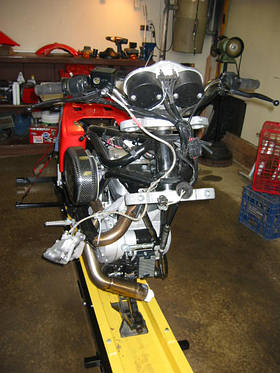 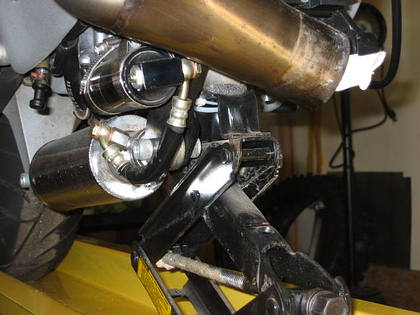 | ||
Johnc |
This lift makes the job so easy! 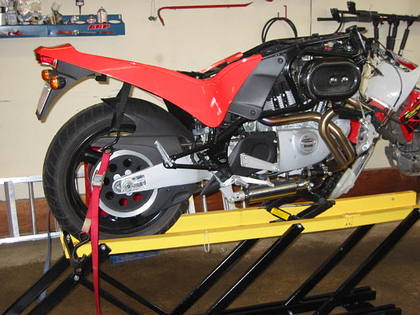 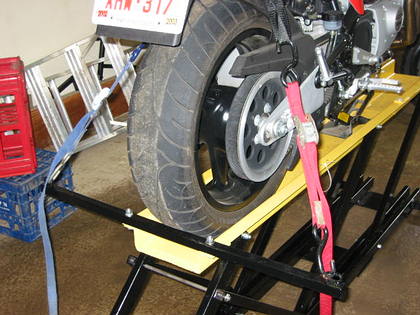 | ||
Bluzm2 |
John, Did you reinforce the channel where the bolts go through? I think I'm going to extend the channel (with a rear drop section) and make it 9" wide. I figured I'd weld thick fender washers where the bolts go through to give the bold a bit more load bearing surface. I think the 14 guage sheet metal could wear oblong hole without it. They will also distribute the load over a larger surface area on the channel. Thanks again for the great pictures and discription Brad |