| Author | Message | ||
Johnc |
Ever take your wheel in for balancing and get it back with a gouge or scratch in it? I have, so I decided to build my own wheel balancer. You can duplicate it for about $25.00 worth of materials. I used 4 small ball bearings, 22mm od and 8 mm id. The bars that the bearings mount to are 3/4" square steel bar stock. The frame is 1" square tube. I removed the seals and grease from the bearings and lube them with light machine oil to reduce the rolling friction. It is accurate to 1/8 ounce. Mount the wheel using the bike's axle and let the heavy spot settle to the bottom. I then add 1/4 ounce stick on weights, 1 at a time until a neutral balance is achieved. In this case the wheel still was heavy oposite the weights with 1 ounce, but was heavy at the weights with 1 1/4 ounce. I cut a 1/4 ounce weight in half and achieved neutral balance. I then marked the location of the weights and removed them and added new ones that I had painted black to match the wheel. As you can see the balancer is adjustable to any style of axle even if it is different sizes on each end. By the way, this is a rip off of a balancer I saw on another web site so if you don't want to build one you can buy one here. http://www.pbase.com/rodneff/2axis_adj_balancer 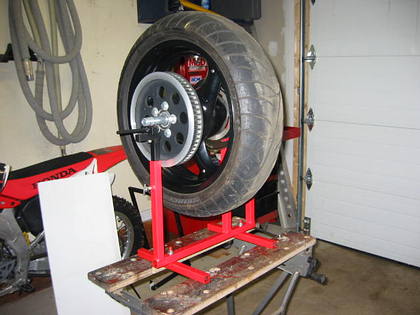 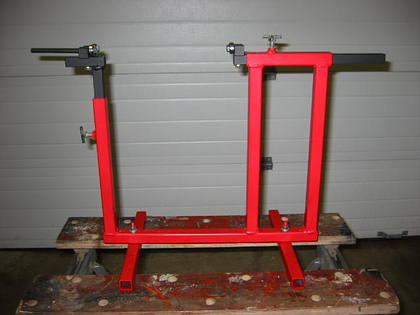 | ||
Johnc |
More pics 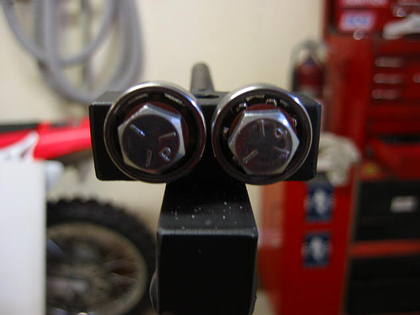 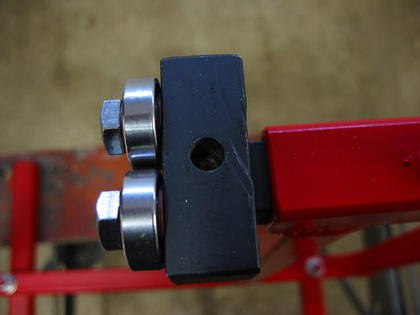 | ||
Johnc |
Here's more pics. 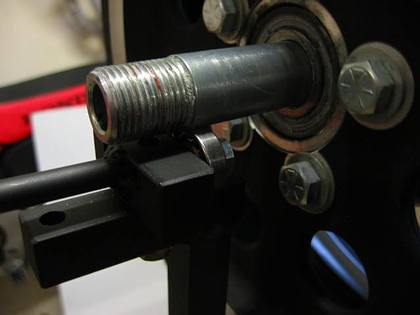 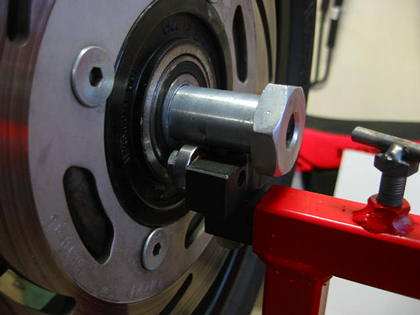 | ||
Johnc |
Weights 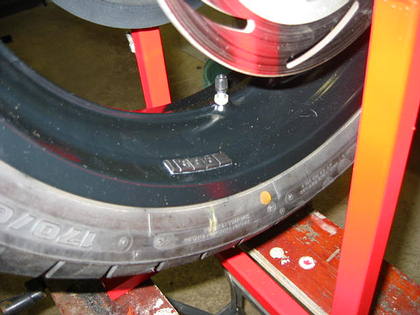 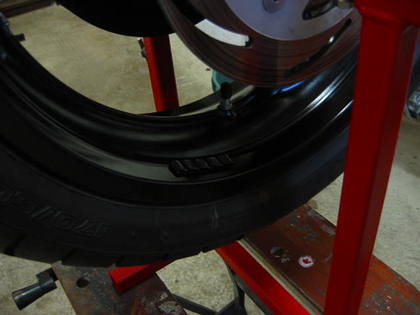 At this point you can stop the wheel in any position and it will stay put with no heavy spot going to the bottom. | ||
Blake |
Cool! | ||
Powerranger |
Nice job John I see what you have been doing on those long cold winter nights in the city of champs lol. You comein down for track day on the 11 of june. ph the dealer down in cow town and let them put you on the list. | ||
Ravnos |
You should build those and sell them. I'd buy one and It could pay for your tires. | ||
Bluzm2 |
John, Did you use ABEC 5 or 7 skate bearings? I heard they are the hot setup for this type of balancer. Brad | ||
Henrik |
John; nice job, nice design with well thought out details Henrik | ||
Johnc |
Brad, I actually used some bearings designed for the foot pedals on my sons base drum. You could use any bearing near this size. With these bearings it is so accurate it's scary. If you're 1/8 ounce out the heavy spot goes right to the bottom. Even the $10,000.00 dollar computer balancer in our shop for car wheels is only accurate to 1/4 ounce. Ravnos, you can already buy the same set up from the web site I copied the design from so I can't take credit for the design. I wouldn't want to sell a product he designed, even though there is no patent. Powerranger, I probably won't do a track day on my Buell but I might lace up a set of road wheels for my Honda CRF 450 and try that. It's a lot cheaper to fix is I wad it up! We'll have some track days at Stratotech park near Fort Saskatchewan this summer. By the way, are you going on the Brag ride in June? I haven't decided if I am yet. Thanks guys. John | ||
Mbsween |
John, I just bought a balancer from Rod. I see the rear wheel fits on yours, is it dimensionally the same as Rod's plan or did you widen it? I'm wondering if the rear wheel will fit on the one I got. Nice work btw Matt | ||
Johnc |
I wasn't exactly sure of the dimensions of Rod's balancer but knowing that the material used was 1 inch square tube it was not hard to make a scale model. I made the opening for the wheel 12" wide and 16" high and the rear wheel from the Buell fits ok. It is high enough to balance a 21" wheel and I think the Buell rear is about the widest around with the pulley on. If you have access to a mig welder and a drill press it only takes about 2 hours to make and about 20-25 dollars in material. I could make scale drawings if anyone wants. | ||
Powerranger |
Hay John so far me and some others plan to go but things could change we will see. | ||
Grndskpr |
Johnc, i would love the plans, was thinking of buying Rods, but if i can build it and save the cash, that would make the wife even happier thanks Roger behling@cdnet.cod.edu | ||
Mbsween |
John, I'd like a copy the drawing also. let me know Matt Matt's email | ||
Csg_Inc |
Johnc Please make it three. csg.inc@cox.net DAVE | ||
Ara |
Four, please! seriousfun3@yahoo.com BTW, our rear wheels are way wide with the pulley on or off. I tried to have mine balanced at a local Japanese bike shop and they couldn't do it even after removing the pulley. Thanks very much, John. Russ | ||
Johnc |
Here's some plan I drew up for the balancer and a materials list with some comments. If anyone has a question, my e-mail address is jconroy@canada.com. Wheel Balancer Material List. ¾� steel square solid bar stock, two 2�, two 12� and one 3� piece. 1� square tube,1/8� wall thickness. One 13�piece, two 14.5� pieces, one 6.5�piece, two 12�pieces and one 20"piece. 4 single row ball bearings, 20 mm OD and 8 mm ID. Two 3/8� X 2� NC cap screws with nuts, flat and lock washers. Two 3/8� NC set screws, can be made with 3/8� X 1� bolts with a 2�piece of ¼� rod welded across the top of each. Two 3/8� NC nuts for the set screws. Use the two 12� pieces of 1�square tube for the legs. Drill a 3/8� hole through each leg in the centre and enlarge one side to 11/16� to allow the head of a 3/8� X 2� bolt to pass through. Drill two ¼� holes from the side to allow the head of the bolt to be spot welded in place. The holes in the bottom of the balancer frame for the leg bolts are 3� from each end. The legs can be turned 90 degrees the frame for balancing and parallel to the frame for storage. A handle made from 5/16� rod can be welded to each bearing block to allow easy alignment but it is not absolutely needed. Drill a 3/8� hole in the centre of the 6.5� piece and the 13� piece through one side only and weld on a 3/8� nut for the set screws. 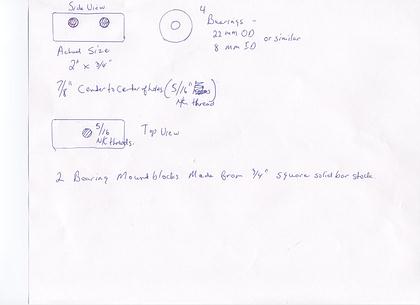 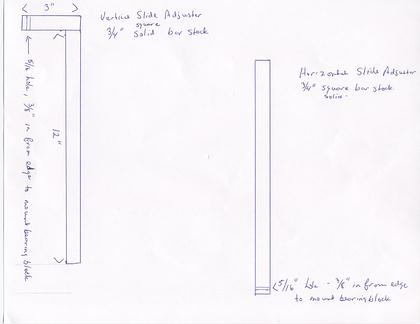 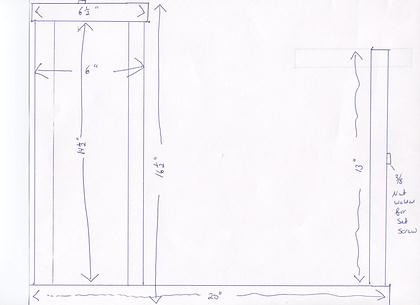 | ||
Johnc |
Here's a picture that details the way the bolts are spot welded into the legs. I changed this detail from Rod's plan so the legs don't have to removed for storage, the bolts can be loosened and the legs turned so they are parallel to the frame. The unit can then be hung on the wall and it's only 1 inch thick. 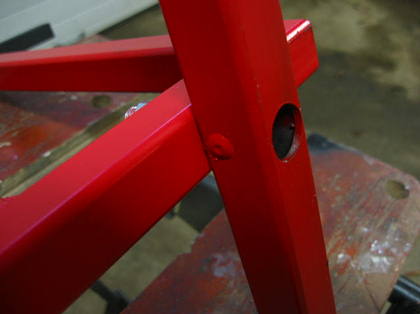 | ||
Johnc |
One more. 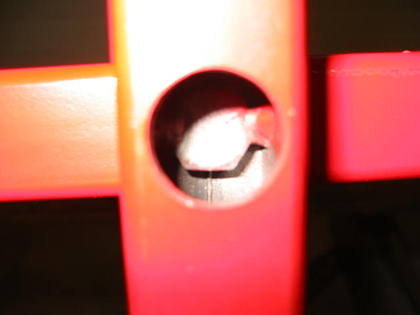 | ||
Hoser |
John: Very nice work , I wanna build one too , for now all welding happens at work , the rest would be a piece o cake , at home. I'm probably going to the coast and back for the Brag ride , join us if you wish. The S2 is being , ........ um , .....Tweaked right now with a planned +30 more horses / flat 80+ ft/lb torgue cure , it's been stock far too long !! | ||
Powerranger |
Right on man can not wait to rip up the duffy lake road with ya,maybe with all that power you will be doing it on the back wheel. later |