| Author | Message | ||
Captainkirk |
Well, I haven't measured yet but it looks like the HD plate would fit in place of the Baker plate...if you wanted to...but I suspect the gentle lobe profiles are what makes it "smooth shifting" in the first place. As long as it works well and stays in gear I'll probably leave it as-is. My original detent plate is trashed anyway, as you can see by the photos. | ||
Captainkirk |
Just for snicks...a few pix of the trans on the bench. 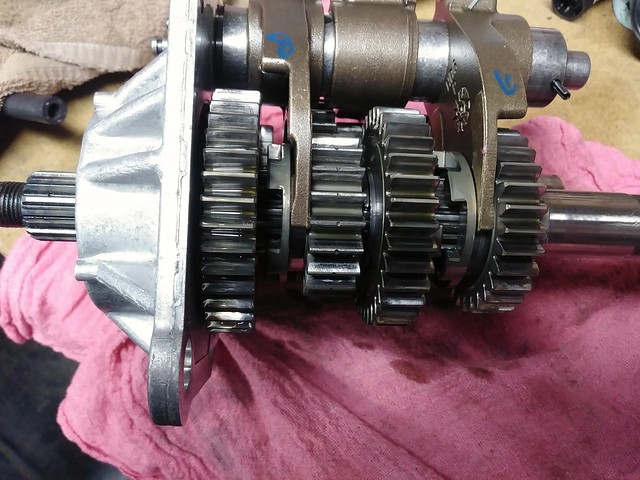 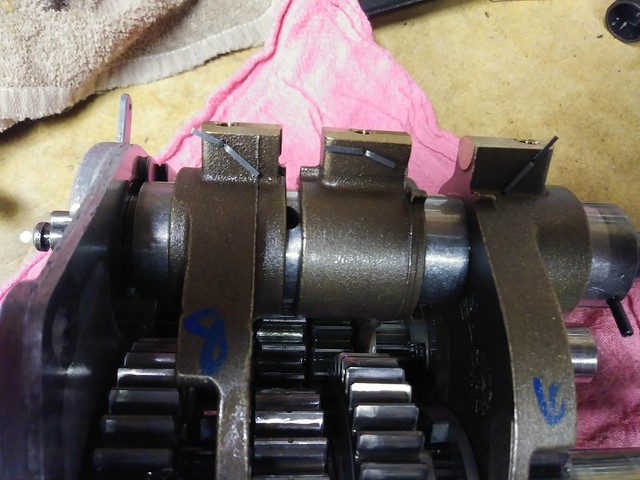 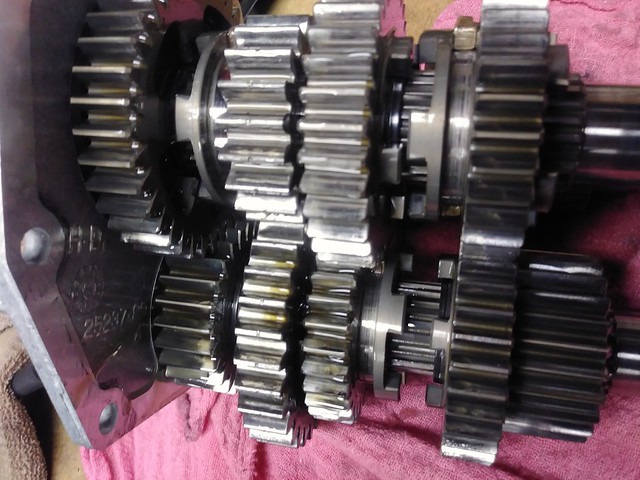 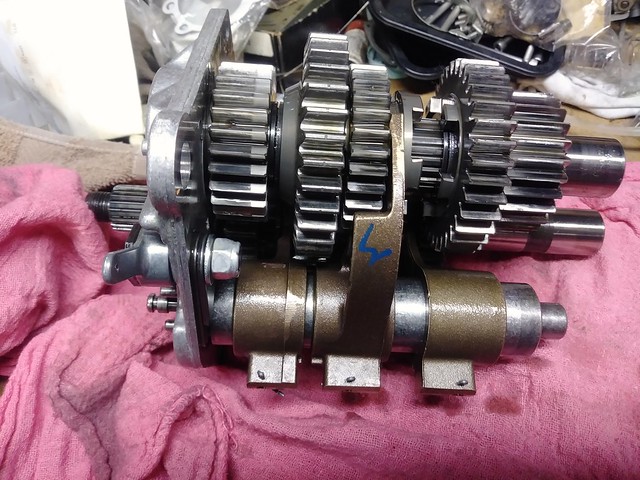 Now, who brought the popcorn? | ||
Ocbueller |
Okay, got to laugh. Apparently never did install H-D 33656-90A. I know so because I am looking at it on my desk in front of me, unmolested and brand new. Not sure now what I used in addition to the Baker drum. Oh well, I'll replace it one day. | ||
Captainkirk |
You probably used the one that came with the Baker shift drum. (Message edited by Captainkirk on May 03, 2020) | ||
Captainkirk |
While I wait for parts to arrive... Here's a couple things I do both to amuse myself and also to smooth the job along... Home made primary lock tool...don't leave home without it! Mine is aluminum so it doesn't bother the sprocket teeth at all, but still wedges in there good for a solid lock up.I've found that using a proper impact wrench will spin those primary nuts right off! Just remember the clutch basket threads are left hand...  These bolt/screw templates took about 60 seconds to make,yet keep all the fasteners in their proper place. The first one I've had lying around for more than a decade! 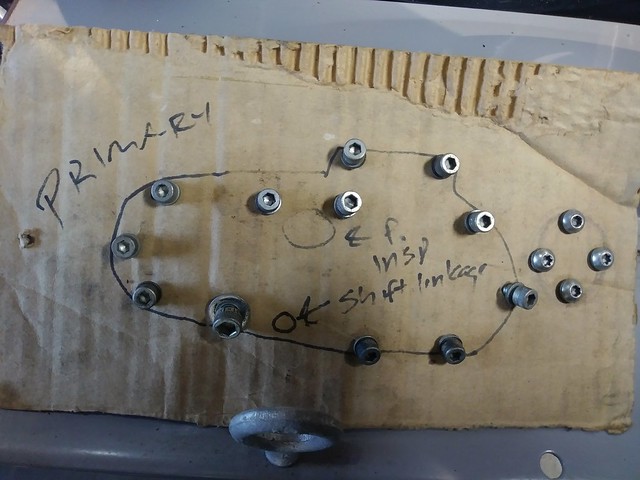  In the mean time, I've kept busy cleaning the grungy bits on the bike and replacing my rear brake pads. | ||
Captainkirk |
Harrumph. Sometimes I think (OK; know!) I'm my own worst enemy. How so, you ask? Well... Let's just say the tranny could be bolted in now. My first mistake was being anal about using the correct "new" cotter pins. Since I couldn't get them without waiting for H/D to order them, and since I wasn't exactly sure of the diameter/length (didn't want to pull the old ones and lose a shift fork pin), I ordered some NOS Harley pins from eBay. I fully expected to get them in the sealed HD white bag. Nope. They came in a clear Ziploc bag and I ain't gonna tell ya how much I paid for five stinkin' 1/16 by 7/8 cotter pins and have you question my sanity. Oh, did I mention they had surface rust on them? No?  After sprucing them up a little with Scotch Brite, I pulled out the old cotter pins, removed the shift fork pins and shift fork clamp along with the detent arm and roller assembly, and the old drum slid right out. Even more surprising was the fact that the new one slid right in. And then I noticed that the roll pin on the back side of the drum that actuates the neutral switch plunger was seated much deeper into the new drum than on the one I just removed. So I carefully popped the tranny back into it's vacant house and observed the pin action. Sure as shootin' I could see the pin only covers about half the plunger ball. It does actuate it, but I don't know if this will cause an issue down the line...so, back out with it, and on the bench. Will call Baker tomorrow. That will be my second call in as many days, because I called them today. I asked tech support,"Since you don't include instructions with your shift drum kit, what does the detent plate bolt get torqued to?" Long pause..."Let me check" After several minutes he gets back on the horn; "There don't appear to be any torque specs". Seriously? Well, I figure I can use general specs for a 1/4-20 bolt, I guess. But when I look them up...(see below)  ...um, yeah. Just what grade bolt are we talkin' about, Spanky? I guess I'll be calling back tomorrow anyway to ask about the neutral pin... Oh, and the new detent plate? Far too "raw" for my liking. I'll be going over the ramps with some fine sandpaper to polish them up. I also asked the Baker guy about the lack of a lock washer under the screw head. Should I put one there? He sort of avoided answering that question so then I asked if Loctite was OK. He seemed to think blue thread locker would be OK, but let's remember I'm like ultra-paranoid about this whole detent plate thing to begin with; let's recall how I got here in the first place. Long story short; trans was ready to go in. Hell, the trans WAS in. And if I wasn't so picky and particular it would probably be halfway together as we speak. Like I said; my own worst enemy. But at least I sleep well.  Here's the old shift drum roll pin: 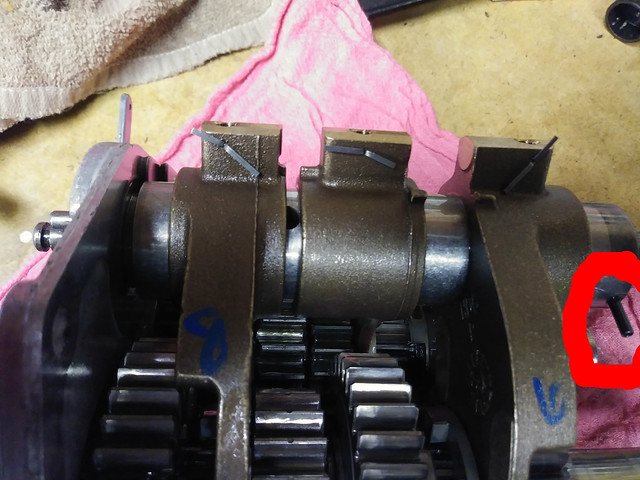 Here's the new one 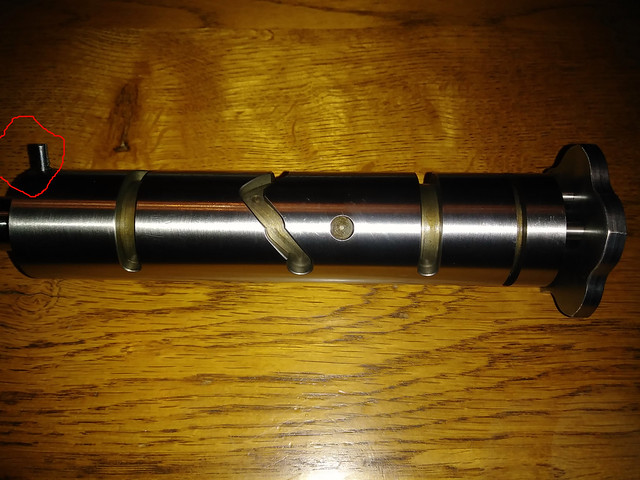 See the difference? (Message edited by captainkirk on May 05, 2020) | ||
Captainkirk |
Well, the folks at Baker are nice and helpful. But they don't have any answers for me. They couldn't tell me the bolt torque. They couldn't tell me what grade bolt I'm dealing with. They couldn't tell me if using a lock washer was acceptable, or if not, why not. They couldn't answer my question about the neutral switch roll pin. Guess I'm on my own here. But this is one of the reasons I'm doing this thing. So that if anyone else goes down this road, I can review the product and how well it works, and impart the info, good or bad, that I pick up on the way. Wish me luck. | ||
Ocbueller |
I think you are correct, in that I probably used the Baker detent. I remember it was raw looking and debated its improvement over the Harley part. A little work with a dremel or sandpaper will definitely help. I used blue loctite and german torque specs. Gutentite. Not sure about the roll pin. SteveH | ||
Captainkirk |
Well, after thinking about this last night, I believe I only have 3 choices at this time WRT the bolt: 1) Do as Ocbueller suggested, and use the German torque setting with blue Loctite 2) Since the grade of the Baker bolt is unknown, choose a torque setting somewhere in the middle or the torque setting chart I listed above, and use Loctite. 3) Do as my brother suggested and pitch the Baker bolt, start out with a known factor grade 8 bolt from local procurement, and use Loctite and/or a lock washer. Suggestions? Comments? | ||
Upthemaiden |
If you have access to the proper grade 8 bolt, that sounds like a good way to go. There really shouldn't be much force on that bolt, so I doubt it needs to be a grade 8. If it was me, based on your chart, I'd probably just use some blue Loctite and tighten it down to about 10ft-lbs. On my bike I'd just twist it till it felt tight, but considering you've gone through this a few times, I'd probably pull out the torque wrench to be sure. | ||
Captainkirk |
"There really shouldn't be much force on that bolt..." No, there shouldn't be. But that begs the question, "then why do the retainer clips keep breaking?" The obvious (to me) answer is: Because they are spring steel, and after numerous hundreds of shift cycles, they fatigue and crack. And that translates to outward pressure being applied via the shift pawl. Could that loosen a bolt? I can't say, but I don't want to rule it out. In this instance, I would say grade 8 is probably overkill, but... | ||
Captainkirk |
So the Captain's comedy show continues...I happened to glance up at the pegboard above my workbench and saw a Ziploc with primary cover seals in it. I pulled it down to see if they were the same seals I just bought (yep) and there was a second bag hanging there...McMaster-Carr. Guess what was in there? 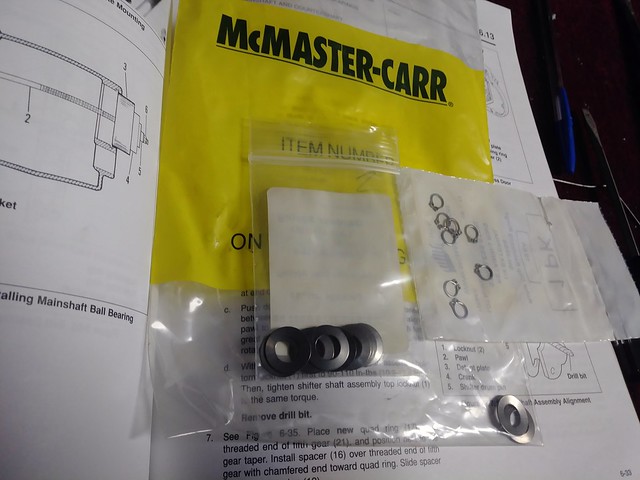  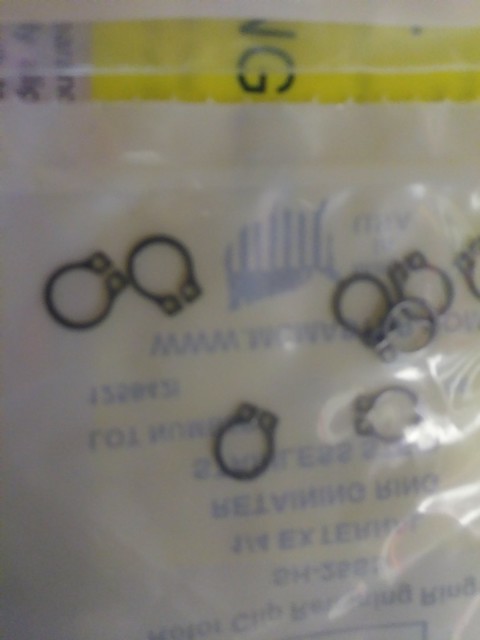 Apparently in one of my past lives, I had tried to remedy the situation before. FWIW, I had no memory of doing this, but curiosity killed the cat, so they say, and I had to see if it worked. So I tried a stack-up on the old shift drum. And realized why they were hanging on the wall...no. Maybe a different snap ring *might* have worked, but these things opened up and stayed open. And the Belleville was sloppy as well. So I felt a little better, anyway. Now, for a little more seriousness... I set the old shift drum in place to see exactly where the roll pin contacts the neutral switch plunger...see pic below. It fully covers the actuator ball. 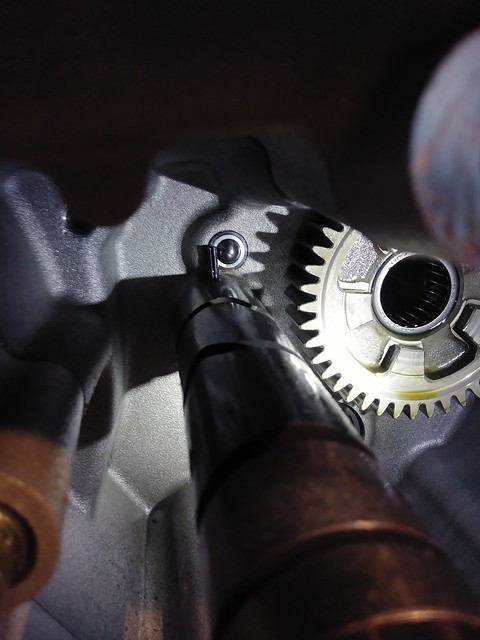 Then I set the trans in place and took a photo of that...see below.  As you can see, it only goes about halfway up the plunger ball. FWIW, I did check to see it it illuminates the neutral light...it does...but I worry about the end of the pin scratching up the ball. I played with the roll pin on the old drum a little to see how tight it was...nothing doing. Pulling it out will probably destroy it. So question is...would you run it like that if it works? Or order a new one and try to remove the old one (likely destroying it in the process)? Right now this is the only issue keeping me from bolting it in. | ||
Upthemaiden |
I guess I'd first try to get an answer out of Baker(which doesn't sound like it's that easy) as to exactly how long that pin is supposed to be to know if yours is right, or if it was pressed in farther than it's supposed to. I tried looking around on google and can't really find anyone else talking about it, so if that is the correct length pin, it doesn't seem to do any well known damage. On the plus side, it looks like Baker sells replacement neutral switches and from the picture it appears they just screw in from the outside of the engine, so if yours does start to wear, it'd be an easy job to fix it without having to pull the transmission back out. The baker part is only $24, and I assume the OEM switch is probably a few dollars less than that, so if Baker doesn't respond back to you in a couple days I'd just toss it in and not give it a second thought. If your neutral light quits working in a few years just stick in another neutral switch. I'm sure there's also some outward force from the detent plate being twisted on it's post, but if you think about it, if that brittle little curved spring clip can hold up to even a years worth of shifts, any bolt should have no problem handling it. Think about replacing any cheap bolt with a spring clip, and how long it would take to inevitably break it. | ||
H0gwash |
That is a great set of pictures that many tuber newbies will appreciate when they are faced with tuber transmission drama. | ||
Captainkirk |
"I guess I'd first try to get an answer out of Baker(which doesn't sound like it's that easy) as to exactly how long that pin is supposed to be to know if yours is right, or if it was pressed in farther than it's supposed to. I tried looking around on google and can't really find anyone else talking about it, so if that is the correct length pin, it doesn't seem to do any well known damage. On the plus side, it looks like Baker sells replacement neutral switches and from the picture it appears they just screw in from the outside of the engine, so if yours does start to wear, it'd be an easy job to fix it without having to pull the transmission back out. The baker part is only $24, and I assume the OEM switch is probably a few dollars less than that, so if Baker doesn't respond back to you in a couple days I'd just toss it in and not give it a second thought. If your neutral light quits working in a few years just stick in another neutral switch." Baker already responded..."they don't know"...which is why I said I was on my own.  I'll just have to make a decision I'm comfortable with WRT the pin as well as the torque. You do make a good point about the switch, it could be changed without breaking into the trans if need be. And like I said, it does work. I've already determined trying to pull the roll pin could be opening up a can of worms, so if the switch works, it's probably best to leave it alone. I'll have to make a decision before the weekend, as that's when I want to start buttoning things up. I'll just have to make a decision I'm comfortable with WRT the pin as well as the torque. You do make a good point about the switch, it could be changed without breaking into the trans if need be. And like I said, it does work. I've already determined trying to pull the roll pin could be opening up a can of worms, so if the switch works, it's probably best to leave it alone. I'll have to make a decision before the weekend, as that's when I want to start buttoning things up. (Message edited by captainkirk on May 07, 2020) | ||
Captainkirk |
That is a great set of pictures that many tuber newbies will appreciate when they are faced with tuber transmission drama. Thanks...that's why I'm trying to detail this so well. I know someone else will be going through this in the future. Hopefully not me again! | ||
Captainkirk |
And, let's just say, for argument's sake, that the correct pin IS installed in the shift drum. And that the installer firmly seated it to the bottom of the hole. In that case, buying a new pin and installing it would either mean: a) not seating it to the bottom of the hole, or: b) seating it to the bottom and experiencing the same issue. In the latter case, changing it would make no difference. In the former...would I feel comfortable knowing the pin was not fully seated, even if I used Loctite? Probably not. | ||
Upthemaiden |
My only other idea, would be to pick a sportster board with a lot of traffic, and post a question on there asking if anyone has installed one and noticed the same thing. You might get lucky. At the very least, maybe just take a fine file and make sure there isn't a sharp edge at the end of the post. You wouldn't want to round it too much, because anything you take off will be that much less that's pressing on the sensor, but if you can just soften up the edge slightly it'll keep it from wearing on the switch quite as fast, if any. | ||
Captainkirk |
Great idea on the pin, Josh. I should be able to take any sharp edges off without affecting the length. As far as the Sportster forums...would probably take too long to elicit any responses for a newbie question. I'm ready to zip this thing up. I reckon I'll be the guinea pig for this. And, losing a neutral light indication wouldn't be the end of the world, but losing a loose roll pin into a spinning tranny just might be. Think I'll just roll the dice on this issue and leave it as-is as long as the neutral light still powers up once the tranny is torqued in place. | ||
Captainkirk |
OK...progress has been made. After bolting in the trans and finding the neutral light still operating after I dressed the edge of the roll pin, I continued on with assembly. After replacing the detent roller with a new one, (during which time the retaining clip took flight and caused me to waste nearly an hour desperately searching for it, only to find it hiding invisibly under my rearset stand)I got the detent plate and cap screw installed with blue Loctite. I had finally decided to go with the midrange setting for a 1/4-20 bolt, but before I had even reached it I felt the hex bit beginning to strip so I stopped and left it at Ocbueller's recommendation of German Torque; "Gutenteit". If I ever had to replay this scene (or if you are considering it) I think next time around I'd do a hardened Allen cap screw. I would also consider a spacer to sandwich between the shift drum and the back side of the detent plate. All there is now is about a 1/4 inch of screw threads. While it's rock solid, I think a spacer would be a welcome addition, but that's water under the bridge. What's done is done, and time will tell. Anyhow, I installed the detent roller linkage along with the new, lighter spring and set the pawl clearance using a #28 drill bit shank with the trans in 3rd gear per the SM. I slathered the detent ramps and roller with plenty of Lubriplate 630AA, and we are ready to rock... 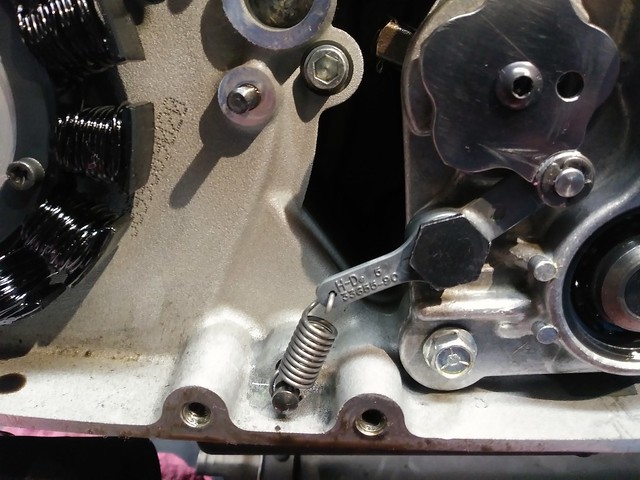 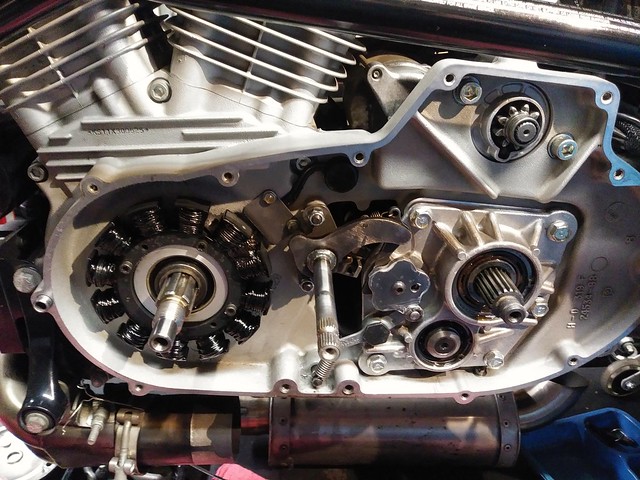 Next goes the rotor/clutch pack/primary chain, as a unit. The threads on both the crank and trans main shaft and nuts got cleaned with contact cleaner, and red Loctite was applied. The crankshaft nut (R/H threads) gets really honked on, torqued to 200 ft/lb, then the clutch pack nut (L/H threads) gets torqued to 90 ft/lb. No way you're doing that without a good, high quality (Snap On) torque wrench and a locking tool, so be prepared to invest if you plan on doing this yourself. (I've had my torque wrench quite a while. This ain't my first rodeo.) Once everything is buttoned down, it's time to install the primary cover. 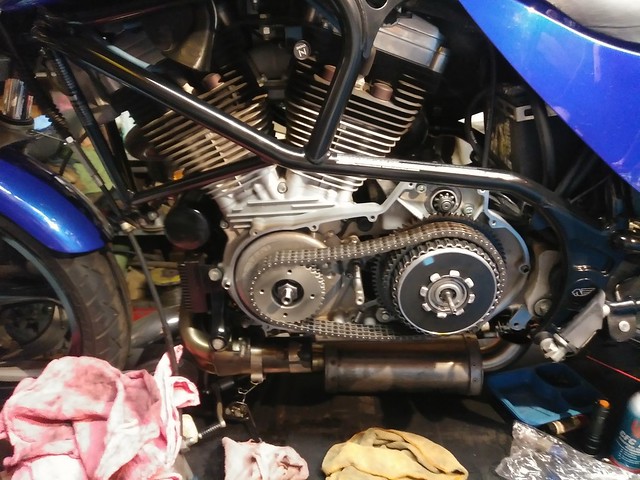 | ||
Upthemaiden |
Looking good! Can't wait to hear your comparison between how it shifted before vs now. I know the common route often taken is a breaker bar, your body weight, and a little bit of math... A long breaker bar marked at 1 foot, a 200lb guy just stepping on it with all his weight at that mark=200 ft-lb on the crank nut. I'm right around 180lbs so I could do the crank nut by putting all my weight on the 6" mark. Use the torque wrench if you've got it, but you know.... haha | ||
Captainkirk |
I know the common route often taken is a breaker bar, your body weight, and a little bit of math... A long breaker bar marked at 1 foot, a 200lb guy just stepping on it with all his weight at that mark=200 ft-lb on the crank nut. I'm right around 180lbs so I could do the crank nut by putting all my weight on the 6" mark. Use the torque wrench if you've got it, but you know.... haha You know what they say..."If you've got it, flaunt it!" (Message edited by captainkirk on May 11, 2020) | ||
Captainkirk |
So, primary cover went back on without incident. Cap screw threads were cleaned with contact cleaner, blue Loctite applied to threads, and torqued. I lubed the shifter pivot point bushing with the Lubriplate, correctly indexed it referencing the Buell SB (as applicable to the 2001-2002 shift linkage, which I have): http://www.badweatherbikers.com/buell/messages/384 2/B039-263586.pdf ...set up clutch free play per the SM and installed the derby cover and then set basic (cold) primary chain tension at 1/2" free play as a basic setting. Gettin' close... 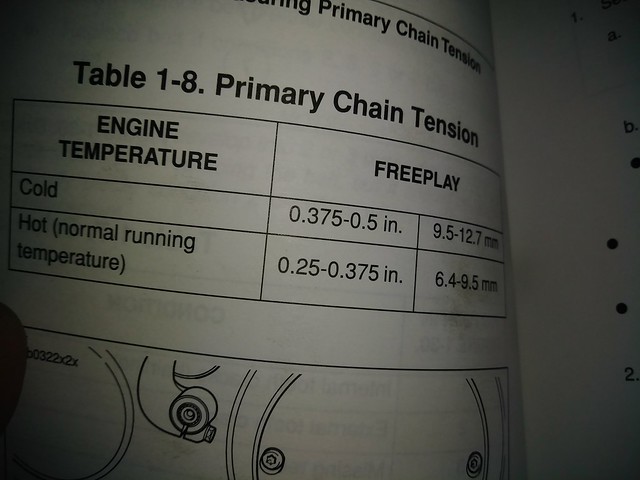  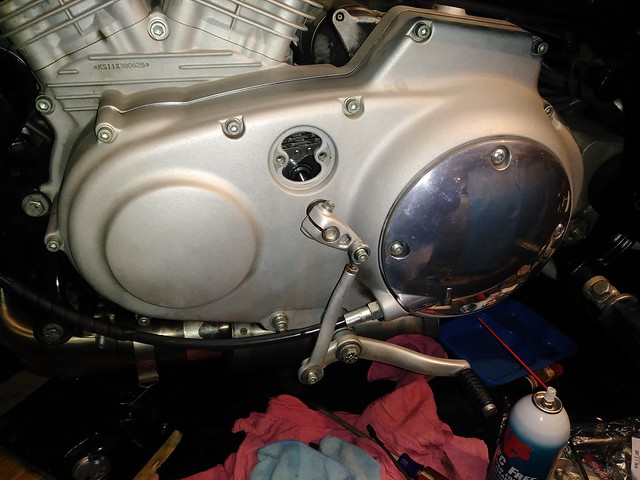 | ||
Captainkirk |
Oh yeah...almost forgot. While I was waiting for parts I threw on some new rear binders. 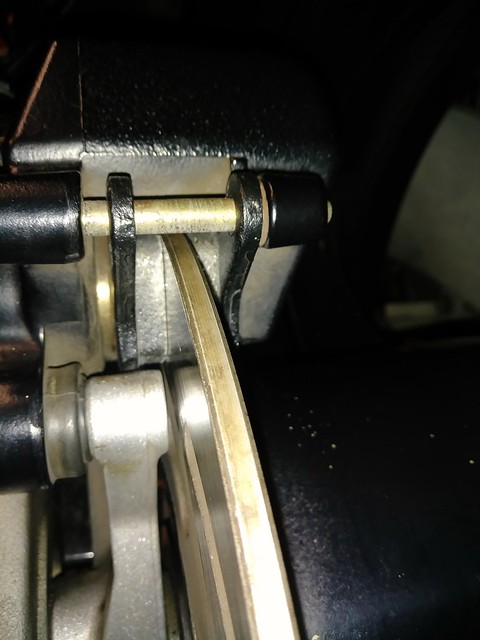 (Message edited by captainkirk on May 11, 2020) | ||
Ocbueller |
Looks like you've got it well in hand. The Baker shift drum definitely improved shift quality for me, with the exception of my hot neutral issue. It will never shift like a sportbike, but it is okay. If someone spent a lot of time with a grinder on the tranny it might show some more improvement. SteveH | ||
Captainkirk |
After sprucing things up a bit, I put the race muffler back on. I've learned a little trick (or as the Millenials say, "a hack" (where they come up with that is beyond me). Anyway, as I was reinstalling the muffler, I took some photos to share this, err...hack...with you guys who might have the same issue... The problem is this; the rear hanger(s) have two separate tabs with two separate bolts. The inner bolt is a major PITA because once you've gotten two wrenches on the bolt and not, you can only rotate the two about 10 degrees at a time. This makes removal an exercise in frustration, hand cramps and just plain aggravation. But there's hope... Insert the bolt, head out, through the hanger, after applying blue Loctite: 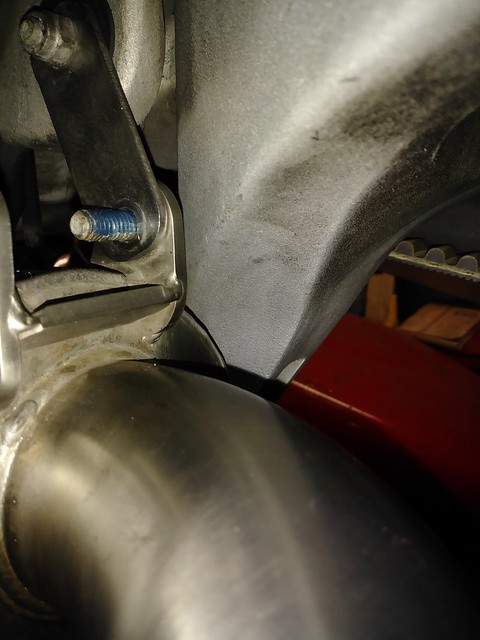 Attach the nut: 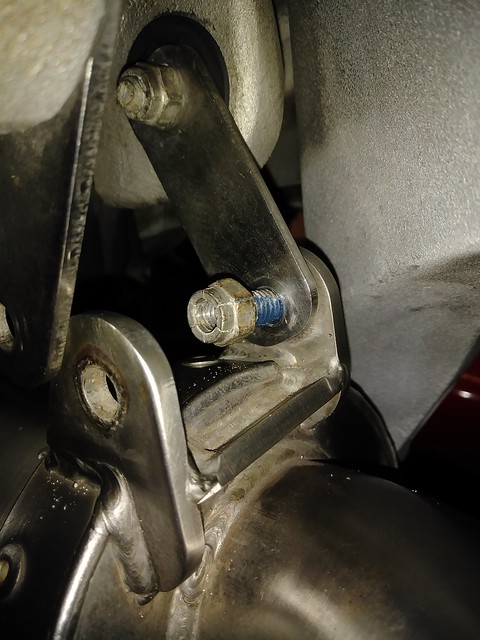 Slip a 1/4" drive 1/2 inch socket over the nut. Slip your 1/4" extension THROUGH the outer muffler tab. FWIW, I only have one extension that will slip through the hole, but one is all you need. If yours doesn't fit, a little judicious trip to the bench grinder will fix you up. The one that fits came from my Craftsman metric socket set: 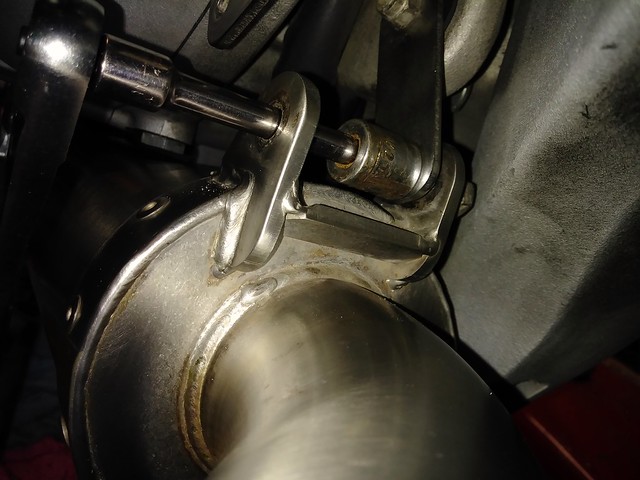 Tighten and torque completely before installing the outer clamp bolt. Once both bolts are torqued (DO use Loctite on these bolts!) you can tighten the clamp on the front of the muffler (to the header pipe) 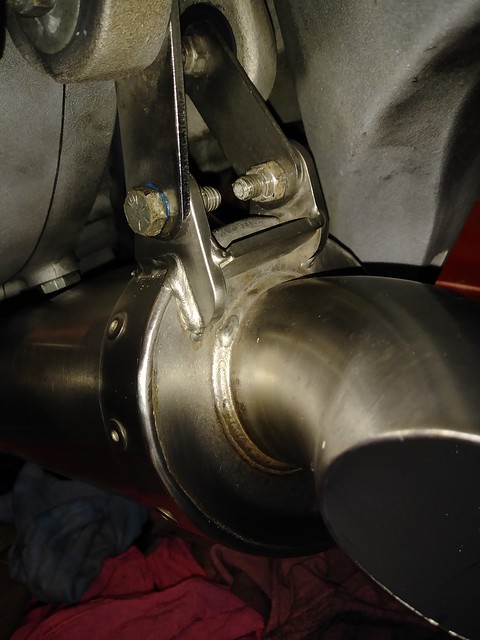 While some folks prefer to use one long bolt with a spacer between the tabs, I don't, for these reasons: 1) The nut has to go on the inside, near the rear shock mount. There is precious little clearance for a locknut, and if it falls off or works loose, you'll never see it 2) If it DOES work loose, you only have one bolt holding the entire muffler on, rather than two separate ones. The clamp on the front slip joint won't be able to keep the muffler on the header by itself. Your can will be sparking on the concrete for about a minute before it departs the bike, right in front of your rear tire. 'nuff said? (Message edited by captainkirk on May 13, 2020) | ||
Williamscottrobertson |
If you�re 180lb, to get 200ftlb you�d need to stand at 13.3� from the fulcrum.  180lb at 6� gives 90ftlb. Weight and balance (torque) and weight shift I deal with daily flying airplanes for a living lol. 180lb at 6� gives 90ftlb. Weight and balance (torque) and weight shift I deal with daily flying airplanes for a living lol. | ||
Captainkirk |
"If you�re 180lb, to get 200ftlb you�d need to stand at 13.3� from the fulcrum. : ) 180lb at 6� gives 90ftlb. Weight and balance (torque) and weight shift I deal with daily flying airplanes for a living lol." Yes, and working on them daily for a living, I can tell you that that's standard lingo out of WWII era aircraft maintenance manuals! | ||
Upthemaiden |
"If you�re 180lb, to get 200ftlb you�d need to stand at 13.3� from the fulcrum. : ) " Or if you don't like doing math, just plan ahead and gain 20lbs before you've gotta rebuild your primary  Good info Captainkirk. Hack isn't a new word, but people certainly have managed to overuse it and make it obnoxious lately. It fits into the 'nails on the chalkboard' category for me now. I had a really hard time getting the wrenches where I needed them for my exhaust, so I just used some rivnuts in my bracket so I only had to deal with one wrench. I don't expect them to last long term with the way this engine shakes. I'll eventually just cut some new brackets and weld some nuts onto it. | ||
Captainkirk |
"Hack isn't a new word, but people certainly have managed to overuse it and make it obnoxious lately. It fits into the 'nails on the chalkboard' category for me now." Yeah, me too. That, and "hashtag". WTF is a "hashtag"? It's a "pound sign" as far as I'm concerned. And a "hack" is someone I don't want: a) cutting my hair, or; b) working on my bike. |