| Author | Message | ||
Mike_lee |
Anyone ever added these? How hard would it be? Originally, I was thinkin just find some pegs with a 5/16x18 stud and tap it right into the frame with some locktite. or is it more than that? | ||
Ratbuell |
I assume you have an S1. ALL S1s, regardless of solo or twin tail, had passenger peg mounts on the frame. Solo bikes had a black rubber cap over the mounting tabs. 2 tabs, each with a hole. Space between the tabs accepts a male-mount footpeg like the rider pegs. Proper mounting is a pin/C-clip setup, and a form of spring washer to click the peg up for non-use, and click it down for use. | ||
Ratbuell |
Battletrax from years ago, see the green circle. 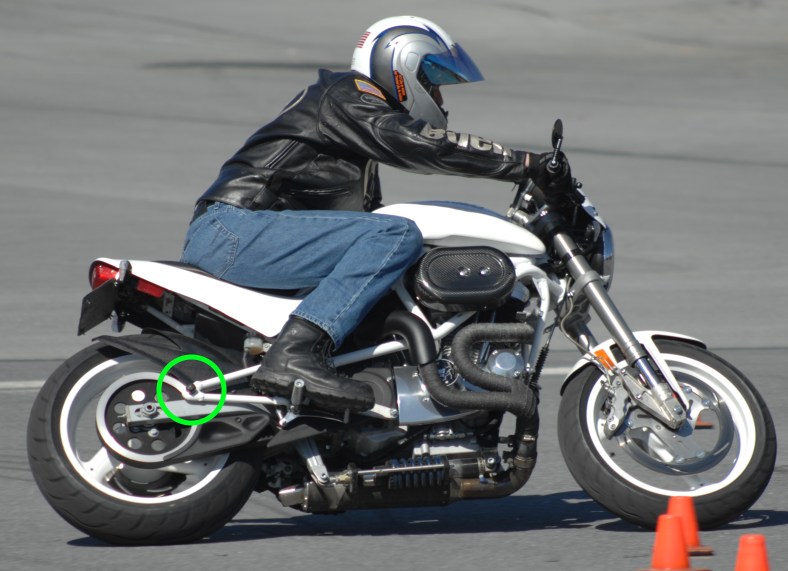 | ||
Mike_lee |
I figured the tab was there from the factory. Mine are gone. PO mustve ground them off before PC�ing frame.  | ||
Natexlh1000 |
They filled it with bondo or jb weld? Try waving a magnet over where the hole would be. Perhaps they threaded a bolt in there and ground it flat? | ||
Mike_lee |
Havent tried the magnet thing but will. Good idea. Its pretty smooth inside and out. He also removed the stem lock. Not sure why. | ||
Ratbuell |
There is no hole in the part you have left. The tabs are basically two square washers that stick out 90 degrees from the frame tubing that you have left. Those squares have round holes in the middle of them, that the peg pin goes through. Look at your rider pegs - it is exactly the same setup. | ||
Mike_lee |
copy that. the tabs were welded and ground off then. I guess I wont pursue this any further. thanks for the help  | ||
Upthemaiden |
Mike I think I have something that will work for you. X1's had removable peg mounts and the brackets had threaded holes. I *think* I have two of them. Small chance I just have one but if I do you'll at least be 50% there and know what you're looking for. That way you can just drill a hole in it and bolt these one to be able to use normal buell/sportster pegs. Someday I'd like to remove those brackets from my frame entirely, but I haven't committed to chopping up the frame yet. Currently I put some pegs in them, even though I don't carry any passengers. I just thought it looked better than the empty brackets. These are the X1 parts, to give you an idea. Mounting pegs with threaded studs on them would work all the same though. 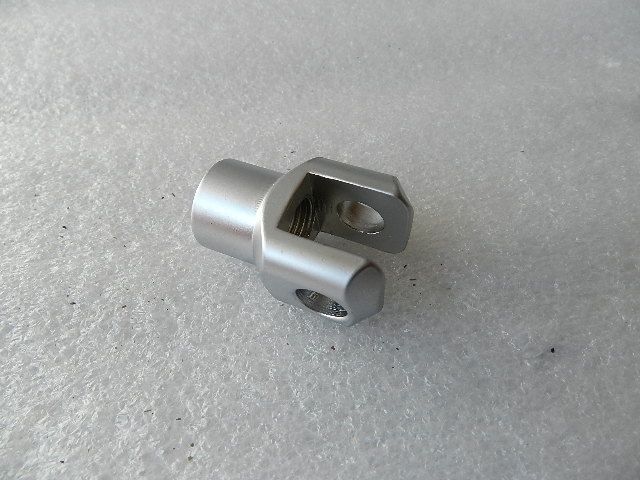 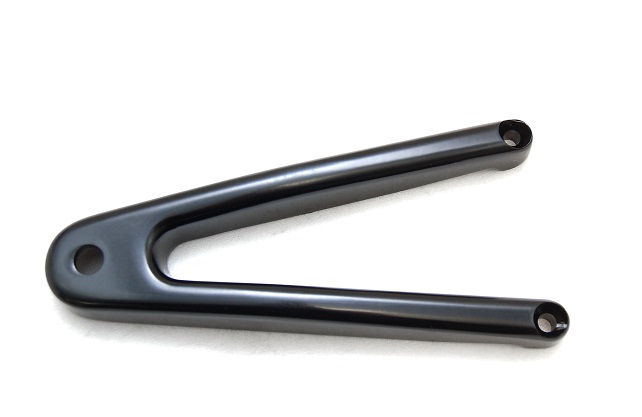 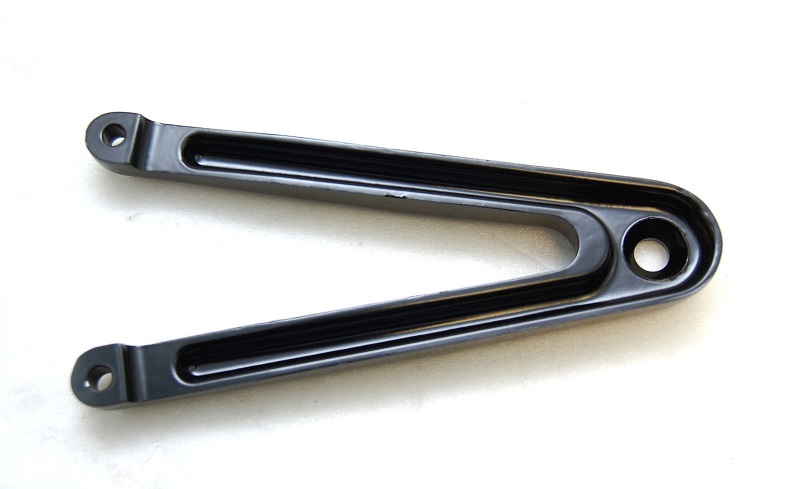 | ||
Natexlh1000 |
Sorry about my ignorant comments above. I just assumed it was a setup like my X1. (ASS out of U and ME, right?) | ||
Mike_lee |
good idea Josh. this would keep passengers off the s1w  nate- I thought it was a similar setup too but without the removable frame sections. | ||
Upthemaiden |
It'd be nice to be able to cut the rear brackets off of an S1, then drill and tap the frame for the removable X1 mounts, but unfortunately the sidestand mount complicates things. | ||
S1owner |
I had cut my rear triangles off and made a plug that allowed them to slide on and of with a small pin to hold them . | ||
Upthemaiden |
Found them, they're yours if you want them. Only catch is that I looked at the back of the brackets on the frame and they arent flat like they are on the X1, so you might have to do a little grinding to flatten it, then drill and countersink the hole. Maybe see if you can use a washer and regular bolts? Threads appear to be 1/2" x 20tpi. I'm sure you can sort it out. 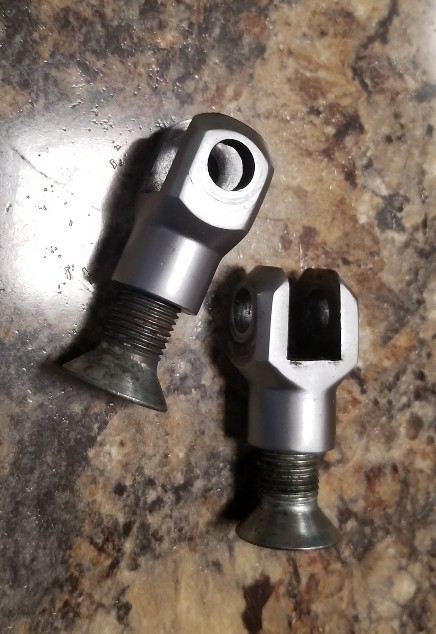 | ||
Mike_lee |
that could work. I can always change the bolt to a panhead too. depending on the space I have to work with on the frame, I may need to have my buddy fab up a piece of aluminum, like a stepped spacer. send them my way and ill return the favor. | ||
Upthemaiden |
You can definitely make them work with these or other bolts. You'll just have to modify the back of the brackets a little. There's plenty of room for a normal bolt head back there. Having a special spacer made could work, or just grind the back flat, fill in the recess with weld so you get a solid surface, and drill it. I'll get them in the mail and it'll give you something to do on a rainy weekend. | ||
Mike_lee |
thanks Josh | ||
Upthemaiden |
I was curious last night when I was looking at the peg mounts.... I wonder why the passenger pegs get those nice big 1/2" mounting bolts, and the front rider gets get those tiny 1/4" bolts, maybe they're 5/16"... I've never heard of one breaking, but I hear about people lifting their bikes by those and it makes me squirm a little thinking about those little bolts holding the weight of the entire bike. | ||
Bluelightning |
If you use the x1 peg bases, you can always drill and bottom tap your frame to the same thread as the peg base. Then using a stud lock tightened into the frame and the peg base. Keeps the inside of the frame a little cleaner look without having to drill all the way through. | ||
Mike_lee |
So if i follow you correctly, the peg bases are what Josh posted a photo of, and i would not use the mounting bolts, but instead use a stud lock? Not sure what that is... like similar to a piece of all thread? Is this just for aesthetics right? I would think drilling thru the frame and bolting this way would be stronger. But i guess with a 1/2� bolt, id prob be ok either way. | ||
Upthemaiden |
I was curious about this too, are you talking about cutting the whole triangle bracket off and drilling in the main part of the frame, or leaving the brackets intact, and drilling/tapping just for the 1/2" bolts for the small peg bases? I can't imagine the 2nd option would work, because if you threaded both parts, you'd have to thread the peg bases on to the stud, and chances that the bases would end up at the correct angle is pretty slim. That part of the frame isn't completely solid either. If you were going to drill and tap it I think you'd need to fill in the back of the bracket with weld so you at least have a solid surface to start with. I've always liked the idea removing the triangle brackets and drilling the frame to mount the removable X1 brackets if you needed them, but you still have the sidestand issue. I don't even know how the X1 sidestand is attached to the frame, I've never taken a close look at one. Mike, I've got those parts boxed up here at work and will get dropped off at the post office today. Sorry for the delay, you know how life is with kids... | ||
S1owner |
Simple fix Get some nord lock washers( link below) Drill your hole put these on the peg side. Torque down the bolt with loctite. Done they will not rotate! These things are awesome have them on my headlight that is mounted at the top with one bolt. Never moves. We use these at the power plant to keep bolts in everything! https://www.amazon.com/nord-lock | ||
Mike_lee |
good deal. depending if theres enough meat for a 1/2" bolt on the frame, that's prob the way to go. all good Josh. I do know. all too well.... | ||
Williamscottrobertson |
Does anyone know the part number or what works to replace the rubber cover over the rear footpeg mounts in the green circle above? Mine are ratty lookin and I can�t find them in the parts manual. I thought about buying something at Lowe�s like a chair leg floor protector and cutting it down. | ||
S1owner |
I just remembered I have a 2000 M2 frame hanging on my wall! I can get you pics of the original mounts William- I think I have a set of pegs for you if you want I can verify tomorrow | ||
Screamer |
I don't know if you can still find them, but the part number I have for the "foot peg clevis cover" is 34634-97. | ||
Williamscottrobertson |
Thanks screamer. There are a couple out there. About $20/each shipped. Ouch. | ||
S1owner |
williamscottrobertson- Here is the pair I have they are yours for shipping and a beer!  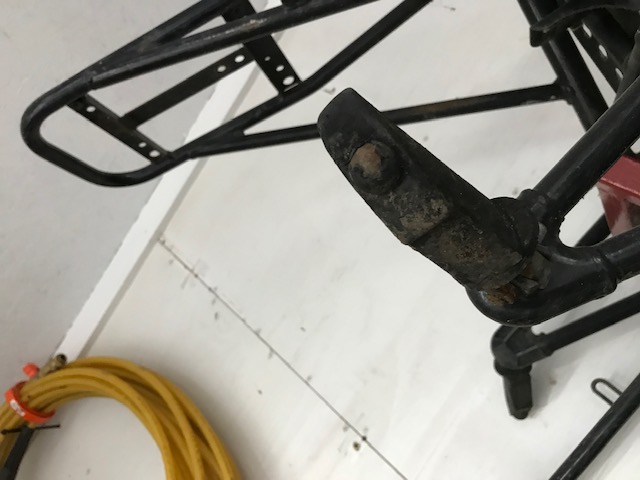 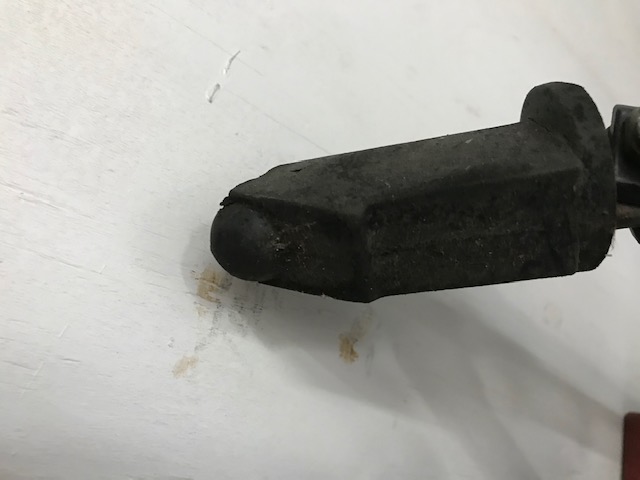 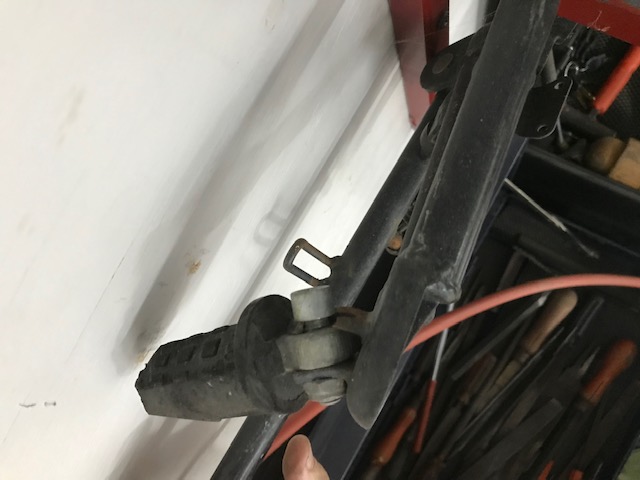 | ||
Williamscottrobertson |
Thanks S1, but I�m looking for the peg cover, not the pegs themselves. | ||
Upthemaiden |
I know they sell little rubber covers in the hardware section, although I'm not sure if they sell any big enough to fit over the peg mounts. I buy them and use them to cover the plug on the airtools, so dust and random stuff doesn't get inside the tools, but I can't say for sure. I would think something like this would work. Less bulky than chair leg protectors, and even though they're expensive for what they are, still much cheaper than the oem part. Only tough part is they're measured as round, and you'll be wedging them on a square part, so it's hard to say exactly what size you need. I'd wrap a few layers of electrical tape around the peg mount, pry it off, and measure the inside diameter while it's round to get an idea of what size you need. https://www.amazon.com/10-Pack-Round-Flexible-Rubb er/dp/B0742KBV6M https://www.amazon.com/500-Rubber-End-Cap/dp/B00KV N9O26 |