| Author | Message | ||
Cyclone8u |
Well I started the long put off refresh of the M2. I'm not sure how deep i'll go, but for now the goal is to just get her back to corner carving worthiness again. Here's a before pic, a bit deceiving. She's a lot rougher than the pic leads on. 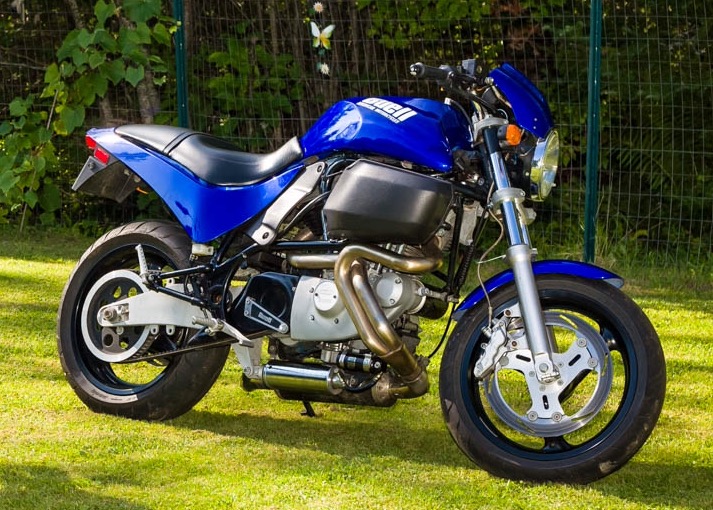 Stripped the bodywork and front end for a fork rebuild. 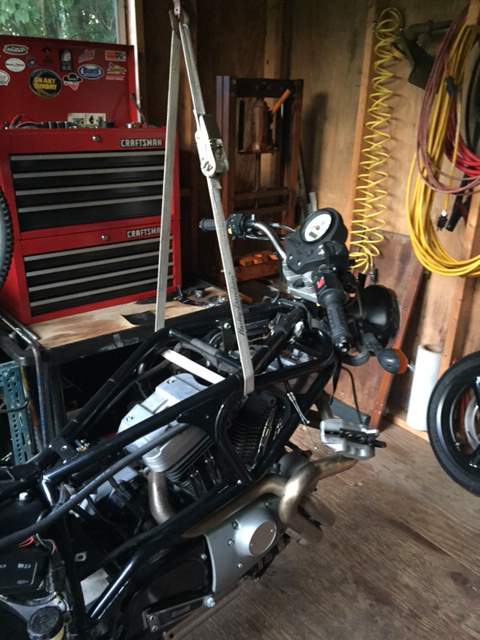 Removed, stripped, cleaned & reassembled carb. Gave intake manifold a quick polish & painted the flanges. It needs new seals as the old ones were not sealing for crap. I'm going to try the James blue ones. 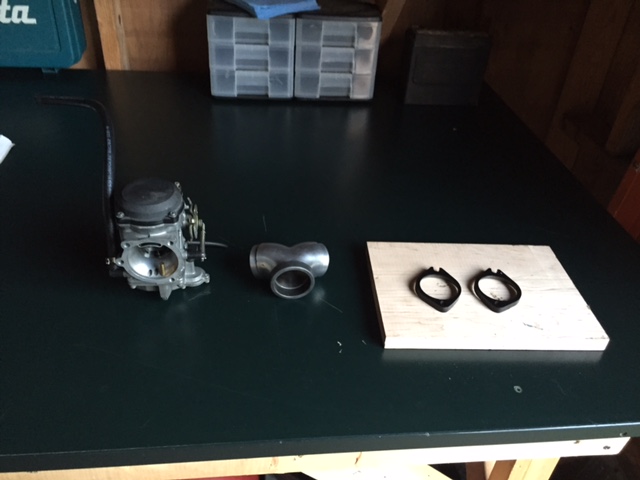 I'll be ordering up the parts this week, will update as I progress. | ||
Upthemaiden |
I wish my bike looked as good as yours does in the "Before refresh" picture.  | ||
M2x2 |
Good for you. Keep us posted with detailed up dates and new or improved parts used. We all appreciate your efforts and willingness to share. | ||
Cyclone8u |
I wish my bike looked as good as yours does in the "Before refresh" picture. It's all camera angle & lighting...like a dating site picture  Since I bought my Uly in '08, the M2 has seen fewer miles, ultimately sitting in the shed for the last few years. You can see the right rear directional missing, a victim of falling off the ramp loading it in the back of my truck to move it here. Unfortunately it also scratched the crap out of tail section which is autographed by Erik - so repainting it is out of the question. I'll probably by a new tail and hang this one up and make up a tall tale of the epic get-off that caused the scrapes  The rest of it shows the neglect of the years. All the bare aluminum has a patina of oxidation, the powder coating (especially the heads) is chipping & peeling and steel parts like the head bolts and shock can are showing rust. Ideally I would love to completely strip it down and refinish or replace everything, but I'm doing this on a shoe string budget and in a 10x12 shed... I'll definitely update as I progress. It may be a long project or I may just get her road worthy and pick away at it, either way it's a long term relationship that's lasted 18 years so far, so it will definitely continue! | ||
Cyclone8u |
Here's what you'd see upon meeting your internet date... 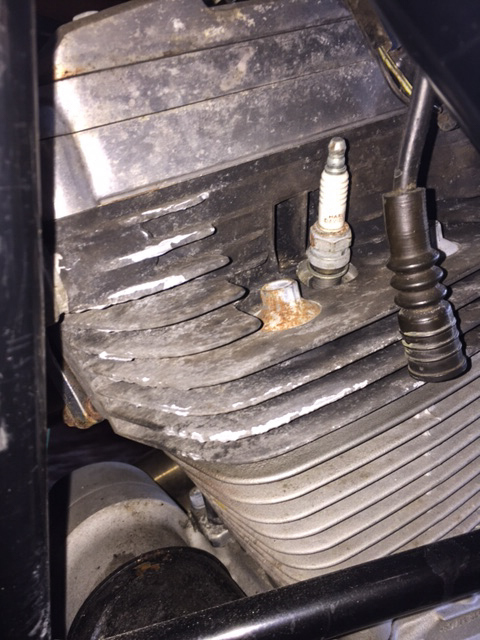 Here's why this project will take a while and why when I was making a living as a mechanic I wouldn't work for a flat rate shop. Breather bolts, one before thread chasing & some work on the wire wheel and one after... 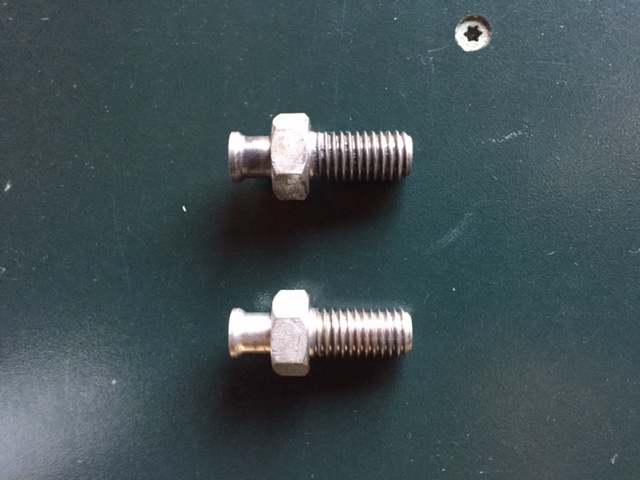 I'd like to change out one for a banjo style or 90 degree to route my breather lines more efficiently, so if anyone knows a good source, I'm all ears. Also any tips on refurbing the finish on the thunderstorm heads, I'd love to hear them. I may break down and just pull them and have them re-powder coated, but if anyone has effectively done them still mounted, I'd love to know what you did and how it came out. To be continued... | ||
Hootowl |
The fading and dirty black on the heads can be visually improved with armor all. It is pretty amazing how well it works. It won't help with the chips... | ||
Cyclone8u |
Thanks Hootowl, I am going to try that on the rear pulley, it's not as far gone. The heads, especially the front one are probably beyond that, sadly. It doesn't show in the picture, but the powder coat is bubbling & peeling, obviously the aluminum underneath is oxidizing and causing the powder coat to delaminate  I'll try to get a before and after of the pulley. | ||
Hootowl |
The armor all repels new dirt too. I didn't believe it...I struggled for years washing, scrubbing, etc. and never got that deep black back. Finally heeded the advice to try armor all...amazing. | ||
1313 |
I'd like to change out one for a banjo style or 90 degree Careful with the 90� breather bolts... Earlier tubers had them and they were a PITA! You have to install them to the right amount before putting the frame on, and it you wanted to remove one without damaging it (cut it to get it off), you'd have to take the frame off in order to do so. A good all around compromise is to go with the XB rocker covers with the PCV valves and then you can block off the breathers in the cylinder head. I just used normal bolts in my S2 as you'll still need the carb support bracket to keep the carb in place. My $0.02... | ||
Williamscottrobertson |
I never cared for the silicone in armor all. The Gunk brand engine shine is amazing. Does what the armor all does but holds up better with the heat. I have a bottle of S100 brightener on the counter I need to try. I just bought a set of head bolts for my S2, cheapest I could find was $45. Found a burned exhaust valve on my way to base gaskets and pigtails. Doesn't hurt to pull the heads off every once in a while and take a look. Especially if you've been running with an intake leak. | ||
Hootowl |
S100 is good stuff. But it's expensive. I've used it. The silicone in armor all is no different than the silicone in the expensive HD pig spit spray, other than being massively cheaper. I've tried them all. Armor all is cheaper and better. Don't take my word for it. Use what works best for you. For me, it was armor all. Keep it off your paint. Frame and engine are powder coated, so no worries there. | ||
Upthemaiden |
My bike came with one straight and one 90 degree breather bolt, and I was magically able to still twist it out. Maybe it was due to my isolators being shot and the frame sagging a little? Who knows, got lucky I didn't have to start cutting. Post up as much as you can, I even enjoy seeing the difference between the cleaned up bolts like you posted. My bike is going to get that treatment someday, but not until I've got something else to ride that I can sacrifice pulling this one apart for that long. | ||
Jayvee |
I like my banjo fittings for the breather bolts. Found some drilled allen head stainless breather bolts on eBay. Much easier than the stock solid 90� bolt thing, and better than the "horseshoe" metal breather pipe. | ||
Cyclone8u |
Upthemaiden - I agree, I don't think I'd want to take my only bike out of service for any length of time. Hopefully the Uly continues to run strong in the interim. Jayvee - That was my thinking with the banjo bolts, much more versatile. I'll have to add watching eBay to my list of chores. I like the sound of allen head bolts, post a pic if you can. | ||
Upthemaiden |
I have the banjo bolt style that's on ebay. They're simple and work fine(although the plastic washers destroyed themselves after a few times of installing and removing the bolts). I didn't mention them because you had a stock airbox and I didn't know if they'd still work with that setup, but otherwise I got them on ebay for a few dollars and they work fine. | ||
Jayvee |
The pictures of mine is: http://www.badweatherbikers.com/buell/messages/476 23/692297.html | ||
S1owner |
Put XB rockers on with pcv brearhers much cleaner and effective | ||
Cyclone8u |
That's a clean look Jayvee. I agree with you S1, the XB covers & breathers are the way to go, and I probably will go that route in the future...it's just not in the budget at this point. I tried the armor all trick and I've got to say I'm impressed. Before: 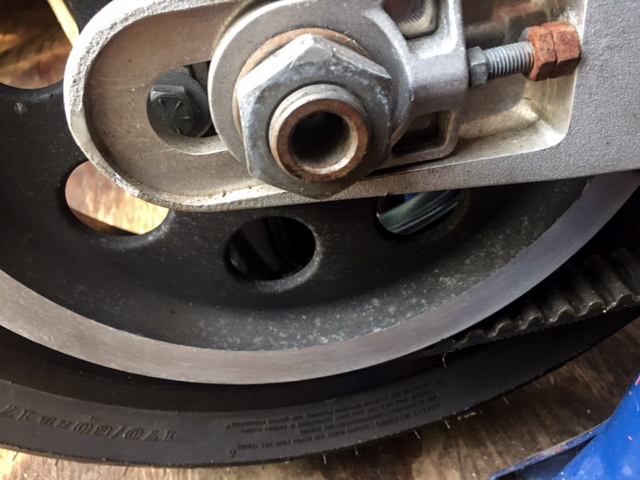 After: 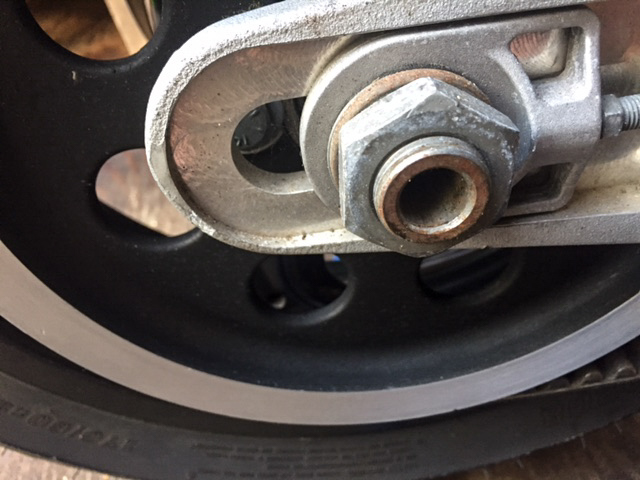 I also pulled the exhaust and the rear wheel. I started working on cleaning up the belt adjustment hardware and then I stopped and just sat and admired the simple elegance of Erik's design with everything out in the open now. The incredible balance of function and form engineered into these bikes still blows my mind to this day. It's a damn shame what H-D did...a damn shame. | ||
Captainkirk |
I can't remember exactly what I did on my breather bolts but if memory serves, I cut the one that hit the frame short enough to remove it in place. But that was a long time ago... | ||
Cyclone8u |
Well, I got some parts in from St. Paul H-D and started putting some things back together as I disassemble, clean/fix other things. The James blue intake seals rock. I assembled using brake caliper grease as recommended in other threads and they still are a tight fit. If I do this again I will be purchasing a set of 12 point bolts to make the process smoother. Once assembled and tightened down, I've never felt the intake manifold feel as solid as it does now. I have high hopes when I finally fire her up. The forks had a layer of sludge in the bottom after draining the oil out. 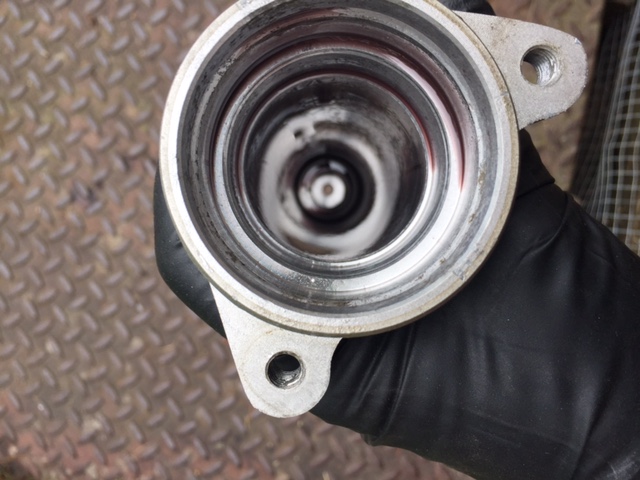 I thoroughly cleaned everything and started reassembling them. 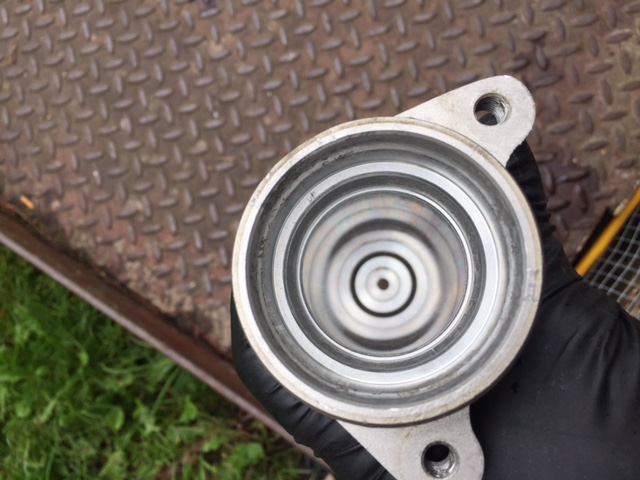 I installed a new header stud that backed out with the nut. Waiting on new gaskets for that. I cleaned up the rear axle & belt tensioner hardware. I think I'm just going to swap out the nuts for stainless as I know these will start to rust again immediately and I'm going to give the bolts a good dose of antisieze where they go into the swing arm. With the funky rounded heads on them, I doubt I can find a stainless replacement. 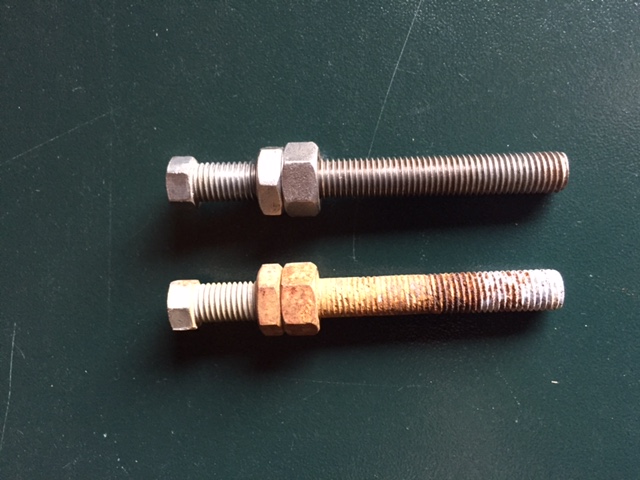 That's about it so far. | ||
Williamscottrobertson |
If you know the size and pitch, bolt depot probably can get them, however they won't have the smaller heads. | ||
Jayvee |
I remember they were unusual size, but I'd have to look it up or measure one. But they're around, for example, here's some imported bolts: http://www.motosport.com/bolt-chain-adjuster-bolts | ||
Upthemaiden |
A few minutes on a bench grinder with some regular stainless bolts and you should be fine. | ||
Jayvee |
I tried it free-hand against a grinder wheel and no way, I couldn't get 3 pairs of parallel sides, much less 6 equal sides. With a holder jig/stop that would make the grinding repeatable, should be possible. Is there a simple way to make a jig for this? That's the kind of thing I got my cross-slide vise for, but so far haven't. | ||
Cyclone8u |
The more I think about it, they're only called adjusters. I can safely say that with the exception of one time I brought the bike to the dealer for the recall shock and they adjusted the belt, which I immediately had to readjust back to "scary loose", I've never touched them in 18 years. I might just paint them black, slide them back in the swing arm and forget about them for another 18 years... | ||
Upthemaiden |
If you don't adjust them often, you could also get some hex cap screws, the kind you use with a hex key, use some calipers to measure and set them to the same length as your current ones, then lock them in before you put your wheel in. | ||
Cyclone8u |
Upthemaiden, I think you nailed it... off to the hardware store! | ||
Cyclone8u |
I started reassembling the forks. Put everything together and installed new seals. 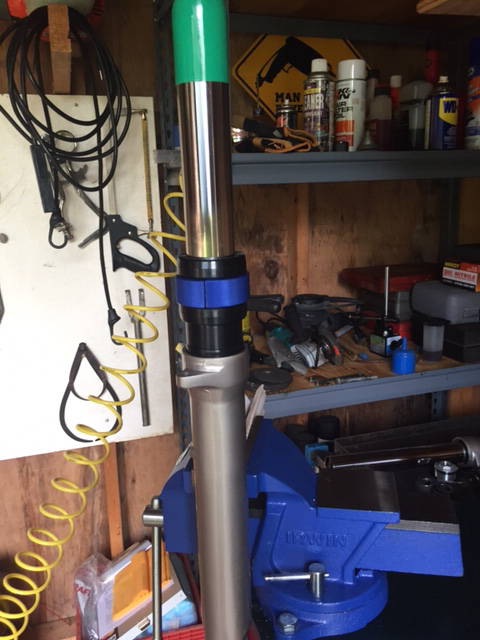 Followed by dust seal. 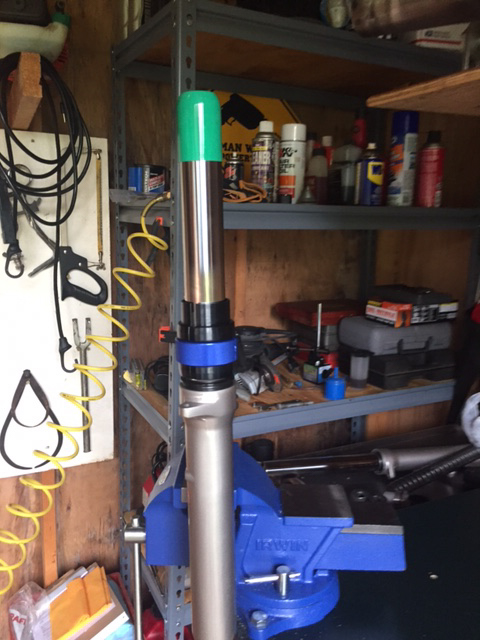 Set oil level and capped off. 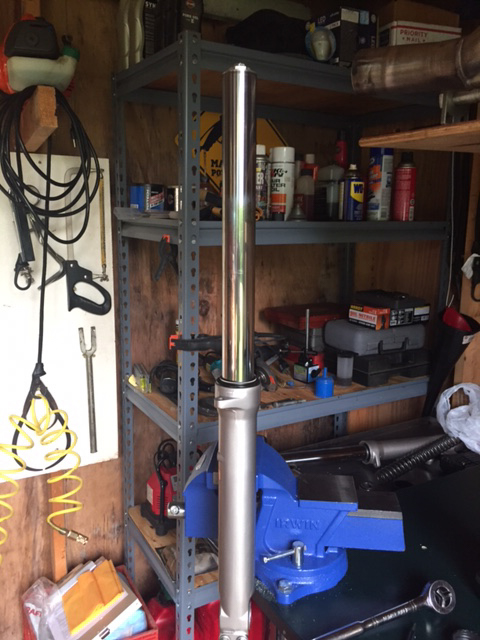 I got tired of dealing with the wooden blocks in the vice and decided I needed som proper soft jaws. Started with some aluminum angle stock and self adhesive magnet. 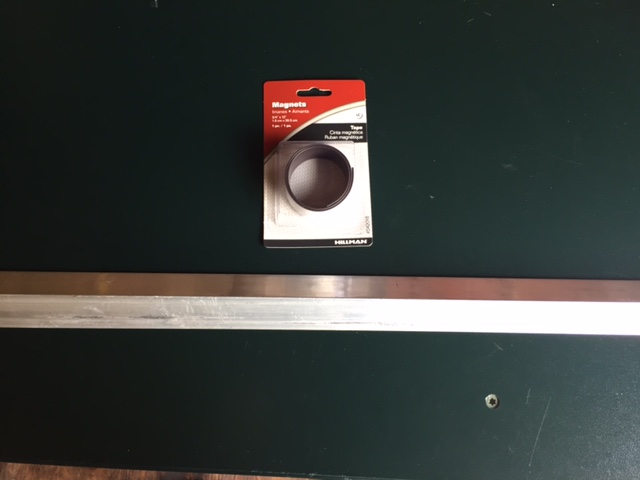 Cut angle stock to length and filed square. 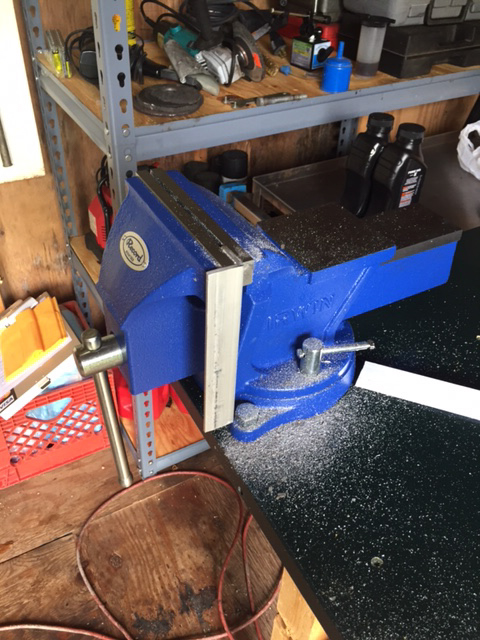 Applied magnet. 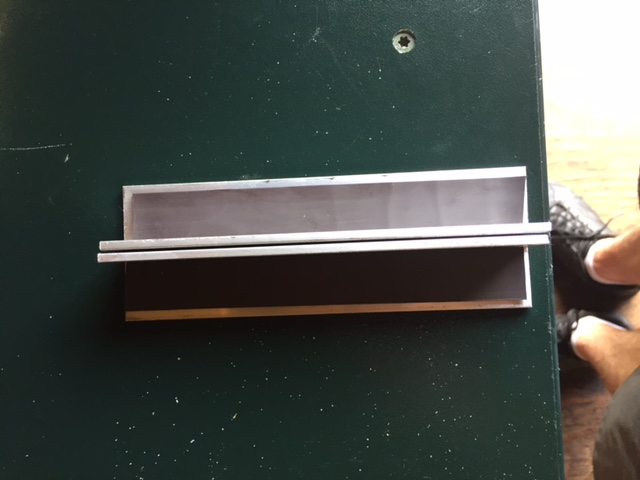 Finished product, ready for next fork. 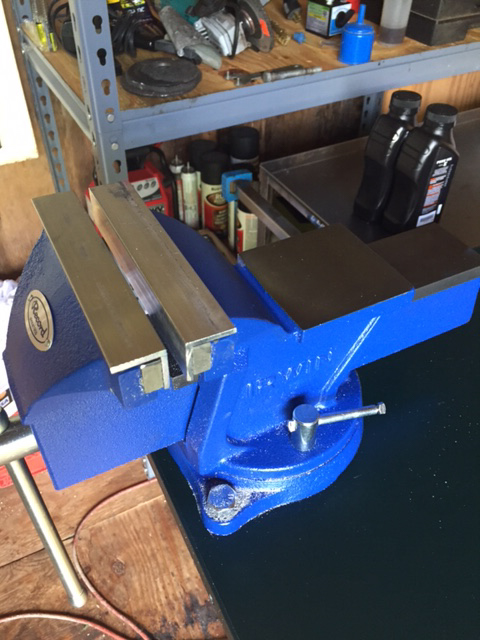 Next up was the adjusters. The only stainless bolts I could source didn't have enough thread. So I had to improvise. 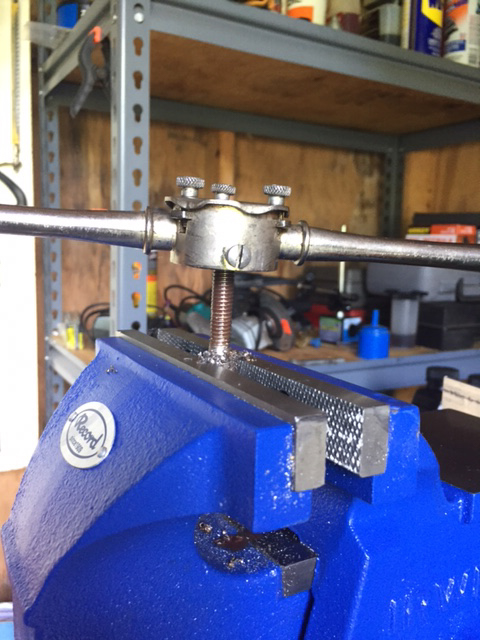 Much better. 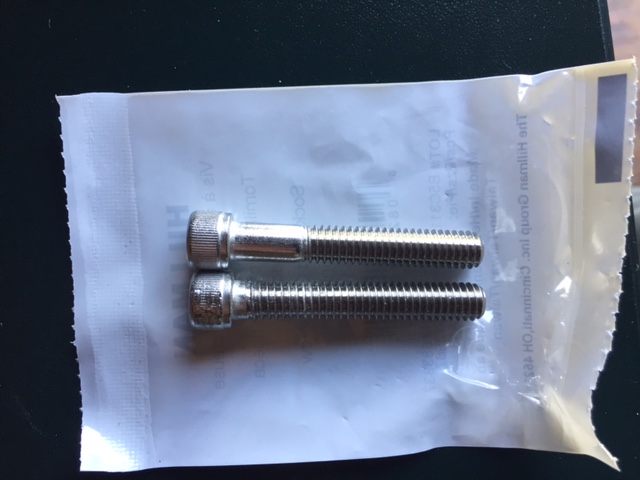 So much cleaner looking now. 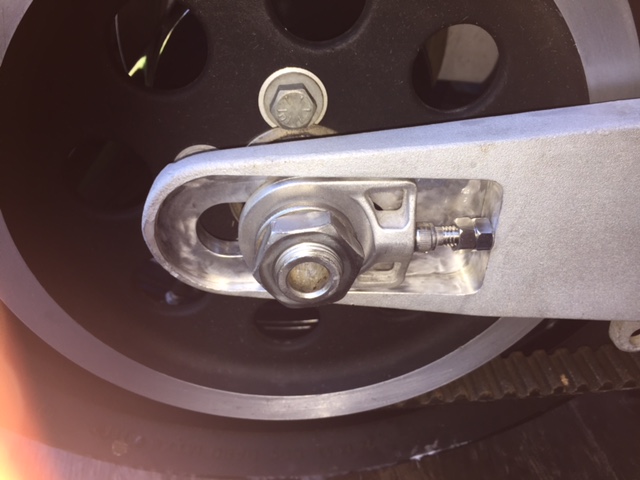 (Message edited by Cyclone8u on August 20, 2017) | ||
Upthemaiden |
I just made some soft jaws a couple weeks ago, they're great! Years ago I chopped up a plastic cutting board and drilled it, so when I had something softer to clamp I'd put on the plastic jaws. They worked great, but I got tired of swapping jaws all the time. The aluminum/magnet pieces are so much more convenient. The axle tension bolts look great! I assume that since your bolts have two nuts locked against each other, your swingarm is one of the ones that doesn't have threads in it? I heard some did and some didn't. | ||
Cyclone8u |
No threads in the swingarm, which also allowed me to find the hardware locally much easier as fine threaded hex cap screws seem to be harder to lay my hands on...I probably could have gotten some at Fastenal, but I saw no sense in paying the extra coin for this application. I used my calipers to set the depth from head to base of second nut and when it was all buttoned up I still had the proper scary loose belt adjustment. And as a bonus, I don't have to watch them rust and corrode anymore. Wish I could say the same about the axle... |