G oog le BadWeB | Login/out | Topics | Search | Custodians | Register | Edit Profile

Buell Forum » Old School Buell » Archive through October 09, 2016 » Exhaust Bracket "Fix" « Previous Next »

Author Message
Top of pagePrevious messageNext messageBottom of page Link to this message

Mikethediabetic
Posted on Thursday, August 04, 2016 - 02:20 pm:   Edit Post Delete Post View Post/Check IP Print Post    Move Post (Custodian/Admin Only) Ban Poster IP (Custodian/Admin only)

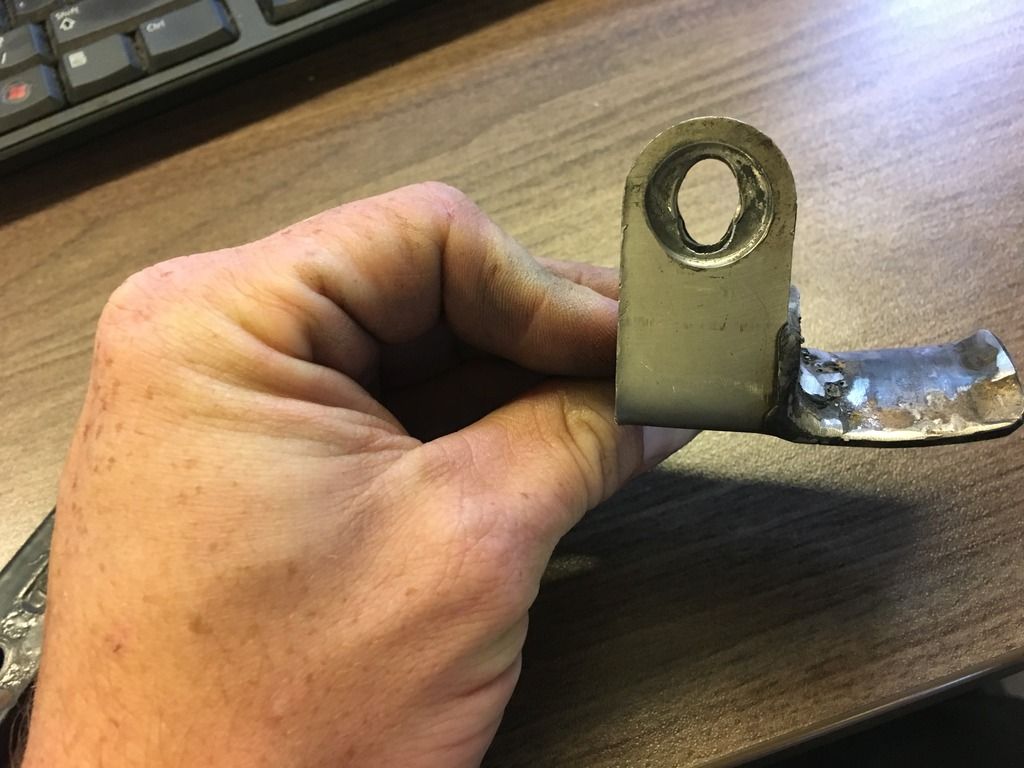
So after putting multiple bandaids on my exhaust bracket and race exhaust mount, the time has come to officially do something about it. You will see from the pics below what had happened.

Here you can see how the exhaust mount has been rubbing and eating away at the hangar.
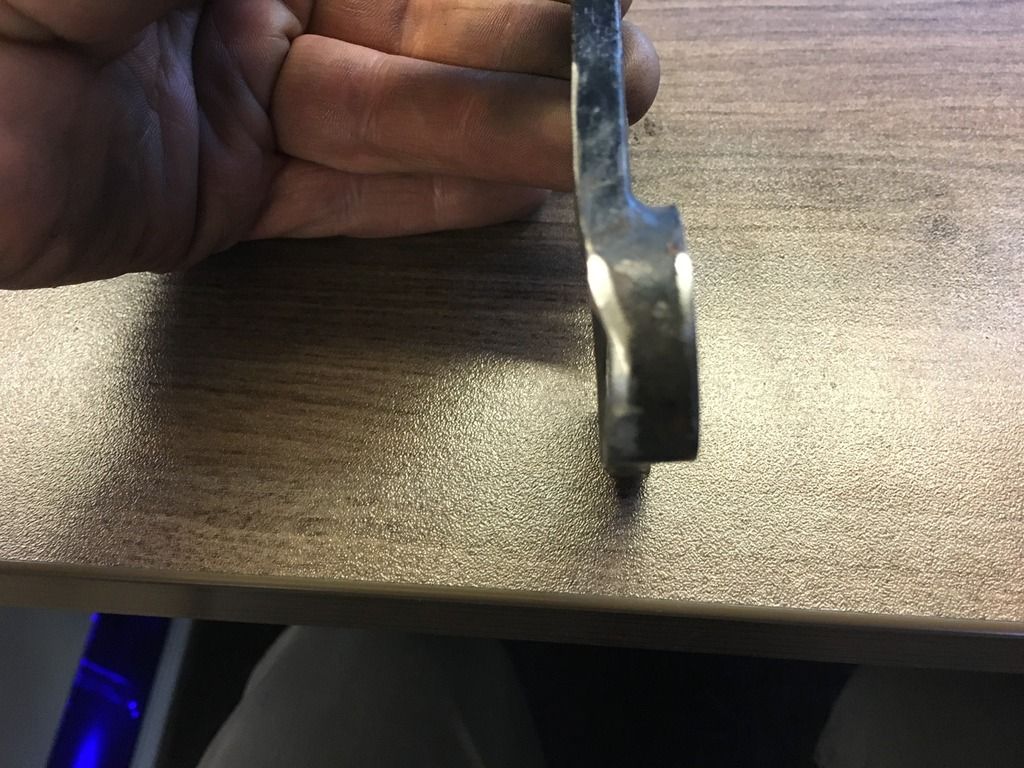

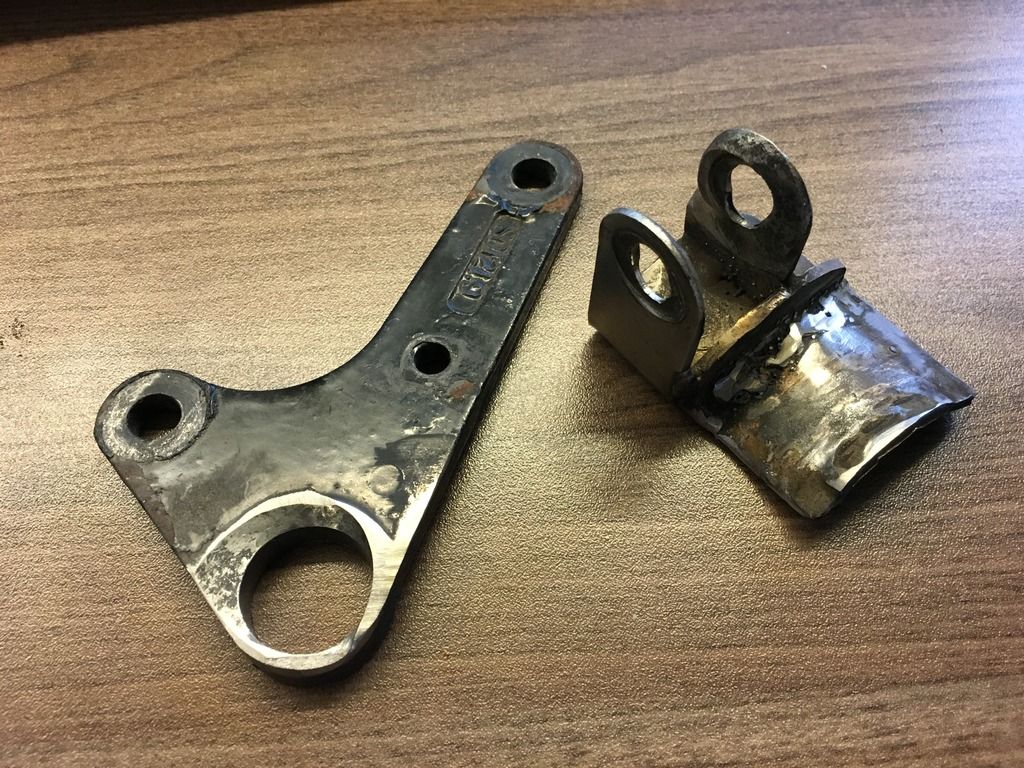
Here you can see the elongated mounting holes from the vibrations as well as the crappy weld from it cracking in half

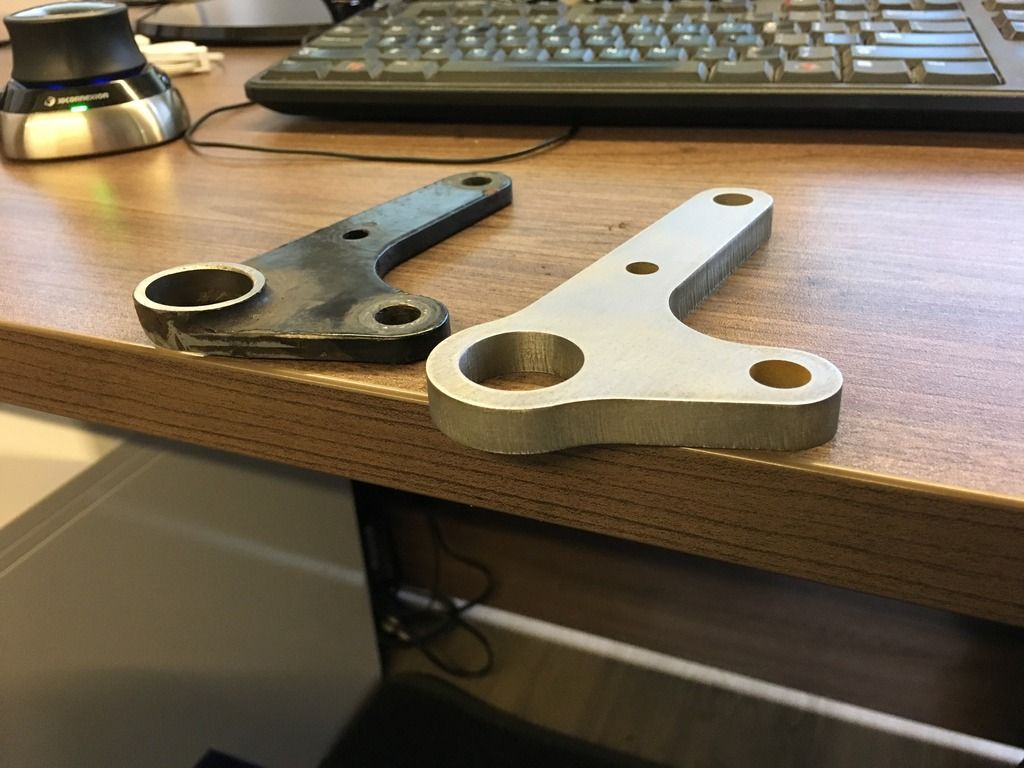
A shot of both together. As you can see they are not in good shape.

So on to the fix. First i started with water jetting out a new hangar made out of solid 3/8" thick plate.
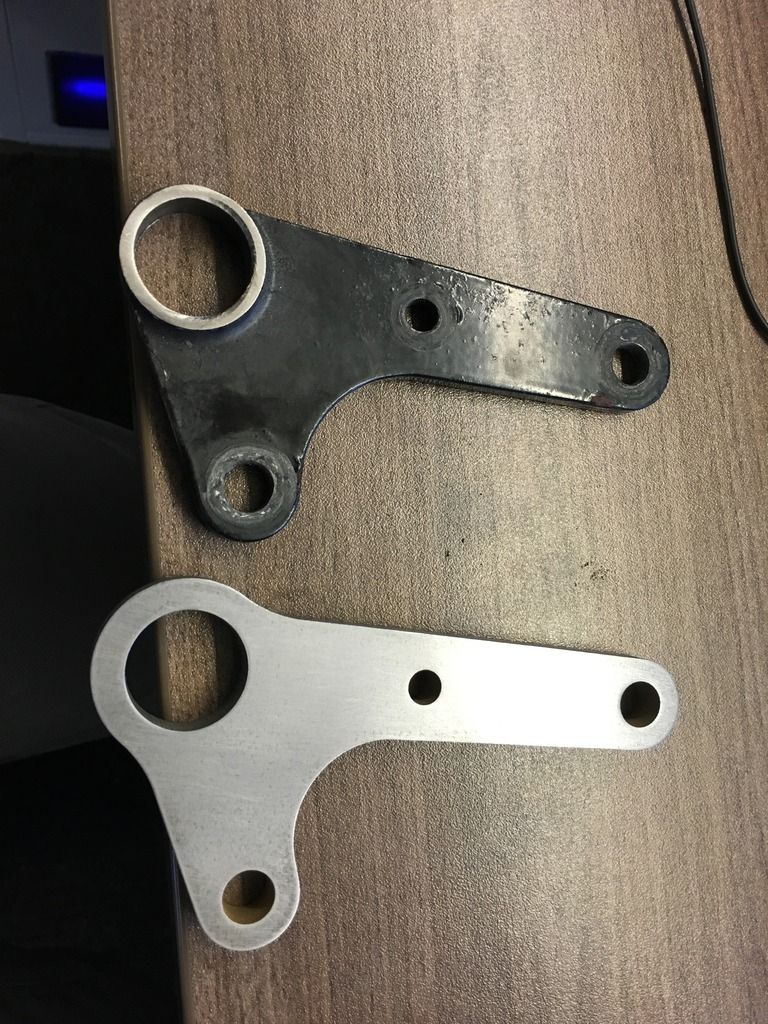


Im sure i will have to counter sink the holes where it bolts to the motor but for now this is my starting point. I am welding up a new mounting bracket for the exhaust clamp that will look pretty much exaxtly like the old one, just new. Then i will machine some delrin sleeves/ spacers to go into the new hangar. Stay tuned for updates.
Top of pagePrevious messageNext messageBottom of page Link to this message

Reepicheep
Posted on Thursday, August 04, 2016 - 02:53 pm:   Edit Post Delete Post View Post/Check IP Print Post    Move Post (Custodian/Admin Only) Ban Poster IP (Custodian/Admin only)

Stout!
Top of pagePrevious messageNext messageBottom of page Link to this message

S1owner
Posted on Thursday, August 04, 2016 - 04:55 pm:   Edit Post Delete Post View Post/Check IP Print Post    Move Post (Custodian/Admin Only) Ban Poster IP (Custodian/Admin only)

Wouldn t the updated y bracket work?
Also if you want a more stout race muffler shoe search the site Dave made some that are better
Top of pagePrevious messageNext messageBottom of page Link to this message

Mikethediabetic
Posted on Friday, August 05, 2016 - 08:58 am:   Edit Post Delete Post View Post/Check IP Print Post    Move Post (Custodian/Admin Only) Ban Poster IP (Custodian/Admin only)

S1owner. Im sure the Y mount would have worked but i didnt wanna try and track one down and also i can use all the material and machines for free so i figured "Y" not. It may not even work in the long run but i figured it couldn't hurt to try. Literally have nothing to lose.
Top of pagePrevious messageNext messageBottom of page Link to this message

S1owner
Posted on Friday, August 05, 2016 - 11:24 am:   Edit Post Delete Post View Post/Check IP Print Post    Move Post (Custodian/Admin Only) Ban Poster IP (Custodian/Admin only)

Makes sense I am not familiar with the race set up that well! Def looks beefy!!
Top of pagePrevious messageNext messageBottom of page Link to this message

S1owner
Posted on Friday, August 05, 2016 - 11:27 am:   Edit Post Delete Post View Post/Check IP Print Post    Move Post (Custodian/Admin Only) Ban Poster IP (Custodian/Admin only)

If you want the updated shoe Dean adams can help you out

http://www.badweatherbikers.com/buell/messages/476 23/786234.html?1464388446
Top of pagePrevious messageNext messageBottom of page Link to this message

Mikethediabetic
Posted on Friday, August 05, 2016 - 01:59 pm:   Edit Post Delete Post View Post/Check IP Print Post    Move Post (Custodian/Admin Only) Ban Poster IP (Custodian/Admin only)

Thanks will keep that in mind. Gonna weld up the mount here first and see how it works out. Will update with more pics.
Top of pagePrevious messageNext messageBottom of page Link to this message

Mikethediabetic
Posted on Tuesday, August 23, 2016 - 09:32 am:   Edit Post Delete Post View Post/Check IP Print Post    Move Post (Custodian/Admin Only) Ban Poster IP (Custodian/Admin only)

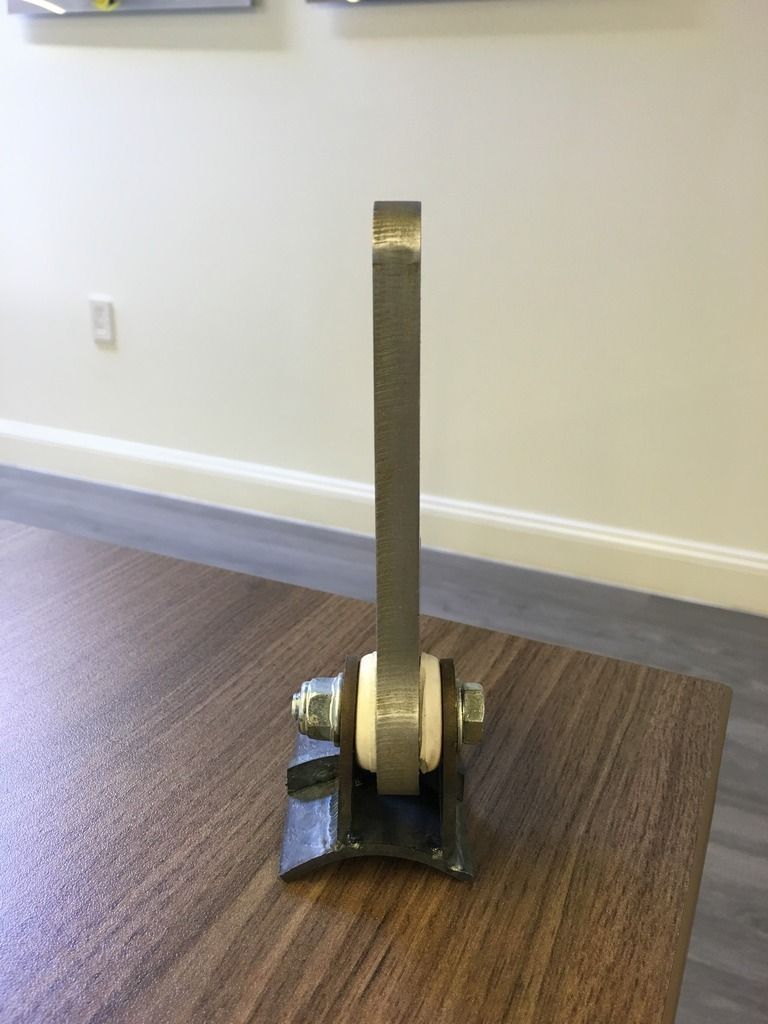
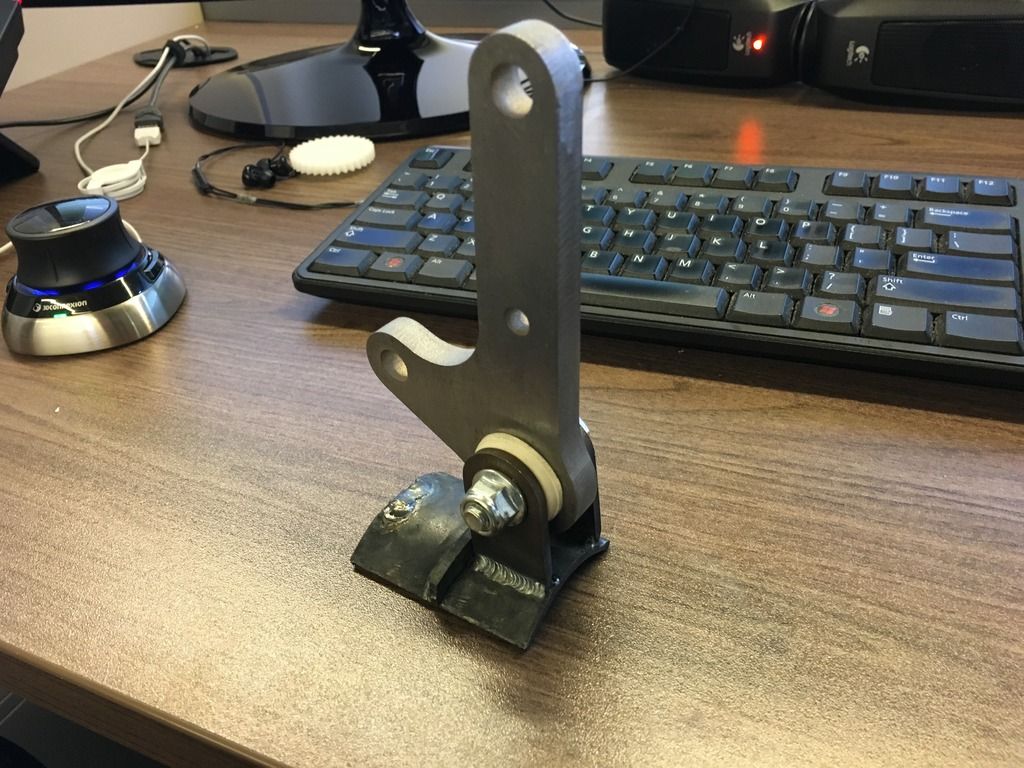
OK, So i finally got some time on the waterjet and was able to finish the assembly. The bracket that mounts to the pipe is basically an exact replica of the original. I couldn't find the bushing so i had to get creative. The bushing is rubber with a delrin core in it for the bolt. Its nice and solid but you are still able to slightly move it around so i think i will work well with flexing and vibration damping. I think it came out pretty good. I still have to paint it obviously, but you can see how it looks for now.

Top of pagePrevious messageNext messageBottom of page Link to this message

Two_seasons
Posted on Tuesday, August 23, 2016 - 09:41 am:   Edit Post Delete Post View Post/Check IP Print Post    Move Post (Custodian/Admin Only) Ban Poster IP (Custodian/Admin only)

I like the delrin in there. Nice work.
Top of pagePrevious messageNext messageBottom of page Link to this message

Brother_in_buells
Posted on Tuesday, August 23, 2016 - 10:09 am:   Edit Post Delete Post View Post/Check IP Print Post    Move Post (Custodian/Admin Only) Ban Poster IP (Custodian/Admin only)

Looks good,
Can You post a link for the rubber and delrin core?

Thank,s
Top of pagePrevious messageNext messageBottom of page Link to this message

S1owner
Posted on Tuesday, August 23, 2016 - 10:19 am:   Edit Post Delete Post View Post/Check IP Print Post    Move Post (Custodian/Admin Only) Ban Poster IP (Custodian/Admin only)

Looks nice
Did you re fabthe shoe also looks heavier?
Top of pagePrevious messageNext messageBottom of page Link to this message

Mikethediabetic
Posted on Tuesday, August 23, 2016 - 02:08 pm:   Edit Post Delete Post View Post/Check IP Print Post    Move Post (Custodian/Admin Only) Ban Poster IP (Custodian/Admin only)

everything you see besides the rubber and the bolt is fabbed up from scratch. As for the rubber and the core. Now don't laugh but i had to get "creative". The two rubber halves consist of these 5/8" rubber leg tips.
http://www.homedepot.com/p/Everbilt-5-8-in-Off-Whi te-Rubber-Leg-Tips-4-per-Pack-49118/203661014

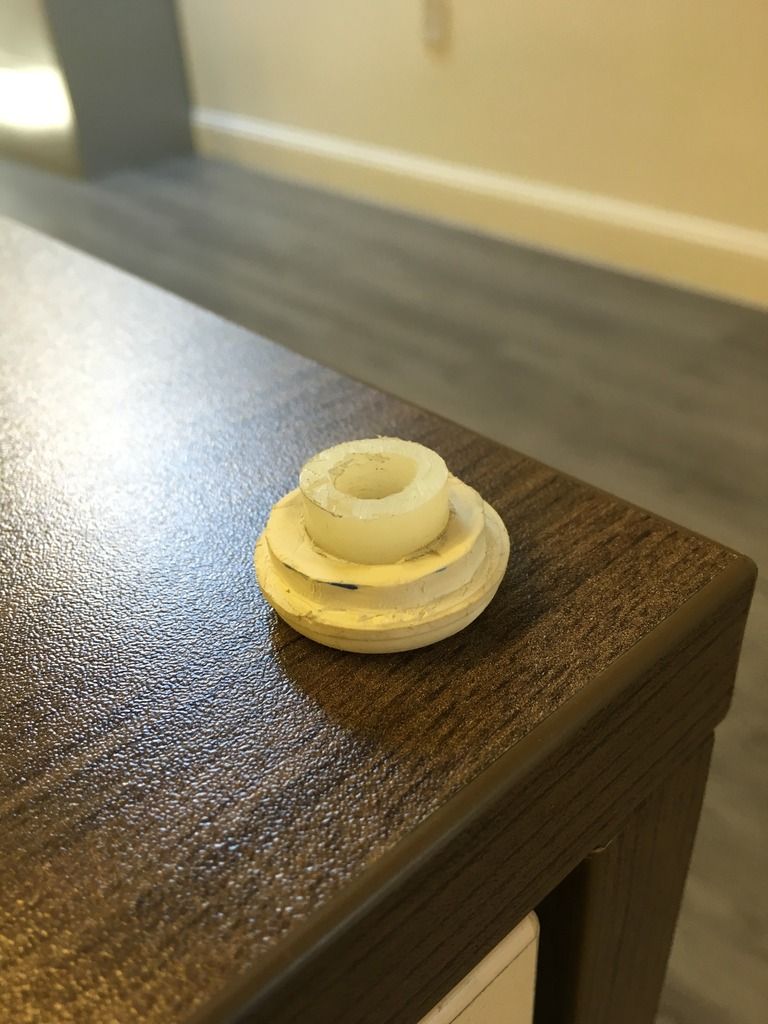
The ID of these are the 5/8" and the OD is slightly bigger that the hole in the bracket. After sanding 2 of the down to create the "halves" i ended up with the bushings. i then took this Nylon Spacer

http://www.homedepot.com/p/Everbilt-1-4-in-x-5-8-i n-x-3-8-in-Nylon-Spacer-815078/204276563

And used that as the "core". Since the OD of the spacer is the exact fit for the ID of the rubber bushing then all i had to do was open up the hole to fit the mounting bolt. I know they are not perfect but i think this might work. Obviously i have t put some miles on it and see how the heat is going to affect it. The way i see it is I have about $10-$20 into this whole project so i dont have much to lose. Anyway, here is how the bushing is arranged.
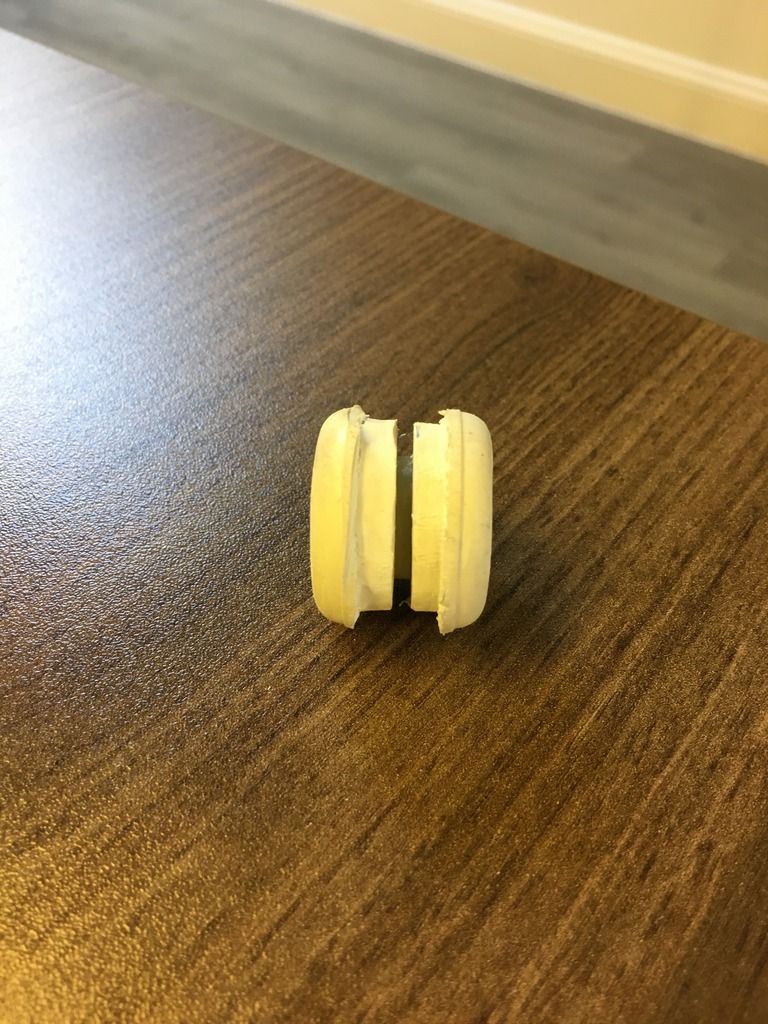

In the bottom pic you can see the Nylon "core" that fit snugly into the rubber bushing. Like i said, time will tell how this holds up.
Top of pagePrevious messageNext messageBottom of page Link to this message

Ralph
Posted on Wednesday, August 24, 2016 - 12:52 am:   Edit Post Delete Post View Post/Check IP Print Post    Move Post (Custodian/Admin Only) Ban Poster IP (Custodian/Admin only)

You may find that you need more of a lip on the shoe to stop the clamp from sliding off.
Top of pagePrevious messageNext messageBottom of page Link to this message

Reepicheep
Posted on Wednesday, August 24, 2016 - 07:52 am:   Edit Post Delete Post View Post/Check IP Print Post    Move Post (Custodian/Admin Only) Ban Poster IP (Custodian/Admin only)

Or just put a couple of nylon washers on either side of the support over the bolt. You probably don't actually need the compressibility out there, where you want the flex is probably that inside bushing.
Top of pagePrevious messageNext messageBottom of page Link to this message

Mikethediabetic
Posted on Wednesday, August 24, 2016 - 08:35 am:   Edit Post Delete Post View Post/Check IP Print Post    Move Post (Custodian/Admin Only) Ban Poster IP (Custodian/Admin only)

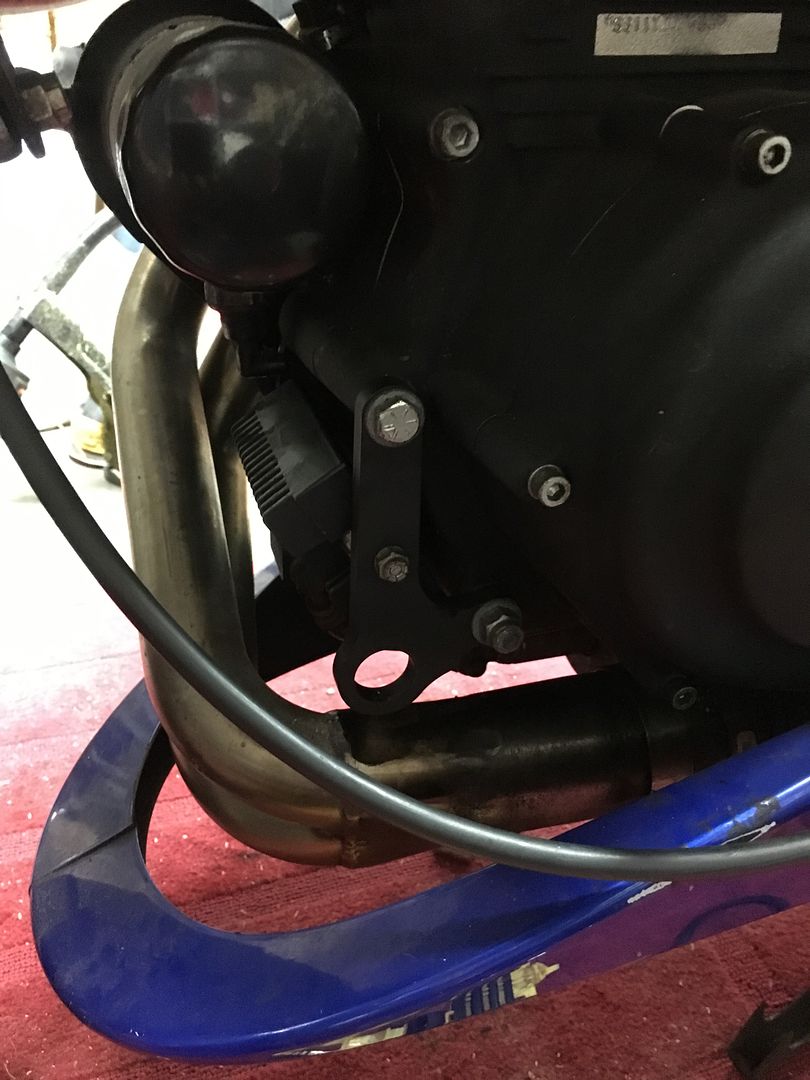
Here is the main bracket installed. And yes, i know my chin spoiler has seen better days.
Top of pagePrevious messageNext messageBottom of page Link to this message

Jim2
Posted on Wednesday, August 24, 2016 - 08:40 pm:   Edit Post Delete Post View Post/Check IP Print Post    Move Post (Custodian/Admin Only) Ban Poster IP (Custodian/Admin only)

@Mike. I love Hardware Store Engineering, and I sincerely mean that. I have to say that I'm amused at your combined mix of H/W store Engineering and High Tech Metal work..

I hope it works out.
Top of pagePrevious messageNext messageBottom of page Link to this message

Mikethediabetic
Posted on Thursday, August 25, 2016 - 09:09 am:   Edit Post Delete Post View Post/Check IP Print Post    Move Post (Custodian/Admin Only) Ban Poster IP (Custodian/Admin only)

Thanks Jim! I am a mechanical engineer so i have access to some pretty cool toys. I dont have any access to anything that has to do with rubber so thats where i have to get creative. I will be sure to check back in after i put some miles on it.
« Previous Next »

Add Your Message Here
Post:
Bold text Italics Underline Create a hyperlink Insert a clipart image

Username: Posting Information:
This is a private posting area. Only registered users and custodians may post messages here.
Password:
Options: Post as "Anonymous" (Valid reason required. Abusers will be exposed. If unsure, ask.)
Enable HTML code in message
Automatically activate URLs in message
Action:

Topics | Last Day | Tree View | Search | User List | Help/Instructions | Rules | Program Credits Administration