| Author | Message | ||
Jolly |
I've been going through my X1 recently after swapping the front forks to Romas from an S2 so that I could install true clip on bars that would fit the Eurocomponants front end (hated the clubmans that came with the kit). I decided before riding it that I would change the oil and could'nt get the top two bolts out of the primary cover due to the fact that they were blocked by the frame.. a little inspection and found both isolators completely torn in half.. ( that's another write up...) after replacing the Isolators I finally could get after a small oil leak that was caused by the last person to work on this bike re-using a gasket (at least it looked like it..)pretty straight forward job to drain the oil, pull the primary cover, clean the old torn and destroyed gasket from both faces (definitely looked like it was re-used) then button it up. right up to the point that I found that one of the clutch inspection bolt holes was partially stripped and would only take about two threads then it pulled those out far before the proper (per service manual) torque value was reached. two options, repair with heli-coil or repair with time-sert. I decided to go with a time-sert since the clutch cover comes off every time the primary oil is changed. the last guy to work on this bike really didnt do me any favors and I paid for the labor.. oddly enough the mechanic no longer works for the shop I used to go to... hmmmm  it's nice to finally have the time to do this stuff myself, though I find I'm correcting previous work by others.... | ||
Jolly |
The web page for Time-serts states that if you are inserting into a blind hole you take the depth of the hole and subtract .250 inches to allow the tap to go deep enough to fully cut threads and for the insert insertion tool to fully pass through the insert before bottoming out. in this case I had the following: depth of hole: .596 minus .250 = .446 inches the options for a 1/4 20 insert in that range is either an insert length of .380 or .500 the sales person I spoke with was very knowledgeable and said for this exact job he always sells a .500 insert as the smaller sizes don't quite need the full .250 pass through length. I went ahead and ordered the kit with the .380 and added a few .500 inserts just to be sure. here is what I was dealing with.. one stripped hole 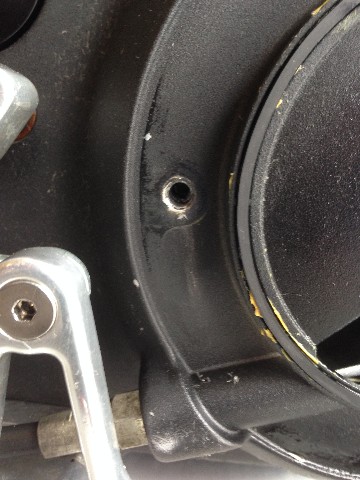 | ||
Jolly |
The kit comes with the following tools from left to right: drill bit tap counter bore tool (to cut the recess for the top of the insert to seat into) insert driver (the inserts are cold rolled at the last few threads and the driver seats them into the wall of the hole you tapped as it passes through) Inserts 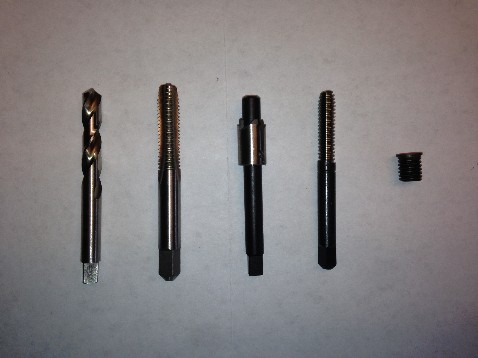 | ||
Jolly |
I decided to use the .380 insert as it was longer than the length of the screw that extends past the hole in the inspection cover, so the longer insert wouldn't really gain anything and there was my own concern about it not fully seating. 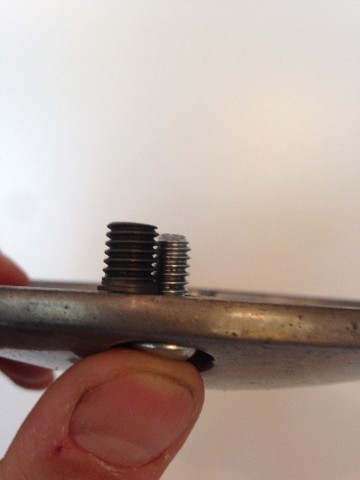 | ||
Jolly |
First step: mark the drill bit for depth, I used the exact depth of the hole. 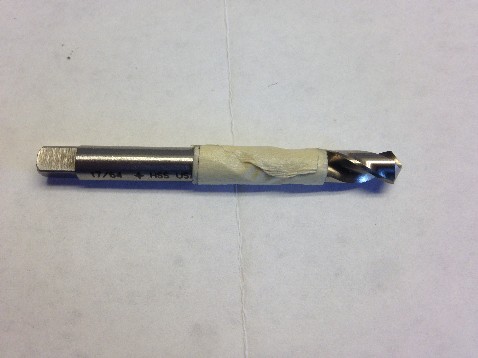 Then drill the hole 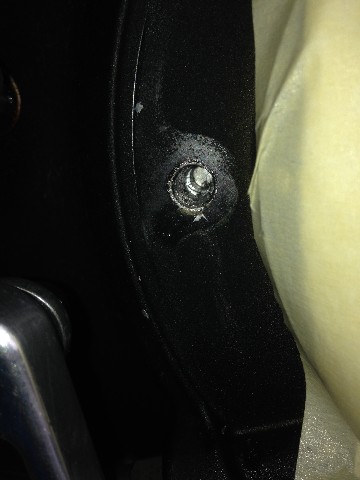 | ||
Jolly |
After you drill the hole you use the counter bore tool and drill till it hits the shoulder built into the cutter, this provides the relief for the top of the insert to seat into. Next step is to tap the hole, I marked the same depth on the tap so that I wouldn't bottom out the the tap and then damage the threads I just cut... 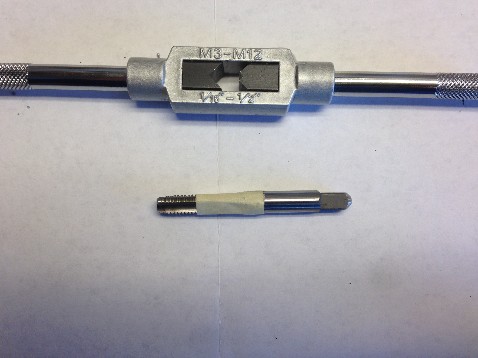 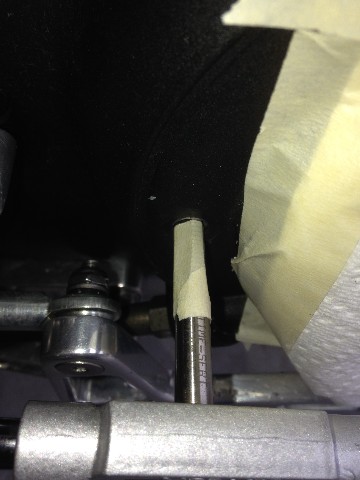 With the threads cut you can see the counter bore relief at the top for the insert shoulder to seat into 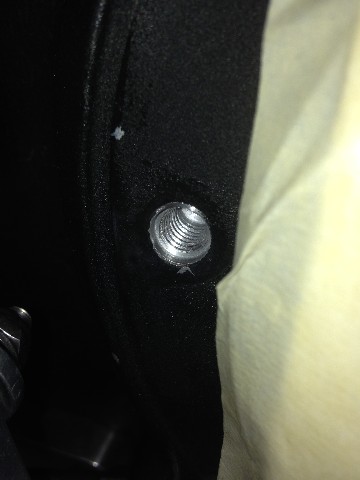 | ||
Jolly |
Next step is to install the insert. using a few drops of cutting oil for the insert tool then partially thread the insert onto the tool, then add a few drops of red loctite to the OUTER threads on the insert.  The tool threads the insert into the threads cut and when the insert bottoms out in the counter bore the tool drives the rest of the way through the insert fully seating the insert by driving through the cold rolled threads and the last section forcing them to bite into the metal of the hole you drilled and tapped. | ||
Jolly |
Insert installed and flush 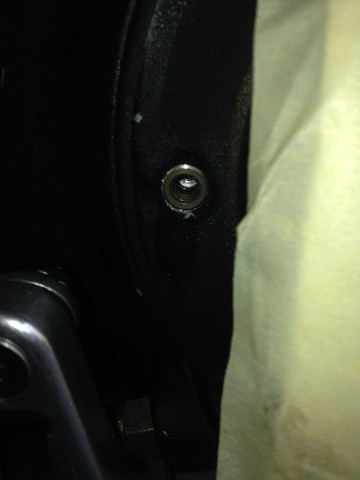 | ||
Jolly |
Job complete and no issues! Its really a basic job, but hopefully this helps if anyone else is having a similar issue and is curious about the best way to repair this. The entire job start to finish, even with taking these photos only took 23 minutes from getting the first tool out to taking the last photo. As a side note, I inspected the other three holes and two of them are border line, I have extra inserts and almost repaired them, but decided to try it first without repairing them, if they fail next time I change oil I'll have everything on hand... 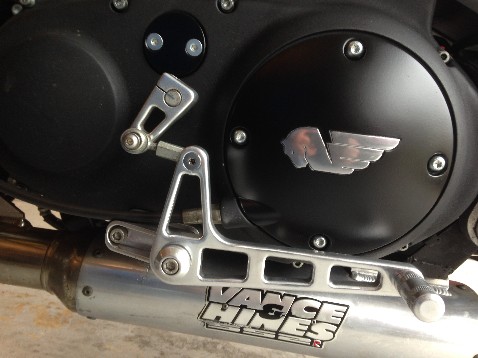 | ||
Littlebuggles |
Nice tutorial, thanks for posting this up. I've got some stripped threads I need to repair and have wondered how this kit works. Sweet derby cover too! | ||
Kalali |
Thanks for sharing. Excellent write up. Are these kits available from local hand tools stores like Sears, etc., or need to go the online route? | ||
Jolly |
I bought mine from here: both sets, this one for the derby cover and the larger one for the head repair for the motor mount. Seems to be a common issue, people that have worked on these things in "shops" over torquing stuff... http://www.mechanicstoolsandbits.com/time-sert-c-2 1.html?gclid=CPTT_ezH074CFeZaMgodRX4AWA And the web page for Time-serts: http://www.timesert.com Great product, very well made and the tools in the kit are very high quality | ||
Jayvee |
Good write-up. I'd like the link to that clutch cover!  | ||
Reepicheep |
The TimeSert is by far the best way to do that, and that fix looks (and should work) fantastically! I did this with a heli-coil on my M2. Not nearly as nice a fix, and not nearly as durable, but a lot cheaper and it worked fine for the next 25k miles until I sold the bike. Just another option. I wish those TimeSert's weren't so expensive, I need one to fix a friends SV-650 we used a heli-coil in that constantly drips, and another one for a tuber front brake caliper I'm going to repair for a friend. Both of those applications scream for a TimeSert. | ||
Jolly |
Reepicheep - PM sent, if all you need is a 1/4 20 I think I can help you out. I do recommend buying the tools for future needs but if its just a one time repair I can loan you the tools. check your email. | ||
Bluzm2 |
I munged a couple of clutch cover holes over the years, I just used heli-coils, I've never had a problem with any of them. Probably done it on at least 4-5 bikes. Not all mine. No issues. TimeSerts are really nice but not always necessary. Especially for a low torque bolt like the clutch cover. | ||
Buellistic |
"OLD SCHOOL RULE" is low side of torque specifications with metal screws/bolts into aluminum !!! Always a BAR TYPE TORQUE WRENCH ... |