| Author |
Message |
    
Reepicheep
| | Posted on Wednesday, October 03, 2012 - 09:08 am: | 


|
Nice! Never thought to check if off the shelf abs would fit inner seal and outer lip. Very cool.
So that's just an off the shelf section of 1.5" pipes, and the corresponding off the shelf end cap for it? Very slick... |
Littlebuggles
| | Posted on Wednesday, October 03, 2012 - 09:41 am: |
|
Yup, off the shelf from the plumbing section. I used my harbor freight plastic miter box and saw to make it a square(ish) cut from the 2' section of ABS pipe.
Your compliments are appreciated Reep! |
Littlebuggles
| | Posted on Thursday, October 04, 2012 - 12:32 pm: |
|
Popped the seal back out last night after making a seal puller tool out of a cheap standard screwdriver, bent the tip over (at a 90 degree angle) and filed the sharp edges and corners off as described by someone here in the KV for removing the shift shaft seal. Wish I'd seen that thread before, oh well.
Pushed the spacer in and drove the seal back in since it looked okay, wiped it all off and started reassembly. Need to clean up the inside of the primary cover and finish the job this morning.
I my beam style torque wrench only reads up to 150 ft/lbs so I tightened to that, then snugged further with a 3' breaker bar. Interestingly, the nut securing the clutch just stopped turning at 75 ft/lbs and would nut snug any further, felt like it just locked up. Weird.
Anyway, I'm going to finish reassembly and hopefully take it for a spin this afternoon and check out how my new clutch behaves. |
Blackm2
| | Posted on Thursday, October 04, 2012 - 02:07 pm: |
|
I don't know Little, myself i would have put a new seal in there. Wouldn't want to take the chance of having to do it again. In that link I posted earlier on, if you can make out the writing on that instruction sheet that comes with the tool, it says that you have to install the spacer with the seal. I believe the tool with the spacer in helps control the depth.
Hope it works fine for you. On that note also, I found a guy who will do the tool for about 30 bucks. So far 15 people want one, you interested? |
Littlebuggles
| | Posted on Thursday, October 04, 2012 - 02:53 pm: |
|
Dave, I just can't spend any more money on this project right now.
Regarding the spacer, with the seal out it pushes easily into the seal, and it will sit where you put it, from the marks on it and if memory serves correctly it goes all the way in. From the pictures posted of the tool on the other thread I don't see how the tool would set the spacer depth, if I'm wrong I'll have to beg to borrow from you or one of the other tool purchasers.
I'm comfortable with reusing the seal as it didn't require any where near the force to remove it as the old one did. It was not deformed or torn up so I will take my chances.
While I'd like to buy the tool, in case I have to do this again in the future, I don't really have the money for extra expenses, so I'm going to have to settle for what I've done at this point. If the new clutch and shifter pawl adjustment don't relieve my shifting/slipping on acceleration from 1st to 2nd I'm going to have to send the tranny off for service and that's going to cost a lot more than I have right now. I still need to sort my XB's fueling problem, with this bike at least put together so I can move it I can get the XB up on the stands and get to working on it.
If I can ride until the snow falls I can save a lot of gas money over driving my truck and make the pending expenses easier. |
Bigslug
| | Posted on Thursday, October 04, 2012 - 04:52 pm: |
|
LB,
The tool sets the depth by bottoming out on the spacer. If the seal gets in too deep, the crank bearing chews it up, too shallow and it doesn't seal. That being said, there is no reason that your set up cannot properly set the depth, you just have keep an eye on it when you are installing the seal.
Mike |
Blackm2
| | Posted on Thursday, October 04, 2012 - 07:55 pm: |
|
No worries Little, if it doesn't work out a few of us are gonna have the tool now. |
Littlebuggles
| | Posted on Thursday, October 04, 2012 - 07:56 pm: |
|
So what does the spacer bottom out on? |
Jramsey
| | Posted on Thursday, October 04, 2012 - 08:37 pm: |
|
Mike,(Littlebuggles) I think the oem/Harley seal install tool is used with the crank/stator spacer in place, the spacer is the "stop" so to speak.
I made my own tool and just eyeballed it to set depth.
Here's the thread with a pic of the seal tool I made.
http://www.badweatherbikers.com/buell/messages/476 23/625436.html
(Message edited by Jramsey on October 04, 2012) |
Bluzm2
| | Posted on Friday, October 05, 2012 - 12:33 am: |
|
James, you are correct. The OEM installer bottoms out on the spacer.
Buggles, the spacer bottoms on the inner bearing race.
Installing with the OEM tool is a breeze, takes all of 30 seconds. Fool proof. |
Reepicheep
| | Posted on Friday, October 05, 2012 - 07:59 am: |
|
If it's a case where you shift into second gear and get on the gas, then a second or so after you have released the clutch you get a big thump / whack, its probably not the shift pawl, it's probably worn dogs. The 2nd gear pair would need to be replaced. |
Littlebuggles
| | Posted on Tuesday, October 16, 2012 - 06:37 am: |
|
So I installed the seal, the spacer bottoms on the crank or bearing as Brad wrote. The tool seemed to work fine, depth on the new seal looked good, i have a couple pics to post up later for yal.
Reassembled, on reassembly the rear shock remote reservoir began a random leak after tapping it with a socket wrench when tightening the exhaust manifold clamp...replaced the shock with the Works unit I've had waiting patiently for the time the Showa decided to fail... poured a little Seafoam in the tank since the bike had been sitting a while... so then the bike failed to start.
Verified I have spark then pulled the carb. Time, heat, and my ham fisted method of removing the fuel line proved the plastic elbow had become brittle. Fortunately I have a brass fuel supply elbow I thought looked neat some years ago, but never installed. That will hopefully install with a careful reading of the instructions again.
The float bowl had a nice glaze inside and weird crystaline haze floating in the fuel as well. I've cleaned the thing out, removed jets and cleaned them individually and put in new gaskets. Once I've got the new elbow in hopefully I can get the bike down to the shop for an inspection and a test run prior to the DMV for registration.
I'll update as to whether I experience any problems with my seal or seal installation.
Reep, thanks for the input. It doesn't slam or bang into gear, just kind of slips if I goose the throttle. The clutch hub was notched up a bit so I surmised the plates were hanging up and not engaging properly. When I flipped it over the last few plates refused to drop out. I used a dental pick to pull those loose. Hopefully those issues are now resolved as well. This bike has needed some attention for a while. |
Reepicheep
| | Posted on Tuesday, October 16, 2012 - 09:13 am: |
|
Could be the clutch plates. If it starts showing up in just one gear then it is likely the tranny. If it is in every gear it could be the clutch.
As for the carb, welcome to the world of modern fuels.  They seem designed to foul carbs. They seem designed to foul carbs. |
Littlebuggles
| | Posted on Sunday, October 21, 2012 - 11:49 pm: |
|
Done, got the carb in late last night, I was going to put the stock bread box with a K&N filter and short velocity stack from A.S.B. on since the fall weather is coming on, but felt the current breather is easier to get off if I need to make carb adjustments. Once it's verified to be dialed in I'll swap to the stock cover.
Fueled the bike up with some fresh gas tonight and she started up once there was gas in the carb. My daughter cheered when it started, she's a pretty great kid!
Gonna take it out for a shake down ride tomorrow and to the dealership Tuesday for inspection. They pulled the brass ferrule out for me so I could put the new elbow in, no charge. Coolness huh?!?
Now I can start working on my XB again, we'll see if I can get that thing going before winter sets in, peace out brothers
 |
89rs1200
| | Posted on Monday, July 30, 2018 - 11:56 am: |
|
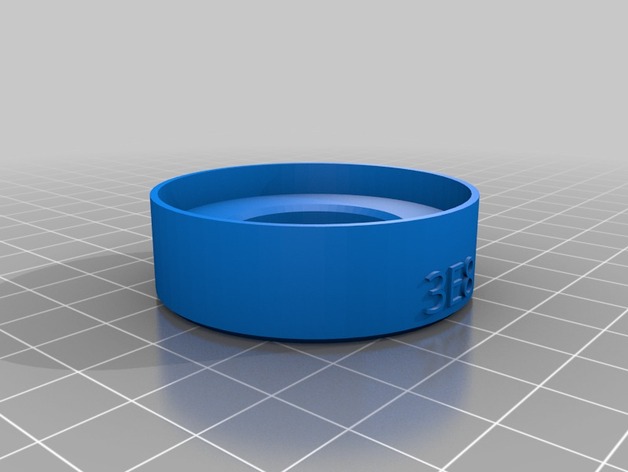
I found and purchased the 3D printed HD45206 / HD-45206 / 45206 Sprocket Shaft Seal Installer.
* Only $16 for two, and yes, it is plastic, but it worked great without deforming!
* The taller tool is just the right height as no spacer washers were needed.
* It worked! Could not have properly installed the seal without the tool. The seal sits out a bit from flush with the opening. I would have seated the seal too deep without this tool.
https://www.thingiverse.com/thing:1784320
This taller one will not need spacers as it is just tall enough to use the stock nut to press the seal in;
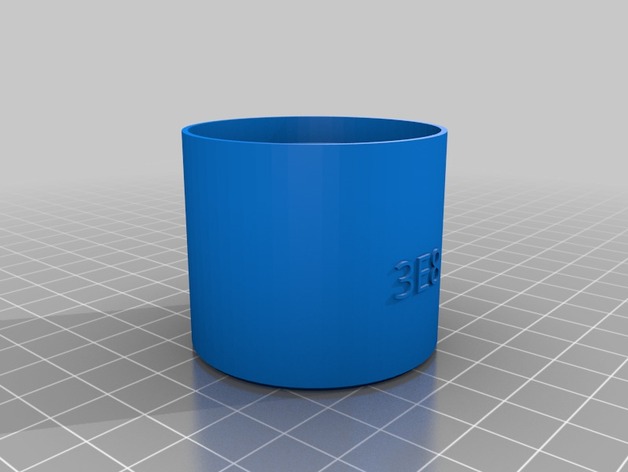
Copy of the Harley tool HD45206 / HD-45206 / 45206 Sprocket Shaft Seal Installer;
|
89rs1200
| | Posted on Sunday, October 15, 2023 - 02:01 pm: |
|
To complete the discussion as to how to get this part printed:
1) Download the file from the above link. I recommend printing the extended tool, (HD45206_ext.stl).
2) Go to this site to upload the file and select someone to print it;
https://www.treatstock.com/my/print-model3d |
|