G oog le BadWeB | Login/out | Topics | Search | Custodians | Register | Edit Profile


Buell Forum » Old School Buell » S2 Thunderbolt » Archive through May 19, 2010 » New Iso kit on my S2 « Previous Next »

Author Message
Top of pagePrevious messageNext messageBottom of page Link to this message

Spiderman
Posted on Wednesday, March 31, 2010 - 03:35 pm:   Edit Post Delete Post View Post/Check IP Print Post    Move Post (Custodian/Admin Only)

Mmmmm FUN!

Iso took about 2 hours but found an issue with the head light which I will post in a new thread...

Here is the old Iso


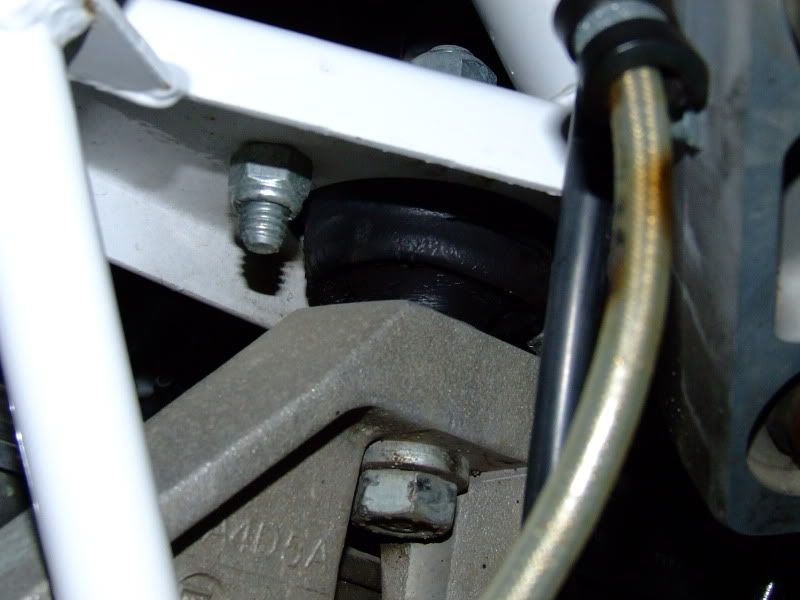
The new Iso mounts under the frame for Older bike with a un-notched frame, on top for a notched frame and gets rod of the D washer


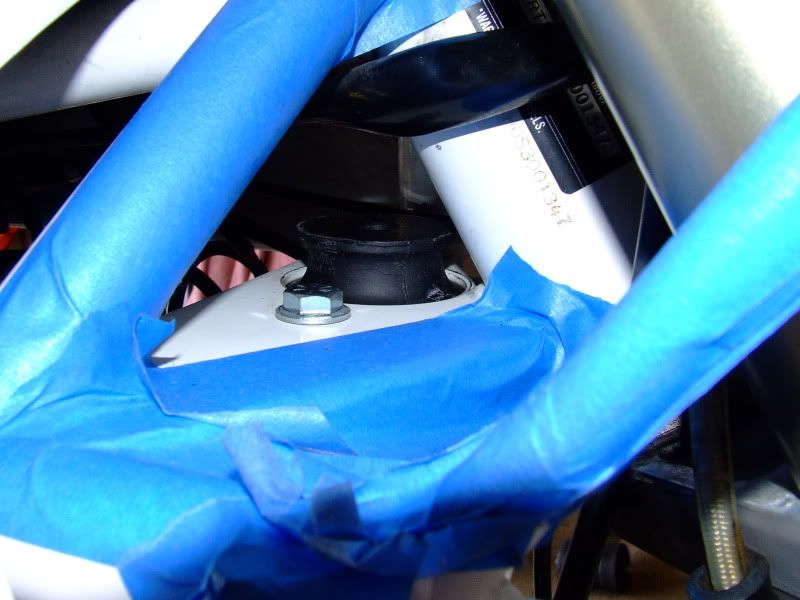
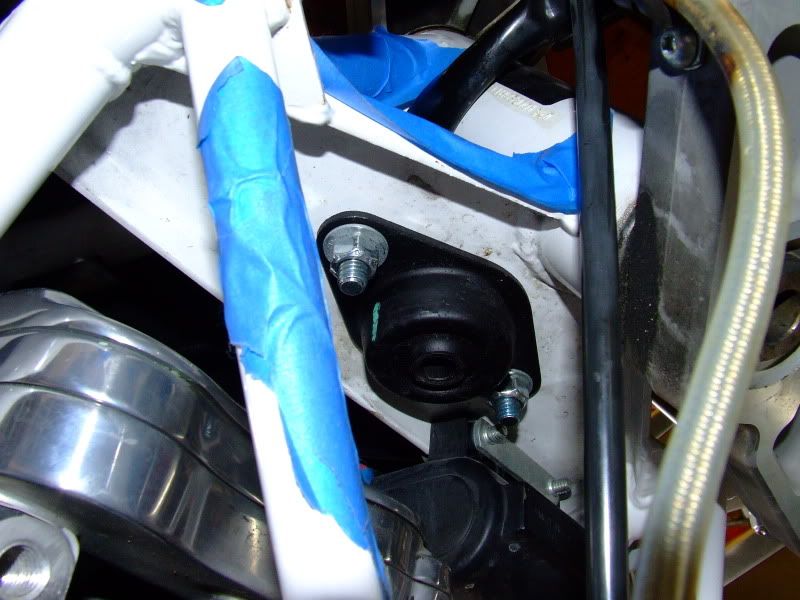
It is a bit of a pain to install without a second set of hands but can be done...


Rides like a champ and smooooth like butta!
Top of pagePrevious messageNext messageBottom of page Link to this message

Fahren
Posted on Wednesday, March 31, 2010 - 04:32 pm:   Edit Post Delete Post View Post/Check IP Print Post    Move Post (Custodian/Admin Only)

This is an under-described procedure in the service manual. As in, not a word (of course not for the updated part, but not even for the original one).

Basically, all I found was it being one of the steps in stripping the bike down for engine work; as in, "Remove front isolator bolt (6), nut (9), D-washer (8) and
washers (7)."

Can you do it just by taking off the fuel tank, or is there more dis-assembly required to get in there?

Am I missing something in the manual? (By the way, this will be for S1W, not for S2).

(Message edited by fahren on March 31, 2010)
Top of pagePrevious messageNext messageBottom of page Link to this message

Spiderman
Posted on Wednesday, March 31, 2010 - 04:44 pm:   Edit Post Delete Post View Post/Check IP Print Post    Move Post (Custodian/Admin Only)

HUH!?!?!

If you are asking how to RR the Iso then here you go.

1. Get bike up on rear stand

1.5 OPTIONAL You can remove your gas tank for better access to the iso.

2. Support the engine with a bottle jack or similar to support the engine weight. Just enough to take the weight off the mount.

3. Remove the main center bolt that connect the Isolator to the mount.

3.5 If you are installing the updated kit you will need to remove the motor mount that attaches to the front head

4. Remove the two side bolts that attach the Iso to the frame. And remove the Iso from the bike.

If you get the kit It will have instructions for assembly if you are putting a original in then assembly is the reverse...
Top of pagePrevious messageNext messageBottom of page Link to this message

Ztferrari
Posted on Wednesday, March 31, 2010 - 05:00 pm:   Edit Post Delete Post View Post/Check IP Print Post    Move Post (Custodian/Admin Only)

how does the stiffness compare to the old one?
Top of pagePrevious messageNext messageBottom of page Link to this message

Xlcrguy
Posted on Wednesday, March 31, 2010 - 05:21 pm:   Edit Post Delete Post View Post/Check IP Print Post    Move Post (Custodian/Admin Only)

My test mule buell (S2) is still rockin' with the new and definitely improved front isolator. Much smoother on the move. I believe it actually "dances" more at idle in neutral on the sidestand, but once underway, it transformed the thing into a silky smooth ride. Still has some level of low frequency vibes, but certainly not annoying. Do it, you'll not regret it.
Top of pagePrevious messageNext messageBottom of page Link to this message

Fahren
Posted on Wednesday, March 31, 2010 - 05:27 pm:   Edit Post Delete Post View Post/Check IP Print Post    Move Post (Custodian/Admin Only)

Thanks, Spidey. S1W gas tank is jumpin' like crazy at warm-up, and old (original 1998 vintage) iso is dry and crumbly feeling.
Top of pagePrevious messageNext messageBottom of page Link to this message

Bartimus
Posted on Wednesday, March 31, 2010 - 05:56 pm:   Edit Post Delete Post View Post/Check IP Print Post    Move Post (Custodian/Admin Only)

is that from HD? what was the part number?
I've been worried about buying any new Iso's since I heard they were harder, and breaking mounting bolts...
Top of pagePrevious messageNext messageBottom of page Link to this message

F_skinner
Posted on Wednesday, March 31, 2010 - 06:16 pm:   Edit Post Delete Post View Post/Check IP Print Post    Move Post (Custodian/Admin Only)

Is the new center bolt the same size?
Top of pagePrevious messageNext messageBottom of page Link to this message

F_skinner
Posted on Wednesday, March 31, 2010 - 06:18 pm:   Edit Post Delete Post View Post/Check IP Print Post    Move Post (Custodian/Admin Only)

Bart, here is the part number: L1501.8
Top of pagePrevious messageNext messageBottom of page Link to this message

Spiderman
Posted on Wednesday, March 31, 2010 - 07:47 pm:   Edit Post Delete Post View Post/Check IP Print Post    Move Post (Custodian/Admin Only)

No new bolt is smaller diameter...
Top of pagePrevious messageNext messageBottom of page Link to this message

Bluzm2
Posted on Wednesday, March 31, 2010 - 11:20 pm:   Edit Post Delete Post View Post/Check IP Print Post    Move Post (Custodian/Admin Only)

Spidey,
Why did you remove the motor mount?

Just curious..
Top of pagePrevious messageNext messageBottom of page Link to this message

Spiderman
Posted on Thursday, April 01, 2010 - 12:36 am:   Edit Post Delete Post View Post/Check IP Print Post    Move Post (Custodian/Admin Only)

I was told by XLCRguy that removal would make installing easier...
Top of pagePrevious messageNext messageBottom of page Link to this message

Ebutch
Posted on Friday, April 02, 2010 - 11:47 pm:   Edit Post Delete Post View Post/Check IP Print Post    Move Post (Custodian/Admin Only)

I found you can torque the two side bolts of iso. with iso mount out of the way.
« Previous Next »

Add Your Message Here
Post:
Bold text Italics Underline Create a hyperlink Insert a clipart image

Username: Posting Information:
This is a private posting area. Only registered users and custodians may post messages here.
Password:
Options: Post as "Anonymous" (Valid reason required. Abusers will be exposed. If unsure, ask.)
Enable HTML code in message
Automatically activate URLs in message
Action:

Topics | Last Day | Tree View | Search | User List | Help/Instructions | Rules | Program Credits Administration