| Author | Message | ||
Dhoffman45 |
I am no longer wondering why the right side of my iso mount broke. It was holding all the load due to the left bolt being broken. What has worked best for those of you that have had to remove broken mounting bolts. It is broken about two or three threads back in the head. thanks in advance. | ||
Guell |
dont use an ez out, it will snap in the head. Personally i would take it to a shop and have them remove it, and check for mounting surfaces to be square and true | ||
Gowindward |
Dave, My older brother was able to plug weld a washer to the broken bolt and the weld a nut to the washer. It took 5 tries before the bolt broke loose without breaking the welds. Best part was he did it with the head still on the motor and in the bike. He is AWESOME!!!! to say the least. Loren | ||
Dpg |
Save yourself some money and aggravation and bring the bike into a machine shop. I was able to get one bolt our with an expanding remover, but that was a crappy job with lots of cursing on my part  P I got the other side out after removing the head and having a machine shop do the work for $40. It was an automotive race shop. After picking up the head the tech guy said next time simply bring in the whole bike as he though he could have removed it without disassembling the engine. Now he tells me.... LOL! After the repair, keep an eye on that isolator and have a replacement in your tool box for the next time. P I got the other side out after removing the head and having a machine shop do the work for $40. It was an automotive race shop. After picking up the head the tech guy said next time simply bring in the whole bike as he though he could have removed it without disassembling the engine. Now he tells me.... LOL! After the repair, keep an eye on that isolator and have a replacement in your tool box for the next time. Safe ride, Gary in Oaktown CA | ||
Blackm2 |
I am on my third isolator in the span of 4000 miles. I didn't want have to deal with this particular hassle as well so I bought the NRHS billet mount and some fresh bolts from Al at American Sport Bike. Around 250 bucks. Good luck with the bolt.  | ||
13was13 |
Mine broke off level with the head. I would use a drilling jig to get a centered hole and a reverse drill. Plus a heating gun. If you're lucky the reverse drill and the heat will do the job. Otherwise you have to go on with a good extractor. The electric drill has to be short to be manageable between wheel/forks and cylinder. | ||
Oldog |
Remove the head send in to cyclerama have bolt extracted and as Guell says mounting points milled flat and true to each other, get the billet mount and new bolts from Al get a drag specialties iso, check the rear iso, according to Wes Brown, the rears failing can overload the front iso and may be a factor in the failures we see, I agree with that and that over time hot and cold cycles cause reduction in the clamping load (which prevents shear) I guess like rocker boxes the mount may be a rite of passage, you are a member of an elite club now I want to make a last comment, do not waste time and make more problems for your self skip the EZ out, they are not well suited for this task. | ||
Kalali |
This may sound like an overkill (or paranoia) but as a proactive measure, do you guys think it is a good idea to replace the bolts and put them in with anti-seize to make it easier to take out in case this happens in the future? | ||
Buellistic |
"i" would a REVISE FLUTE DRILL BIT !!! | ||
13was13 |
"put them in with anti-seize" No way, this is a critical permanent link. You have to put them in with red loctite and the correct procedure (see the recall sheet). There is an in depth discussion in this forum. I did mine accordingly, trying the extra stunt of extracting the broken left bolt through the hole of the mount. Did some 6000 miles -knock on wood- without further problems. . Loctite will loosen under heat. Look at the specs at their page. (BTW maybe too much heat at the head through too lean running can undo the loctite). | ||
Kalali |
I kind of knew anti-sieze was a bad idea as I was typing... How about replacing the bolts? I am just trying to find a way to "avoid" having to go through the agony of a broken mount bolt in addition to keeping the front and rear ISOs in good shape. | ||
13was13 |
From what I have learnt in this forum and from my own experience you should not replace the bolts as long as they are the original ones and there isn't anything visible and you know that no one has fiddled with them. Keep an eye on them, maybe mark them. Otherwise the whole set up hinges on the interplay of intact front and rear isolators, and the correct torque of the respective bolts. A preventive measure, taken by many, is the Stenzel strut. | ||
Kalali |
Thanks 13. | ||
Cobraman |
What is the "Stenzel strut"? Some kind of funky dance that should be done before each ride? But seriously, what is it? | ||
Jramsey |
It ties the front Iso to the center tie bar mount between the cylinder heads. | ||
Oldog |
What is the "Stenzel strut"? Some kind of funky dance that should be done before each ride?  The intent was to prevent a twisting moment as 13was13 said kali, follow the procedure locktite RED on bolts, lightly oil the hardened washers ( not contaminating the loctite ) tighten to 60 ft lbs, release and re-torque, do not disturb unless REPLACING the bolts, the key to the assemblage work is maintaining the Clamping forces on the parts, consider removing the bolts and replacing them every 30 to 40 K miles, } | ||
Kalali |
I will gladly replace the if they last 30k miles...I am at half that right now but I know my front ISO has a small rip underneath on the backside. Have the replacement all ready to go. Just waiting for the cold weather to set in. | ||
Xl1200r |
Where does this stand? My S3 has a broken bolt in the left head mount. I was just going to try an easy-out (if the dealer doesn't take care of it for me - just bought it used), but it seems that's not the way to go. Plug welding a washer on isn't really an option as the bolt is snapped off a few threads in - I don't think you could get a good weld on it. | ||
Jramsey |
That where a good welder comes in. Mine was snapped off 2 threads below flush, so I used a piece of 1/4" Keystock about 1" long and ground one end down to a 45 degree point then put the point vee side towards the bolt center and filled the gap across the bolt face by Tig welding. The residual heat from welding will more than likely break down the thread locker. I was able to turn mine out the first try with a pair of pliers. | ||
Xl1200r |
Jr - thanks for that idea - I didn't think of beveling down just the one side to give more clearance going in with the weld. I can weld, but I have a friend who would be much better suited for this task - helps that he does it for a living. | ||
Xl1200r |
For those that welded on the broken bolt to back it out - did you have any issues with the head warping and not being to keep a good seal on the gasket surface? | ||
Fullauto |
This has worked for me for the last few thousand miles. Time will tell. 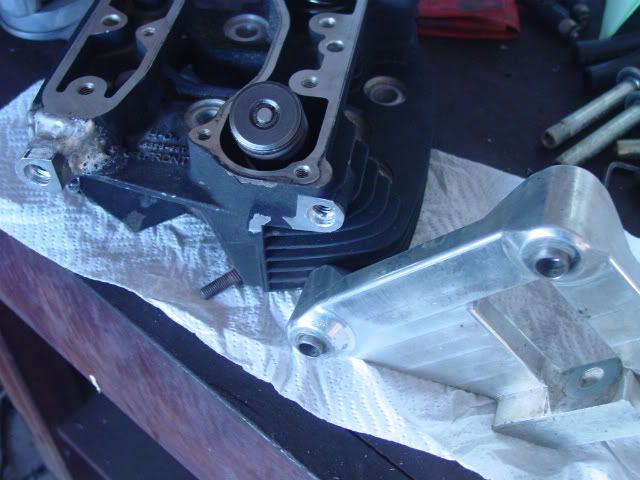 | ||
Skntpig |
Mine broke like ^^^. It looks like my welder didn't add as much material as yours. Mine has been fine for a few thousand miles too. Sorry no pics | ||
Lemonchili_x1 |
I did manage to get my broken bolt out with a screw extractor with the engine in place. It was broken about two threads in to the head. It can be done successfully if you take your time, do it step by step, and use a decent quality extractor, although success is not guaranteed. A few tips I was given by various other members of BadWeb: Use a cobalt drill bit, Use a spotter to watch from the side to make sure you're drilling it straight, Heat it up to loosen the loctite (I used a butane torch) Use a decent extractor - Al from American Sport Bike recommended one to me, but I can't remember the brand or type, Take your time! Having said that, if I had a mig or tig welder I'd probably do it that way  |