| Author | Message | ||
Kyrocket |
about these push rod tubes before I put them back in. After tinkling around with the new one piece bases and test fitting all associated parts it's looking like the tubes just sit on top of the gaskets with pressure from the heads. Is this correct? I'm not liking that engineering very much if that's the way it is. I'd much rather have something go around the base of the tube then have the base clamp down as sort of a compression fitting squeezing it together. After breaking out the old two piece bases it looks like the tubes just sat on the gaskets. Anyone, anyone? | ||
Kyrocket |
Oh, and it that's the case it really makes sense now that someone said to put a couple of drops of super glue in there to hold them in place. I think I'll use the 3M 800 industrial adhesive the book calls for to glue the cases back together. | ||
Wile_ecoyote |
Ya man, poor design. Silicone is your best friend........... | ||
Kyrocket |
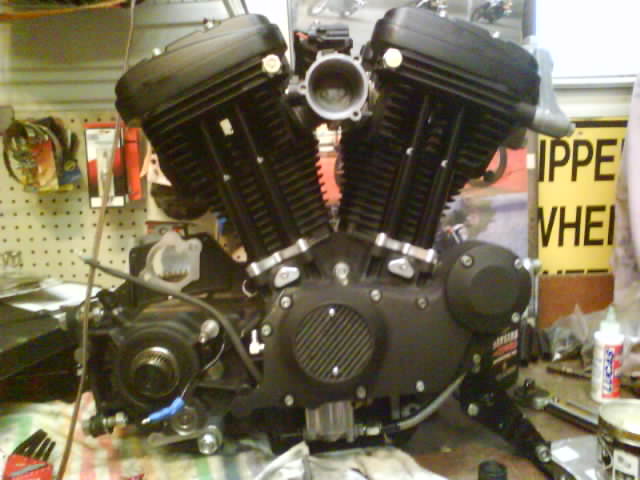
Obligatory pic of the cut down cam cover. 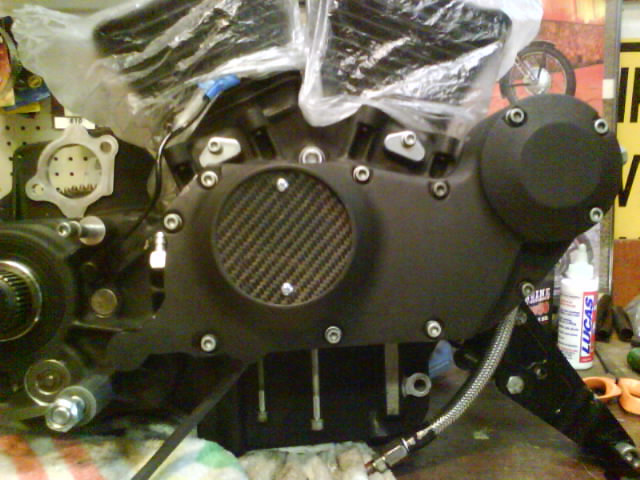 Notice Al's CF timing cover, fits extremely well. Now if I just had some black screws lying around instead of these silver ones. | ||
Buellistic |
Kyrocket: The Part Number for the self tapping screws, so you do not have to use pop rivets to hold the timing sensor covers on is PN 2662W from your local H-D Dealer ... | ||
Buellistic |
Kyrocket: Noticed that you did not UP-DATE(Product Improve) your TAPPET ANTI-ROTATION set up ??? The PN 18532-89 PIN,anti-rotation pins have been known to fail, "BUT" there was never a "RE-CALL" and only a few know about this problem ... You use 4 PN 18532-00A SCREW,anti-rotaion ... You have to drill the hole where the PIN,anti-rotation goes deeper into the other side and tap the hole with threads for the "NEW" SCREW,anti-rotation ... This UP-DATE does away with 4 PIN,anti-rotation PN 18532-89 and 2 PIN PLATE's PN 36804-89 ... WHY ???, well the -89 anti-rotation pins are not supported on the inside of the pin and only on the outside pin hole ... Having the SCREW/PIN which goes into other side is a stronger set-up ... MAY THE LONG LASTING BUELL BE WITH YOU !!! | ||
Preybird1 |
The bases and seals need to be glued together and slipped over the skinny part of the tube first and slowly slipped down and installed that way. If you are installing on black tubes they will not work! | ||
Kyrocket |
According to my calipers the one piece bases are .01 of an inch smaller than the originals making it a bear to seat the gaskets. Wonder if a big O ring and adhesive would work? How much oil pressure is there? | ||
Preybird1 |
I did what you had earlier stated and just crammed the tubes on with head pressure they failed in less than 1500 miles. Then i realized when i had the head off that i had slid the tubes out and remember the sound they made popping out. I did not read the FSM correctly on this part of removal and re-install of the components. That is how i know! I was more surprised they held any pressure at all. | ||
Kyrocket |
Well, after much praying, cursing, and cajoling I have one piece bases and push rod tubes installed. I will hold off on the process and items used but I will say my hands are killing me. Mostly the tips of my fingers trying to hold everything in place. Things are slowly coming together. Should be back in the bike by tomorrow evening. | ||
Pkforbes87 |
Kyrocket, PM me your mailing address and I'll send you a self tapping screw if you want it. I ended up with three, and don't need any of them. You just need 1 to tap the holes in the inner timing cover, then get w/e screws you want for the outer cover. The cam cover looks great! I wish I had mine cut down before putting it all back together, but the oil pump is pretty nasty looking so maybe it's good to keep that hidden! Where'd you get your assembly lube? I had to order mine online. Kind of a waste of money to pay for shipping on one small part like that.. I'll know better next time. (Message edited by pkforbes87 on May 17, 2009) | ||
Pkforbes87 |
Step 1: take pictures of chrome parts, billet parts, and new gaskets  Step 2: superglue gaskets into bases 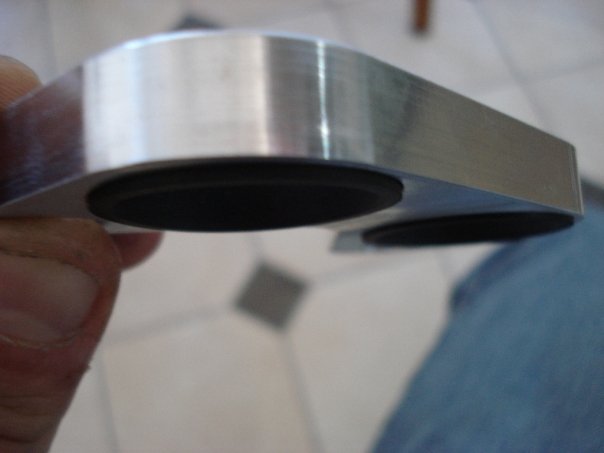 Step 3: lube the covers and gaskets to make them slide as easily as possible - I stuck the covers in the freezer but don't think it helped at all  Step 4: push base over the cover while cursing profusely. take an occasional break to throw something 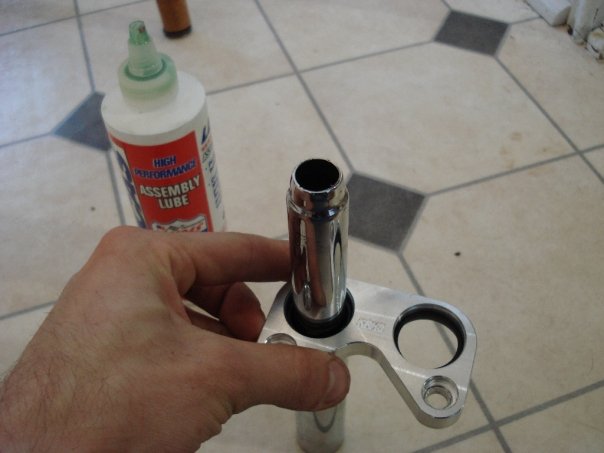 The End. 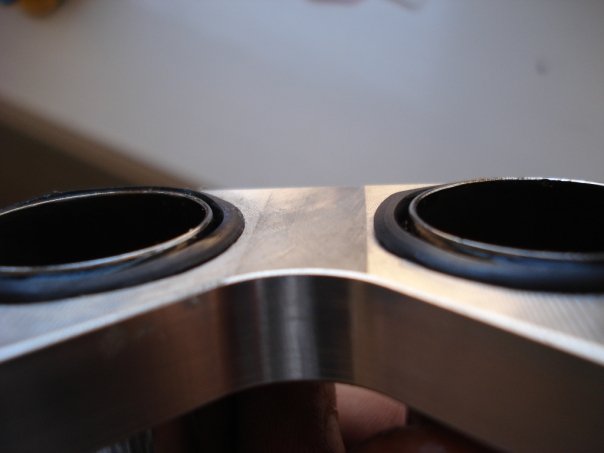 Pull the alignment dowels out of your case before you are ready to assembly everything.. it's kind of a pita to do it when the engine is already in the frame  | ||
Kyrocket |
Yup, things are going soooo much easier with the motor out of the bike. I'm assembling as much as possible before putting it back in tonight. I'll finish up all the little stuff tonight like rocker boxes, starter, oil pump and some wiring. | ||
Bluzm2 |
Prey, The billet bases DO work on the black tubes. I've installed them on 2 different motors with no problems. Use the most excellent procedure above (great job Phillip!) and it works perfect. Really! Brad | ||
Kyrocket |
 Here's a pic of where I am so far. I only have the boxes on top for picture purposes, I'll put them on when in the bike. Getting those tubes through the bases was a real job. I didn't at first believe it possible to get them through there but they will fit with enough lube but once the lube is all over your hands it's rather hard to pull the tubes through. Oh, well, just waiting on some muscle to get the motor off the bench and into the bike. | ||
Phelan |
Mike, that motor looks awesome!!! I wish my Priscilla's motor looked like that! Careful Phillip, those pictures might get deleted  . Anyone have the P/N for the black tubes and know what they cost? . Anyone have the P/N for the black tubes and know what they cost? (Message edited by Phelan on May 17, 2009) | ||
Wile_ecoyote |
Love the way it looks, hopefully it runs as well. Nice job bro. | ||
Pkforbes87 |
Phelan, you may be right. I should have slipped the receipt from American Sport Bike into the pic. Kyrocket, that engine looks freakin amazing! | ||
Kyrocket |
Don't know the part # Phelan, I bought them off of the bay for about $35 shipped. You might check with a sponsor to see if they can get them. I do know that they came out in 2002 but don't know it that was the only year or not. Every once in a while a set will come up on e-bay. Thanks for the compliments, I can't wait to get it into the bike and get the primary cover on complete with CF derby cover. There are a few more things I'd like to do to it but time and money aren't going to let that happen this time. I have several parts boxed up just waiting for some cash to get freed up and time to modify them. This thing HAS to get broken in before Friday. I'm still being optimistic as the Cortech saddle bags will be here tomorrow to match my tailbag. | ||
Phelan |
Yeah, I'be got the Carbon bug as well. I have American Sport Bike CF front and rear fenders, CF front sprocket cover, lower belt guard, and hamcam on the S2; hopefully a CF timing cover and derby cover are in my future. I also have a CF embossed leather iPhone cover and a custom tailored CF t-shirt! I use it mostly as an undershirt for my longsleeves when I'm dressed for show. I have a line on some more CF embossed leather that I'm going to use to have my Corbin seat recovered, make new fairing bags, a new belt, and maybe a few other things depending on how much material is left (there's a minimum order size). Eventually I'd like to commision a company to make some CF body panels for my S2, but that'll have to wait until I start makin' the big bucks again. Plus there are many other projects ahead in line... (Message edited by Phelan on May 17, 2009) | ||
Kyrocket |
How about some CF push rod tubes? I decided to go all black after owning my Z28. I swore off chrome after spending literally hours bent over under the hood with a toothbrush and a tube of Turtle Wax chrome polish. It looked good all shined up who sees under the hood anyways? The only time anyone saw it was at shows and it just wasn't worth it. I'd post a pic but it's too big, it was a fun car. | ||
Phelan |
Maybe... At one time I thought about trying to modify the one-piece XB tubes to fit. I even bought a pair of them from a BadWebber for $20 but never got 'em. Somehow that member disappeared. I ain't fretn' it, but it's be nice to have a pair to check out. I think I like the black tubes and billet bases better though. | ||
Kyrocket |
I think Spidey was doing a project with XB push rod tube covers. I sent him the ones that came with my XB rocker boxes. I wish I had taken the time and sat down and replaced all the fasteners on this bike with like fasteners and done away with having to switch from standard to metric and back and from torx to allen to hex. I believe these easy to work on engines could be made even easier. I want to design a car that anyone can work on with a 1/2" socket and a phillips screwdriver, I guess job security is engineered into the products. | ||
Phelan |
That's one reason I love my S2, is because everything is Allen head or Phillips, save the torx headbolts. | ||
Kyrocket |
Well, another late night in the garage but I think everything is buttoned up. It will run tomorrow! Just a couple more oil lines to finish because I didn't have enough clamps and I have to go to the stealership tomorrow for fluids. I was tickled to say the least when the transmission clunked through all the gears and nothing fell out. Primary cover is back on, throttle cables adjusted, clutch adjusted, will check primary chain tomorrow but the rear wheel is aligned, tightened and belt slack set. Battery is also charged so hopefully tomorrow I can start the break in procedure. Oh, by the way, my Cortech saddle bags came in today. These things are huge when they are expanded out. Really look like quality stuff. | ||
Pkforbes87 |
Sounds awesome! It feels good to put those long hours in on something you love. | ||
Jmkybf |
Sweet looking motor. Did you have to repaint the cam cover after it was cut down? If so, what kind of prep and paint did you use? | ||
Kyrocket |
All I had to paint was the rear and bottom where it was cut. I just masked off the powder coat, cleaned it with alcohol and hit it with rattle can black. Hi-temp engine black of course. It looks pretty decent. |