| Author | Message | ||
Firedude |
OK all of you technical savvy people.... I'm sitting here thinking of putting an aftermarket intake on my 99 X-1 (actually while I was drooling over the catalogs in the bathroom...err library). Unless I'm wrong, the only difference between the forcewinder for the carb and the fuel injection is that there is a hole for the temp sensor bung, or something similar...and a hundred bucks. Now, 100 dollars is alot for a hole, albeit a hole that I'm not very confident that I could make without screwing it up! So here's my thought: The temp sensor is just that, a temp sensor. Why not extend the wires, wrap a little foam around it for good measure, and stick it up into the underseat storage? Really, what difference in temperature will there be anyway? I could save 100 dollars, and maybe clean up the install a little bit also. Think this would work?? Secondly, I just picked up a race ECM off of FleaBay (One of you guys are probably the one who kept out-bidding me). If I install it, have the TPS reset, will I also need to have it reset again after putting on a forcewinder? Right now I am using a gutted breadbox w/K&N and a supertrapp can. Thanks for all of the guidance. Wish some of you folks lived down here so that I had someone to ride with. -Matt | ||
Natexlh1000 |
The air temperature sensor has to be in the same air that is being sucked into the engine. The air under the seat is not going to be the same as the air outside. There is no mass airflow sensor on our bikes so the computer extapolates how much air is actually getting in the engine by sensing the air temp and throttle position. The mixture is further modified by the engine temp sensor in the rear head and the oxygen sensor in the rear exhaust header. In other words, if you put your air temp sensor somewhere random, your bike will run like crap. Let me re-suggest my previous suggestion: Get the carbed type of forcewinder Get a seperate breather setup http://www.jpcycles.com/productgroup.aspx?GID=3E77C63E-722D-4B20-B2D9-5994399FFB 7C Throw the forcewinder's standard breather in a river. (An ocean works ok too.) Stick the air temperature sensor in the hole where they wanted you to put the breather. The forcewinder for fuel injection comes with a stupid aluminum housing that covers the sensor but there is no way that it i mounted to the filter so the heavy aluminum housing rattles around. Also, the housing requires you to CUT and file away at the sensor plug o that it fits in their phoney cover. I regret using their aluminum thing. I have to cabletie it to the throttlebody to keep it from rattling loose. This is why I think that the forcewinder kit is overpriced. You have to hack your bike to make it fit. | ||
Oldog |
Fire dude as Nate suggests use the carb setup from Force Motor Products loose the FMP breathers unless you like to fish out broken bolts (ask me how I know  ) ) use banjos OR the XB vent setup (see KV) 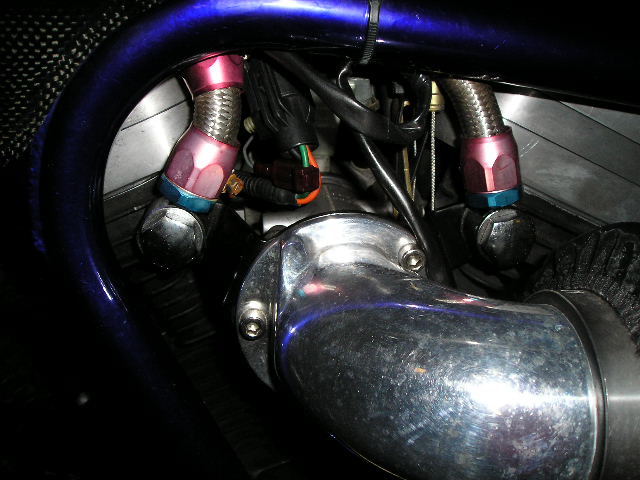 get a catch can and re plumb as you desire. try this for the sensor the filter has a water resistant sock place the sensor under the sock on the back side. 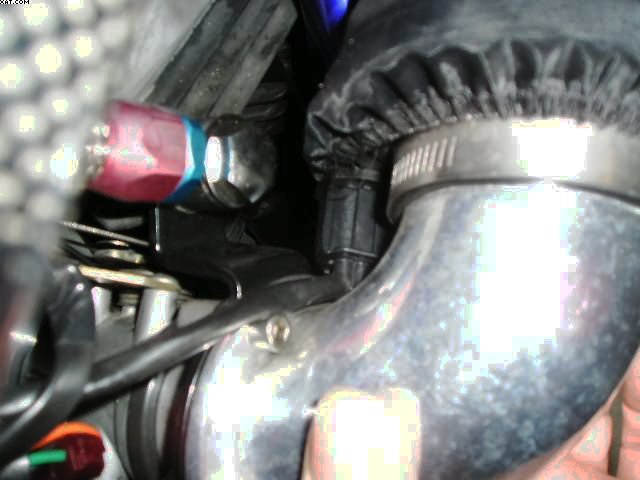 it is now being held in place by the elastic at that end of the sock ( yeah its being held on by a rubber band )  Plan tapping the holes in the throttle body out to 1/4 x 20 inch size for the FMP bolts.. so to review 1 force winder kit ala carb 1 banjo bolt set, Nates were 12$ mine were $50, Some hose, I used decorative hose and clamps, another $50 or so 1 catch can see American Sport Bike (optional) 1 filter for the breather Tps is only required if the throttle pot is moved in realtion to the butterfly so you wont have to have the TP reset when installing the FW unless you remove the Throttle body and mess with the tps you must set zero for an ECM change though, from the porch Oldog. | ||
Djkaplan |
For a little over $100 you can get brand new XB rocker covers and PCV valves and do away with the breather bolts and visible breather hoses entirely. It's a very easy conversion, uses less gaskets, looks much cleaner, and you get less spooge. | ||
Fun2none |
Firedude - I had the exact same thought when I was shopping for a Forcewinder on my X1. The extra $100 for fancy breather kit and air filter in the XR2 kit was just not worth it to me. So I bought a standard Forcewinder XR kit (carb) and drilled a 3/4" hole next to the air inlet. I used the grommet from original snorkel. It seems to work fine and looks ok. See the picture below. 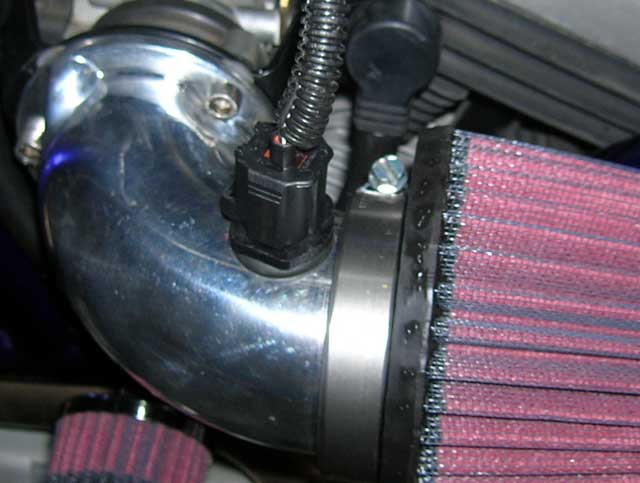 My next project is to rework the conspicuous breather. | ||
Oldog |
Fun: $100 for fancy breather kit and air filter in the XR2 kit was just not worth it to me. I agree with you on the aluminum plumbing stuff, btw you can get the over sized XR2 filter as a separate item and stick the IAT in the filter if desired. what about dirt and water leakage into the inlet? that is under slight vacuum the original install is in side of the still air box What are You using for a breather is it the black thing behind the elbow? why no sock?. It seems to work fine and looks ok. I intend no offense, but I disagree with you cosmetically that big black plastic thing is just plain ugly. but you did a nice job of installing it as it was originally in the suitcase | ||
Oldog |
 filter  no knob on top As Nate indicated the air temp is measured behind the inlet when moving you will get a fair picutre and it is easy to get to with no worries about the groumet leting aluminum oxie nasties get in | ||
Firedude |
Well, I think that I have solved my problems...either that or I opened up another can of worms. I picked up a factory Carbon Fiber Ham Cam still in the box off of Ebay for $150. Should have no problems mounting the IAT into the back as others have done and still get a clean install. Felt like it was a good price, and I believe even comes with a crude breather kit for getting me started. The carbon fiber should look pretty nice with the CF tank fillets that I ordered. Now all I have to do is wait for the race ECM and my additional diffuser discs to arrive in the mail so that I can install and have the TPS reset. Thanks everyone! Matt | ||
Djkaplan |
"I intend no offense, but I disagree with you cosmetically that big black plastic thing is just plain ugly." I think it looks OK. Function wins over form for some people. It looks like Fun has the breather hoses exiting downward, not upward, following the conventional wisdom of working with gravity, instead of against it. I always disliked those fake AN fitting covers. | ||
Oldog |
In theroy if the breathers exit up the oil "should" return to the head. the covers dont weather well, that is for sure. But they look better than hose clamps and black tape. Dont think that you can use AN fittings on the banjos, dont need em any where else oh btw I looked at the Fun method,EXCEPT on the inside. functional and hidden. not in the air to get hit, the elbow casting that I have does not have uniform walls. Fun most likely did some nice file work to get that good of a fit I was going to have an aluminum thread coupling welded in to the in side, and place the sensor in a compression fitting with a different connector body, the rubber band is the height if function it holds the rain sock and the IAT in place and does not penetrate the intake tract so there is no possibility of dirt ingress (one reason that the suitcase is gone) | ||
Bomber |
Old -- yer right, of course, the oil WILL flow back into the rocker covers is the lines go up -- no real place for it to go, though, once it's there -- lots of research done on this (see the KV, and the back issues of the late, lamented Battle2win, see also the diagram of the oil system in your Service Manual) -- | ||
Fun2none |
Oldog-- no offense taken. The 3/4" hole was bored into the FW elbow using a step drill not a file. Any internal burrs were removed with abrasive pad. Prior to installation, the intake was cleaned with compressed air and washed thoroughly to remove any abrasive particles. The grommet (seal) is the same one used on the stock intake. It has a very tight fit with IAT sensor. It is unlikely that it it leaking. I do agree that my current breather setup is an eye sore. But as mentioned previously, it is functional. | ||
Djkaplan |
My original breather and catch-can mod had my the hoses coming straight up. I'm not sure if I had oil puddling problems in the rocker boxes, but the hoses were coated inside with spooge. It still seemed to work OK, but it worked better when I ran the lines down. You can see the routing on my profile pic. I have XB rockers now. | ||
Oldog |
Still A nice job of the metal work, Fun what are you using to come out of the heads with in the photo what is that black fitting some kind of 90? its not a banjo is it? As far as boo-boos go heres my best one to date its messy and just plain ugly 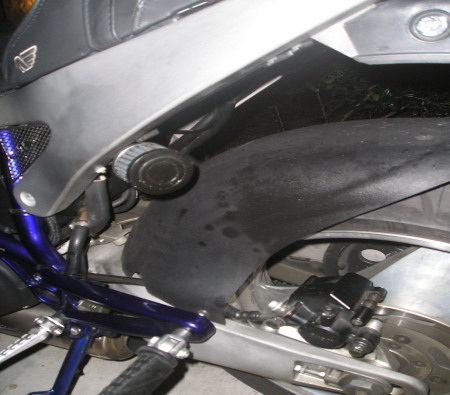 I am thinking about using a compressed air filter / trap or making a catch can from a 20.00$ aluminum flash light [ dont laugh ], I have a custom dash by Aaomy (one of our resident artisans) the proto type was cut out of a cutting board, about 6.00$ bloody slab of 6061 cost Aaron over $100.00 soo the proto type allowed checking for clearence issues and gave Aaron an opportunity to see if any shortcuts existed for the metal part.  | ||
Djkaplan |
Here's my $5 catch-can...  Installed on my M2... 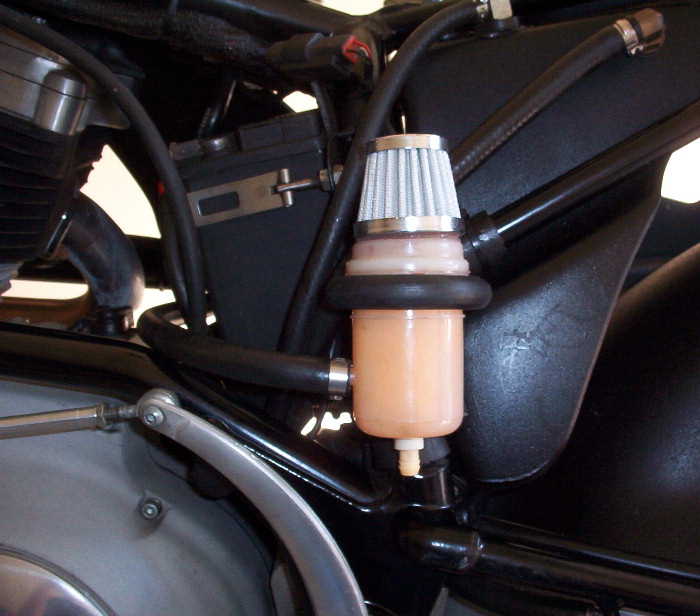 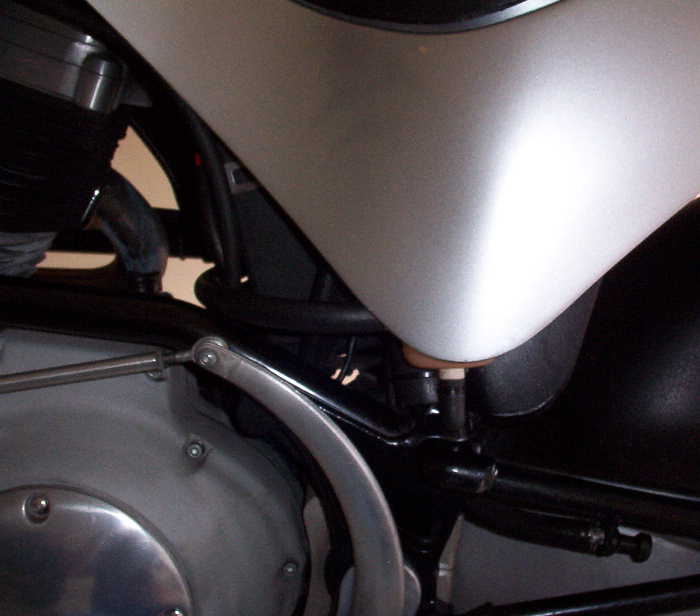 The hose routing is much shorter now with the XB rocker covers. | ||
Bomber |
Dawg -- using a lil maglite or somthing similar makes a great deal of sense! what a great idea! catch cans are fun projects here's one using a model airplace air filter as the spooge catcher  | ||
Oldog |
Hey Bomber Wanna hack up one or 2 in da lab? Ma thunkin.. 2 end caps, 1 body cut the body off just aft of the switch if the wall is heavy enough duplicate( with in reason ) the cap end threads and profile in the cut end after squaring it up, internal arrangement done on the drill press or at the bench by hand, sadly I have no lathe to do this with or I would have, sides the mag light is allready finished an its billit!. 2 for mebe 40$ some fittings from home cheapo or slowes if they can be found C cell versions. As they say in the south of France waller | ||
Bomber |
dawg -- I am certainly open to persuasion ;-} next versions will be a lil larger tho -- this one's too small to damp the chuffs from those big ol pistons . . . . . i'd be tempted to use as much of the flashight as possible -- wall thicknesses are on the thin side, i believe -- could be tough to thread em (for a ham fisted metal butcher like me -- piece of cake fo others, though ;-} ) |