| Author | Message | ||
Hoser  |
Not marketing / simply a display of hand crafted items , not for sale. Moderators , Thank's for starting an area for us to show our hobbies !! Something I was working on yesterday , Um ..... an explanation is necessary first . From time to time ,I purchase discontinued / obsolete items , usually to keep , sometimes to sell , several months ago I bought a bunch of carbon fibre , the S1 wears many such pieces . One part was packaged incorrectly , a fly screen for an X1 , was in a box with the part number tag showing a -96Y , meaning , it was supposed to contain a flyscreen for an S1 , I have seen a lot of this kind of thing , correct part numbers on boxes , only to find the contents are not as shown on the box . The hump for the tachometer is on the leftside on X1's , the rightside for an S1. I tried several times to sell it on ebay , without success ,I thought hey , why not ?? make a new dash to accomodate the X1 flyscreen to an S1 ??. Here is the unfinished / in progress part............... 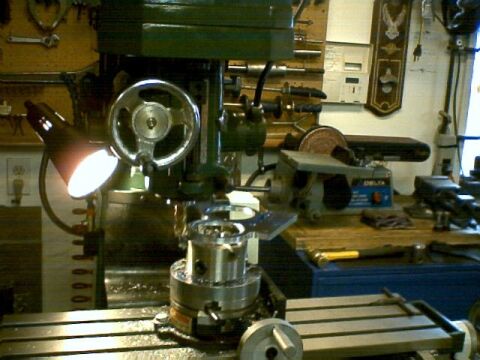 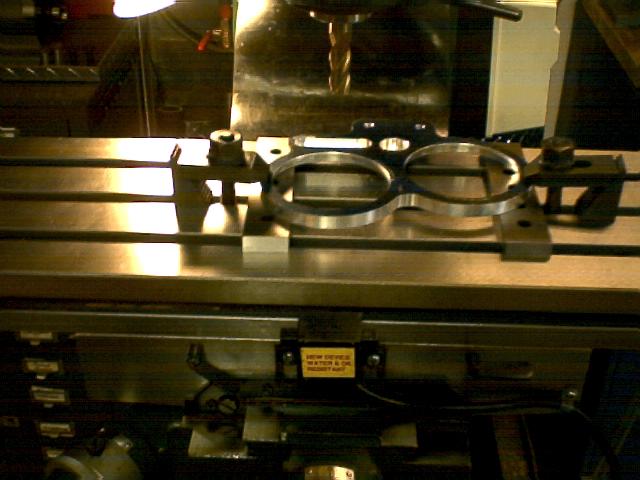 What's left to do is the sanding / hand blending / finishing work , with the intent of having a satin finish when completed, I will post pics when done. No , I won't be making anymore , so don't ask , want it ? , you gotta buy the whole bike , and it aint gonna be cheap.  After last weeks air cleaner episode , I have decided to let those who want one to figure it out themselves , not wanting to attract unnecessary attention or unwanted requests to build stuff for free , sorry , out of respect for the sponsors , moderators and Blake , it's gotta be that way . I'll report back periodically , with more stuff to show , hoping some of you will do the same. | ||
Reepicheep  |
Thanks for showing that Hoser, very neat stuff, I really hope you continue to share it. | ||
Hoser |
Thank's Bill , this is just the begining ......... Being the problem solving , creative type , I sometimes get assigned to projects that require an imaginitive , open mind , often starting with a clean sheet of paper or no paper at all , such as ................... 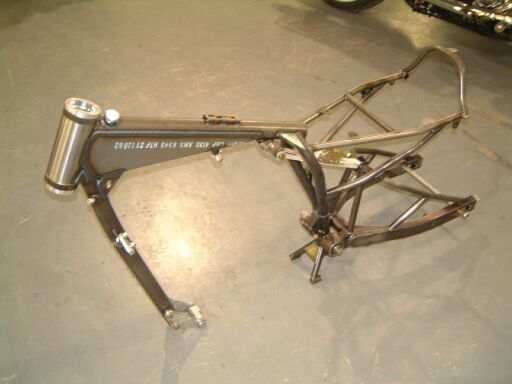 This started out as an idea at a staff meeting , after pounding a test mule blast on the dyno , trying cams , pipes , portwork , compression etc., Hey , how about we build a flat track / ice racer . We arranged to have a frame built , an engine was aquired and the fun began. A number of challenges arose , trying to build this bike with parts that are not generally available in a catalog , most having to be built by hand. Packaging and making things fit , a great deal of thought is required. I was unable to get a proper fit using a CV carb , not wanting to use it anyway and going with advise from Bill Werner , I arranged for a Kehien FCR41 flatslide to be used instead. 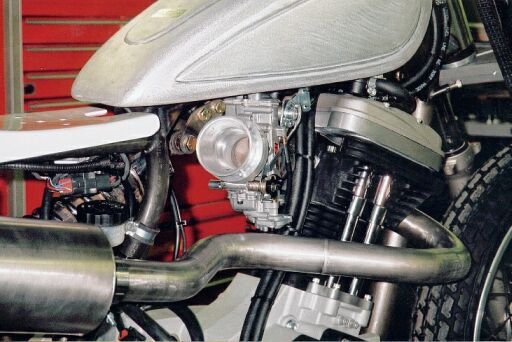 This choice required the fabrication of a manifold and a velocity stack so an air cleaner can be used.  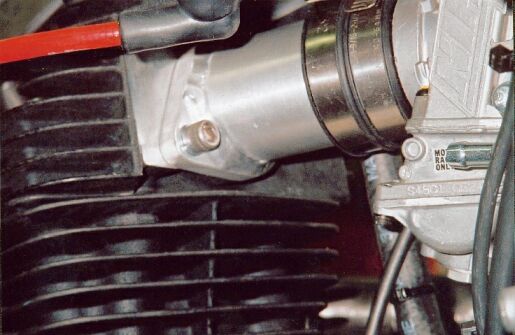 Store bought exhaust system for this bike ? , HA , not likely , I made my own. What's a guy to do with the silly pushrod tube on a blast after having decked the cylinder head and cylinder base for increased compression / enhanced squish ? , at the time there were no pushrod tube bases available to allow the use of telescopic pushrod tubes , the solution was to make one........... 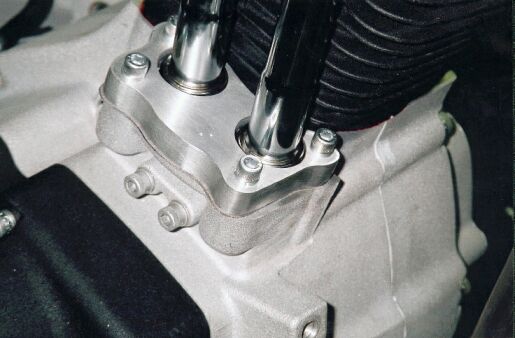 | ||
Hoser |
As with many of the other details on this bike , I was on my own to build a pair of wheels , wanting to stay with the classic flat track theme , and knowing no real flattrack bike uses a front brake , or rear brake if you look back into the 60's and earlier bikes , I decided on a spool type front wheel. Allowing for the addition of a front brake later I chose a standard HD front hub as used on sportsters and superglides with laced 19" wheels , the hub needed extensive machining , the center was machined , removing as much meat as necessary to lighten it and maintain strength. The bearing bores were machined to accept metric bearings as used on Buell front wheels , a bearing spacer was machined to use outer axle spacers that passed through the bearings and captured the inner sleeve , which was counter bored to accept the outer spacers. A Sun 19" rim and stainless spokes were then ordered from Buchanan's , the hub was laced and trued , then mounted on a standard Buell M2 fork , which had it's own mounting issues when it came time to fit that to the frame. 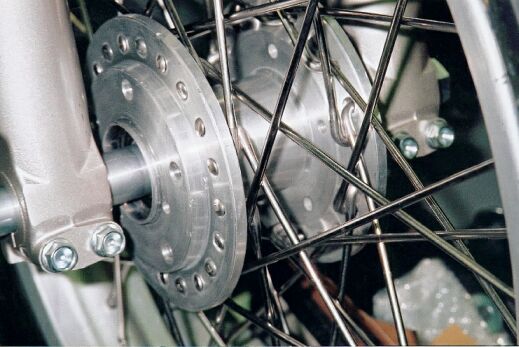 The rear wheel was even more challenging to make happen , I used a standard HD hub again , this time a hub that can be found on a Heritage Softail, I chose this hub so that readily available sprockets and brake rotors could be used , but it is never quite that easy , more machining was required on those parts to make it all work together . Again spacing became an issue , brakes , sprockets and rim to hub offset all had to be calculated on paper after taking several measurements. This wheel uses a Sun 18" rim and Buchanan's stainless spokes , lot's of dicking around to get the offset correct , in regards to the rim to hub relationship. Where's our rider gonna put his feet ??? , solved by making all of that stuff too , a stock buell rear master cylinder was used , a PM four piston caliper on a hand crafted mounting bracket finished off that end. 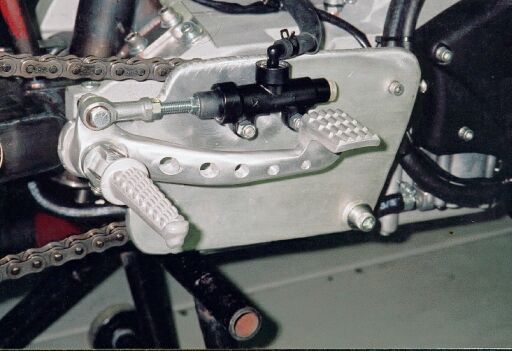 A Storz seat and fuel tank were aquired , a pair of dunlop dirt track tires mounted and the project was nearing completion. Sadly the boss has decided that he want's this bike as yet another of his personal trophies and want's it converted to street use , so it will never see competition. Since then I have added more parts to allow for street use but so far have not taken additional pics , nor completed the project . I will report back when I have done so. In the mean time , there are other things to show and discuss. Again I must remind everyone , I cannot sell or provide anyone withany of this stuff , we can only discuss "how to do it" (Message edited by hoser on December 08, 2004) | ||
Hoser |
More than once I have wondered what Erik was thinking when the S1 was designed , specifically the battery ???. It seemed like the entire motorcycle was designed around that strange battery , you know , the battery that was discontinued , then replaced by a kit that uses a Blast / Vrod , XB battery , and includes an array af bracketry to make it fit ?. I decided against dropping the $300.00 Cdn on said kit and making my own , using 1/8" sheet stock aluminum and some aluminum angle to achieve a similar result , lighter , cleaner and allowing the voltage regulator to be mounted out front as with later models where it can benefit from being exposed to cool air flow. Here's what it looks like and can be easily duplicated using common hand tools. 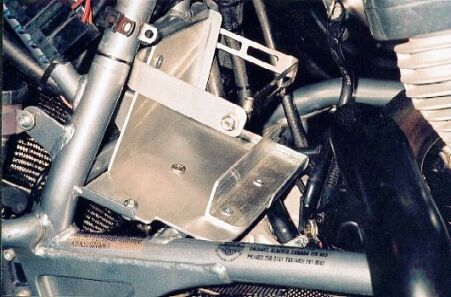 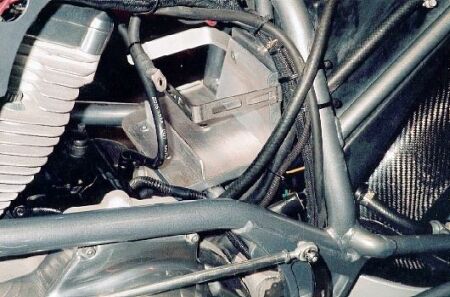 (Message edited by hoser on December 08, 2004) | ||
Hoser |
S1 owners , I have observed whining here about cracked tail light brackets , and have also noticed a number of enquiries about licence plate relocation brackets. Why not combine the two ? , I did , this one requires an investment in specialty welding equipment and a great deal of time and patience with a band saw , a jewlers saw as well as a second set of hands when it comes time to fit and weld all the pieces together , the pictures tell the rest of the story....................... 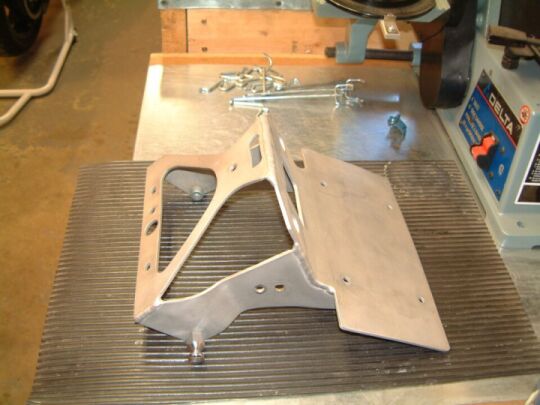 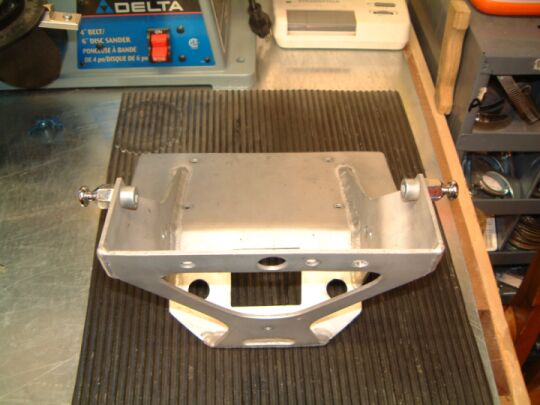 | ||
Hoser |
Here's an old pic from around 1985 , at the time I was a proud owner of an XR1000 , I also had an XR750 at the time , this pic shows me scheming / figuring out how to put the plastic from the 750 on the street bike. 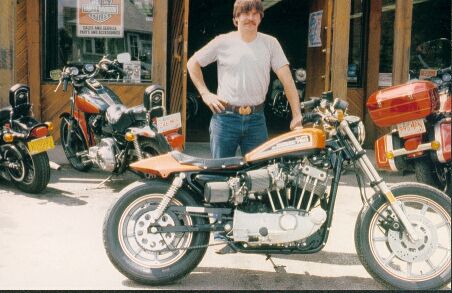 | ||
Odie  |
Hoser, you have a great shop and do some very nice work. Now let's see you fix the cases on your avatar!! Ha! Later, Odie | ||
Bomber  |
very cool stuff, indeed -- seems this thread was sorely needed! keep it coming, gents, please! | ||
Reepicheep |
Next time I have the camera out, I will post some pictures of my tools Bomber, and create a subthread just for us: "Functional Abominations"  | ||
Road_thing  |
Hoser, beautiful work on the Blast tracker! I have a question about the front hub. You wrote: "The bearing bores were machined to accept metric bearings as used on Buell front wheels , a bearing spacer was machined to use outer axle spacers that passed through the bearings and captured the inner sleeve , which was counter bored to accept the outer spacers." Does that mean that the front axle is completely covered between the fork legs by the inner and outer bearing spacers, and that the ID of the inner races is in contact with the OD of the bearing spacers rather than the axle? It seems to me that you'd have to have very tight clearances to keep the wheel running true. Or maybe I just didn't comprehend what you wrote, I can be pretty thick sometimes! Thanks! rt | ||
Bomber |
ROFLMAO! my new digicam (thanks, insurance company!) will be here soon! I'll do the same! | ||
Road_thing |
Bomber has seen pictures (and even an actual example) of my air-powered steam engines! They might well belong in the category of functional abominations. rt | ||
Bomber |
absofreakinlutely, brer thang! post em! | ||
Dsergison  |
this is SOO much better than working! | ||
Hoser |
Odie : I might make a mailbox out of them , that engine is a whole different discussion , it's not mine , and I have been silent about the whole deal .Believe it or not when the bike arrived the engine ran , the front rod had poked holes in the front / rear of the cases , the front piston was jambed up in the cylinder with the snapped off rod still attached , the rear cylinder still ran . The owner brought it in for an "engine noise" to be checked out , even started it up for us to listen to it. It's fixed now , pretty much "new everything". Funny how mechanic / tech types can find humour in this kind of carnage , the guffawing was deafening while the crowd was gathered around listening to this now single cylinder engine clanking . I have digital proof on file for the non believers , the engine did run . Thing : Thank's If you have serviced the front wheel bearings on a tube frame Buell , you have observed what I described ,it's the way Buell makes em. I had to make all that stuff cuz of the hub I chose in an effort to reduce build cost , keep with the classic flattrack look. I probably should have typed a less confusing description. Later I'll take some pic's of tools n' stuff , that is going on right now. That Blasttracker is an " on going " project still not completed , it was something I worked on at the dealership in the off season , this year I got a ten week layoff in return for my years loyalty , so if any progress is to be made it would have to come here , most of the hand made stuff was done here at home anyway , it had to be that way due to the state of things in their "machine shop". | ||
Hoser |
Here's a tool that could be built fairly easily , out of scrap angle / channel , it's similar to what was used on the assembly line at the factory. Handy when installing / removing an engine in a tube frame bike or doing swingarm bearing service. 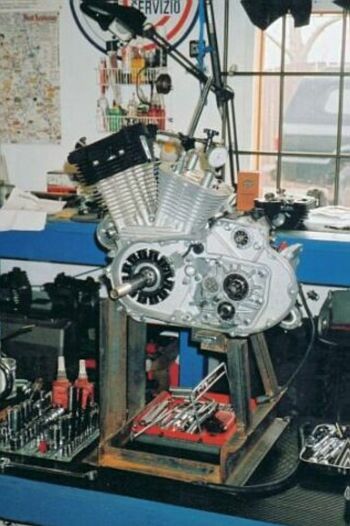 | ||
Hoser |
I'm gonna find a better pic of that engine support shown above , for now , here's that dash I'm workin on , nearing completion ( see the begining of this thread ). 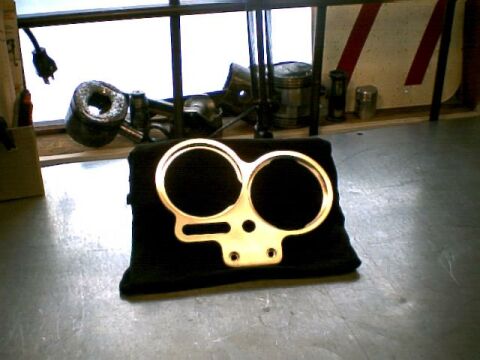 kinda a mirror image of the stock dash , so's I can use an X1 carbon fly screen, 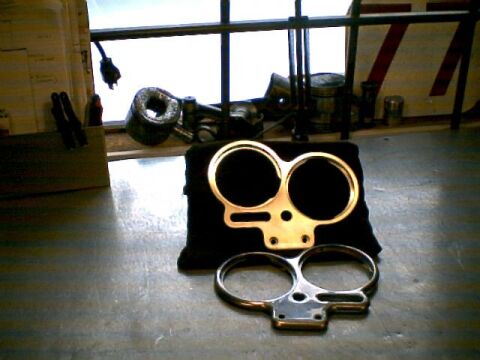 | ||
Hoser |
Pay no attention to that junk in the background , it's part of my "wall of shame display" , to be discussed later , each and every piece has it's own unique story. A few weeks ago , I had mentioned I made tools occasionally , also made some suggestions as to where to source some of the specialty tools needed for wheel bearing service n' stuff like that. Here's a few pic's of hand made tooling , used to service a variety of bearings , bushings , valve seats , valve guides , crankshafts & main bearings , transmissions , seals , there are a couple of store bought items shown too , like the wheel bearing drivers available from Motion Pro. 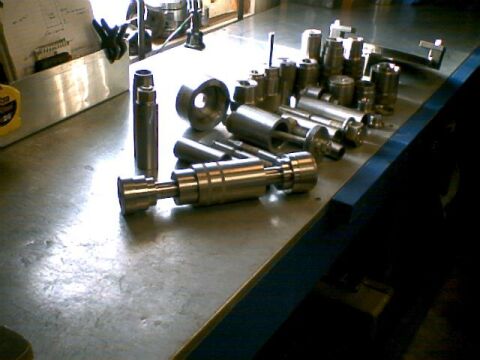 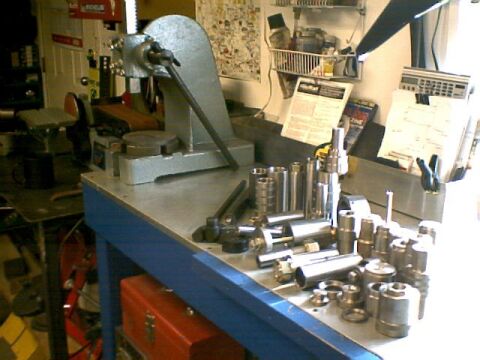 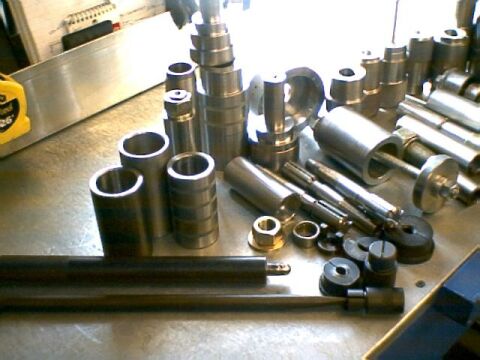 | ||
Hoser |
Some times , when building custom bikes , fitting differnt wheel / sprocket / rotor combinations and such , a means to hold sprockets and rotors for machining is required , often to accomodate the use of earlier parts on to late wheels , where larger bearings and hubs are used , a lot of aftermarket wheels do not "bolt on" right out of the box. These fixtures are used as faceplates for holding sprockets / rotors for machining internal bores. 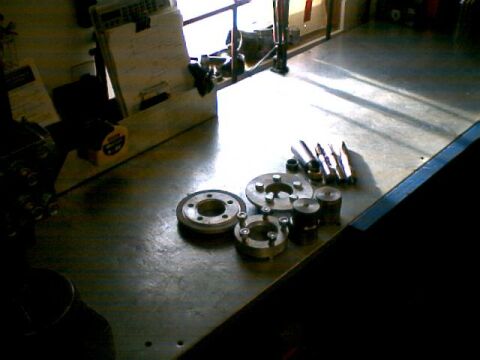 A good selection of machine tool accessories makes all this possible. 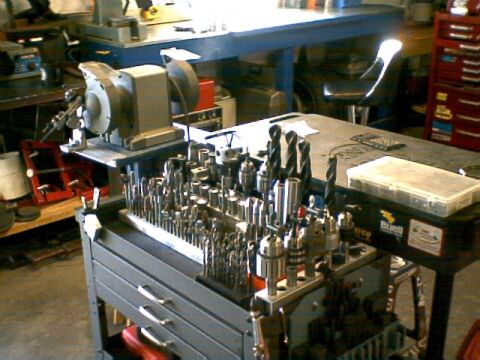 | ||
Road_thing |
"A good selection of machine tool accessories..." Yes, and the surface of the sun is kind of warm... That puts my little toys to shame... 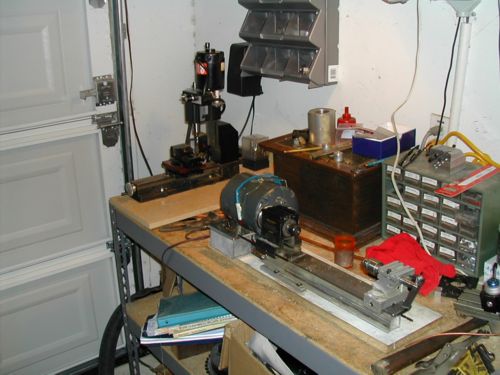 I sent this one to Bomber...  These are still under "improvement" in my garage: 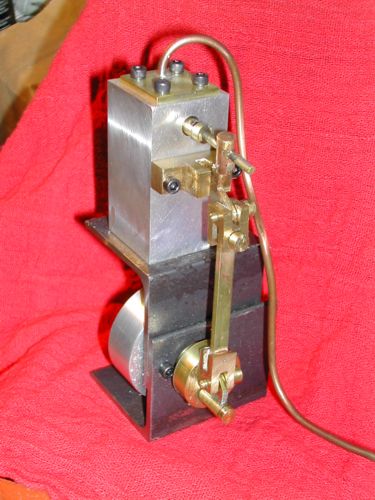  They're all "steam" engines, although I run 'em on compressed air. The last two are 1/2" bore X 3/4" stroke. The brass one I sent to Bomber was smaller, maybe 1/4" X 3/8". They'll run on just a little bit of air, maybe 8 or 10 psi, once you get 'em started. Don't ask me why I build 'em, I just hate sitting in front of the TV at night, so I escape to the garage and make swarf. rt | ||
Hoser |
RT : Cool !! , the mini mill / minilathe , looks like Taig equipment ?? , There's a dealer not far from me . An impressive assortment of tooling is offered for those . Did you design these steam engines ? are they kits ? plans that are then turned into what we see here? . An ambitious fella , if he had a couple of years to spare , might want to build one of these ....... http://dynamotive.netfirms.com/merlin/index.htm I'm not a big Tv fan either , having watched some people become slaves to the boob tube , I do have a Tube in the shop , choosing music / radio most of the time as it's less of a distraction. | ||
Road_thing |
Thanks, Hoser, the lathe is Taig, mill is Sherline. The motors were built from raw stock, I started with plans off the web, then improvised to match the designs to the tooling and materials I have available in my (meager) shop. That Merlin would indeed be an ambitious project! I think I need to hone my skills (get it? hone? jeez, I kill me...) before I take on a project like that! rt | ||
Lornce  |
Hoser, Thanks for taking time to share some of your creative energy with us. Good on you, sir. Don't sweat your employers decision to lay you off this winter. You obviously have plenty of very marketable talents. Perhaps ten weeks respite from your normal "routine" will help you get a better idea of your possibilities AND your skills true worth. thanks again, Lornce | ||
Hoser |
Lornce : Thank's , I've had several job offers in recent weeks , still mulling it over , kinda procrastinating , or ....... will return to "that place" in mid january. Say , .... while I have your attention , could you direct me to the discussion you had participated in regarding spun wheel bearings in PM wheels , I have one  , a rear , rhs outer , looking for a one time permanent fix , problem #2 is the wheel will not fit in my lathe or the mill here , will have to out source. I seem to remember you having a clever suggestion offered as a repair. , a rear , rhs outer , looking for a one time permanent fix , problem #2 is the wheel will not fit in my lathe or the mill here , will have to out source. I seem to remember you having a clever suggestion offered as a repair. | ||
Lornce |
Not sure where that old thread on wheel bearing repair is. I just sleeved the wheel hub with a steel insert. Operating from memory here, I fit the sleeve with about 0.005" interference into the bored hub using dry ice and a press. I finish cut the sleeve's bore (after install in the hub) for 0.0005" interference with the bearing's outer dia. The sleeve is roughly 1/4 thick and I forget the alloy's details, but it's pretty hard (though likely unnecessarily so: ie. i'm sure mild steel would work fine in this app.) Brian Sparr, a Buell buddy of mine in Mississauga, (who has a killer whacked-out 88" S1) let me use the 12ft lathe in his mold making shop to do the work. I just wrapped brass shim around the hub on the rotor side and grabbed it directly with the chuck's jaws. FWIW, the bore was concentric to the hub to 0.0002". Thort that'd be close enough. Farming out the hub's boring shouldn't be that bad, especially if you supplied the sleeve and your desired finished sleeve I.D. Have a GREAT 10 week creative holiday! | ||
Odie |
You guys and your awesome toys are making me very jealous. I'm just trying to talk the boss into letting me buy a plasma cutter right now. I'm buying a Hobart 10K generator due to the hurricanes coming thru here all the time. What she doesn't know is that it is also a TIG/AC Stick welder to go along with my MIG!!! I'm sure I'll get busted eventually though. "Why are you running the generator all the time honey????" HA! Later, Odie | ||
Odie |
Hoser- HA! Too funny- "Let me start it up so you can hear the noise she's making!" Unreal....Odie | ||
Odie |
Road_thing, I have seen some Sherline mills on ebay and am thinking about getting one. I have a friend that is an engineer that uses them at work everyday and they churn stuff out constantly. He hooked me up with a great, free CAD/CAM program that will interface with the mill. Definitely lots of plans on the web too. Neat engines. Do you drive anything with them or use them other than making them? Later....Odie | ||
Road_thing |
Odie, the Sherline is a nice piece, very well made and precise. Mine is a lathe with the accessory milling column, so my X-Y travel is limited to about 3". If I were doing it over again, I'd make sure to get the mill base. But I'm very happy with it. I haven't tried to drive anything with those motors yet--I'm always amazed that they'll even run! rt |