| Author | Message | ||
Oldog |
Some days I think that my user name should be changed from OL-Dog to "Lucky-Dog" the original drive belt gave it up at 22K, while being seriously abused, about 200 yards from the "house" I recall reading some where that the X1 belt can be changed on the side of the road. Makes sense with the removable side plate and all. I decided to document it I thought an hour would be enough, (errrrrrrrrrrrrr wrong) I grabbed most of the requsite tools and beat feet for the treehouse. get a torks or allen to fit the ISO it must come off. 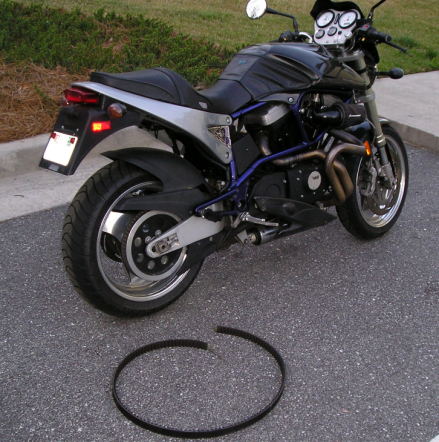 Its really straight forward with a couple of points. mark the iso / mountblock for re postiton, er and make sure that you have the correct wrench for the iso bolt. with the bike on the side stand. 1. remove all obstructions on the outside of the belt path, Except the side plate. 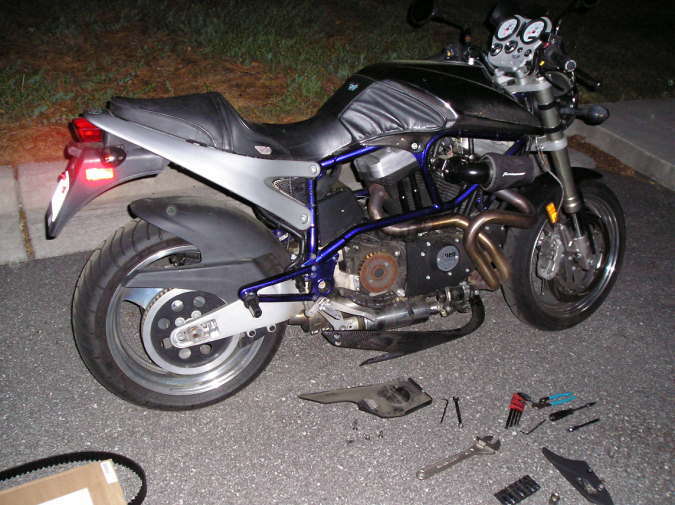 the 2 front hugger bolts are not visible but they have been removed.} 2. mark the iso / mount block line up loosen the Iso bolt I should have done this it would have saved me some serious grief. 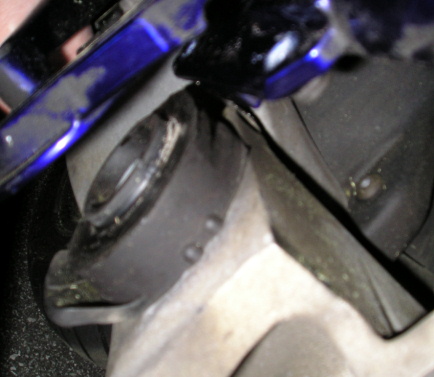 (Message edited by oldog on April 01, 2007) | ||
Oldog |
3. Remove the Side plate with the larger torks gently bend it slightly out and Remove the Isolator CAUTION I DID NOT REMOVE THE REAR MASTER CYLINDER HERE YOU ARE BENDING THE REAR BRAKE HARD LINE EASY DOES IT AND BEND ONLY A TINY LITTL BIT AS NEEDED 4. loosen the rear axle and move the rear wheel fully forward bolts and blocks do not have to come off. 4. Place the belt through the gap, teeth up, Minimal twisting of the belt this way. once in place flip it over and thread it on the pullies reverse of removal from here Iso, plate, gards, wheel line up, belt tension, and axle secure. ( Lafayette and Phoneman could probably have done it in half an hour. )  Notes I re used the plate bolts, the FSM says not to, I brakecleaned them and used blue locktite on all of the plate and the iso bolts. { loctite should not be used on well nuts } the rubber mount things. tools, wrenches for Axle, (12" , 15" crescent ) adjusters (1/2" x2 and 3/8") torks for hugger outside bolts, belt guide way T 25 I think chin faring, T30 I think 3/32 Allen wrench for chin faring bolts 1/8 Allen wrench for front cover 3/4" box end for the steady front nut Oh and what ever wrench fits the isolator Locktite rags and brakecleaner, and a new belt.. If you decide to do it at night a couple of flash lights are good, coffee, and a good nights sleep, Oh and make sure that you have the wrench for the isolator bolt  from the porch Ol-Dog. } (Message edited by oldog on April 01, 2007) (Message edited by oldog on April 01, 2007) |