| Author | Message | ||
Toona |
Greetings all, I have read countless threads on people wanting to know information on what's involved in doing the "S" to "R" tail swap (myself included). So here is my version of what I did. It may not be correct, but it looks good to me. I will preface this post with this information: I bought an entire (95% complete) "R" tail off the BadWeB. So I don't have all the individual part numbers. You will need to go to the Sponsors section and get them if you need them. I scored all the used parts for $250, WAY UNDER new retail prices. The only parts I bought new are the black plastics (fairing and passenger pillion cover). I still need a few fasteners/grommets etc. I will be pulling it back apart to clean/paint all the used parts before final re-assembly. So with that info in mind, HERE WE GO! first things first, get the "S" tail off. 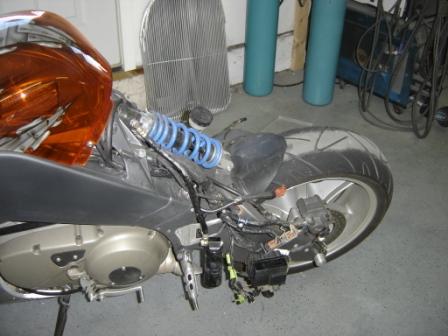 I pulled the seat, unbolted all the brackets, battery, etc and removed the entire "S" tail as a complete unit. It's a little tricky, but I didn't unplug anything other than rear light wires. All the fuse block/ECM/tilt sensor wires stayed connected. The only wire (other than rear turn/tail light)I had to unhook was for the rear brake light switch, it is an orange double wire coming up from the rear master cylinder. There is a disconnect on the harness for it-simple, no cutting required. | ||
Toona |
Next, I mounted the subframe, just using the top 5/16" bolts (one on each side), to hold in temporarily to the main frame. It will be on and off a few times, so all 4 bolts are not required yet. This allows you to pivot the subframe up for easier access under the tail to install the bolts that hold the undertail to the subframe. 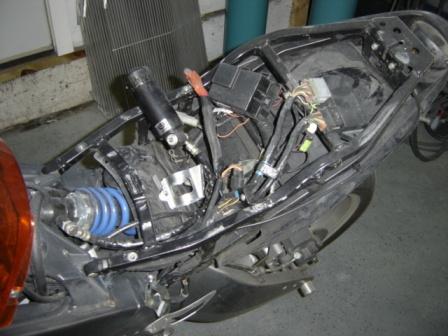 Once I had it "mounted", I laid all the wiring on top and wondered "where in the world is all this stuff going to go?" 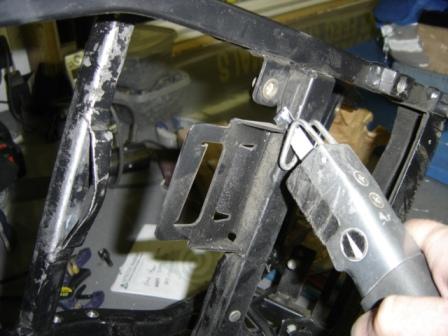 I think this bracket holds the shock reservoir on the Firebolt. It was in the way for my location of the fuse block, so I cut it off. To my surprise, the subframe is aluminum, not steel. So it cut off easily. I will be using the "S" shock reservoir mount later.  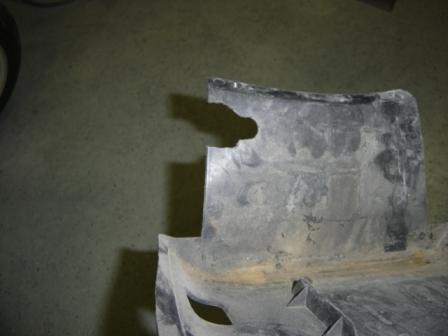 I notched the front of the plastic under tail for wire harness/battery cable/shock reservoir line clearance. I only cut the odd shaped "recess", the vertical edge is factory. I used a RotoZip to cut it, but you could file it off with a coarse round file. I will use a grommet here upon final assembly, nothing really moves here, but I don't want anything rubbing and causing future problems. 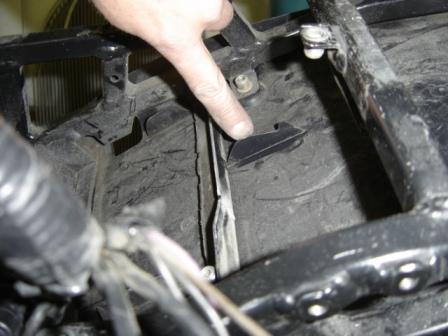 This little tab was sticking up where I wanted to mount the fuse block, so I cut it off with a utility knife. 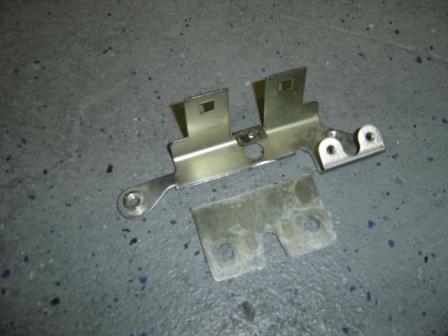 This is the fuse block mounting bracket from the "S". I cut the back tabs off because they were in the way and not needed. I will drill two 1/4" holes thru the undertail to bolt this in place and hold the fuse block. 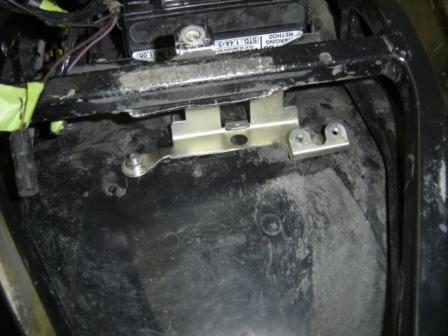 the "double hump" tab is for the tilt sensor, so you will be able to use the factory rubber mount for it as well. 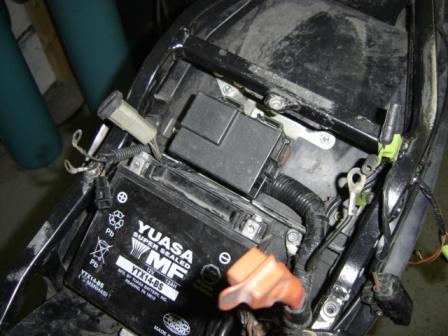 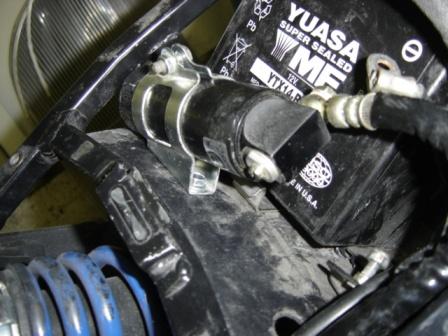 As I stated earlier, I used the "S" shock reservoir mounting bracket. I drilled a 1/4" hole thru the front of the undertail using the 1/4" hole on the bracket as a guide. I also enlarged the 3/16" hole on the bracket (farther to the right) to 1/4" and put a second bolt in there so it won't rotate and rub on the battery.  I'm going to use Velcro to hold the ECM to the undertail. I was going to bolt it like the fuse block mount, but decided otherwise because the bolt placement would put them right in line with the tire spray on the bottom. I didn't want a leak or rusty bolts I couldn't get out later. The Velcro will offer some "cushion", so it won't be a hard mount. You will need to extend the wiring for the tail/brake light and turning signals as well. 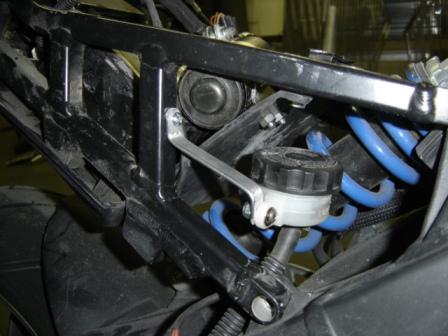 The one bracket I did have to make was for the brake fluid reservoir. I made it from 1/8" x 1/2" x 4" long aluminum bar stock. I drilled and tapped (10-24) the subframe upright and installed another 10-24 screw and nylock nut at the res. I was going to drill thru the lower subframe support, but decided against it because it would weaken one of the four mounts to the frame. The upright, isn't as "critical". If you look above the brake res. cap, you can see the nuts for the shock res mount. I will turn the bolts around so that the nuts are on the inside for final assembly. Now for the moment we've all been waiting for......... 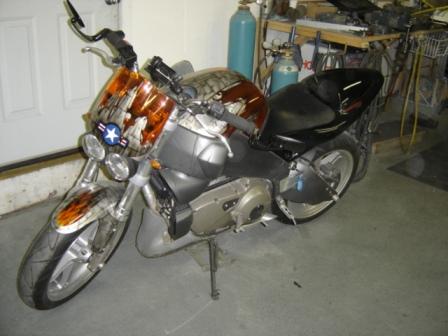 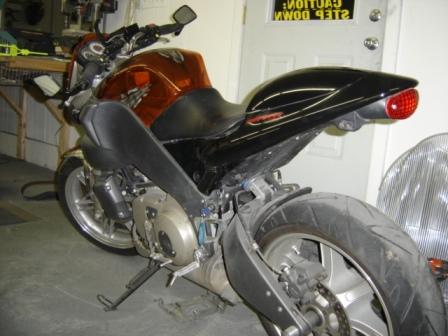  I'm fortunate that I have a lot of tools, but this could be done with basic hand tools. It would just take a little longer. I probably have 4-5 hours in so far, with another 1-2 hours to tidy things up and extend the rear wiring. A few side notes: 1. You can use your original "S" seat lock tumbler on the "R" tail. There is a little clip that hold the tumbler to the body, so you won't have to have 2 different keys. The release cable is longer on the "R", so you will need an "R" cable. 2. The aluminum passenger peg mounts are the same between the "S" and "R". I just didn't put them back on yet. 3. I'm not going to use the under seat storage tray from the "R", the ECM is in the way. I usually have any paperwork in a Ziplock baggie anyway. Maybe in the future I'll rework the tray, who knows? I have another "super secret" project in the works, so stay tuned..... "Same Bat Time, Same Bat Channel" | ||
Toona |
Also, WRT the seat and how it latches to the bike. The front "R" seat bolts to the subframe and doesn't come off with the key. The rear seat goes on and off SO EASILY! No more "C.P.R." to the back of the "S" seat to get it to latch, WOOOO HOOOO! | ||
Rick_a |
I love it. That's a killer look. |