| Author | Message | ||
Oldog |
I had some questions about the front forks on my bike at one point I though that I may have had a leaking seal, not so.  Some points I got cute and tried to loosen the top nut while in the trees, and the top clamp tite -Woops that does not work you must loosen the upper pinch bolts. I posted pix of the oil change last year I will repeat this the uppers and the fasteners outside are aluminum be careful! they are soft and easily damaged. 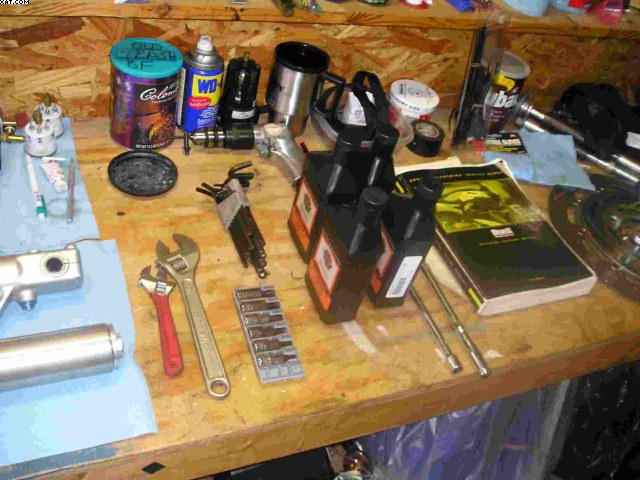 I had a few supprises coming as I took the forks down the watch word here is clean! I washed my hands and put fresh paper down too. Its a good idea to have all parts on hand prior to starting. | ||
Oldog |
 you can pull the spacer down by hand and remove the keeper, I caught the spring spacer under the damper assm head, note the blue is aluminum. Even though its metric an 11/16 inch wrench works (17mm) my inch size wrench has a narrower head. 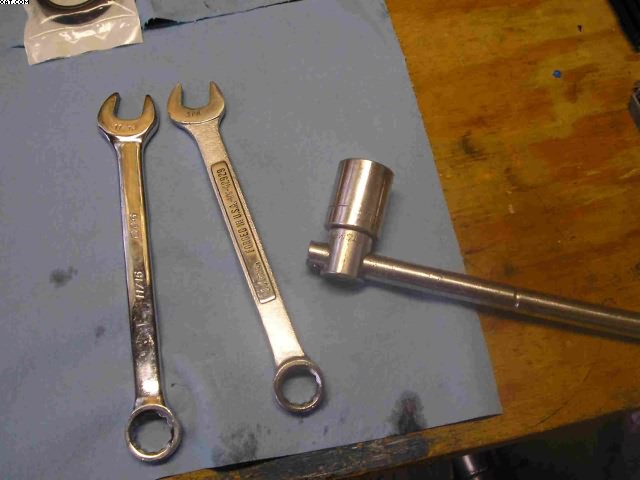 15/16" socket on the top nut, the orings are replaceable these are pliable and show no permanent set. 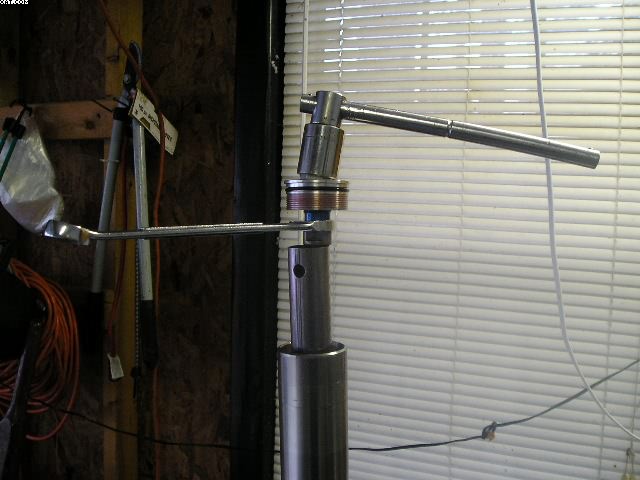 Off with the top and then you can drain the leg and pump the damper cartridge a - while to get the oil out. | ||
Oldog |
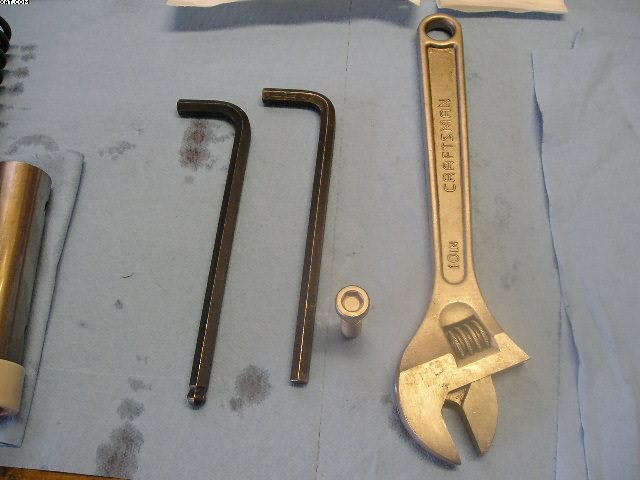 When you go to remove the bottom center bolt for the forks its 8mm or 5/15" in THIS instance the inch wrench fits well, I have "ball end" wrenches these do not work well here as the socket head of the bolt is shallow you need to use a flat end. I don't know if it was needed but I opted to replace the bolt as well, the copper washer should be replaced as you would a brake line. I will use a swab and some brake cleaner to clean the face at re-assm 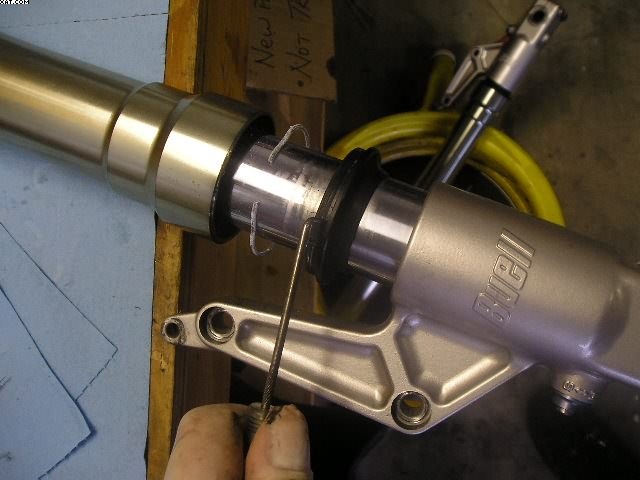 I used a right angle pick to gently pry the wiper out of the hole a slim pair of needle nose picked out the wire keeper ring up to this point it follows the FSM to the letter, the damper cartridge comes out from the top as a unit with the centering ring the seal and bushings come out hard, AL at A.S.B. suggests using a dryer, I did not have one to use, so it was brute force the steel keeper ring shows signs of corrosion, the upper edge under the top of the wiper is Hard and is in need of replacing. 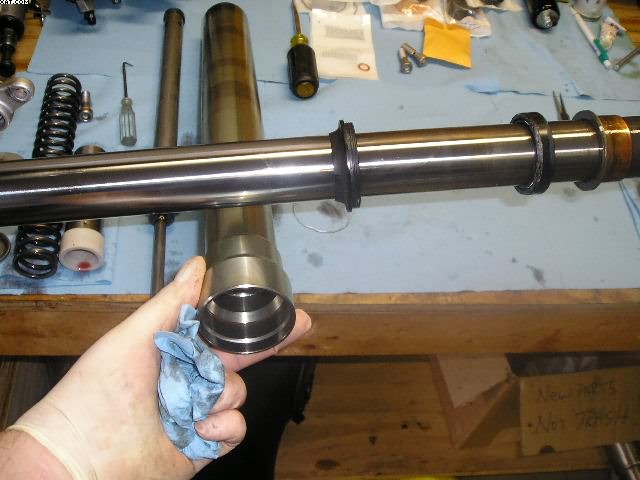 I want to say this again [ not meaning to be an A$$ ] the uppers are thin at the ends and a tip over from the bench will likely require purchase of some expensive japanese bilit (Message edited by oldog on January 02, 2007) | ||
Oldog |
I have the lower end clamped in the bench vice in soft jaws, made of 1/16" gasket material cut in strips to fit 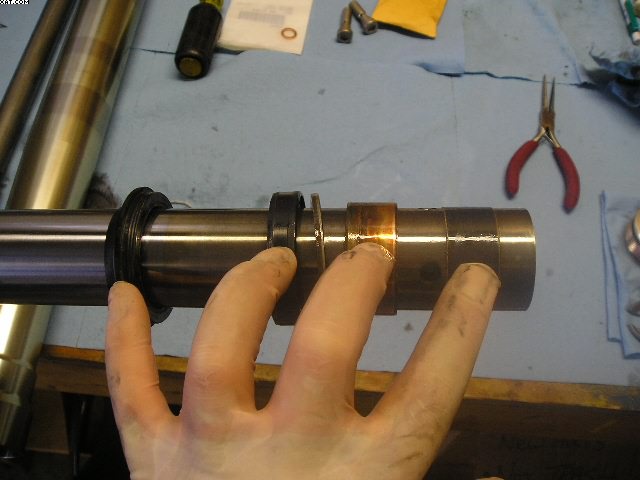 From left to right Dust seal, keeper (REMOVED), Oil Seal, Backup ring, guide bushing, slide bushing. the black surface if the slide bushing is covered with teflon or some thing similar, This is what Al is talking about failing, the inner surface of the guide bushing is coated as well the bushings have splits and only the slide bushing need be pried apart to be slipped from its slot. 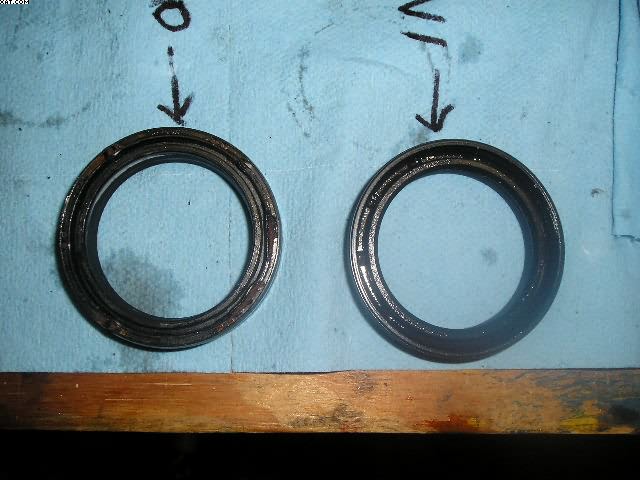 The FSM does not tell you HOW to identify In and out the bottom or out side has a wider outer lip the seals were pliable and had some white gook in the gap between the wiper edge, sillycone maybe?  look close though there is rust evident on the wiper side ( on the wire keeper side ) look close though there is rust evident on the wiper side ( on the wire keeper side ) 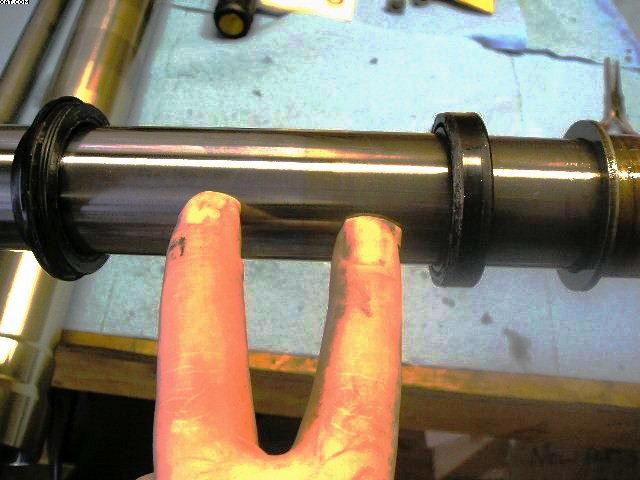 I think that this is normal IIUC chrome even hard chrome goes on over another material, decorative chrome is done over copper / nickel hard chrome is different, in some respect, can't say for sure I altered the color some to help show the contrast. | ||
Oldog |
After removing the bushings and seals I wiped it all off with clean towels and taped up the end of the fork pipe as recommended in the FSM I used electrical tape, and lubed and re installed every thing except the wire ring ( it can be spread and installed later ) on the tube 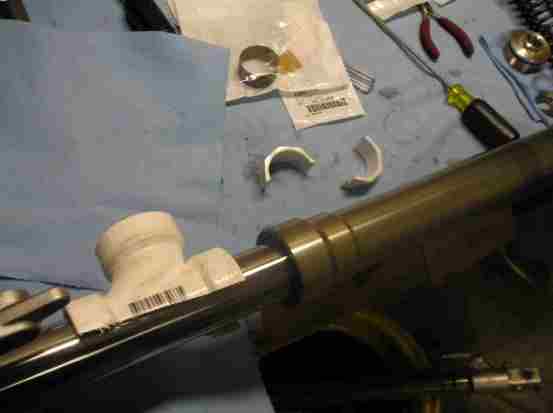 I hope that you have better luck here than I did I could not drive the seals home with my improvised tool and will have to take the assembleys to the HD dealer to have the seals driven home. STAY TUNED | ||
Oldog |
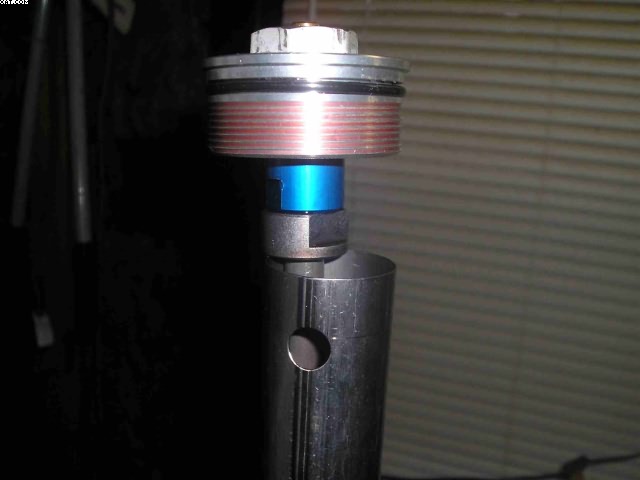
Out of sequence and I cant insert it this is the damper cartridge with the blue end, below it the "spring joining", spacer, the spring (duh) and the keeper the bolt by the spring is the bottom bolt  Can any one provide the XB spring setup info for this end of the fork ( adjustable preload ) | ||
Buelltroll |
WAAAAAAAAAY too involved for me I'll be taking mine to the stealership for the 10k. | ||
Al_lighton |
Great pictures, Jim. Donnie, It really isn't a hard job to do once the fork tubes are off the bike, and once you've done one, you'll not want to pay someone the exorbitant $$ to do it. But Jim has a tuber, so getting the top keeper out to release the damper rod is fairly simple (a third hand helps). The XB's really need a fork spring compressor tool to do the job. And for most service (i.e., oil change or seal replacement), you don't need to remove the damper rod or the end bolt. Al | ||
Gowindward |
Here's the exploded view of the XB fork and parts list. I have rebuilt my forks twice as an annual service. I did buy fork tools (spring compressor, seal driver, etc) from Race Tech. It's not hard work, but kind of tedious.}  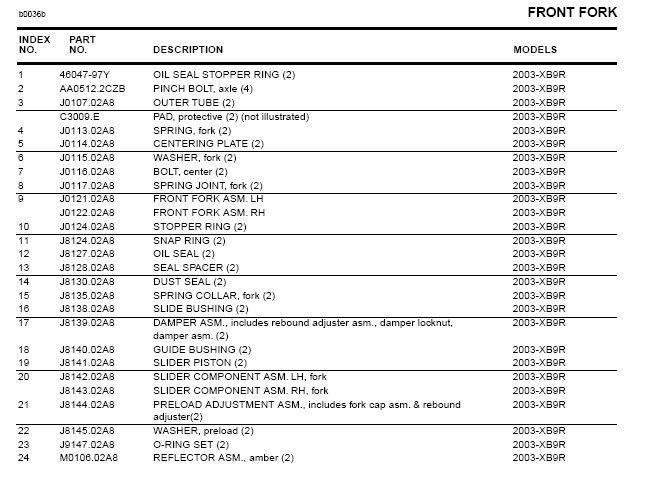 "some white gook in the gap between the wiper edge, sillycone maybe?"I believe that is a mix of fork oil and water, that builds up over time, because there is nothing on the new seals. | ||
Diablobrian |
possibly assembly lube from showa? maybe lithium grease? | ||
Reepicheep |
Cool write up! Thanks Jim! So Al, can the normal fork service oil change be done on the XB forks without the spring compressor? Is the factory service manual procedure the right one, or is there "another way"? I really should do it myself this winter. I think I could get the forks off and on the bike OK, I just don't know what I am getting into above that. | ||
Gowindward |
possibly assembly lube from showa? maybe lithium grease? Brian, This fall I rebuilt my forks for the second time as preventive maintenance on the seals. Since this was my second time in the forks there was no "factory assembly lube" on the seals. I used fork oil the previous time, when I installed the seals. Yet, there was the white gook as Jim said. That's how I came to the conclusion that it must be oil and water mixed over time. Bill, You do need the spring compressor to change the oil. The damper rod assembly is under spring tension, and that assembly holds a bit of oil and has to be pumped to remove the oil. It can not be pumped until the spring is released. | ||
Diablobrian |
Cool, good call! I was just trying to help offer other possibilities  We need to work up a communal spring compressor, and seal pushers. I'm sure funds could be raised by badwebber contributions. Just have the person that needs it pay shipping charges and then agree to ship it off to the next needy badwebber in line. This wouldn't be that big of a stretch for the badweb. The honor system is not something I'd worry about here, unlike other forums I've been a part of. It certainly would be cheaper than having so many of us buying a tool that we would only use very rarely. | ||
Gowindward |
Here's photos of the upper end of the Xb fork as it is disassembled. Parts needed for the rebuild. 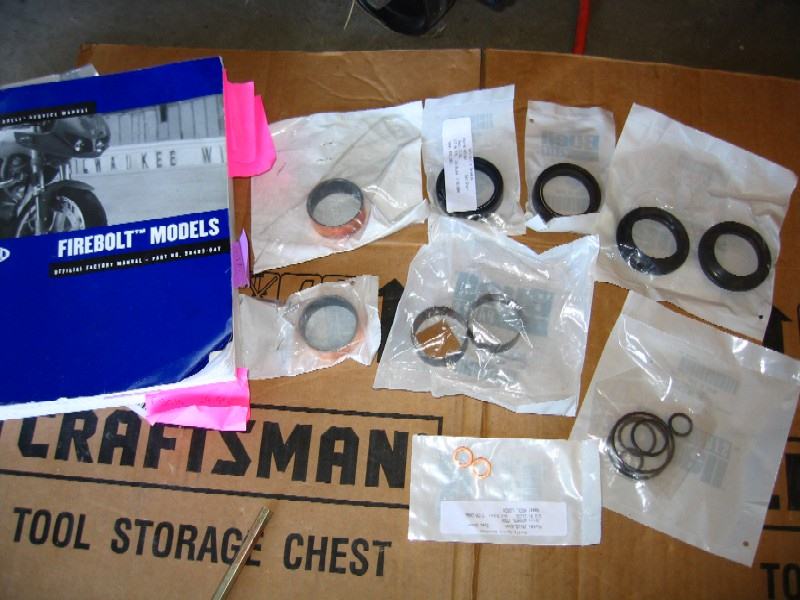 The preload adjuster removed 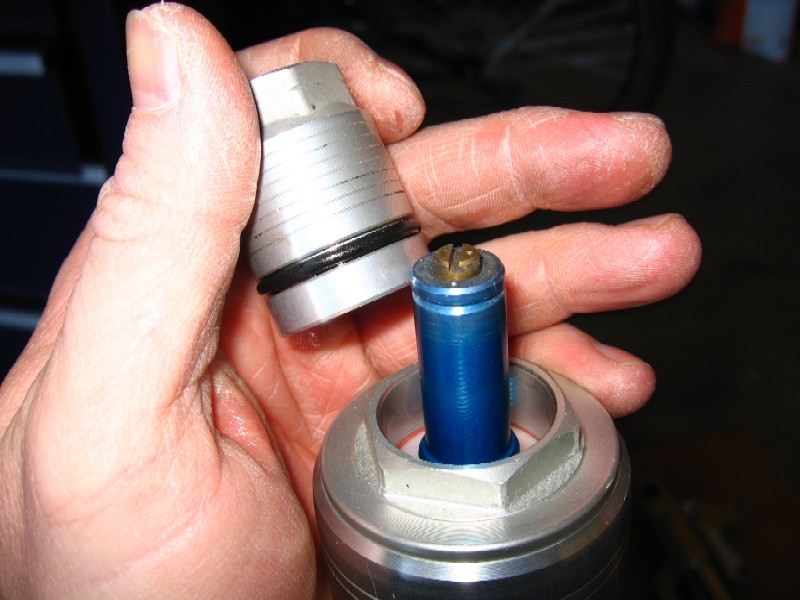 I have the Heli clamp on my bike so I use the OEM part as a clamp to hold the fork tube while the top cap is removed 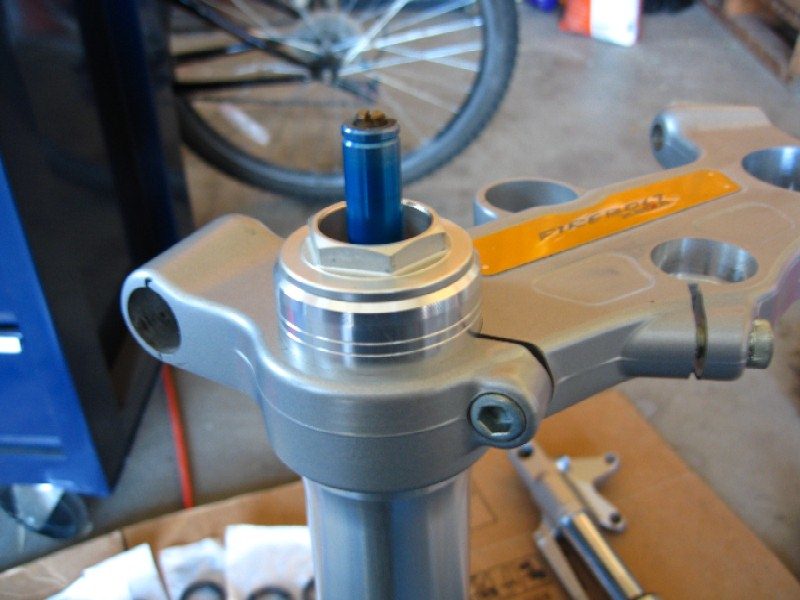 Here the top cap is removed. This is NOT under spring load here. 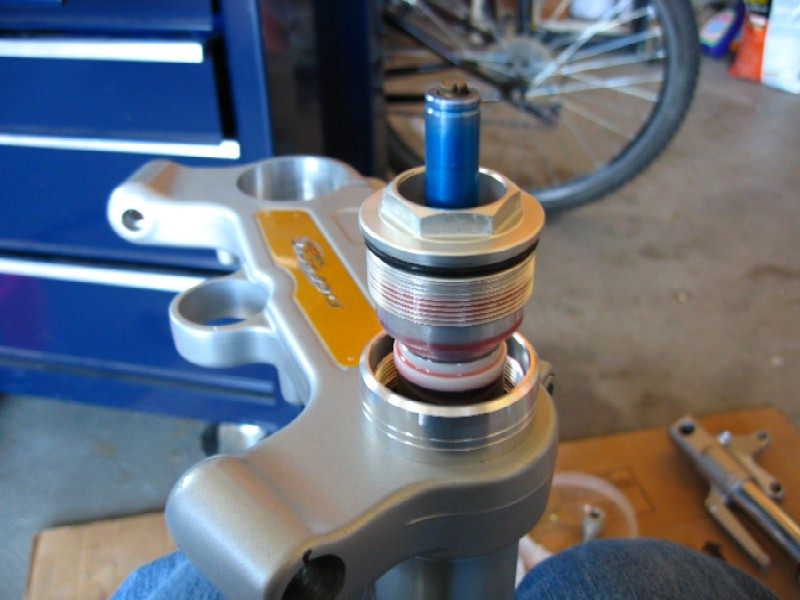 Here the spring compressor is being put on the spring collar. 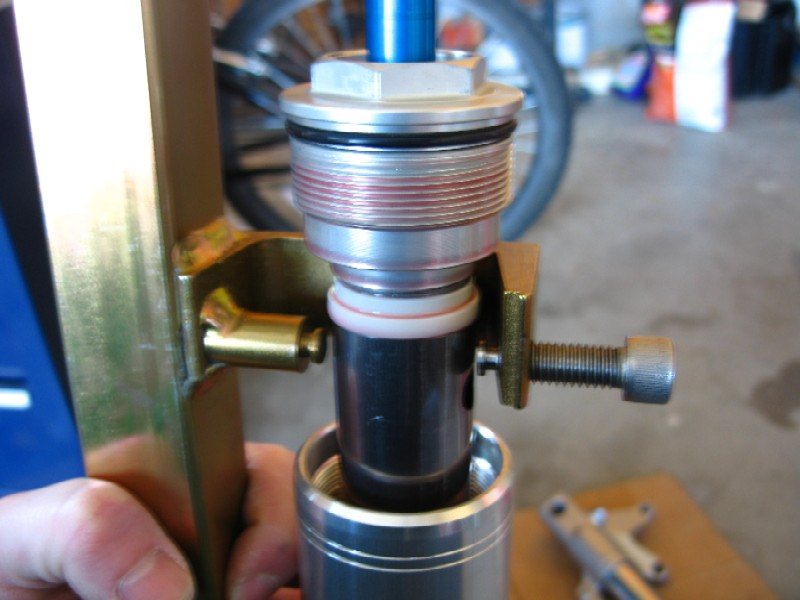 Here the spring has been compressed and allows access to the damper rod assembly lock nut. 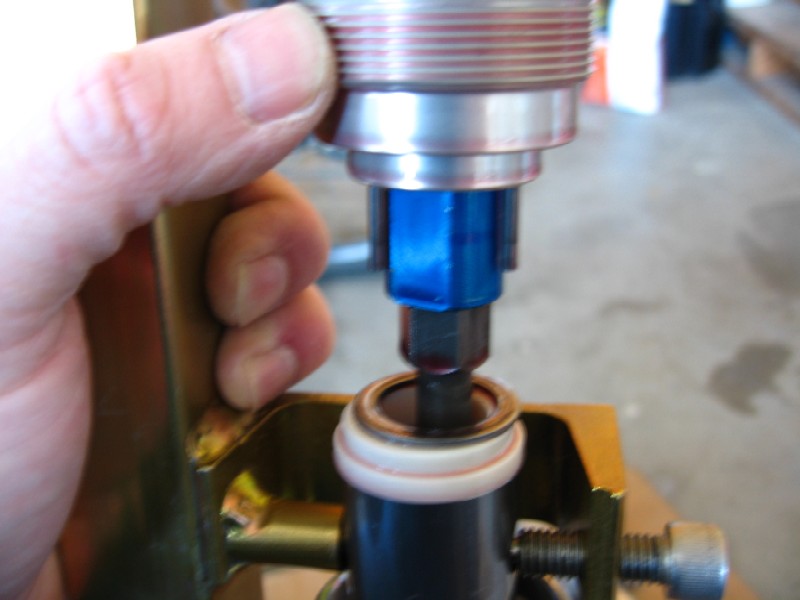 Here the lock nut has been backed off and the top cap is being removed from the damper rod assembly. 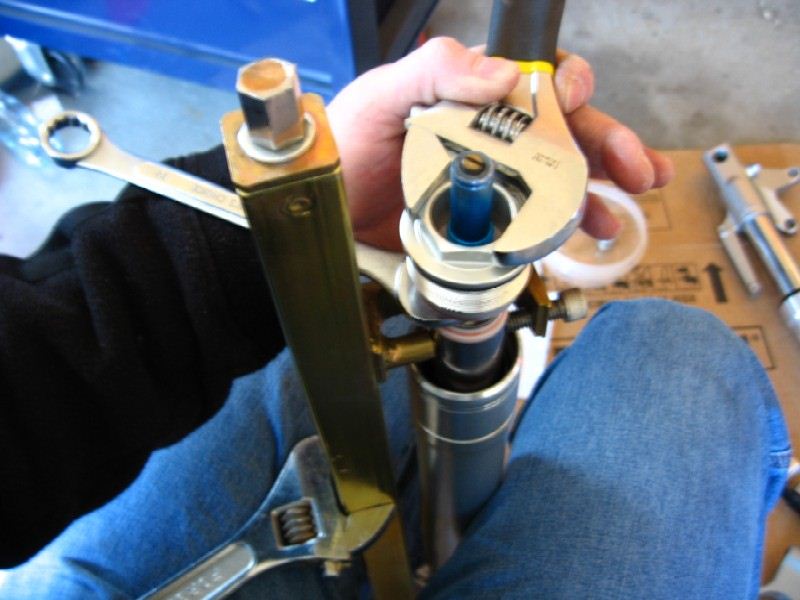 Top cap is off 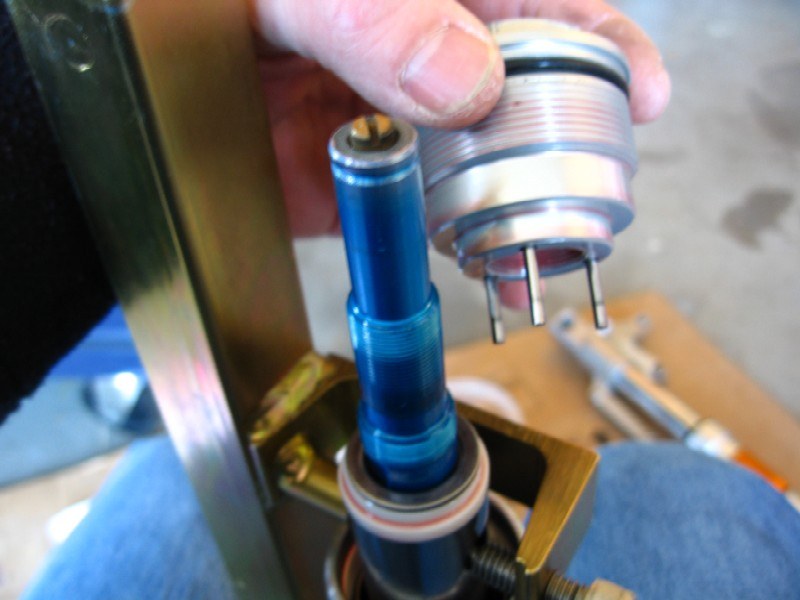 Preload washer and slider piston off. 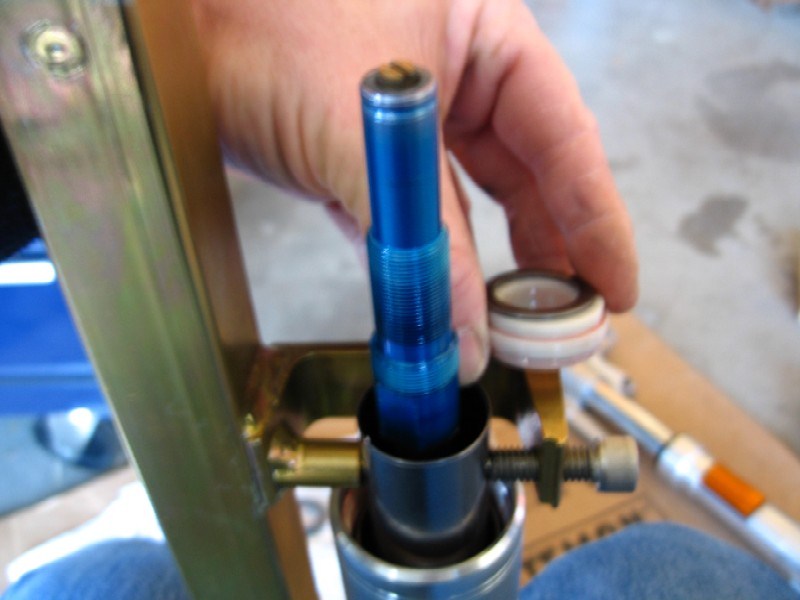 Spring compressor off and spring load is gone. 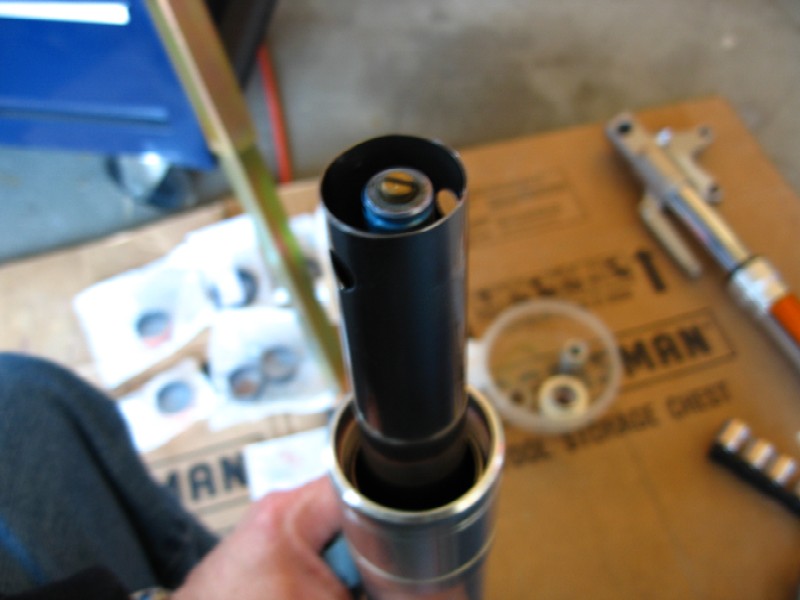 Center bolt being removed, which frees the damper assembly. Not using the axle to hold the for slider and keep it from turning while removing the center bolt. At this point the oil has been dumped, the damper has been pumped to get all the oil out of it. The rest of the fork is like the photos Jim posted. Note to LONG 8mm allen socket. A standard socket is to short and large in dia. to fit in the hole shown. The first time I did this work I used a standard Allen wrench and did not torque the center bolt. The copper crush washer ended up leaking a little and I had to pull the axle so I could tighten the bolt some more. This time I visited the Snap-On guy and had him order me the socket shown so I could use a torque wrench. No leaks this time around. 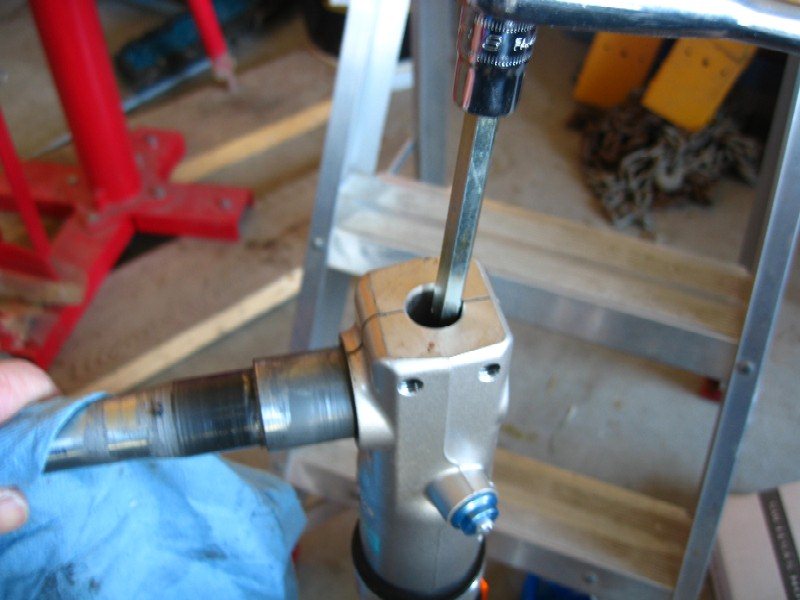 | ||
Oldog |
Thanks for the addendum there Windward I had not condisdered the water & residue as the goop that was between the seal lips, On teh Xbs' I thought the ringed top works is a preload adjuster of some sort?? this does not look like its interchangable with the older tube frame units, ( i wanted to make mine adjustable for preload. On the tubers you cant remove the top nut if the top tree is tightened around it you must loosen it or move it down below the nut area. on the stay tuned, I had to take the forks to the local dealer to have the seals driven in and the guy put the clips and wipers home as well, dont waste you time with the plastic pipe bits total waste of time and money If you dont mind what did you have to pay for the seal driver? and will you post a pic, please. BTW I needlessly replaced the hardened bottom bolts, NOTE OL-DOG REALY CAN READ [ IF HE WEARS HIS GLASSES] HE JUST SOME TIMES ELECTS TO JUST LOOK AT DA PITCHERS INSTEAD LEADING TO SOME EMBARISING MOMENTS  } } (Message edited by oldog on January 09, 2007) | ||
Gowindward |
Jim, The ringed nut (preload adjuster) does adjust preload. See in the photo with the top cap off. The three pins coming out of the bottom of the top cap are transfer pins. They run through the top cap and push against the preload adjuster on the top side and the lower side they push on the preload washer, which is sitting on top of the spring collar/ spring. The triple clamp that I'm using is lower on the fork tube than the as installed position. I can imagine if it was higher on the tube and tight that the fork cap could be under some compressive loads from the triple clamp and not loosen easily. Here's the fork seal driver, the spring compressor, and the oil level tool. 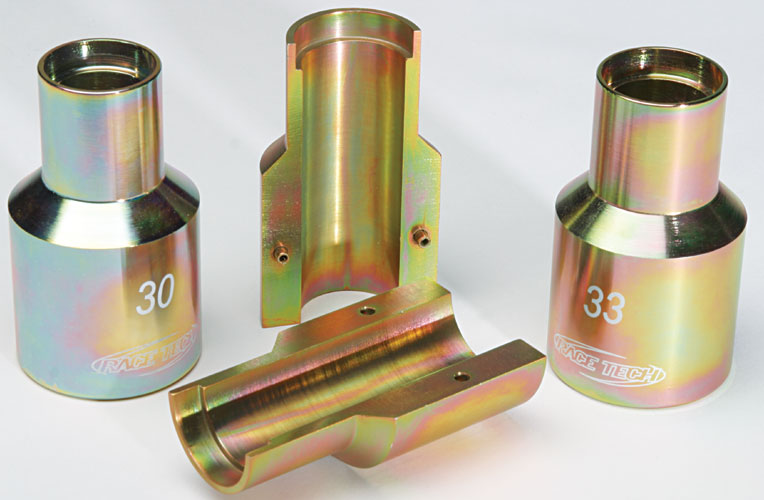   All from http://www.racetech.com/shopping/shopdisplaysubcat.asp?id=9&showPage=street Traxxion makes a cheaper spring compressor, but it would take two people to do the job with their tool on the XB fork. One to hold the spring compressed while the other wrenches on the fork to get the lock nut loose and then the top cap off. | ||
Dbird29 |
Gowindward Thanks for the pictures, it really helped my fork rebuild. I did it with the Traxxion spring compressor and managed to master the one person operation. I did get a seal driver and skipped the PVC rigging. All in all not too hard just took some time. D Bird | ||
Dbird29 |
Some pictures from my XB fork rebuild. 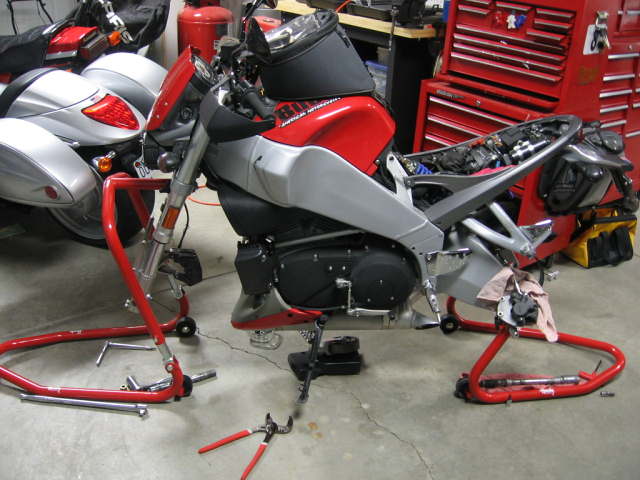 The bike on the Handy stands. 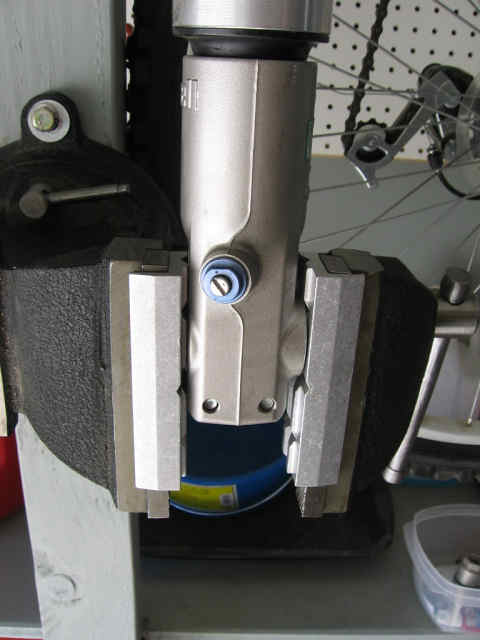 Aluminum jaws for the vise. 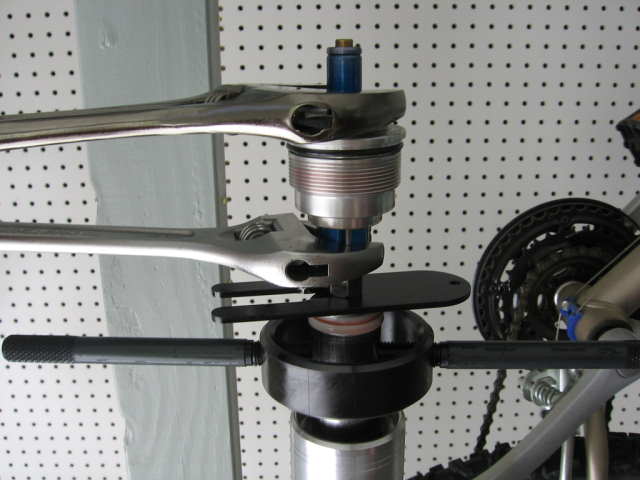 Traxxion Dynamics Spring Compressor. It is possible to use it without 3 hands. 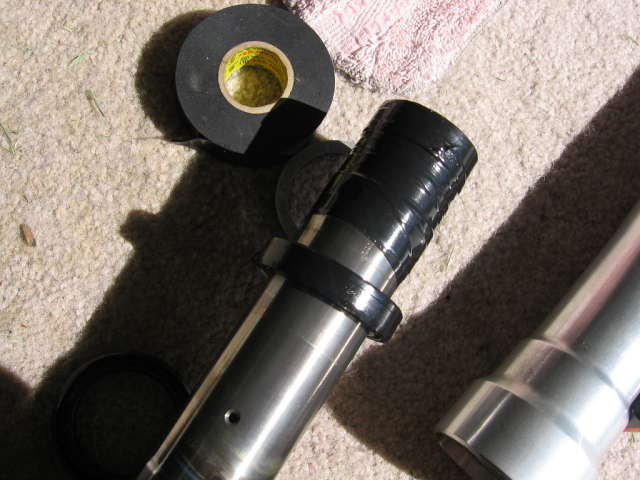 I didn't get enough tape covering the sharp edges the first time and had a seal leak. My year XB has 41mm forks and a HD Wideglide seal superseded the original Buell number. No problem just used more tape the 2nd time. 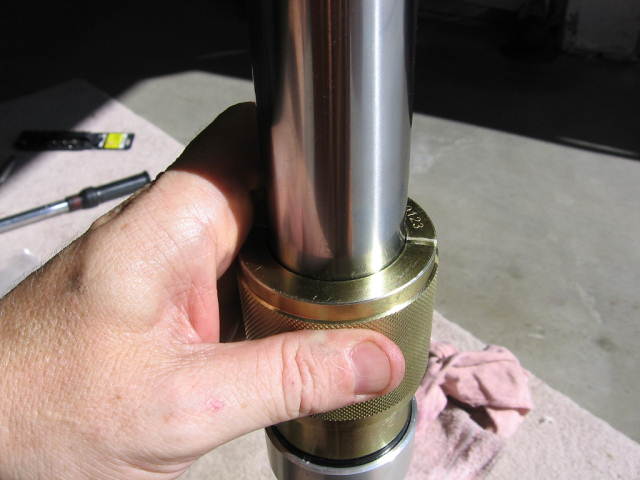 The Motion Pro seal driver sure made it an easy job getting the fork seal in there. 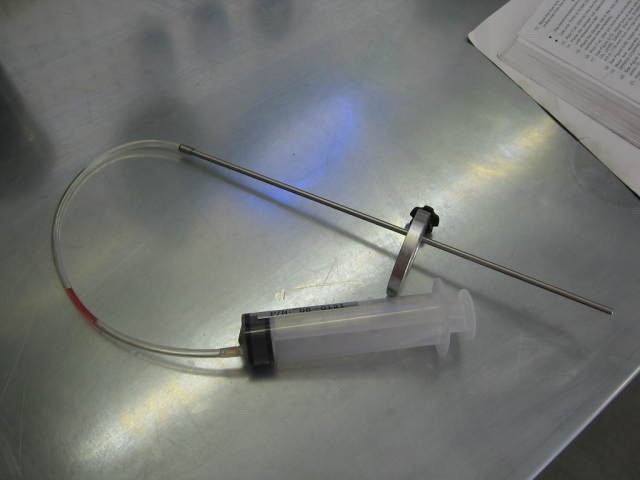 Motion Pro fluid level tool. Set it to 118mm for my fork and just suck out the excess fluid. 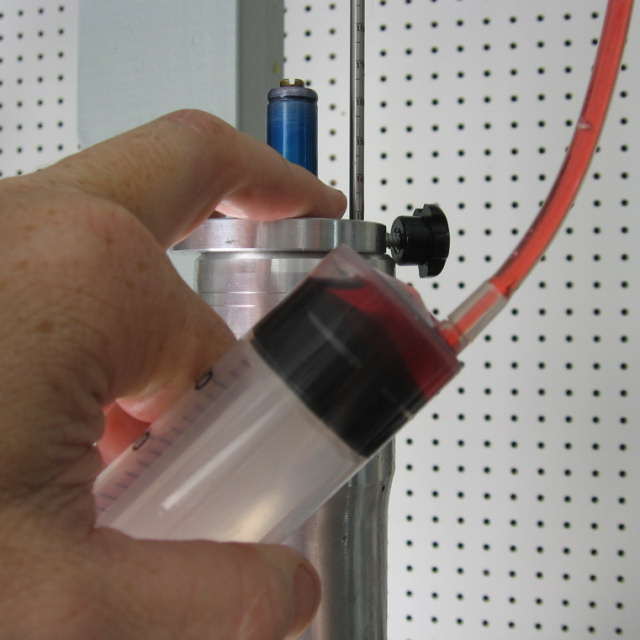 Voila! 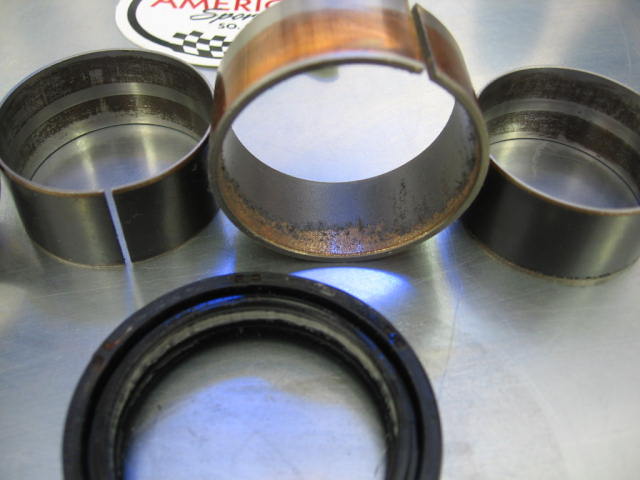 Notice the coating worn off the inside of the Guide Bushing. Hope these pics help the next person wondering how a fork rebuild is done. | ||
Kdkerr2 |
Are these instructions good for the old X1 upsidedown forks on Tube Frame Buells? | ||
Oldog |
the top area are X1 forks, the lower section relates to the XB seri bikes the major differences are around the top and spring preload. ride safe.. | ||
Oldog |
bump | ||
Nillaice |
bookmarked | ||
Nillaice |
3 things to add. 1- keep the meat of your palms above the seal driver when driving seals in. -ouch- 2- the damper assy snap ring is the most worthless part of the entire fork assy. 3- if you forget to remove it, and grind the preload adjuster into it; calm down, put the dremel back, and remove the fork cap. -the first few steps CAN BE DONE out of order- once the fork cap is removed you can put your wrench on teh bottom part of the damper assy and un-jam the preload adjuster. be sure to remove any burrs from the snap ring rim before re-assembly with new o-rings. 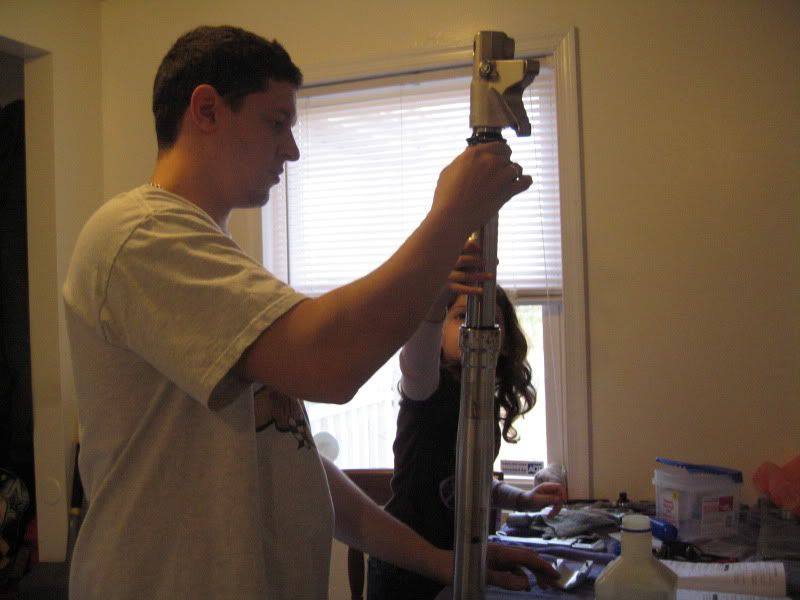 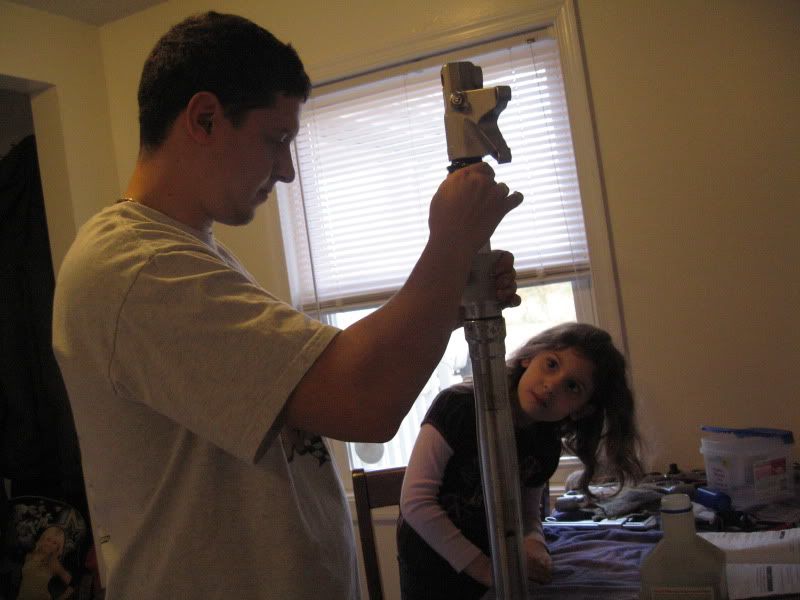 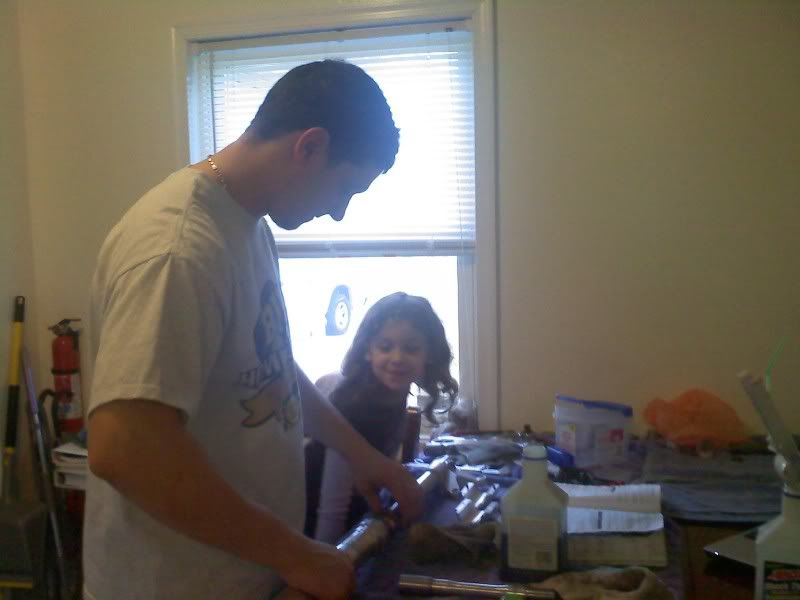 | ||
Puddlepirate |
Is the verdict out on whether or not the seal driver tool is actually needed, or will PVC or a similar material work? | ||
Al_lighton |
I'vew used a split PVC pipe on 41mm slider forks, but not on the 43mm forks. The common PVC sizes don't fit the 43mm tube. Al | ||
Puddlepirate |
Cool, thanks for the information Al. Got all the parts in from you guys this afternoon (41mm XB forks on the Sportster) and will probably be attempting this over the weekend. | ||
Nillaice |
rebuilt another set today and i forgot how to re-zero the top of the damper rod and jamnut, but after re-reading the manual 5 times or so it 'clicked' again i also go the parts from Al at American Sport Bike. thank you Al for fixing my order!! -i forgot the slider bushings- i received some All-Ballz seals instead of 'GENIUNE H-D' parts, but all the other stuff was | ||
Kdkerr2 |
The right seal on my 01 Buell M2 Cyclone was leaking last year. It has the 01 Lightning upside down forks. I was able to purchase the seal at BlueGrass H-D which was a Buell dealership. I didn't have the correct seating tool to compress the seal so I took it to my buddy's shop Junction City Cycles and he finished the install. It hasn't leaked a drop since. |