| Author | Message | ||
Jim_Witt |
Russ, I'll see if I can dig some up at work (even though I'm retired). I'm not sure how "cool" it would look with end caps either. It will take a few days BTW. -JW:>  | ||
Ara |
Thanks so much, Jim! I can visualize what you mean by the end caps. Do you think that the glue stron enough to hold flat circular pieces simply butt-glued on the ends of the cylinder as long as there isn't much pressure? Thank you! Russ | ||
Blaster420 |
Ara, what about threading 2 end caps into it? or what about square? I got my catch can in now. I'm pretty happy with it, but I bet that I make 10 to 15 more of them in the next 6 mos. 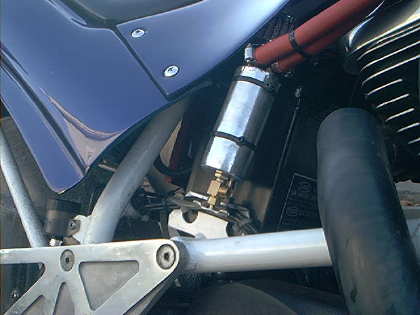 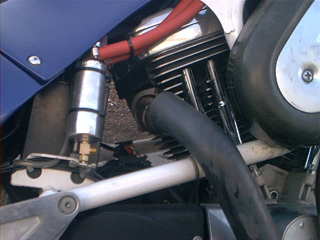 Ben | ||
Ara |
Nice piece of work, Ben! How is it attached - zip tied to the battery strap? Excellent solution. I managed to pick up a piece of clear PVC and intent to make alloy end-caps. Since there's no real pressure, sealing the plastic to the aluminum should be relatively simple. Russ | ||
Blaster420 |
Ara, yes that is just what it is, and thank you, I have started on another one and I am going to try to put the inlets on the side of the can this time. For some reason I am becoming addicted to making these darn things. I can't wait to see what yours looks like. Ben | ||
Ara |
Ben, you're doing your own aluminum welding? Geeze, I've wanted to be able to weld aluminum for years and years. I just have an oxy-aceteline rig. Russ | ||
Jim_Witt |
Russ, Still trying but not much success. Looks like you found some clear PVC then? Another option might be using a clear PVC coupling (either threaded or glue joint) and insert a PVC plug in each end (instead of a cap). -JW:> | ||
Ara |
Jim - Thanks very much for your efforts. I did manage to order a three-foot long piece on clearance from Sears. I haven't received it yet and have no clue as to the diameter. I only found one other source for clear PVC - they don't stock it normally but would be happy to order a 20-foot length for me. I haven't found any sources for fittings, so I've settled on a design that has alloy end caps. I think it'll work well. It has the advantage of having metal to drill, tap, and screw the nipple and drain fittings into. Russ | ||
Jim_Witt |
Just for information sake, we drill and tap all types of plastic piping (PVC, CPVC, PVDF, PP, PFA, etc.) all the time. I'm still trying to get you some 12" lengths of sch. 40 2" nom. clear PVC pipe, a coupling and plugs. S'later, -JW:> | ||
Ara |
Thank you, my friend. | ||
Noface |
Has anyone fabricated/installed one on a XB bike yet? If so, I could use some ideas on where to put one. There's not many places to hide one on the XB series. Pic's would be great! Also, since the breathers on the XB bikes use some type of one-way pass valve, would it be necessary to filter the output line of the breather? I can't see why since the one-way valve doesn't let any air into the engine cases. Thanks! | ||
Blaster420 |
Russ, I don't have my own welder, but at work I have access to TIG and MIG welders. We also have a Tool & Die dept there that is able to help with "Home Projects". TIG welding is so cool, if I ever have the chance I will get one. Guess I better go buy some lottery tickets. I can't wait to see pictures of your catch can. Ben | ||
Xb9 |
Noface, I've done a breather mod on my XB. Basically joined the two original breather hoses with a T right above the rear cylinder, ran a 3/8" hose along the frame on the right side. Had to cut just a little of the plastic on the tail body piece under the seat near the airbox cover so I could run the hose down around the fan. Where the hose runs along side the fan area, I placed another T with a 3/8" hose running vertically up around the tail frame just to the rear of the battery. That is where the breather filter goes, there's room there where the CA. evaporative emission canister would go if you had one on the bike. Back down at the second T by the fan, I have a short section of 5/8" clear tube with a 5/8" 90 elbow fitting pointing downward just below the shock, between the frame and the swingarm. The "can" is actually a length of curved clear 5/8" tubing with a PVC end cap cemented that has a drain screw threaded into it. The end of the "can" rests on the engine case between the starter and the sprocket cover. Not allot of extra room on this bike, took some thought to come up with this idea. Seems to work fine, haven't had it on long though. Lightweight, simple and cheap. I would advise using a filter, low RPM there is a sucking/blowing action through the hose. Off idle it diminishes noticeably. 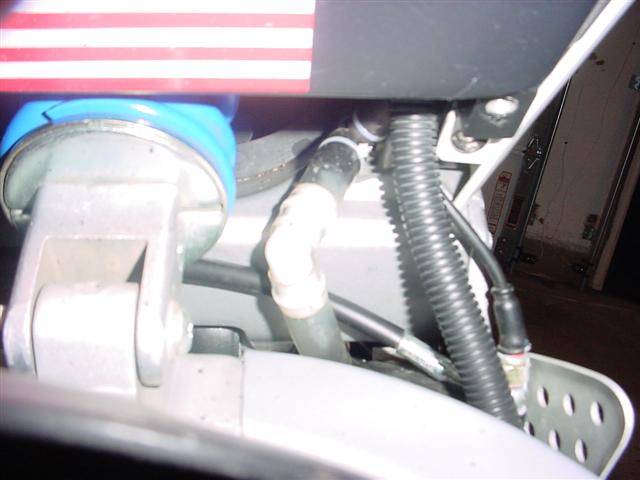 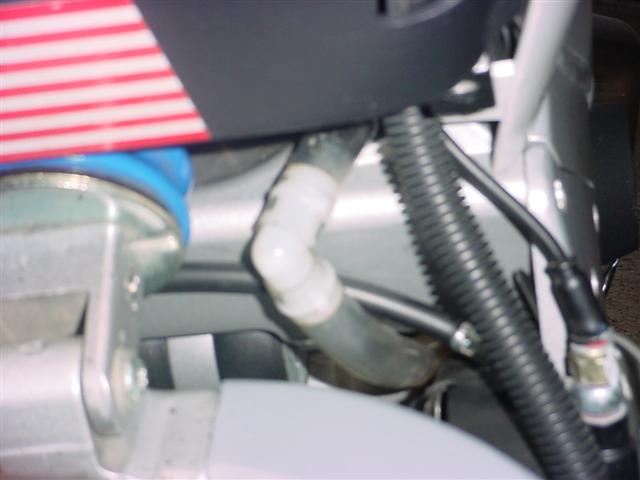  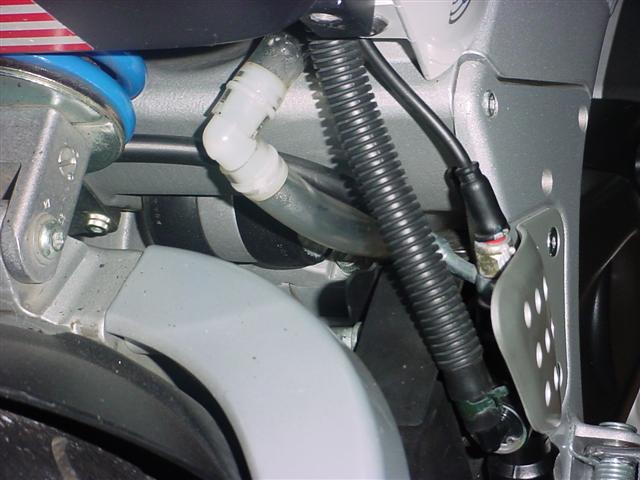  | ||
Noface |
Excellent info! I've got some better ideas now. Thanks a bunch! Jody S. | ||
Ara |
Ben, I've observed TIG and MIG welding in the past and both are very cool. Not sure I could get the foot treddle thing down, though - I have a tendency to tap my foot to whatever music is running through my head at the time! Jim, I received my 3-foot long piece of clear whatever-it-is from Sears last night. It's 2 inches OD, but the walls are so thin I'm not sure the stuff is suitable. They're 1/16 inch or a bit less. The material is somewhat compressible so if I use straps to attach it to the frame, it'll likely deform it and possibly break the seals at the ends. Given the vibrations inherent in our bikes I figure I'll have to strap my final design down pretty firmly, so this material is questionable. Nuts. Russ | ||
Blaster420 |
Russ, I have some free time today so I will look into some sources around here. I will let you know what I find. Ben | ||
Noface |
A good friend of mine fabricated this nice catch can for me today, so I thought I'd share a picture. I'll be installing it on an XB. I'll also get some nice digital pics to share as well. L8Tr, Jody S. . . see photo below . . | ||
Noface |
I can never seem to get the pic right the first time... here goes again. 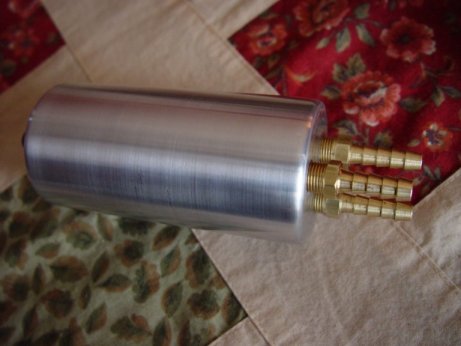 | ||
Henrik |
Very, very nice Henrik | ||
Ara |
It's beautiful! (The quilt, too.) Can you outline his fabrication method? | ||
Noface |
The catch can started out as 2" thick wall aluminum pipe. It's cut to 4" length. Wall thickness was originally about 1/4". He used the lathe to open up the ID and make the wall thickness to about an 1/8". Then he used 2" aluminum round stock to create the end caps. He machined a lip or a step(lack the proper term) to fit inside the ID of the cylinder, with the OD of the cap to match the OD of the cylinder so that the caps "fit" onto the cylinder. He then welded the caps on, and the last step was to put it back in the lath and turn down the welds, making it look like a single piece of aluminum. An interesting note that the bottom cap is thicker than the top with a "funnel" machined down to the center of the cap where we drilled and tapped a 1/4x28 hole for a drain screw. Really slick. The fittings are 1/8" pipe tap hose barbs. One inlet for each cylinder and one outlet for a remote breather filter. I mounted the can to the bottom of the battery box (which is part of the underside tail section) near the rear shock and fan, just above the swing arm pivot. I used some sticky back velcro and a tie-wrap to secure it to the bike. I had to drill two holes in the plastic cover to thread the tie-wraps through, and the velcro helps keep it in place. 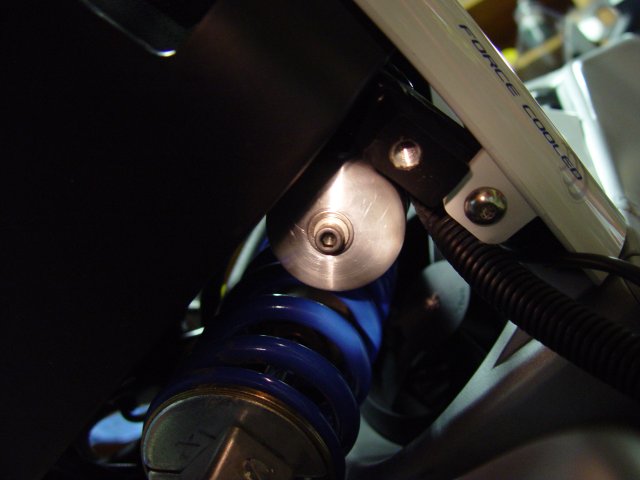 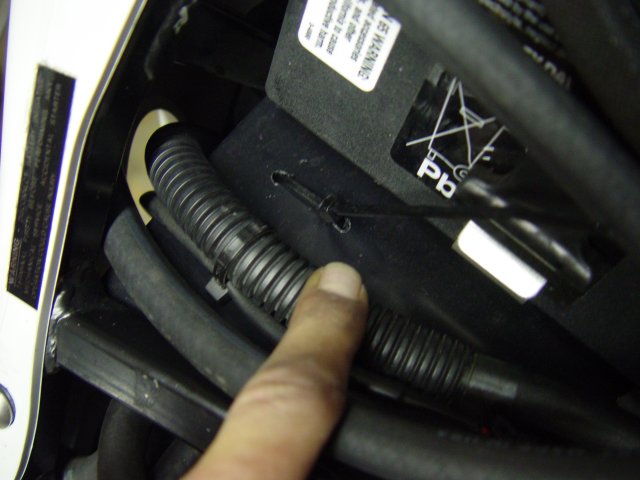 In the next two pics you can see the view of the can from the right side of the bike, where you can see the tie-wrap holding it to the battery box cover, and the bottom view, looking up from near the belt guard.   In the next pic you can see how I routed the breather hose from the engine compartment to the shock tower cavity. It's essentially the same on the other side. I did not have to trim any plastic body work to get the hose to fit. Note that I used 5/16" hose, rather than 3/8". 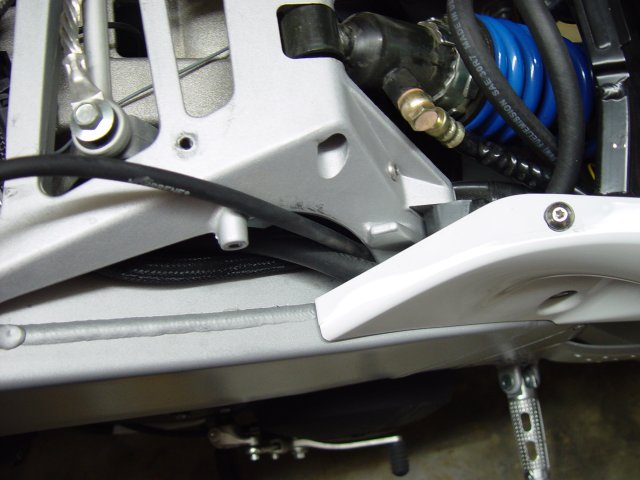 I haven't finished installing the remote filter yet. I plan on routing a hose up through the battery box, under the seat, and then back to the tail section where there should be enough space for the filter. More on that later. I was going to ride to work tonight, but there's a big rain storm just west of my house, so I didn't get to to try it out yet. I did fire it up and run it for a few minutes, and it seems to work well. I'll have more when I get the filter done and a test ride to see if it all stays together. Regrads, Jody S. | ||
Noface |
The picture below should have been the first in the series of pictures above. Somehow I got the files mixed up on my hard drive and saved the same file with two different names. Here's the pic that should have been first. It shows a view of the can from the top. 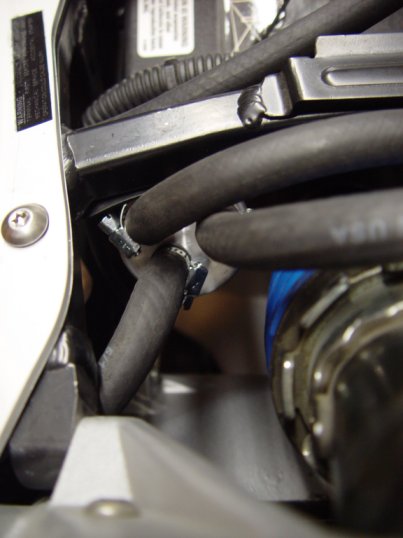 | ||
Ara |
Noface: Only one word suffices: BRILLIANT! I'm curious as to why you used 5/16 rather than full-sized 3/8 breather lines. | ||
Noface |
Ara, The main reason I chose the 5/16 was that the 5/16 seemed less bulky and allowed me to route the hoses with less hassle. I had a small piece of both sizes in the garage (not enuff of either to complete the task) and the 5/16 allowed me to route the hoses without modifying anything. I do wonder if the 5/16 is small enough to cause a restriction, but the pressure and velocity of the system seems low and hopefully the 5/16 should be adequate. Anyone have an opinion on 5/16 vs. 3/8 and why? Ara, BTW, I notice by your profile you're in Alabama. Where in AL? I'm in central middle TN, about an hour from the AL TN state line. If your ever up this way drop me a line and maybe we can find some good twisties to ride on. Regards, Jody S. | ||
Jsunstar |
clear pvc and fittings can be found at www.customaquatic.com...heres a link for ya! http://www.customaquatic.com/customaquatic/listcat1.asp?CatID=pf ive gotten clear PVC there before, they have the fittings too. good luck and keep up the good work fellas! | ||
Ara |
Jody - I'm in Huntsville. Ping me any time! Jsunstar - Thanks! | ||
Jim_Witt |
Looks like a good link to me. Spears is the same brand name we use at work. I still haven't been able to get anything "free" from work but haven't forgotten. S'later, -JW:> | ||
Timbo |
I posted this over on the quick board but probably should have put it here, so here goes... Bracket and can Bracket is made out of some flat stock aluminum I had in the garage. The can is simply a travel size shampoo bottle (painted black). 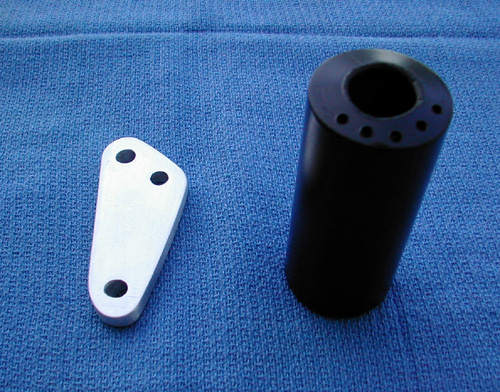 | ||
Timbo |
Next I plugged the holes in the breatherbox with some short bolts and washers. Rubber washers were used under the flat metal washers to give a good seal. Flat metal washers and nylon locknuts are on the other side. 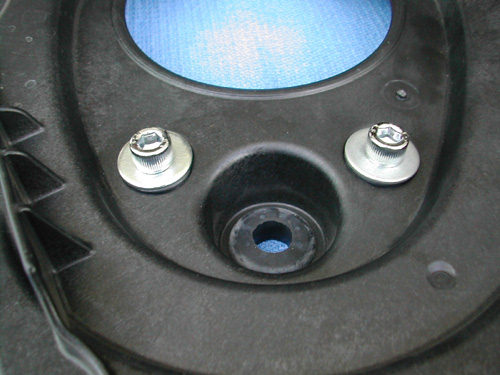 | ||
Timbo |
This is the can mounted to the bracket, that is mounted to the backside of the peg mount(off the bike). 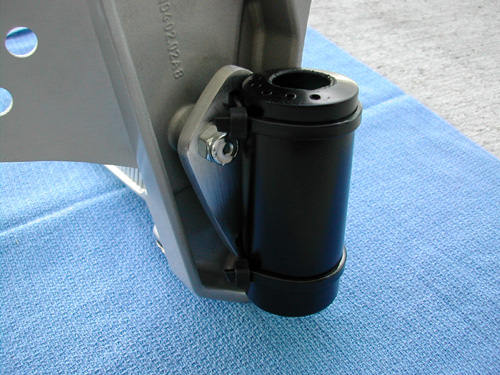 |