| Author | Message | ||
Cjburr |
Has anyone put a Buell S1W front end on a Sportster ?? I have a complete front end from a 98 S1W that I am putting on my 06 Sportster. The steering head bearings are the same part number so that will work. The tube that the fork lock goes into has the hole for the lock in a different location, so I will swap out the one from the Sportster. This tube also accepts the bolt at the top to torque the bearings into their respective cups, I haven't taken it apart yet, but I'm betting it is keyed in some fashion to make sure the hole for the lock lines up. If the keys are in different locations I will have to have a new keyway machined into the Buell lower tree. Fork stops are cast into the Sportster lower tree while the Buell uses the frame as its stop so I will have to lay out and drill and tap a couple of holes and install capscrews to act as my stops. Have no fear, I didn't take apart a perfectly good S1W, someone else did to build a chopper and got in over his head. His loss will be my Sportsters gain. I love the cartridge forks and 6 piston brakes on my own S1W and wanted my Sportster to have the same. Next will be a swingarm so I can mount the rear Buell rim to the Sportster. If anyone here has done this, or knows of anything else I need to watch out for feel free to speak up. Constructive criticism is also welcome. Thanks, Chris | ||
Bomber |
Chris -- great swap -- the sporty will be big fun with that fork and brake, I'm thinkin while I've not done that swap, other front-end-transplants tell me you may wish to take a look at the weight of both bikes -- a spring change may be in order I'm curious as to your workaround for the master cylinder mounting -- 7/8 inch bars on the S1, 1 inch on the sporty -- I susptect there may be enough meat on the S1 cylinder clamps to hog out to an inch, but would bet the farm on that ;-} (Message edited by bomber on August 10, 2006) | ||
Henrik |
I can't contribute anything useful, but I'd love to see pictures of the progress and the final outcome. Sounds like a fun project and a fun bike when done. Henrik | ||
Cjburr |
Thanks Bomber, I was considering using a Sportster twin disc master cylinder if the bore size is the same as the Buell. Anyone know the bore size of the Buell master cylinder ?? This would also allow me to use the stock Sportster clutch and brake levers. Is there a site with a chart for what springs are good for certain weights ?? Do any of you guys have a vendor preference for springs ?? Thanks for the encouragement Henrik, I'll try to post pics as I go. | ||
Cjburr |
The Sportster twin disc master cylinder has a bore of 14 millimeters. I looked at the manual you guys have here online but was unable to determine what the Buell master cylinder bore was. Anyone happen to know the bore size on the Buell master cylinder?? | ||
Henrik |
I believe the later model tuber master cylinder has a 5/8" bore. I only have an S2 manual which doesn't apply, so I'm typing from memory. Hopefully someone can confirm. Henrik | ||
Davefl |
Would a master cylinder for a S2 not fit on a sportster? Is the caliper different on S1's and S2's? Sounds like and easy solution to me.. | ||
Bomber |
traxxion is great for spring -- they are familiar with Buells -- Buell forks are sometimes considered to be undersrpung for gentlemen of substance (ehem) -- I've got Traxxion 1.1 kg springs in my M2 (did a fork swap with an early S3, White Power forks, similar to yours) -- I weigh in, geared up, about 225 or so (how the heck did THAT happen?) -- I'm guessing the sporty is a lil heavier than either the M2 or S1 -- I'd start with at least 1.1, and be prepared to go up form there . . . . or, give Traxxion a buzz -- they are very helpful, provide good products at reasonable prices, and understand customer service ;-} and, no, I don't work for em | ||
Henrik |
The master cylinder on an S2 is a pure HD part. Can't remember the bore, but it's bigger than the later tubers, and I know from experience that the front brake comes up a bit lacking compared to the later model Buells, even with a Nissin caliper mounted. I just plunked down $$ for an ISR master cylinder fitting a 1" bar and with a bore appropriate for dual disks: http://www.isr-brakes.se/products/mastercylinders/21-005.shtml Henrik | ||
Cjburr |
The handlebars on the Sportster are 1", the Buell bars are 7/8". This will mean I have to ream the perch on the top tree to fit a 1" bar. It looks like there is enough meat to do this. The master cylinder for the twin disc Sportster is 14mm or 0.551", a 5/8 bore = 0.625". Do you guys think the difference of 0.174" is enough to warrant going with a aftermarket master cylinder ?? Thanks Bomber for the tip on Traxxion springs I'll look them up and see if someone from there will talk to me. Just got off the phone with the Buell dealer here, he has some master cylinder rebuild kits and said I can come in and measure the replacement piston and put an end to the speculation. | ||
Henrik |
If you use the smaller size master cylinder, you'll be increasing the braking efficiency. I guess it's worth trying before you go spending more $$, but please be careful. A late model tuber with the 5/8" master is 2-finger braking - just as a point of reference. Henrik | ||
Cjburr |
Did a little brainstorming with help from some hydraulics sites on the web today, here are the results. If the piston in the Buell master cylinder turns out to be 5/8" then the master cylinder for the dual disc Sportster at 14mm will provide a 27.84% decrease in bore diameter and a 28.68% increase in pressure at the pistons of the Buell brake. First get the area of the master cylinder pistons, Area of a circle = Pi(R X R) , R = Diameter / 2 The pressure is arrived at by Pascals law F(force)= P(pressure) X A(area)or P(pressure)= F(force) / A(area) So with a 10# force at the 5/8" Buell break lever we get P= 10 / 0.306640625 where P= 32.6 PSI. You would then multiply 32.6 by the area of the Buell piston in the brake caliper to find the actual pressure applied to the disc by each brake piston. Take the same 10# of force with the Sportster dual disc and you get P= 10 / 0.238326785 and P= 41.95 PSI an increase of 9.35 PSI. So, if for the sake of my theory the area of one piston in the brake caliper is 1 square inch then each piston would apply 32.6 PSI for the Buell master cylinder and 41.95 PSI for the Sportster. This adds up to a 28.68% increase in pressure at the disc. 9.35 / 32.6 and move the decimal over 2 places to get 28.68. I would appreciate any of our members who enjoy mathematics to go over my calculations and remediate me if necessary I haven't had to do this kind of thing in a while. An almost 30% increase in pressure has me wondering what that would do to the seals in the caliper over time, not to mention the fact that the brake would become overly sensitive and possibly lock up on me very easily in a panic situation. I also don't think it would take much hand pressure to excert 10# of force on the piston, you probably put more than that on the piston during regular braking. Does anybody know if the braking power is additive ?? If it is, does that mean when I put 10# on the piston in the master cylinder of the Buell it equates to 195.6 PSI on the rotor due to it having 6 pistons ?? (assuming each piston is 1" in diameter) I don't drink very often but I certainly feel like a beer right now | ||
Henrik |
Impressive calcumalationg there  I'm not good with that kind of calculations, especially since there are more factors than just the master cylinder size vs. piston size going on. For instance: - the Buell caliper is 6-piston differential bore for one thing. I don't know anything about the sportster calipers? - the 14mm master will push less fluid than the 5/8" master, and depending on the total area of the caliper pistons that may lead to excessive lever travel before the brakes engage if the Buell caliper has a significantly larger area than the Sportster calipers. - the brake pad area per caliper is most likely different, but how do they compare between the 2 types of calipers? - mechanical advantage of the brake lever may very well be different between the Buell 5/8" and the Sportster master. I'm sure a likely guestimate can be made - just not by me  Blake may be sharpening his colored pencils as I type though Henrik | ||
Cjburr |
Score!!!!!!!!!!!!! The replacement piston for the Buell master cylinder is only 9/16", not 5/8". This means the difference between the Sportster dual disc and the Buell master cylinders is only .0115". I was unable to put calipers on a Sportster dual disc master cylinder piston to confirm its diameter, but my manual says 14mm. I can live with that, Cost from Zanotti's for the master cylinder is $72.93. This is all the problems and their solutions that I can find before tear down commences. All that is left is to dig in and see what else crops up. I'll be looking at some internal fork stops to see how they work, but I think the cap screw solution will be the simplest way to go. I will take plenty of pics along the way, wish me luck | ||
Henrik |
Glad it seems to have worked out Chris. Good luck  and keep us posted. and keep us posted. May I suggest a banjo bolt with a bleeder nipple for the master cylinder. Makes it much easier to get a good bleed of the system. I think Galfer and Spiegler sells some. AFAIR Galfer's banjos are steel and Spiegler's are aluminum. I'd go with steel. Henrik | ||
Bomber |
Chris -- you should REALLY hook up with Blake -- you and he can discuss this all day long and leave the rest of us drooling in our oatmeal ;-} sounds like you on the right track! very good news indeed! | ||
Cjburr |
Thanks everyone for the encouragement. This may take me a little while to complete, so bear with me. I have 2 little girls, 3&5 years old who require my attention during the week. So most of my progress will occur on the 1 day off I get on the weekend. If anybody else can think of anything I've forgotten to check or has any brainstorms about how to do something better feel free to chime in. Hopefully I'll get the time this week to tear down the Sportster and do a fit check of the Buell trees, lay out the locations of the fork stop screws, and make my final decision on whether to mill off the handlebar perches or just ream them up to 1". I also need to check and see if the Buell brake line will mate to the Sportster master cylinder or if I need to have one fabbed. Thankfully I have my S1W to ride while I'm playing with the Sportster  | ||
Cjburr |
Well I got started tonight.:clap :clap Here are a couple of before pics. 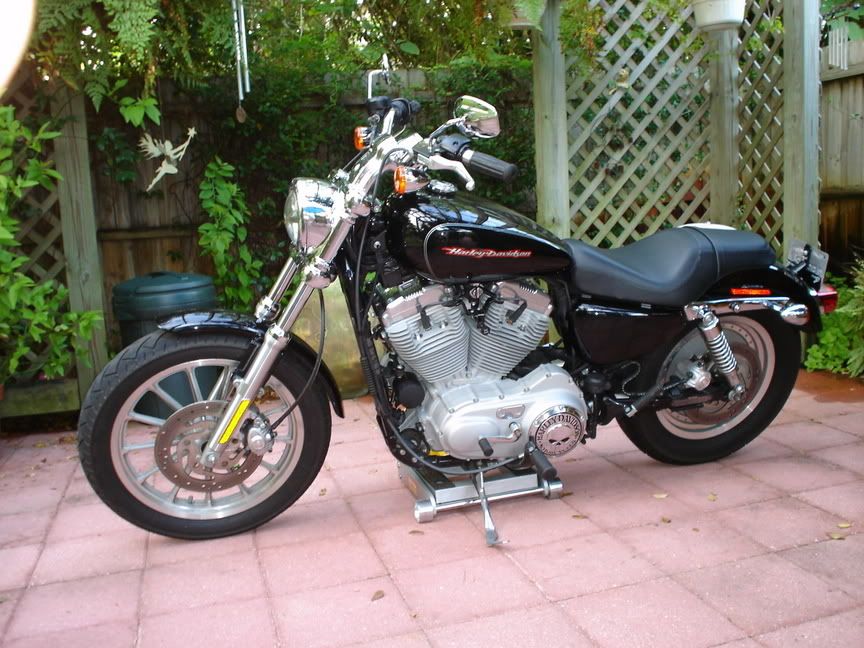 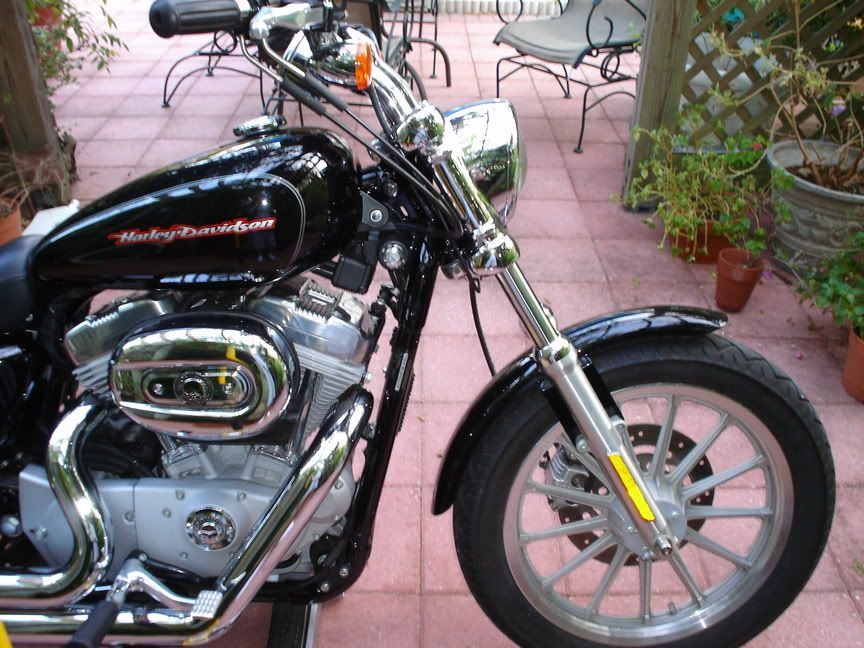 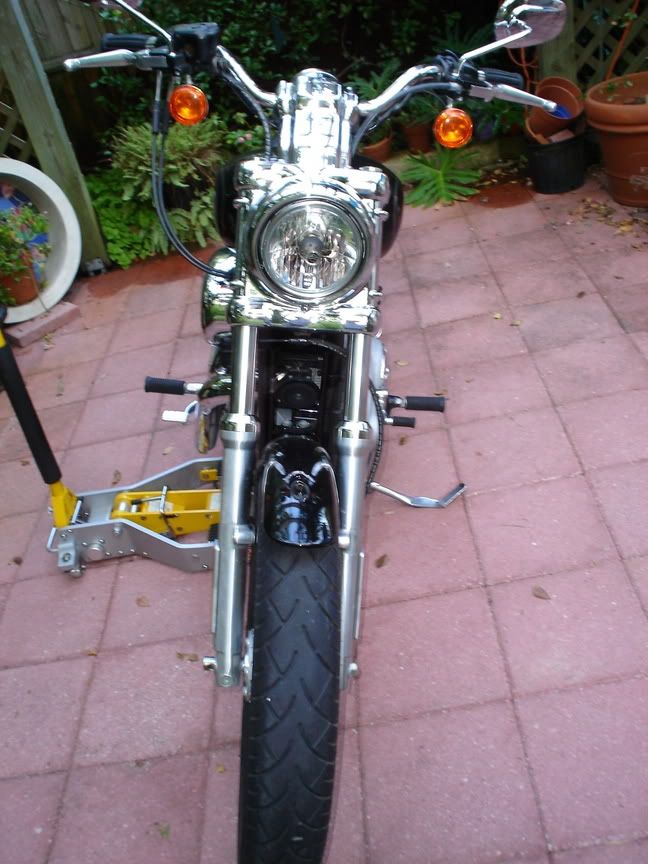 I only got as far as getting the nacelle and light removed before it got too dark on me. 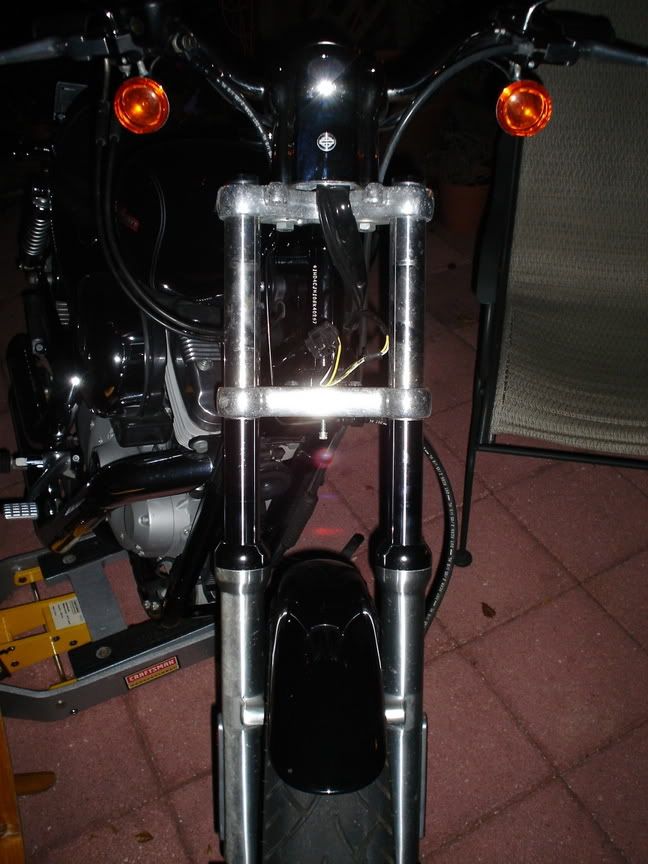 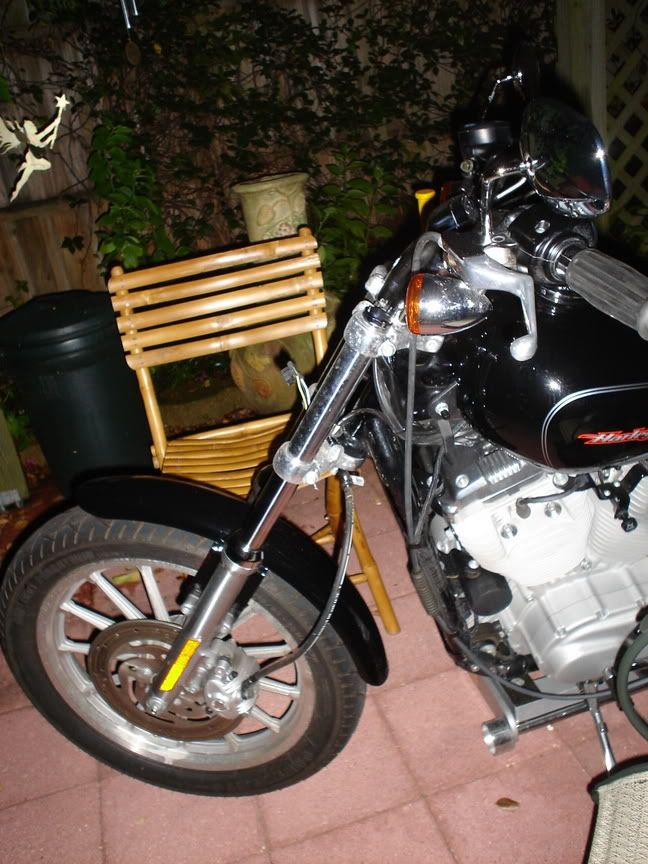 Talked to my friend at work and he said it's no problem for him to mill off the handlebar risers if I want him to. I'll try a test fit of the bars and see how they feel before I do that. Hopefully tomorrow I'll complete the teardown of the Sportster and test fit the Buell trees the day after. | ||
Henrik |
Good going Chris. I should have been wrenching last night but only got about an hour into it before I ran out of steam. Nice lift btw. Henrik | ||
Bomber |
lemme see, you remove the headlight and it gets too dark to work . . . . . . . . ;-} | ||
Cjburr |
Progress was made today. Gianna had dance class, so Annalea and I decided to tear down the Sportster after we gathered snail shells for show and tell at school. First we took off the front brake master cylinder and set it on a chair next to the bike. We then removed the handlebars, complete with riser and set them aside also.  Next was the upper tree removal, very easy, take out the center bolt and loosen up the pinch bolts, couple taps with a small plastic hammer and presto:wonderlan no more upper tree.  The upper bearing looked like it was a sealed bearing when I first saw it, but it just has a rubber seal around the dust seal.  Took the handlebars and riser and placed them on top of the tank so they would be out of the way.Loosened up the pinch bolts on the bottom tree, tapped it down, and the entire front end slipped right off.:clap :clap 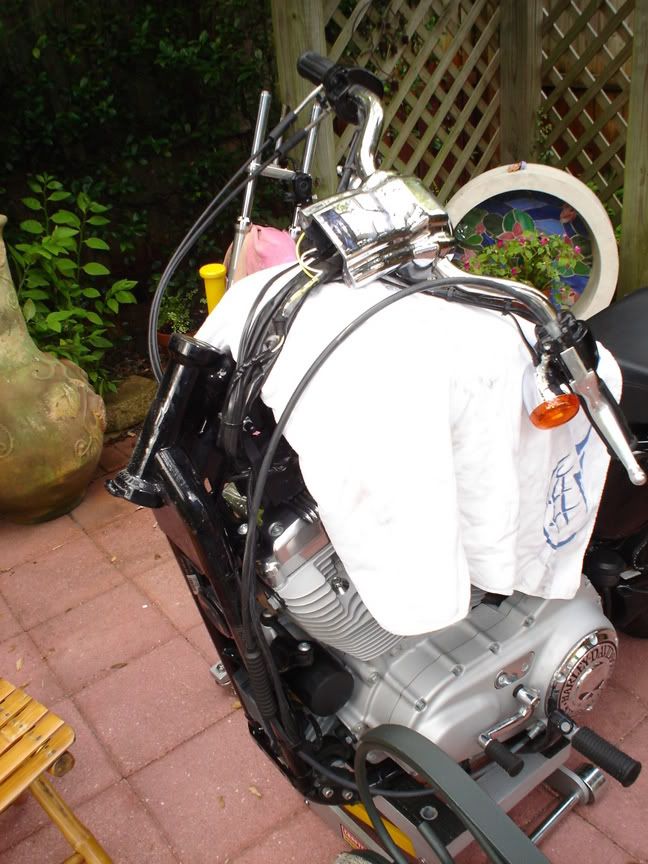 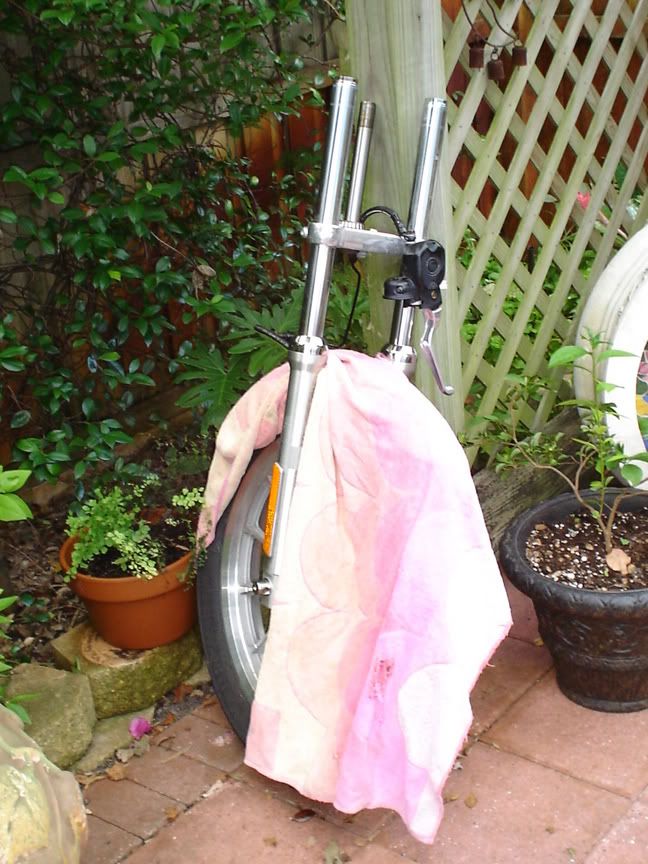 Here is a shot of the stem where the hole is for the fork lock 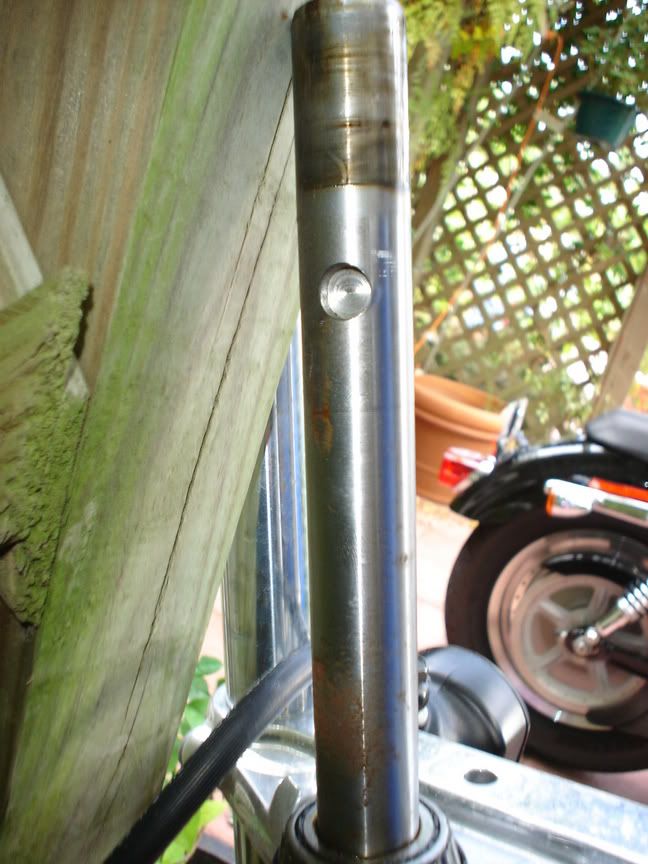 Internal shot of the Sportster neck with upper bearing installed 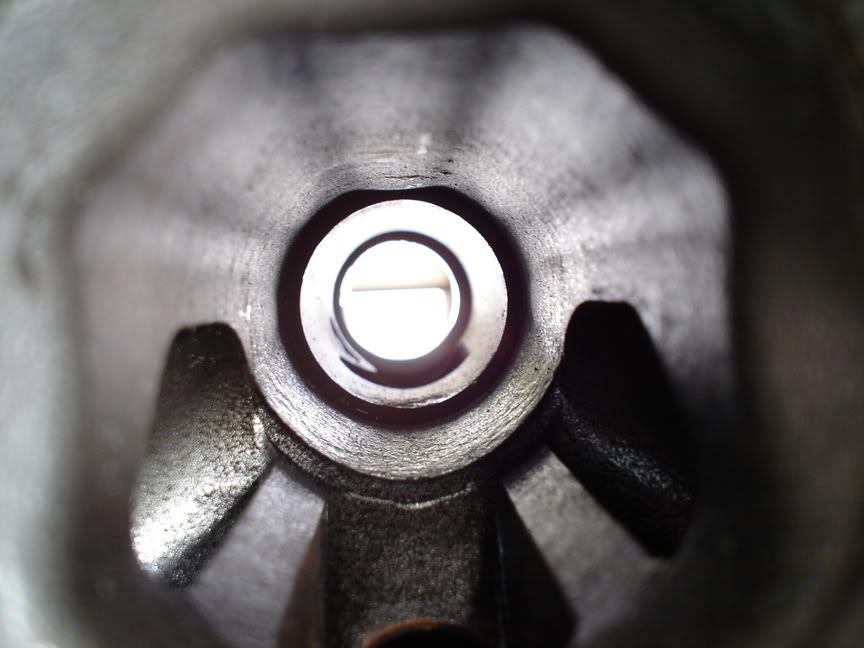 A shot of the bottom side of the upper tree, notice the raised section where the tree sits on the bearing. This will be recreated on the Buell tree with a spacer or washer so the rubber seal on the bearing will be recessed into the Sportster neck as it was originally. 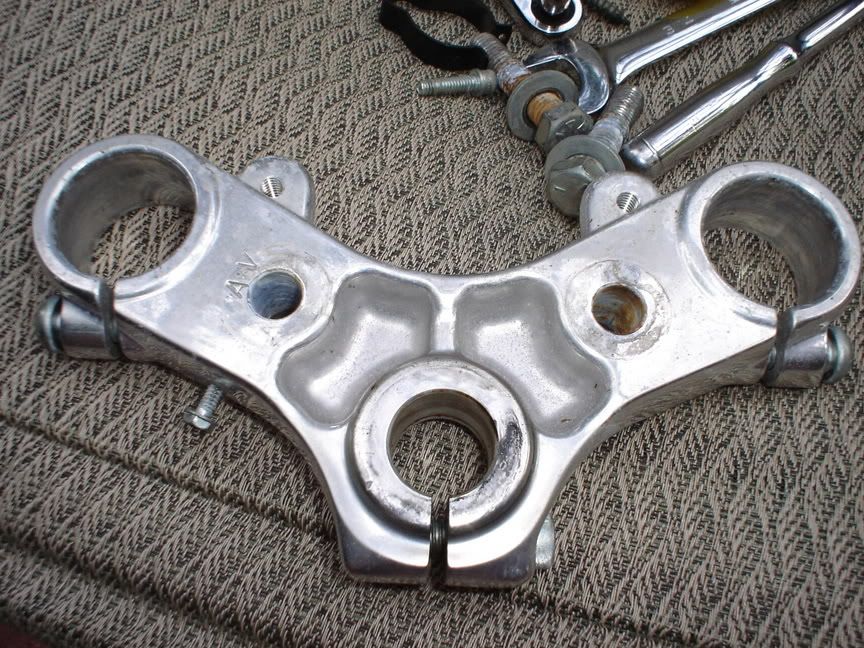 Top of the upper Sportster tree, it has a counterbored hole where the stem bolt and washer reside. 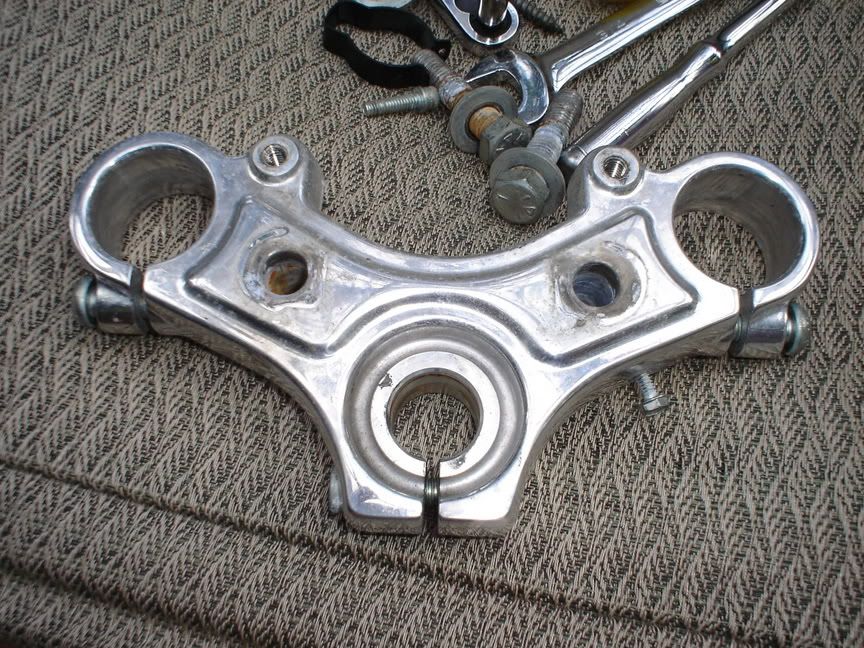 Here are some comparison shots of the two different trees, upper and lower. Can you say "BIG FORK LEGS" :roflblack :roflblack Top of the upper trees  Bottom of the uppers  Bottom trees with stem bolts  Side view showing how the Sportster stem is taller. 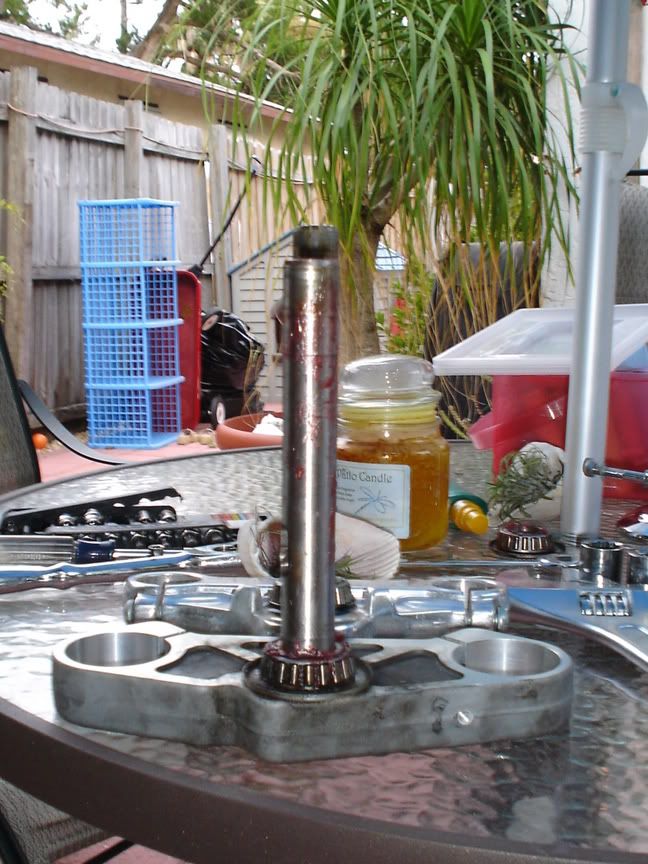 Here you can see the raised portion of the Sportster lower tree that recesses the bottom bearing seal into the neck. Pretty good shot of the rubber seal on the bearings also. 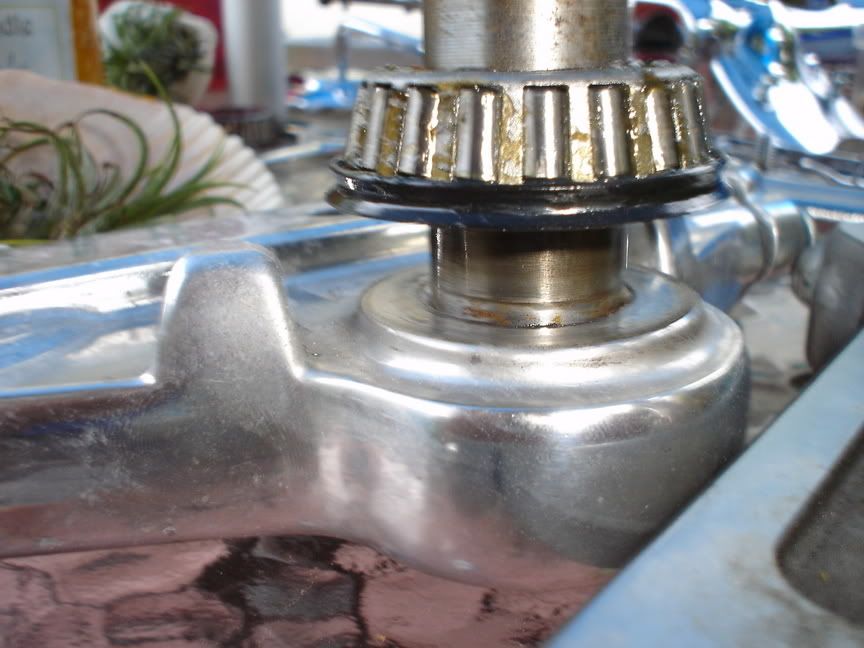 A fit check of the Buell trees to see if there where any other problems that would become obvious with them installed. No new problems noted and perhaps the problem of the fork stop solved. It appears that the lower tree will contact the Sportster frame before the handlebars or the upper tree contact the tank. I won't know for sure until I get the bars mounted, but it looks like I can put little self adhesive rubber pads on the frame and this will act as my fork stop just as it does on my Buell. 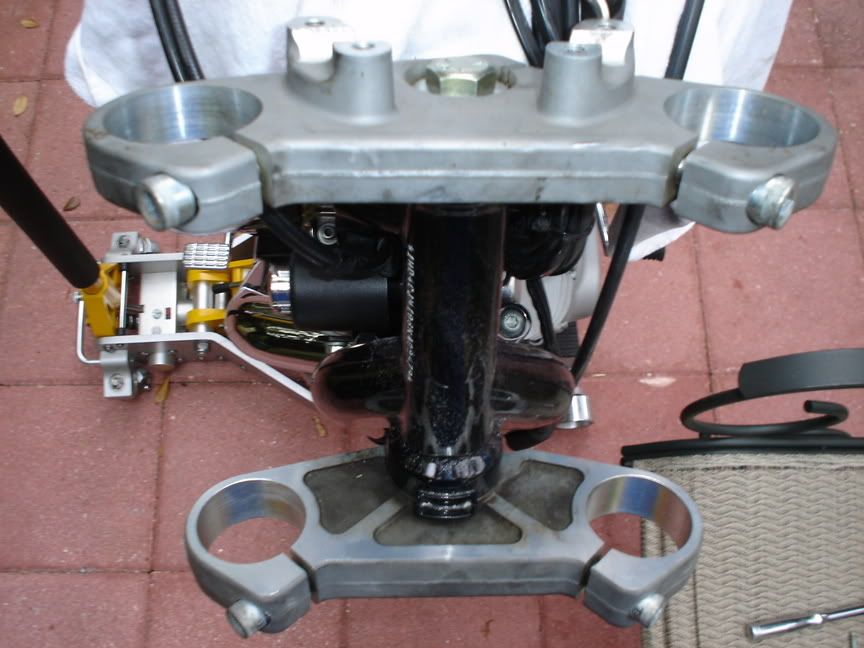 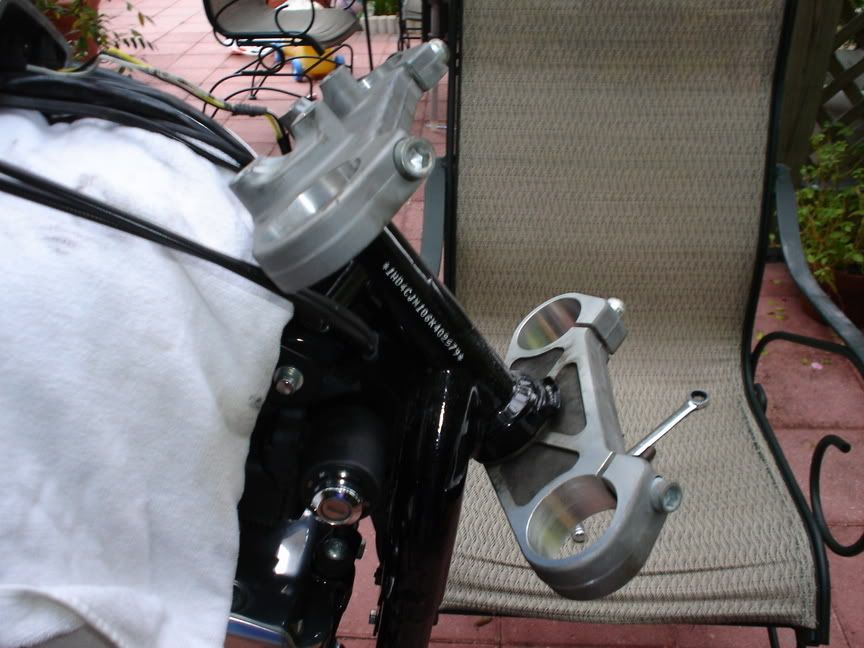 These 2 pics show how the Buell dust shields will not go into the Sportster neck, this is o.k. because I like the rubber seals on the Sportster bearings anyway.  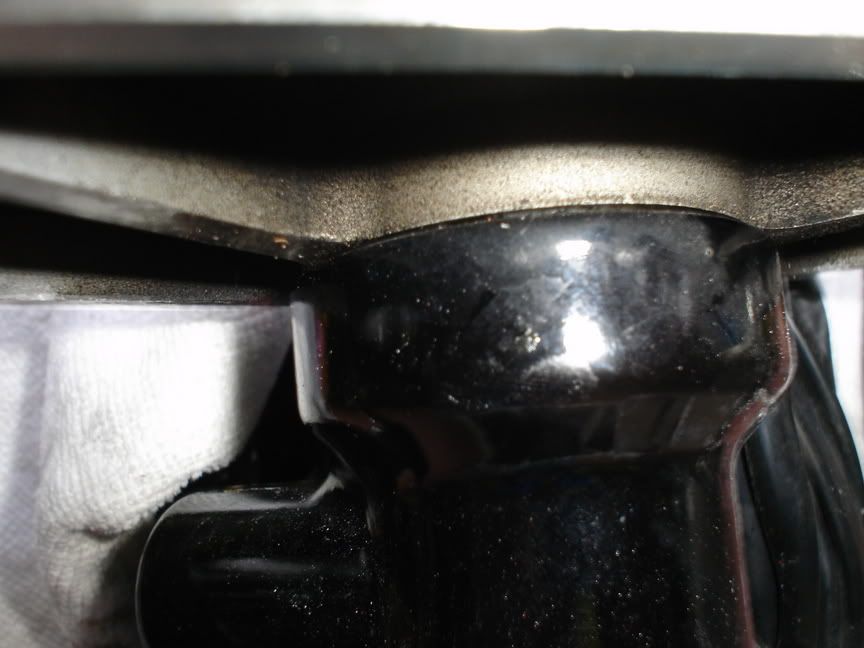 Last but far from least, my helper for the day, little Annalea  anana anana anana anana anana anana anana anana  All in all a good day. It doesn't appear that I will need to do any machining to the Buell trees to make this work. I just need to press the stem and bearing off the 2 lower trees and press the Sportster stem and bearing with a spacer under the bearings rubber dust shield onto the Buell lower. Must make sure the hole for the fork lock is in the correct place also. | ||
Henrik |
Excellent progress and report - and very cute helper Henrik | ||
Cjburr |
Here are some pics of the Sportster stem installed on the Buell lower tree. It took some decent pressure to press them out. No way you are going to just hammer them out, you really need a hydraulic press for this part of the job. 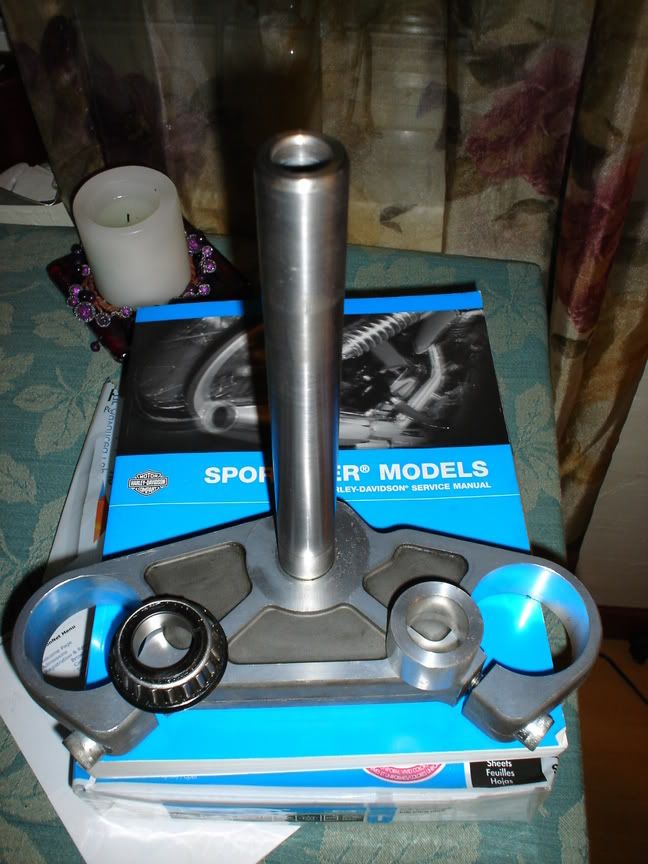 A side shot so you can see the hole for the fork lock  I had purchased some stainless washers to place under the bearings so they would become recessed in the neck of the Sportster, but after drilling them out to 1" and stacking them to .175" under the bearing, I had second thoughts. I've decided to use a single piece spacer fabbed out of aluminum, I just didn't like the look of the stacked washers. I've got a spacer that Ollie fabbed up to support the washers while drilling them out and we will cut it to the appropriate height tomorrow. There will be a spacer on the top and bottom bearings to simulate how the original Sportster trees are cast. Spacer on the stem 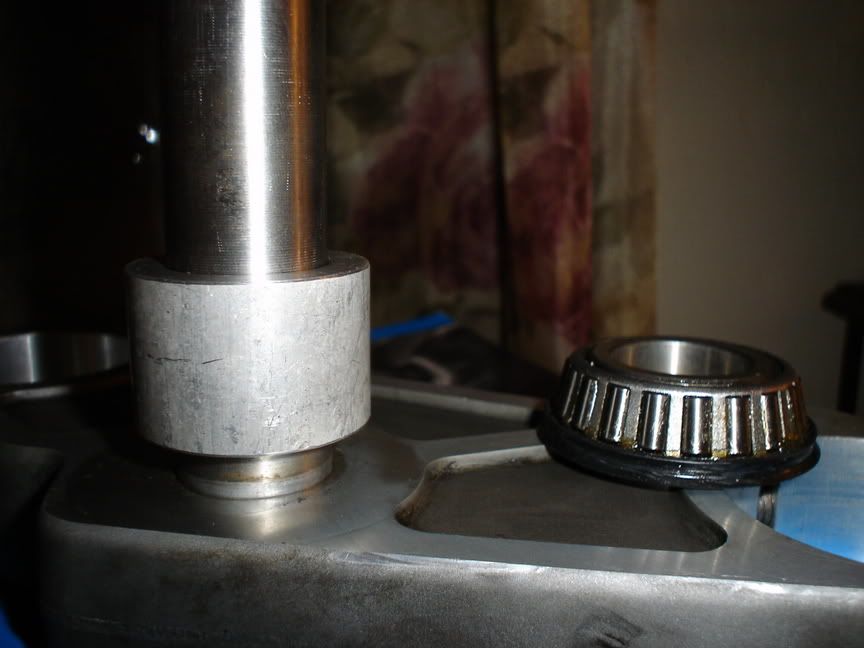 Next to the bearing 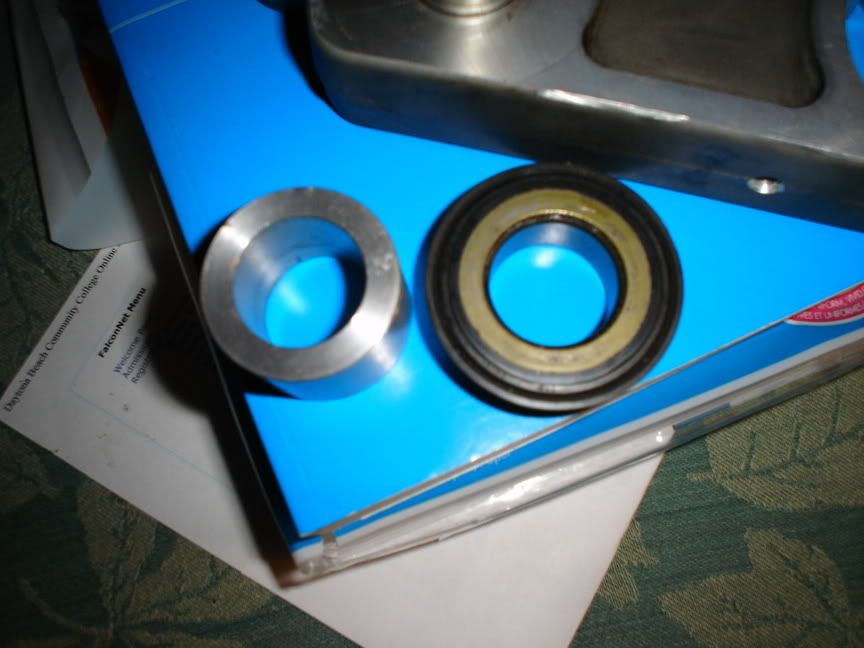 On top of the bearing 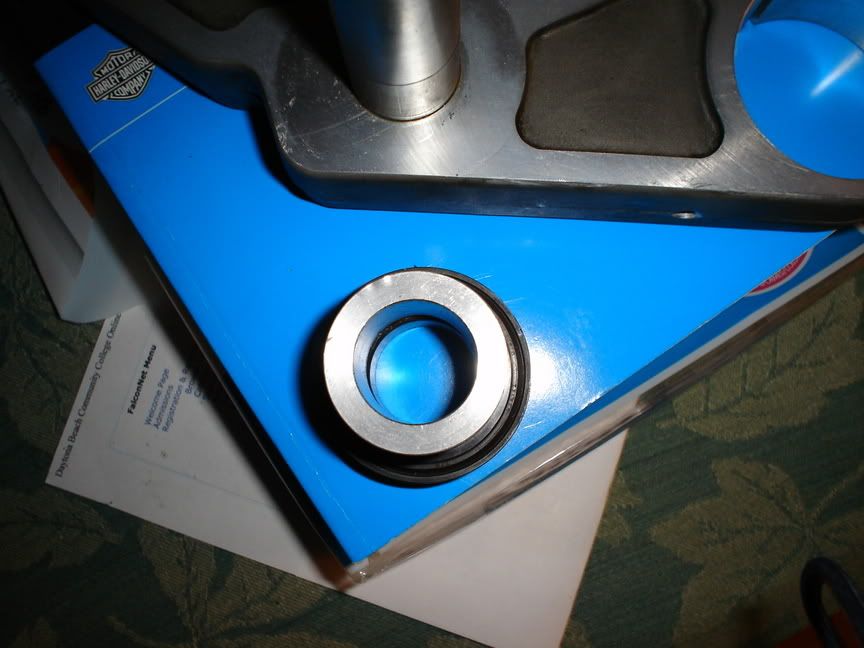 Here you can see the raised portion of the original trees that I need to simulate Lower Sportster tree Bottom of the upper Sportster tree I can see where some might think this a little too much work, but quite honestly it has been a lot easier than I thought it would be ........so far The only place where you would need help so far has been to have the spacers fabbed and to get the stems pressed out and swapped. I called the dealer to inquire about having the stems swapped and they quoted me a price of $145 We have a street here in town where there are many auto shops and today I asked a friend at work if he knew anyone who had a hydraulic press in that area. He did, called the guy, went there after work, he let me use his press, and I was done in 10 minutes. I asked how much for the services and the gentleman kindly told me he thought it was cool what I was doing and to just bring the bike by when I was done so he could see it, no charge for the use of the press. SWEEEEEET!!!!!! That's enough for tonight, tomorrow I will get the spacers cut and start the installation of the Buell front end | ||
Henrik |
Progressing very nicely Chris. Good job  Henrik | ||
Cjburr |
While pondering the install I began to wonder about the the fork lock hole lining up correctly. I measured the thickness of the two lower trees and discovered that the Buell tree is just short of 31mm 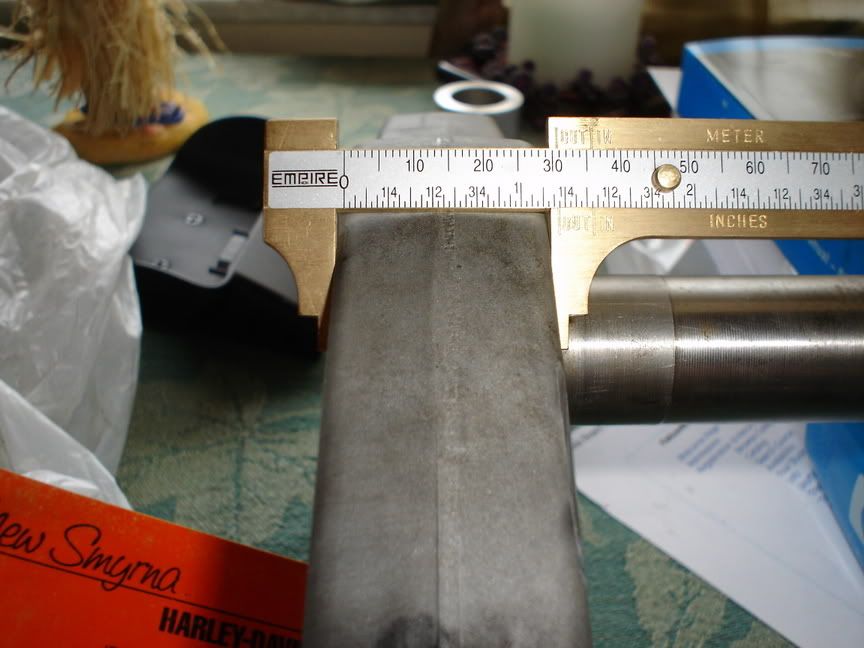 The sportster tree is a tad more than 28mm including the cast in riser that pushes the bearing up inside the cup 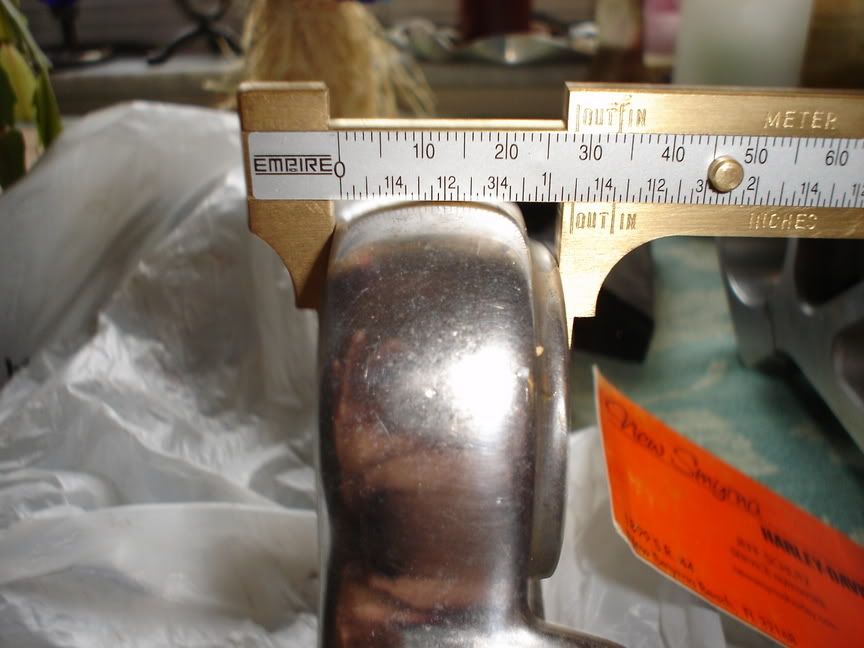 There is a counterbore in the bottom of the Buell tree that is about 4mm 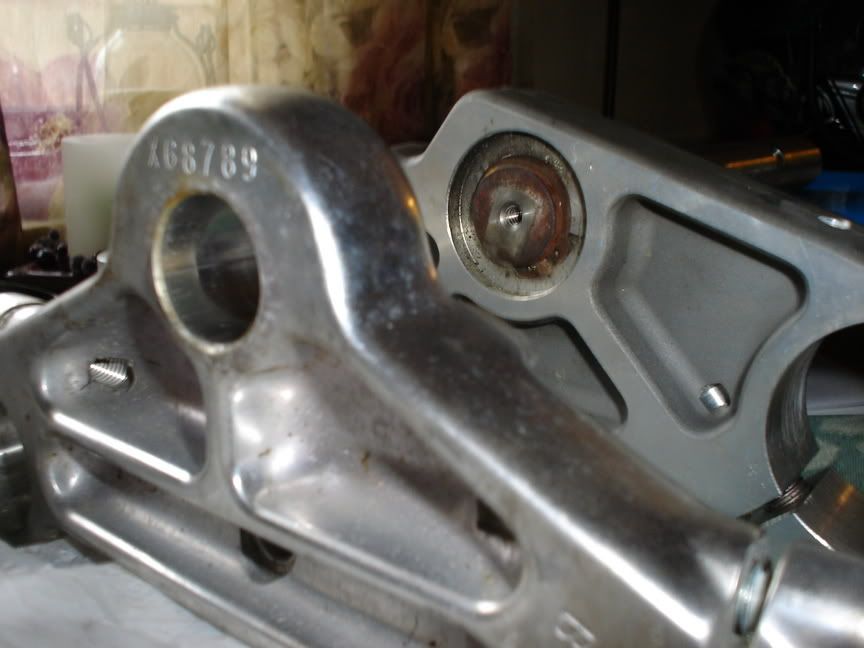 This means that there is only a difference of 1mm for the shim on the Buell that I need to install to make sure the bearing goes up inside the cup and seats on the race properly. The cast in riser on the Sportster is 4mm tall. There was a gap between the lower Sportster tree and the cup, however I did not measure it  It looks like I could get away with making the spacer 2mm tall and still keep the lower tree from hitting the cup and have the bearing seat properly. However this will lower the position of the fork lock hole by 1mm. I don't know if this will prevent the fork lock from engaging or not but we will see. Looks like a trip to my friend Ollie is needed to put micrometers and dial calipers on the situation and see precisely what I have going on here. See you all soon, Chris | ||
Cjburr |
Ollie wasn't home today, so I didn't get my spacer issue settled So I spent the day tearing down the Buell front end and found a few pleasant suprises. 1) The indicator lights on the Buell and the Sportster are the same. This will allow me to use my Sportster lights without any electrical mods. I will just remove them and install them in the Buell instrument pod. 2) The headlight on the Buell is an H4 just like the Sportster so I will be able to just plug and play with this issue also. 3) The speedometer from the Sportster will fit in the Buell instrument pod and I will now have a provision for a tachometer which I have wanted badly. 4) My sportster turn signals look like they can also be used by fabbing a simple block for them to mount to. In summary, I don't think I will have to do a single splice to get all my instruments and gauges to work. Does anyone know if the plug for a tachometer is just capped and stowed on the Sportsters that are not equipped with one from the factory ?? I would assume that the wire harnesses are the same for the different models to keep costs down. If this is true then I will have it made in the shade when I install the tach. I will post some pics of the instrument installs when I get to that point. Time for bed as I have to be at work at 3 a.m. ( It is double time though ) | ||
Djkaplan |
This is so cool. You can't buy stuff like this in magazines. | ||
Jackbequick |
Chris, The six pages below are the installation instructions for the M2 tach kit. On pages 4 and 5 are the instructions for connecting the tach and some wiring diagrams. Those describe the how and where for connecting to the harness in a 2000 M2 and, as far as I know, all of the tubers. The tach signal on the M2 comes out of the ignition module (I think anyway) and is present in a 10 pin Amp Multilock harness connector under the front of the tank. I think Sportsters use the same ignition module. With that kit, the three wires from the tach (orange, pink, black) have the pin or socket contacts (I forget which it is) crimped onto the wires. Those contacts just have to be seated into the correct positions in the shell of thee harness connector to pick up the mating contacts for the tach signal, tach light, and ground contacts that are already there. The contacts lock themselves in place but can be released with a pick tool like a small screwdriver. If you don't have the tach wires with the crimped contacts in place, I am pretty sure that H-D dealers carry them or can get them for you. The connector is called a Amp Multilock and you'll need either the pin or socket connectors. A dealer would likely have the crimping tool for mounting the contacts too. If your service manual does not have the section with instructions on the Amp Multilock connectors, let me know and I can send you a copy of those pages. You're doing a great job on documenting this, it makes for every interesting reading and should come in handy for others. http://users.adelphia.net/~jackerbes/Buell/tach_1.jpg http://users.adelphia.net/~jackerbes/Buell/tach_2.jpg http://users.adelphia.net/~jackerbes/Buell/tach_3.jpg http://users.adelphia.net/~jackerbes/Buell/tach_4.jpg http://users.adelphia.net/~jackerbes/Buell/tach_5.jpg http://users.adelphia.net/~jackerbes/Buell/tach_6.jpg Jack | ||
Henrik |
Chris - I'm very happy about all your progress and encouraging findings, wiring wise. Cool stuff. Henrik | ||
Cjburr |
On my bike it looks like I will need to splice the following wires coming out of the tach and the speedo to install the tach. O (ignition) in the #1 pin LGN/V (databus) in the #2 pin Bn/GY (battery) in the #5 pin OW (accessory) in the #6 pin BK (ground) in the #7 pin This is what the manual says for an 06 1200R with tach and speedo Ollie was busy today  so I will get my spacers cut tomorrow hopefully. It looks like I will put a 1/8" spacer on the upper and bottom trees and maybe another on the top of the upper tree and things should line up. so I will get my spacers cut tomorrow hopefully. It looks like I will put a 1/8" spacer on the upper and bottom trees and maybe another on the top of the upper tree and things should line up. Without the spacers I concentrated on the speedo and tach bracket today. The bracket had been painted with black wrinkle and it was cracked, peeling, and just plain ugly. I sanded all the paint and scratches out of it today in preparation for a coat of Vivid Black. The chrome trim rings on the speedo and the dummy lights should stand out nicely against the black. Here are some pics  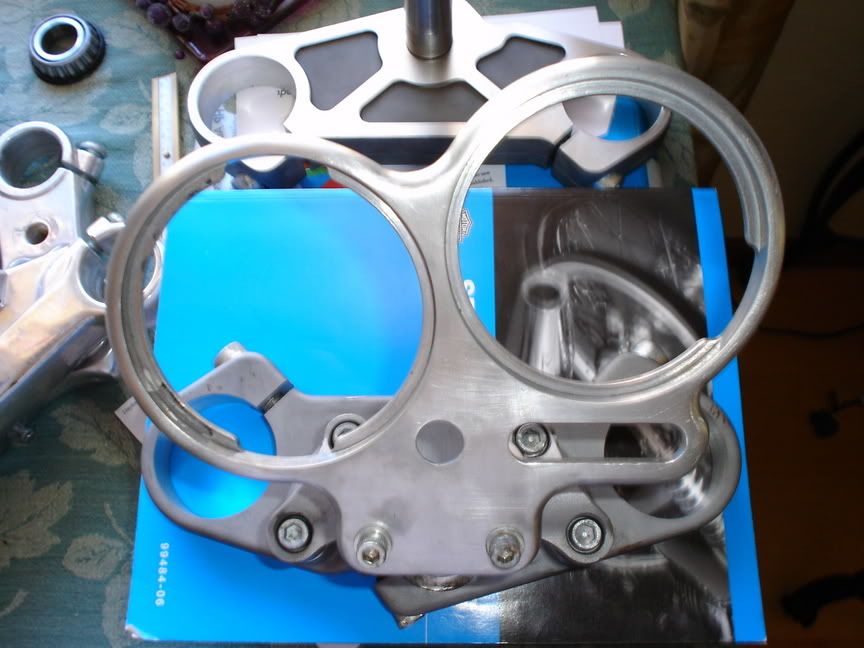 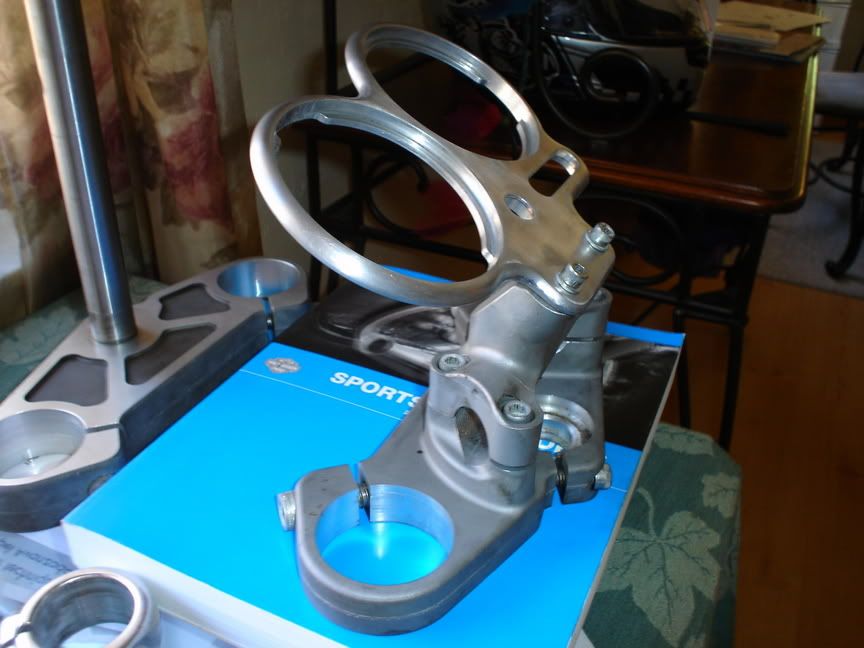 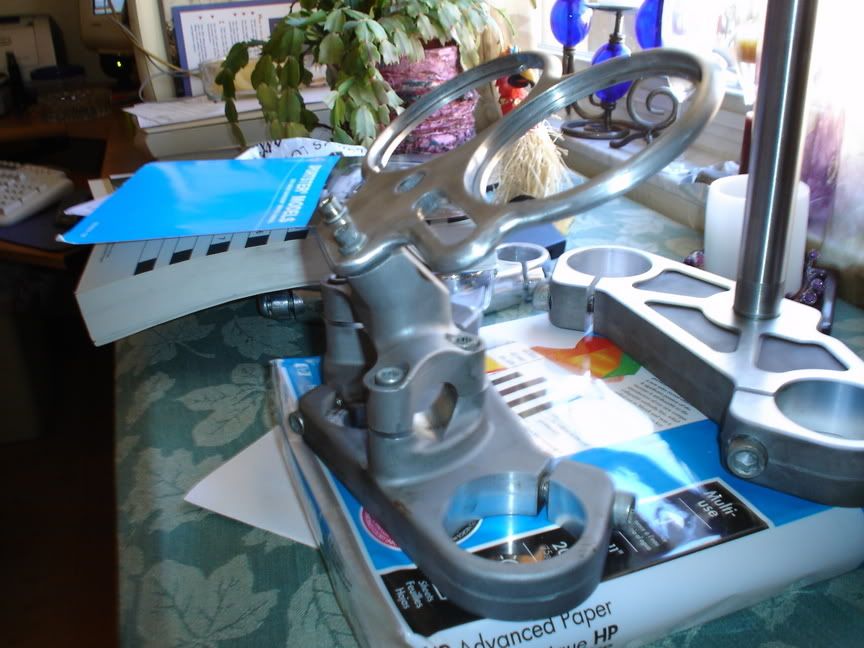 I think I read somewhere that H/D sells touch up paint in aerosol cans, is this true?? If so that's great and I'll use that to paint the instrument pod. Hopefully getting my new garage door tomorrow, so the most I'll probably get done is getting the spacers made. Back soon with more progress reports, Chris |