| Author | Message | ||
Hippyjoe |
This is a quick post covering the highlights of the installation of a Crane Hi-4 ignition in my Y2K M2. Ignition cost 300 new complete. In 2 hours I had the bike running. It took me 4 hours total to complete. I'm kind of slow and thorough. I've been installing and running single-fire for over a decade, previously the Dyna S, the 61-64 Panhead twin-points distributor, and the Morris unit for magnetos. This was my first experience with the Crane unit in a Buell. Overall I am very pleased with the product. I'm sold on single fire: the easy starting, the elimination of carb cough, the smooth idle and reduced vibration on long trips. Marketing claims of increased fuel economy, engine longevity, and horsepower gains make sense on paper but I haven't really noticed any remarkable gains in these areas. 1. The first thing I did was pull the tank and factory coil. The Hi-4 coil bolts right into the stock location. However, it is slightly larger than the factory coil. It hits the tank. To keep it off the tank I did 2 things: first, I shimmed it as far down as possible using two 1/4" lock washers and the supplied shim plate between the coil and the mount. It still hit, so I carefully filed the plastic coil covering on the upper corners a little at a time until it no longer hit.  I only removed the external fin material and didn't file into the smooth part of the plastic. It's hard plastic and I think the coil should be structurally fine. It doesn't get very hot so I figure the fins are for strength rather than heat dissipation. Wiring for the coil was straightforward in the instructions. I pulled power from the original coil+ wire, using a tap splice connector. I kept the original connectors intact and taped over, "just in case" I ever need to return to a stock ignition. | ||
Hippyjoe |
The ignition unit itself was very easy to install. The 5-wire pigtail fits in the factory hole, and the sensor plate fit right into the nosecone. I had scribed the location of the "V" notch in the factory sensor plate into the cam cover prior to removal, in case of a return to stock ignition. The Crane instructions say to install their ignition in the same location as a ballpark measure, and it was pretty close. The hardest part of the sensor installation was removing the factory wiring. I had to dig around and cut wire ties, get in under the starter and disconnect the plug, then I had to remove the battery+ cable at the starter to fish the connector around to the right side of the bike. This gave me enough room to pull the pins from the Deutsch connector which allowed the pigtail to slide out the hole in the cam cover. As with the coil wiring, I wanted to leave all factory connections intact in case I need to return to stock ignition. Routing of the Crane pigtail was straightforward. There are 5 wires: 3 go to the coil, one is for the tach, one is for the VOES. The green VOES wire from the ignition I tap spliced into the purple/white hot factory at the VOES connector.  The wires from the VOES itself are both black, so I tapped in front of the plug at the hot wire just to be sure I wasn't tapping into the ground. I apologize for the crappy photo; to the left of the isolator mount you can see the blue tap connector. To the right you can just make out the VOES lying under the heim joint. I also left the factory brain box in place along the right frame rail, "just in case." I taped over the end of the connector, which is located on the left side of the bike, above the starter. | ||
Hippyjoe |
And that was it. With the electrics connected, I static timed the bike according to the instructions. Very easy. There are 5 programmable curves: two click switches and 3 trimpot-style circuits. I left them at the factory settings, which were electric start mode and VOES mode on the switches, and smack in the middle for the trimpot advance curve adjustments.  Again, the crappy photo makes it look more complicated than it really is. The instructions make it really simple to figure out the mapping. I like how everything fits under the nosecone, clean, and it makes future troubleshooting easy. No chasing circuits through the wiring harness, just 5 wires, a coil, and a vacuum switch. The first time I tried to static time it, the LED wouldn't go out. So I rolled the motor over and sure enough, I was 180 out. Once I recentered the flywheel TDC line in the hole and moved the sensor plate a bit, the light went out and I locked it down. | ||
Hippyjoe |
I'm more a seat-of-pants rider than a scientist. Static timing is all I usually do on my bikes. For now it works fine, easy starting, smooth idle, smooth power, no coughing. Perfect, really. Maybe once I install the Lightning cams and am "done" with engine mods I'll take it to the dyno for some fine-tuning. For now she runs fine, purrs like a kitten and pulls like a tractor. During the first 25-mile ride I noticed slight pinging when taking off uphill from a stop. So I reduced the overall advance curve by two clicks at the trimpot, and the problem went away. I had also tried kickstart mode but didn't notice any drastic improvement in starting, so i went back to electric start mode to save wear and tear on the starter shaft. In either mode the bike would spin 2/3 times cold before lighting, about the same as factory. Hot, in either mode, you push the starter button and kabang, fire and instant loping idle with no throttle. The sign of a well-tuned engine. There may be other coils that fit under the tank with no modification; I don't know. I had to mail-order my parts and wanted to try Crane. The Hi-4 has been around for years and I've heard only good things about it. I've also visited their factory in Daytona, talked to their techs and workers, and got a good feeling for the company. I had also talked to a Dyna engineer and didn't get such a great feeling... I had burned up a Dyna sensor in the past, so I was ready to try something new. Of course, now that the Crane is in the bike, the local hotshot hotrod mechanic says he prefers the Compufire for total adjustability. I don't know much about that brand... maybe next time. For now I'm really digging the Hi-4. It does everything I wanted and more, and it sure looks good under the cover. 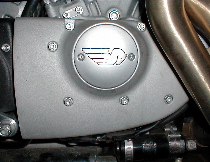 Cover looks pretty good, too.  | ||
Henrik |
Great write up. Thanks Joe. About the total adjustability of the Compufire - IMO it also leaves huge openings for messing things up. KISS you know. Henrik | ||
Hippyjoe |
Keep it simple, yep, the Crane ignition is fine for me. Actually the Dyna S eliminates the VOES, but I wanted to keep the coil in the stock location. I had a look at the Compu-Fire site, looks like a good product. Although it looks like their coils won't fit under the tank. Also pretty expensive for the fully electronic unit. So I'm happy with what I've got. And the five adjustments on the Crane will give me enough to think about for a few years. On the electrics--everything still works on the bike, as far as I can tell. Neutral light, oil light, running lights, handlebar kill switch, etc. The only thing that no longer works is the kickstand kill switch. I.E. I can now take off with the kickstand down. This seems like an improvement to me, as there's one less remote switch in the ignition system. Besides, the first left curve should pop the stand back up where it belongs  |