| Author | Message | ||
Henrik |
I did this write-up some years ago, and it's always tricky to find again when some one asks brake bleeding questions. So I made this particular thread in the KV for ease of use, and added a few pictures and some detail description to aid in understanding. >>>>>>>>>>>>>>>>>>> Posted by Henrik on Thursday, August 08, 2002 - 10:38 pm: -------------------------------------------------------------------------------- I actually like bleeding brakes - after finding "The Way" (pun intended). Get a 60 cc syringe and a 5-6" piece of clear plastic tubing; I.D. should fit the tip/nipple of the syringe and the bleeder nipple of course. If you do a web search for 60cc syringes, I think the catheter tip syringes will work better than the Luer tip ones. What you'll see in the pictures is a Luer tip syringe with a few modifications: - Luer tip syringes come with a small cap protecting the screw connector (the Luer tip is the screw type connector - when you see one you'll understand) - don't loose the protector! Instead, use Goop or silicone to glue it in place on the syringe. - then carefully cut the very tip off the protector to open it up. - and carefully shave the ridges off the sides of the protector - now that the protector is firmly attached and smooth, you can get an air/fluid tight fit of the hose. Attach the tubing to the syringe, making sure the fit is air-tight (a skinny wire tie cinched tight around the hose/nipple will help). After completely draining the system, remove the bleeder nipples and wrap the treads with a few wraps of teflon tape - explanation follows. Just a few wraps of tape is plenty. Make sure you wrap the tape clock-wise as you look at the bleeder from opposite the bleeder end. 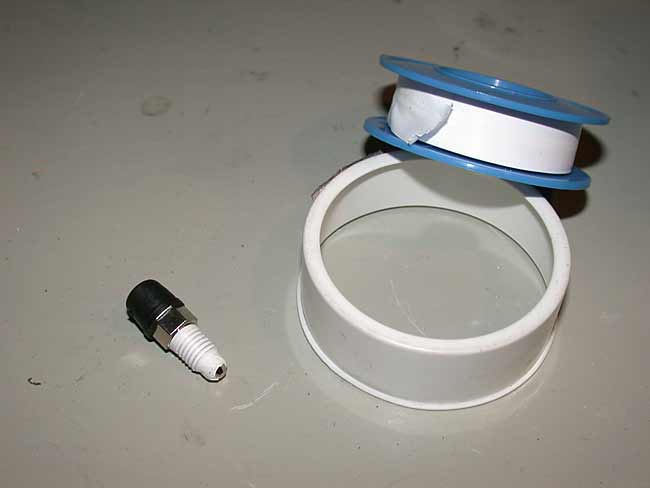 Now, take a sharp blade (razor or utility knife) and cut away excess teflon wrap to make sure the bleed hole is clear and free. 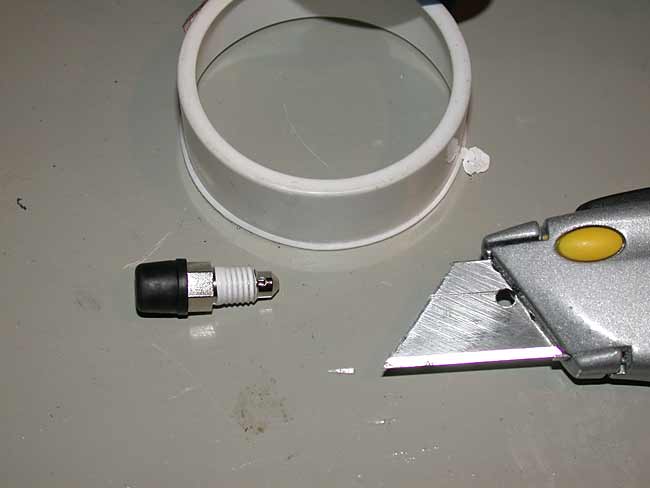 Here's a close up of the bleed hole. Note that the teflon wrap is safely cut clear of the hole: 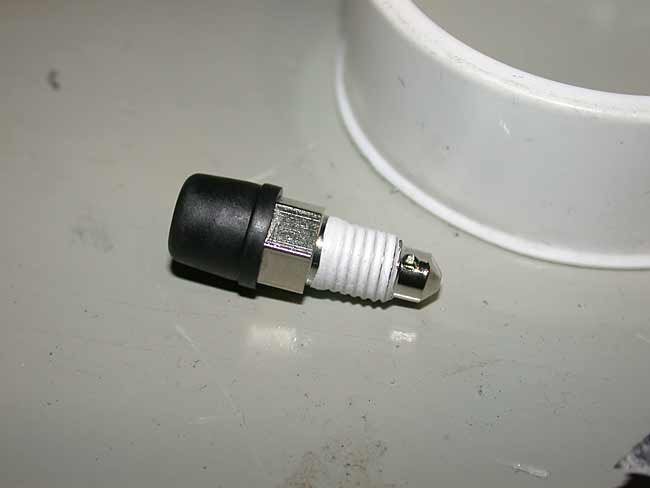 Fill the syringe with new brake fluid. Make sure the keep the hose submerged in the brake fluid while filling; if it starts "slurping" you'll get lots of little bubbles in the new fluid = more air to bleed out of the system after filling. 1) Put the wrench on the bleeder nipple and a rag under it. Flip the syringe/hose so the hose points up; press syringe piston to expell most of the air and completely fill the tube with brake fluid. 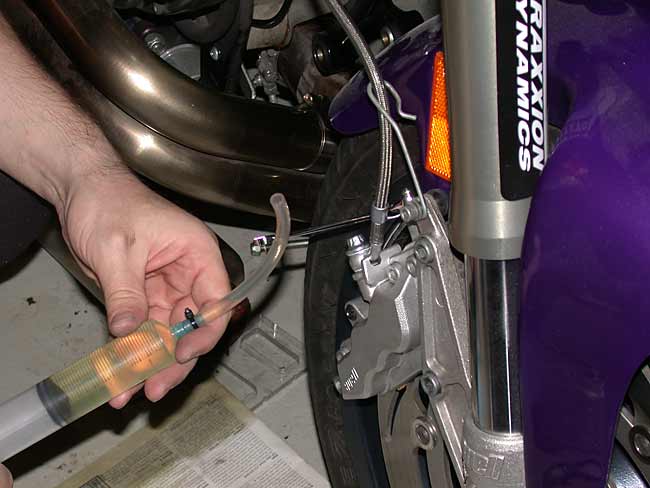 (I had uploaded the wrong image here, but can't seem to get the right one inserted - software won't let me) Slip the hose over the bleeder nipple trying to avoid air in the hose. Hold the syringe above the brake caliper - any air remaining should rise to the syringe itself. 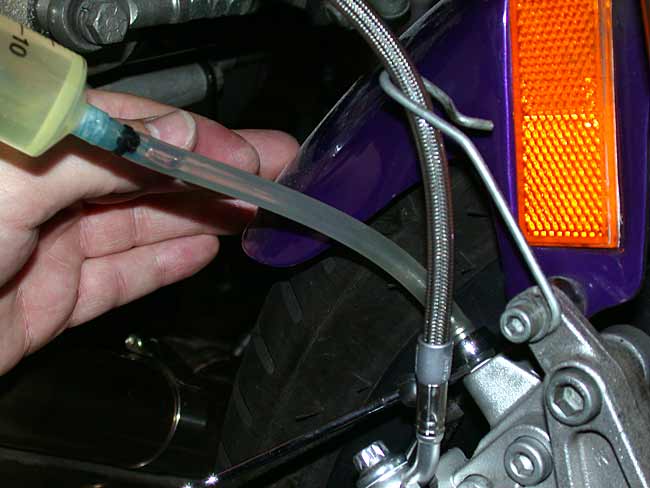 2) Loosen the bleeder nipple and inject fluid into the system until you see the fresh fluid in the reservoir - fill it half way. 3) Now, here's the real trick; without tightening the bleeder nipple, pump the brake lever - it will pump fluid back into the syringe. Don't pump more than there is always enough fluid in the reservoir to prevent pumping air into the system. Keep alternating between injecting fluid from the brake caliper and pumping it back out with the brake lever. The flow will carry most of the air out either at the brake caliper, where it will rise in the syringe so it doesn't get injected back into the system, or out into the reservoir. The teflon on the bleeder nipple threads will keep fluid from seeping out and air from seeping in around the treads. 4) Tap the brake line to dislodge any remaining bubbles and pump back and forth a few more times to flush them out of the system. Tighten the bleeder nipple. As you can see in the following picture I'm using a ratcheting box wrench to loosen and tighten the bleeder nipple. Since I only loosen at the beginning of the bleed and tighten at the end box or open end doesn't make a big difference, but box is certainly easier. 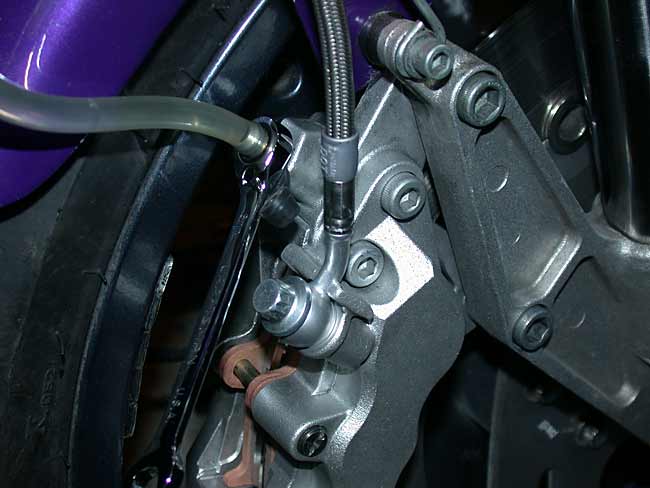 But Here's the Caveat: in race circles it's becoming the norm to only use an open end wrench on bleeder nipples. Reason being, if you forget that the box wrench is on the nipple and leave it there and take off - that could be a recipe for disaster. Whatever you choose, please be careful. Having perfectly functioning brakes is not to be taken lightly. 5) Sometimes air will get trapped in the banjo bolt at the master cylinder. As Blake said, keeping gentle pressure on the brake lever and loosening the banjo bolt a hair, until fluid seeps out, may get rid of that air. A good investment is a banjo bolt with a bleeder nipple in it. That way you can use the syringe to flush that part of the system as well. 6) put the lid on the reservoir and let the bike sit overnight. Tap the brake lines again and repeat step 3), but make sure you pump from brake system to syringe as the first step. Air trapped at the top of the caliper will be pushed out. Air trapped at the master cylinder will stay where it is for this first pump -gravity, don't ya know. 7) if you are not doing a complete bleed, replacing all the fluid, but just trying to firm up a spongy lever, here's a tip: after filling the syringe and tube, and slipping the tube over the nipple; loosen the nipple and squeeze the brake lever first. That will immediately remove any air left in the nipple and trapped in the caliper. After this initial step, just pump fluid back and forth as described, using syringe and brake lever alternately. All this sounds laborious and time consuming, but once you're set up, it'll take less than 15 minutes to do a dual caliper front brake set-up to perfection. Disclaimers: As always when working on a bike, please be careful. This is what I do, but YMMW. if you're not comfortable and 100% certain you can perform whatever service correctly and safely, please have a professional do the job. Henrik (Message edited by Henrik on February 08, 2006) (Message edited by Henrik on February 08, 2006) (Message edited by Henrik on February 08, 2006) (Message edited by Henrik on February 08, 2006) | ||
98s1lightning |
What about the rear set up? | ||
Henrik |
Sorry Wayne - didn't see your question 'till now. I use the same general principle for the rear brake, except that due to the rear brake line routing, air is often caught at the top of a loop in the brake line, and no amount of flushing will push it out. So I usually end up taking the rear caliper off and move it around (lower it) to give air a straight shot *up* through the brake line to the reservoir. Henrik | ||
Tgontz |
Henrik, On a system that has two bleeder valves for each caliper would I have to do this at each valve? | ||
Ceejay |
Thanks to you and Reep I can now do stoppies again! wahoo! Thanks again for the excellent info. | ||
Kalali |
Excellent info indeed. One quick question. When pushing (gently) the pistons in while changing the front pads, do I need to open the lid of the brake fluid reservoir to catch the excess fluid? Somehow I don't seem to see that step mentioned when folks talk about pad replacement. Thanks. | ||
Puddlepirate |
Kalali, when I have done this, not enough fluid went into the reservoir to make it overflow, if that is what you mean. I took my cap off anyway. (Message edited by puddlepirate on September 04, 2008) | ||
Kalali |
Thanks. I will remove the lid just in case.It's hard to tell how full the reservoir is just by looking at the little sight glass window. | ||
Blake |
Excellent advice on a very cost effective, simple, efficient and reliable way to bleed your Buell's brakes. Thanks Henrik! |