| Author | Message | ||
Bads1 |
Ryan, Ya can't put that film on until the paint has cured for quite awhile. Its going look better without anyway. Are you coming to the races still at my place??? I'll show you my bike's paint. | ||
H2owerker |
I was hoping to protect it from chips and bug-burns. Yeah that's Mar. 6th right? | ||
Bads1 |
Man I'll tell ya I have thousands in my paint. If you keep it clean and a good polish on it your golden. And yeah the 6th. I have a few that have committed to coming. | ||
Andymnelson |
I spent a number of years managing an auto body shop. My advice (if you want it): don't cover your paint with the sticker stuff or wax for a good 3 months. The paint truly does need to breath and cure properly before you seal it up, otherwise you'll have a paint job that won't stick as well. Good luck, and sorry to hear about your flyscreen! | ||
Diablobrian |
Dana has it right. Talk to your painter and ask him how long until your paint is fully cured. Some out-gas volatile chemicals and are therefore still soft for over a week, and that's at a steady 70+ degrees F. | ||
H2owerker |
I got a lot done today... And here's a preview of the new color! 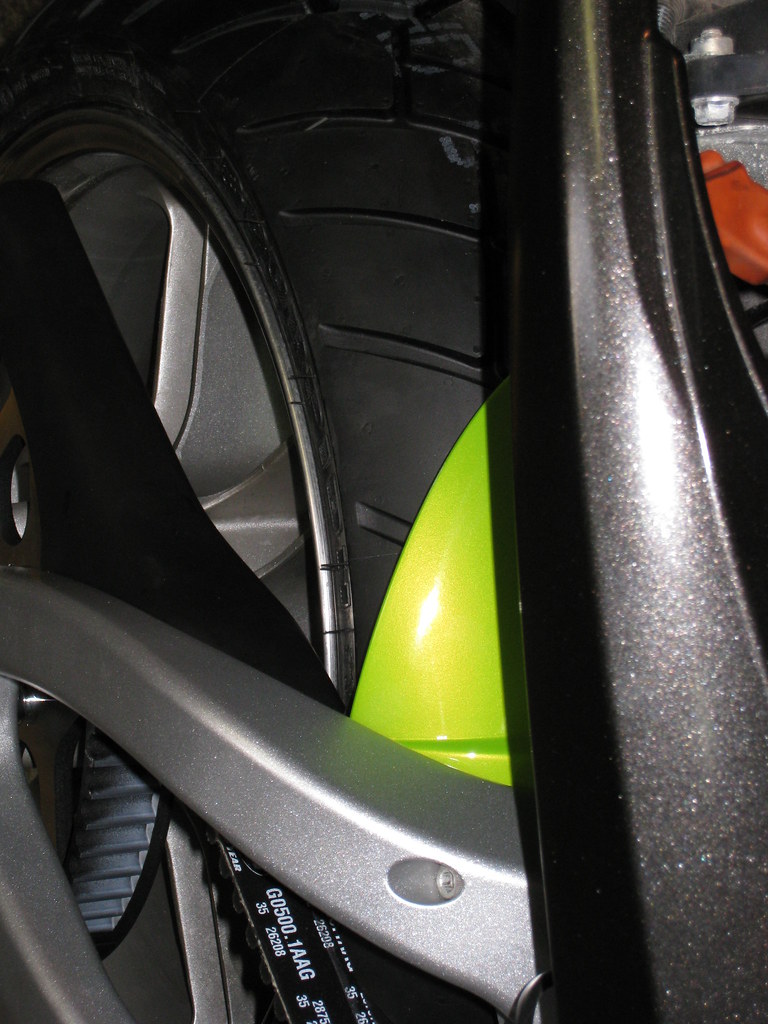 | ||
Nillaice |
oooh, you're such a tease | ||
Bads1 |
Ryan, Come on man lets see it Bro??? | ||
H2owerker |
If I had all the parts... | ||
Bads1 |
Yeah thats right... crap!!! | ||
Joesbuell |
lookin good  nice colour too nice colour too | ||
Schleppy |
That looks like the green Triumph uses on the Street Triples. Looks good! | ||
Buellinachinashop |
I love that color. One suggestion, add a clear platic strip to the rear of the fender, closest to the frame, a ton of small rocks and dirt set up back there and it'll get scratched easily. I had a carbon fiber one and learned this the hard way. | ||
H2owerker |
I placed the Buell logos on the "tank", they are not OEM badges. I got vinyl cut... I started by trimming the excess backing from the forward and center edges using a straight edge and razor. These edges were used to take measurements. Then I put 4 strips of painters tape down the center of the tank and marked the center line. I did that wrapping a seamstress measuring tape around it and marking the center point on the tape. I connected the center marks (about 3 inches apart) by laying a heavy piece of paper down and drawing a line connecting them. The first decal got laid down where I felt the original had been. I used this photo to give me visual reference,  and measured from the center line to both ends of the logo. I also measured from the front of the tank to the lead edge of the vinyl at the center-most corner. I put painters tape along the forward and center edges for guides, and duplicated the lay-out on the other side. Replicating the measurements on the opposite side was pretty easy, and the final product looks symmetrical. Sorry I forgot to take some pics... | ||
H2owerker |
How bright is too bright for a tail light? I started soldering L.E.D.s together to make an integrated tail light, and tested 2 'strings' of 5. They're so bright that from 20' away they make my eyes hurt, and I see spots for a couple minutes. I wouldn't be to concerned about it...except that I'm planning to add 90 more. After I get them all wired I might have to get a variable resistor, and play w/ resistance values... | ||
Nillaice |
i wouldn't make the running lights too bright, but i say blind'em with yer brake lights!! | ||
H2owerker |
Yeah. That's kinda what I'm going for. I do want the running lights and brake lights to be the same intensity though. There are 15(each side) for turn signals, 30 running lights, and 40 brake lights. I'm hoping that whatever I come up w/ for resistance the 133% increase when I hit the brakes will get some attention. | ||
Sifo |
Here's mine that I built last fall after seeing the work others on this board had done. I think I used 60 LEDs. I dim them all with resistors for running lights. It's a bit brighter than stock, but looks way better IMO. I used the RL5-R3545 from Super Bright LEDs. http://superbrightleds.com/leds.htm I wanted a decent viewing angle for when I may not be squared up the the car behind me, and these provide a 45 degree viewing angle. Can't wait to see your bike all together. 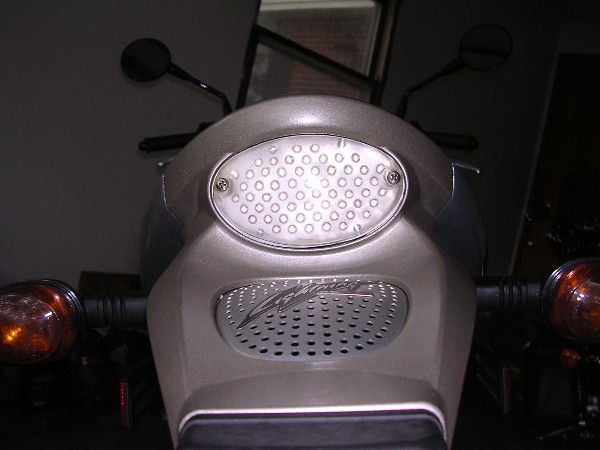 Power off.  Running lights.  Brake lights. | ||
H2owerker |
Nice lights! Where did you get the lens? Did you sand off the convex 'dots' from the inside of a Clear Alternatives and polish the inside? Or is that just a piece of Lexan cut to size? I've checked out SuperBrightLEDs.com, but bought my lights from http://www.buy-leds-online.com/index.html Anyway, I got all the lights wired last night. I'm not happy w/ the way the lens breaks up the pattern I created, so I'm considering sanding the dots inside the lens down, and using some VHT Nightshades to 'black' it out. Cutting a piece of Lexan and using it has it's appeal. But I'd have to recreate my 'circuit board' to allow it to fit deeper into the light reflector... | ||
Sifo |
Thanks H2owerker, I cast mine out of acrylic resin. It was a real stretch of my DIY skills and had a couple of miserable disaster lenses before I got one right. It is the exact look that I wanted though and sometimes it's just feels good to do true custom touches. Given how crowded my LEDs are I'm curious how you will get another 30 in there. That's a lot more solder connections you have to do too!  I hope you get the same satisfaction on yours that I got from mine. When I got mine right I just couldn't wait for my riding buddies to see it. That makes it all worth the hair you pull out along the way! I hope you get the same satisfaction on yours that I got from mine. When I got mine right I just couldn't wait for my riding buddies to see it. That makes it all worth the hair you pull out along the way! | ||
H2owerker |
WOW! That's custom! Did you mold the LED's into the acrylic? I don't think I'm going to go to that extreme. I'm using 5mm LED's, and placed them as close as possible. (approx. 5.8mm on center) The pattern is slightly offset so the LED's aren't touching, but are dang close though. At this point it looks like I'm going to remove the 'dots' from the inside of the clear lens, tint it w/ VHT 'NightShades' and change my 'circuit board' a little. Hopefully those changes will get the results I'm looking for. | ||
Boney95 |
What is this VHT 'NightShades'? A film or a paint? Wondering because I want to tint out my turn signals on my Jeep a bit. | ||
H2owerker |
It's a spray paint. http://store.summitracing.com/partdetail.asp?autof ilter=1&part=VHT-SP999&N=700+115&autoview=sku And here's the best DIY write up I could find about it. http://www.corrado-club.ca/mods/tailtints.html | ||
Sifo |
I thought about molding them right into the lens but didn't really like that idea. One of my big fears was that if I screwed up the molding process the whole LED package would be lost. I did a separate circuit board that just gets sandwiched between the lens and the cheesegrater piece just like the stock taillight reflector. Holes were drilled for each LED and the LEDs were glued in place with CA glue (paying attention to where the +/- leads were to make for easier soldering for each group of LEDs). I made another circuit board that had the necessary resitors for running/brake light operation and spade terminals that would plug into the wiring harness. A bunch of wires run between the circuit boards to connect things up. The circuit boards are then bolted in 4 spots with long bolts using nuts to keep them spaced apart as required. Here's what it looks like from under the seat.  This worked well with the stock lens so I figured worst case I could get a clear lens off Ebay, but I really wanted the LED look. A recon trip to Hobby Lobby scored a product called "Amazing Mold Putty" made to make plaster casts of your baby's hands, some modeling clay, some simple clay modeling tools, mold release, acrylic resin and a looming fear of disaster. I took the stock lens and smoothed out the pattern on the inside using the modeling clay. I would later regret not getting this smoother, but thought it looked good at the time. I then started making the molds with the mold putty. This turned out to be tricky to not get wrinkles, air pockets, etc. trapped. It took a few tries but eventually had flexible male and female molds. 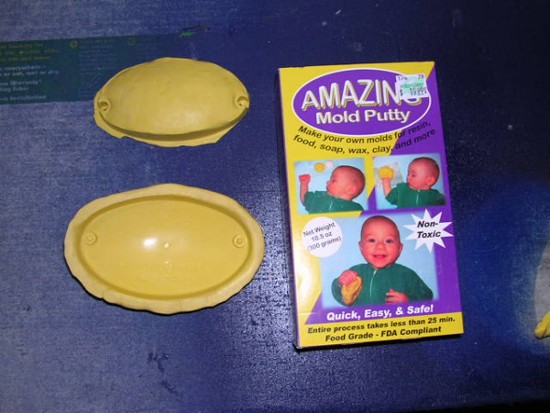 These molds are really floppy though and need some structure around them. I popped the stock lens back in the molds to keep their shape and made some backing for the molds out of some drywall compound (the powder stuff not the premix!). Once I had a top and bottom I assembled everything together with the stock lens again to get the alignment right and drilled some alignment holes. Took it all apart and put some steel pins in the outer molds alignment holes. This allowed me to then accurately set the inner mold in place. The molds then got sprayed with a couple of coats of mold release. It was now time to mix a batch of the resin. I used a disposable epoxy brush to paint the molds with the resin so that I was less likely to get any air bubbles from surface tension. The inner mold then got slipped over the alignment pins and lowered into place squeezing the resin out of the mold. First try didn't quite fill the entire mold, but gave me a good idea of what the quality would be. Frankly it looked like a turd! The mold release left a texture that really looked bad. I had nothing to loose at this point so I hit it with some wet/dry sand paper and polished it like you would paint. I found that you really can polish a turd so I tried casting a second piece with a bigger batch of resin. This time the excess resin oozed out all over the place. This was good, but it also bonded the plaster parts of the mold together. I had to open it up with a hammer and chisel! This was the end of the plaster part of the mold, but I had a lens that I could work with. After sanding a polishing it was a nice shiny clear lens that looked like you were looking into a fun house mirror! Where I smoothed the inside of the stock lens with clay was not even enough and cause real bad distortion when looking through the new lens. Again with nothing to loose I started sanding the inside of my new lens with 40 grit sand paper taking down the high spots. I worked my way down to 1500 grit wet/dry, then rubbing compound then polish. At this point I'm thrilled with the look even though few people will ever know how unique the piece is. I've been thinking about turn signals, but have just come up with a plan to modify the stock units. Time to search out the new materials! EDIT: The circuit board that holds all of the LEDs was painted white before gluing the LEDs in place. (Message edited by SIFO on February 28, 2009) | ||
H2owerker |
Thanks Tom! I was about to tackle this project simply. But now am in the process of molding my own lens... | ||
H2owerker |
And it's off to a bad start. I didn't realize that modeling clay could have a 'reaction' w/ the acrylic lens I'm trying to partially replicate. But it has left some kind of deposit on the inside of the lens where I filled the dimpling, and I can't seem to remove it. I've tried dish soap/water (with a toothbrush), Windex TM (also w/ toothbrush), Isopropyl alcohol, and Mineral Spirits. GrrR! I thought that I had smoothed the inside sufficiently, but after molding it w/ 'AMAZING Mold Putty' the dimples seem to have reappeared. I'm hoping to be able to rub them off the mold though... Then while trying to mold the outside of the lens I got distracted...and the putty became unworkable. I really need to learn to stick to a plan. This wasn't part of it. So back to the craft store tomorrow. | ||
Sifo |
Ryan, I'm so sorry to hear that you are going my route of molding your own. It certainly if fraught with frustrations, but more than that if you make it work, you're only a couple hours north of me! That's way too close!  Did the modeling clay react with the original Buell lens, or were you using clay as part of the mold for the acrylic? The clay I used was a pain to get out of the original Buell lens, but lots of hot soapy water and a toothbrush eventually got it clean with no sign of any reaction. Since my experience with the Amazing Mold Putty I've spent some sleepless nights trying to think of a better material to use for the mold. I keep thinking about 100% silicone caulk. It would probably need a few layers with sufficient drying time to get a reasonable thickness, but I think it might release well from the clear acrylic while being a bit more forgiving being formed to the original. My big question is if it will ever release from the original lens. That stuff can really stick! I haven't tested any of the steps with a silicone mold at this point though. Good luck with your lens. I feel guilty for getting you into this, but will feel great if you pull it off. Maybe we will cross paths sometime near the Kettles! On a separate note, I was trying to hook up a brake light flasher to my light. Miserable failure. The way I have my LEDs combined for running and brake lights have some electrical leakage through the resistors that triggers the flasher as soon as the key is switched on, then it gets nothing when the brake is hit. Time for me to get some more electronics education.  | ||
H2owerker |
You don't need much edumacation...just some diodes (Not Zener diodes!). Point the silver band toward the LED+ (one in each series), and they will (should) keep the voltage from "leaking" back and screwing w/ your flasher. And I plan to head down into Chi-Town this spring/summer to see a friend who's Dad owns a Buell Lightning. Maybe we could GTG then? Or contact me when you are coming up. The lens I was using was the "Clear Alternatives", and the reaction seems to be some sort of mineral deposit. I didn't want to use the original red lens for fear of really screwing up and not having a back-up. If things don't go well I can figure out a way to mount my stock turns, and use the OEM stuff to light the tail/plate. At this point I'm going to get one more container of "Amazing Mold Putty" to form the exterior mold-form, and use (up to) the 8oz. of acrylic resin I bought to make a proper lens. If that doesn't work out I'll cut and sand a 5/8" piece of 'Plexi' we have laying around in the shop, or just sand off the dots in the CA lens. I was feeling quite industrious today, and fab'd a new light panel (during breaks, and after hours) at work today. The original was OK but since I hand drilled all the holes there was some non-symmetry. The vertical mill fixed that...So I ordered more LED's and some new resistors. (Message edited by h2owerker on March 02, 2009) | ||
Sifo |
I figured diodes were the answer. I'm not sure I have the ambition to redo the circuit board in the light right now. I'd rather get my turn signal mods done. I want to keep the stock smoked lights but replace the amber filter with red so that I can rewire for normally on signals. Riding season is right around the corner so the brake flasher may not make it on the Buell this season. I'll probably just stick it on the wife's sporty. It sounds like sanding your CA lens might be the easy way out at this point. How much worse can it get? If it works out it might solve all your issues. A nice 5/8" piece of plexi could also be shaped into a nice piece. The inside could be cleaned out with a router. Shape the outside with a belt sander or even rough it out with hand files. So many ways to skin cats!  Once the weather warms up we ride southern WI frequently. It would be great to meet some more riders in the area. It would be great to see what you've done to your bike up close and personal too.  | ||
H2owerker |
I found some time and ambition today to create a license plate relocation bracket. Here it is... 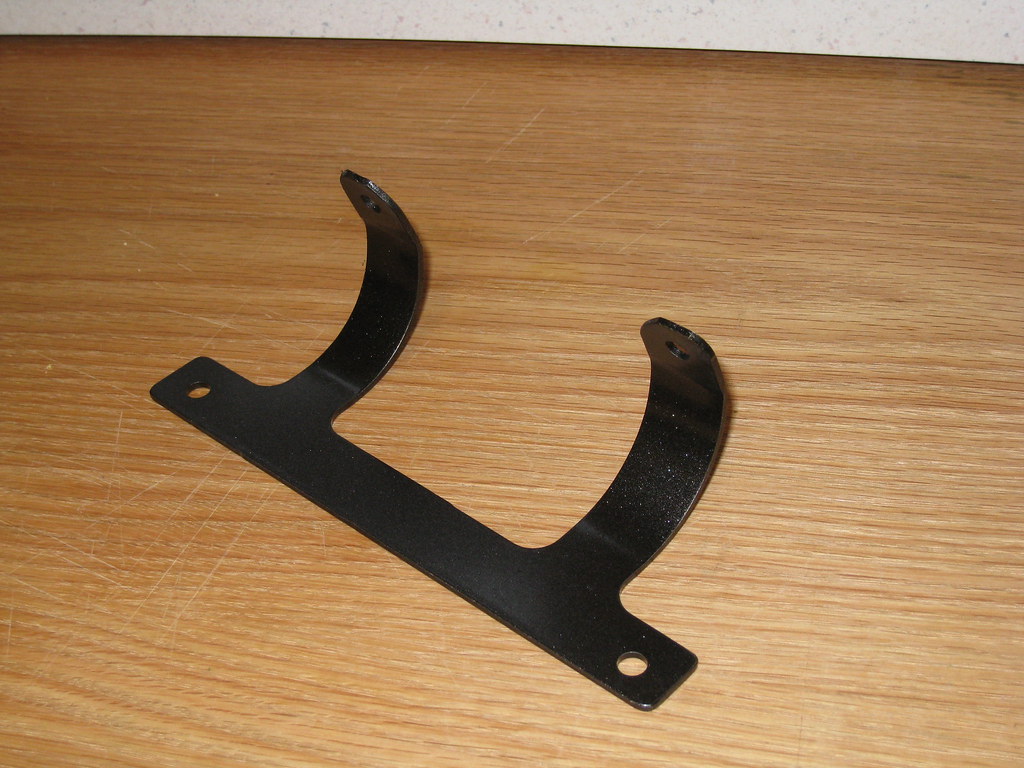 |