| Author | Message | ||
Juggalo080 |
Hey, I got a new clutch cable the other week from daves and am trying to get it apart right now without a manual. I loosened the cable up and got slack, unhooked it from the clutch lever, I have the inspection cover off and am unsure how the cable unhooks from inside. Does it just pop out of the piece it is into? or do I have to unscrew the adjuster screw in there and take things apart? Any info would be great, thanks. | ||
Jackbequick |
You unscrew the fitting on the end of the sheath or cable housing where it enters the primary cover (primary lube will run out). The cable and the sheath are all one assembly and the piece that you unhooked will come out with the rest of the sheath. That fitting that screws into the primary will seem unnecessarily long, it is made out of aluminum, and should have a small O-ring for a seal where it meets the case. People have been known to over tighten them at the primary case and break the threaded shank. The torque spec on that is something like 3-5 foot pounds, I'd just tighten it until the O-ring is slightly compressed. Jack | ||
U4euh |
You have the cable, cable end, cable coupler, and that all attaches to the ramp. In the center of the ramp is/was a spring. Behind the spring is one nut(remove it by pulling) Now you see the center shaft w/slot for a flat head screw driver. On the outside of this shaft is nut #2. Turn the shaft and you will see nut #2 start coming forward. BE VERY CAREFUL AFTER YOU STAR THIS PROCESS! Dropping pieces from this point will result in having to remove the entire cover. After getting the 2nd nut out, you can pull the ramp assembly out, thus freeing up the cable and coupler. Remove coupler, make sure to hang it outside of the case and remove cable from coupler and ramp. As Jackbequick posted above, you can now remove the cable by wrenching, might be best to take the allen screw out of your shift lever at the point where it attaches to the adjustment screw, swing it up and out of the way so turning the cable will be easier. PM if you have problems. JIM (Message edited by u4euh on April 05, 2006) | ||
Juggalo080 |
Ok, I got the inside stuff unhitched and then went to take out the other piece and it was either broken already or else I broke it then. What is the best way to get the broken piece out of the case? Can I get an easy out in there that will pull it out? I see there is lock tite on the threads of the new cable, do I need to heat in the area it's threaded in to help it? How has everyone else done this after it getting screwed up? Thanks for the info. | ||
Jackbequick |
The threaded shank on the cable break off in the primary? Is that what happened? If so, I'd cut the cable off and tap an Easy Out (laughter and scoffing heard in the background here) into the hole in the shank and see if it will turn easily. If it does, unscrew it. I have a tuber, some of what I say might not be right for an XB. If the shank does not turn easily, you can pull the primary cover and see if you can get a hold of the portion inside with a ViseGrip pliers and unscrew to the inside. Heat the stub to release any locking compound if it does not turn pretty easily. It takes 500F to set Loctite red free. The shifter has to be removed (use a puller if needed, it will break if you try to pry it open to relax the grip) and the primary chain adjuster has to be backed off to remove the primary cover. If you take the primary cover off, get the new metal gasket before you put it back. The old style paper ones are a major pain to use and prone to leakage. The new metal ones can be reused several times of more. If the Loctite on the threads on the new cable is brown in color it might be a thread sealant and not a locking compound. To keep oil from leaking down the threads. The curve in the clutch cable sheath will keep it from unscrewing itself from the primary. So I'd not tighten it any more than is needed to get a seal on the O-ring. The 3-5 ft/lb torque spec on that cable to primary fitting is stupid. No one has a torque wrench that will measure 3 ft/lbs. If you convert that to 36-60 in/lbs it is a little more credible but I'd still stay on the light end of the range and look for a no leak seal not a tight fitting. When you put it all back, the cable goes on the coupler and the rounded side of the coupler goes towards the motor as it attaches to the actuator. The coupler will hit the primary cover when the clutch is pulled if you put it in the other way. When you put the adjusting nut back (in the center of the actuator) turn the adjusting screw CCW until the nut goes back in and you feel it make light contact at the bottom. Then back off 1/8th turn (or a little more if needed) and put the locking nut (the one with the spring attached to it) back over the hex shaped adjusting screw. That 1/8th turn is your freeplay to unload the throwout bearing. Jack | ||
Juggalo080 |
I got an easy out and the piece broken in the primary cover came out easily, got the new one back on there. How do I adjust it so that the clutch is at the proper position? do I adjust it in the cover first and then in the cable or how do I do it? Thanks for the info. | ||
Jackbequick |
You're a lucky guy! You got an Easy Out to work on the first try! The sequence in the service manual is to adjust the primary chain, then the clutch pack, then the cable length/clutch lever freeplay. Find the tightest spot on your primary chain and adjust the chain tensioner so that the chain has 5/8" to 3/4" of (total, up and down) freeplay when pressed firmly with the tip of your finger. Adjust the clutch cable length adjuster in the middle of the cable until it is screwed all the way in (makes the cable sheath as short as possible, the clutch lever is flopping around). Take the spring/locking nut off the adjusting screw. Use a narrow flat bladed screwdriver and turn the adjusting screw counter clockwise until the adjusting nut goes to the bottom of the cavity in the actuator and just touches. The screw should turn easily, you just want to feel the nut make light contact with the bottom of the cavity in the actuator. This adjustment, when done again in the future, is the adjustment that compensates for the wear in the clutch pack. Back the adjusting screw off 1/8th turn (turn it clockwise). That unloads the throwout bearing, giving it a little freeplay. Slip the locking nut over the end of the adjusting screw, if necessary turn the adjusting screw clockwise a little bit more to align the locking nut with its recess. Lengthen the clutch cable length adjuster until there is no freeplay where the front edge of the clutch lever meets the mounting bracket. Squeeze and release the clutch lever several times. Now shorten the cable length adjuster a little until there is a 1/16" gap where the lever meets the bracket. This is a pretty subjective adjustment, the pressure or resistance felt is pretty light and vague. Lightly lock the lock nut on the cable length adjuster. Start the engine squeeze and release the lever a few times, it should feel about like it did before. Pull the clutch lever in, wait a second, and engage low gear. You should get the classic "clunk" but not a loud or prolonged clash of gears and certainly no pulling. If there is a loud clash or pulling, lengthen the cable length adjuster about 1/4 turn at a time until that stops. Lock the adjuster. If the primary lube and transmission were cold for the initial adjustment, put 9/16" and 1/2" wrenches in your pocket, ride 10-15 minutes, and check the cable length adjustment again. Once that is working right, look at and get the feel of the clutch lever freeplay gap at the lever and bracket. What you see and feel there now is what you want to have for future adjustments. My experience has been that the primary chain, clutch adjusting screw, and clutch lever freeplay all have to be right to get the best shifting and clutch action. So I'll generally do all three of them and in that order. A Buell service manual, modified a little with the hard learned lessons in the KV, is a good thing. Excellent technical detail and illustrations. Just about everything you would ever need to know. Jack | ||
Cactus_dave |
I noticed my cable needing more and more adjustment. Upon further investigation I noticed that it was on it's last 2 strands. I ordered a new cable from Hacienda Harley in Phoenix.. 2 days it was on my doorstep. First thing I noticed was of all the cool features that Buell has, the fellow that designed the clutch setup could definitely learn something from looking at Jap bikes. Any how.. after removing the old cable I installed a new o ring, the proceeded to screw in the new cable. As soon as I felt the o ring start to compress the shank snapped completely off. I couldn't have had 1/2 lb. of torque on it. Where is this stuff made? Taiwan? Geesus! 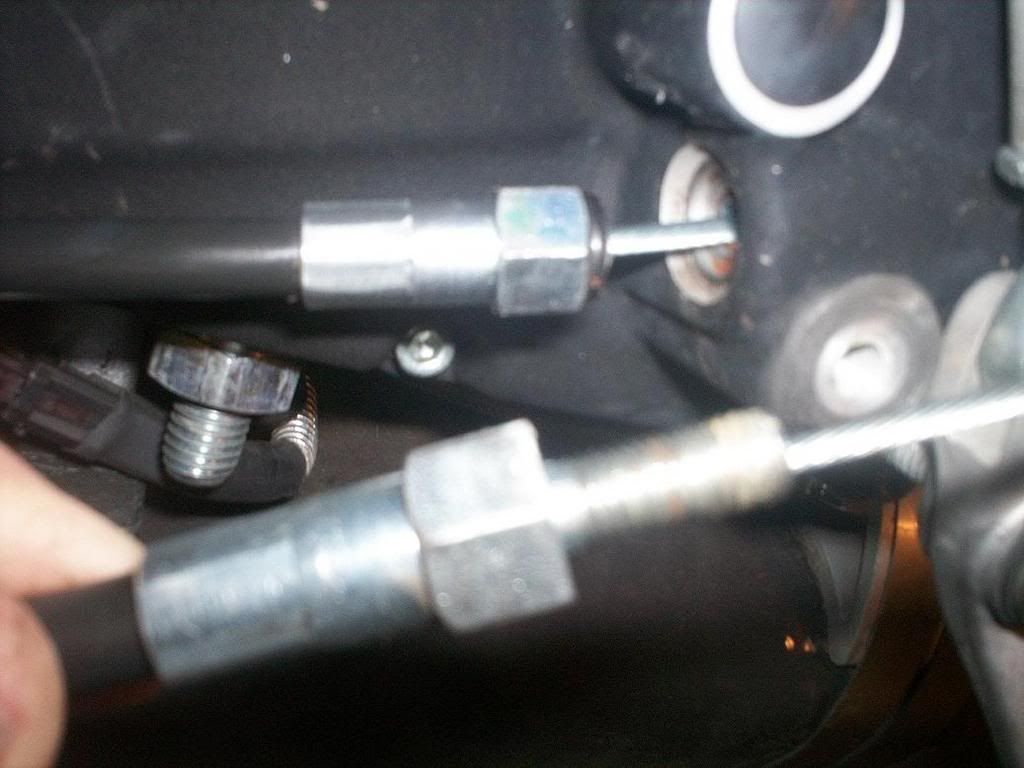 |