| Author | Message | ||
Mcelhaney14 |
I recently experience a tach needle slip and decided to document the repair. I had also experienced a LCD failure when I first got this bike and decided to describe that repair as well. Once you get the IC out of the bike you will need these tools. 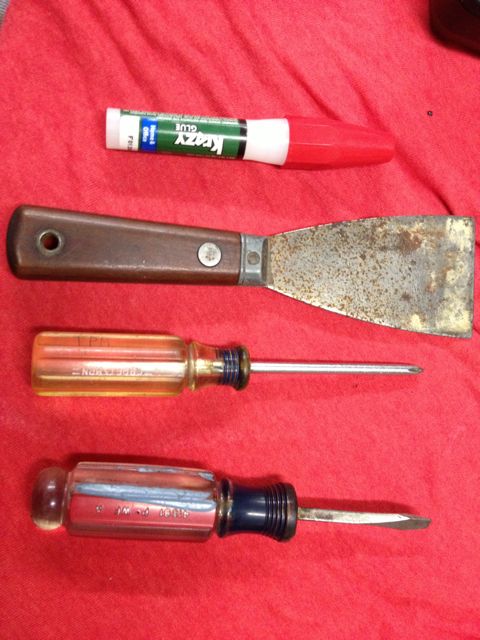 Use a phillips head screw driver to remove 5 screws circled in red that hold the IC together. There may be sealant in them that you should pick out first.  Once all the screws are out use the edge of the scraper on the seam of the IC and GENTLY pry it up. 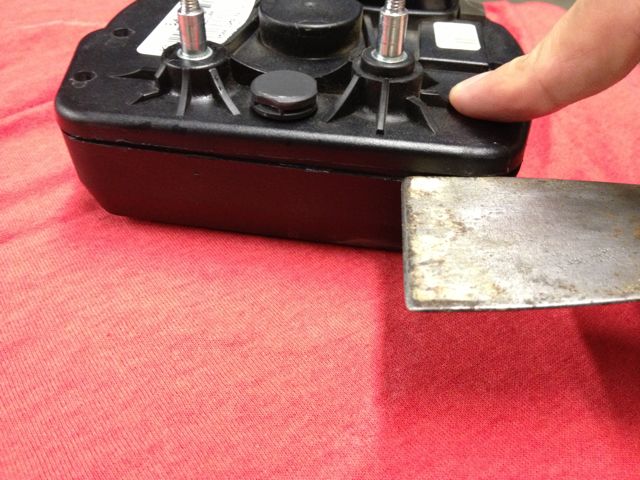 Work your way around the IC until you can separate the halves. 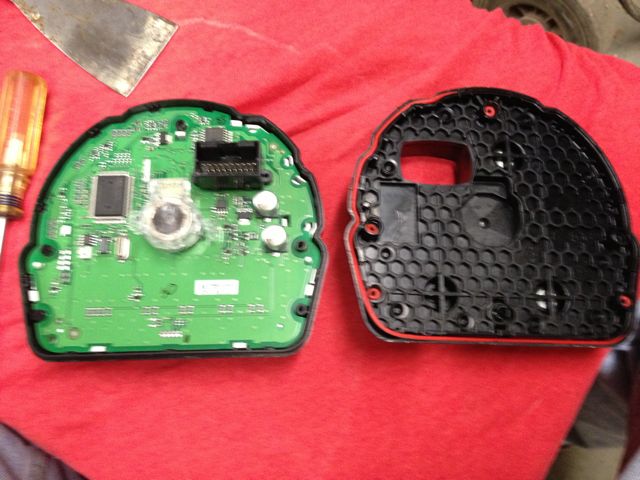 Once separated you need to remove the guts from the front half. It snaps in the front face, spreading the edges of the outside housing helps to release it as well as CAREFUL work with a flat blade screwdriver as shown, don't twist but GENTLY pry it up.  You should now be left with this.  Now remove the needle by twisting it, I did counterclockwise but it might not matter. 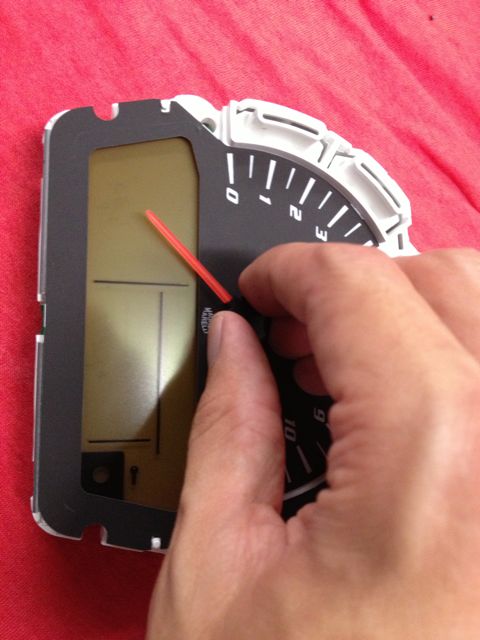 If you are fixing a needle slip ONLY apply a drip of super glue to the needle shaft mount and reinstall with a gently push and twist it counterclockwise until it is zeroed again. Then reassemble. | ||
Mcelhaney14 |
For the LCD screen the problem is the pins boxed in red. Disregard the fact the the guts are still in the front housing, remember you removed them already  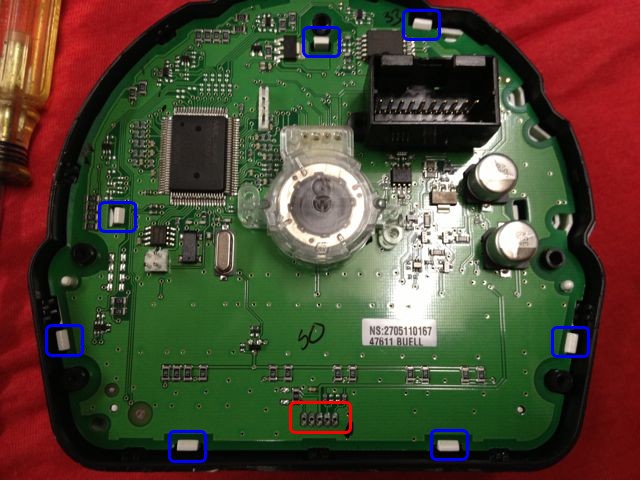 With the guts out and tach needle removed you must unsnap the printed circuit board (PCB) from the white plastic housing. Those are the tabs in blue, I think I have them all circled but you should double check. Once the PCB is removed you must slightly bend the pins in red so that they contact the edges of the PCB holes. 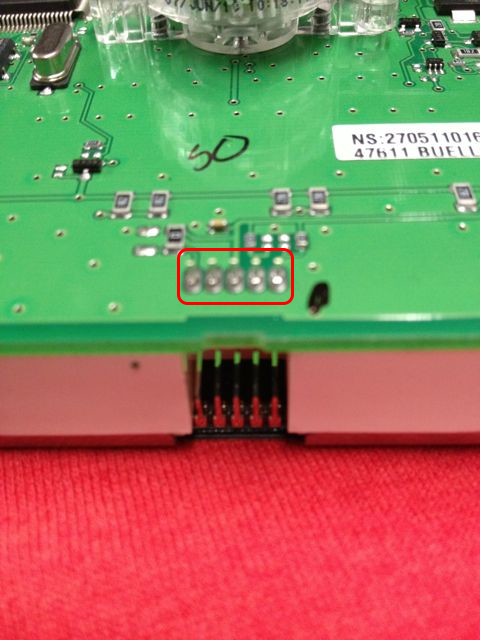 My pins were centered in the hole and not making contact. I just tweaked them towards the bottom edge and reinstalled everything I have described in reverse. I apologize for not having pics of the LCD fix as I was not performing it this time. One tip is to make sure you get all the red O-rings are in place when you put it back together. I lost one from my LCD fix.  If there are any question feel free to ask. Bill | ||
Dannybuell |
nice work! I just looked at your profile, engineering! | ||
Craigg |
Did you just put a drop at the end of the needle shaft? Also how long did this take? | ||
Cataract2 |
What was the issue you were seeing with the LCD? Was it not displaying the numbers/letters or was it the back light? | ||
Two_seasons |
I would also add that resoldering those pins may be a better solution than just bending them over to the edge. Great write up! | ||
Mcelhaney14 |
I put the glue on the hole in the needle. It got sucked up a bit into the hole, which was nice. I wouldn't suggest putting it on the shaft as it could run down into important parts. Overall with removing the cluster from the bike, R model, I would say it took less then 2 hours. However it's important to note that this wasn't my first time pulling the IC apart. I would set aside half a day just to make sure you aren't rushed. My issue with the LCD was the display numbers flickering and going out. The backlight was fine. If I pushed on the corner of the IC the numbers would come back for a second. Steve, I thought about soldering those pins as they were never done from the factory, but I didn't because it would prevent me from being able to take the cluster apart as much in the future. I've put over 5K on her since then and haven't had a problem till I slipped the needle. | ||
Americanbadass |
A great post. I just did this fix and this was very helpful |