| Author | Message | ||
Jamesquick |
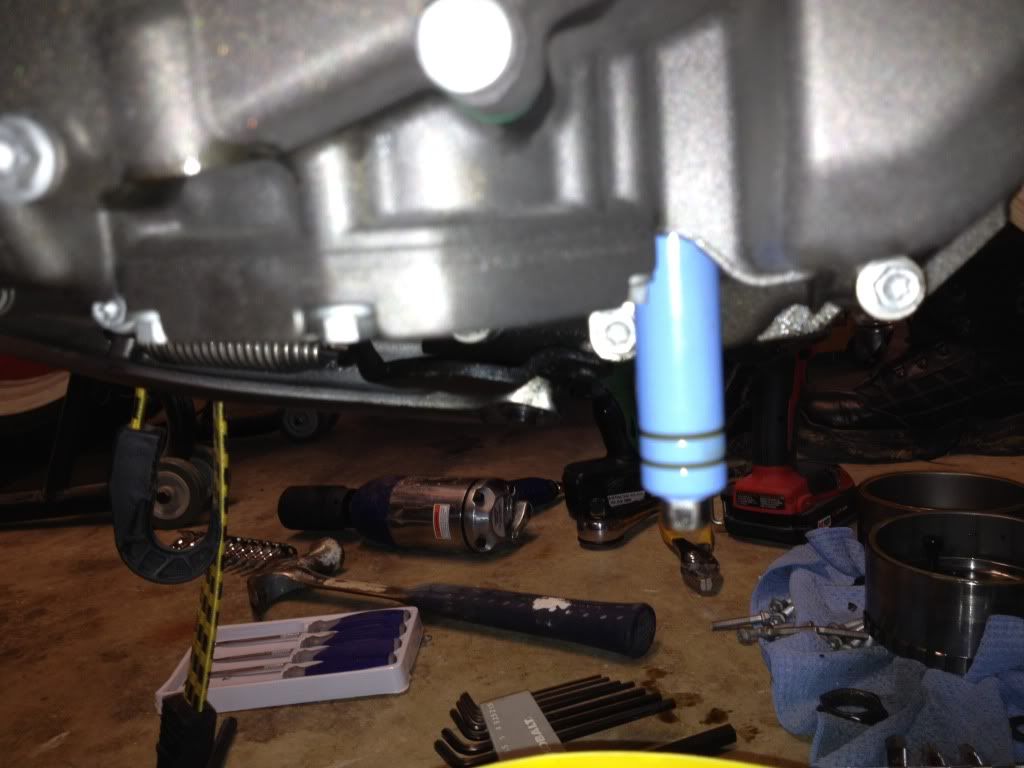
Hello, Im new to this board, but been riding for a number of years. I currently own an 1125R '09 I had my VR go out at about 3XXX miles and replaced it with the Mosfet upgrade. Everything was working fine till I was coming home two nights ago and my check engine light and battery light came on. Uh Oh I guess the bad stator bug got me too. So i have decided that the best thing to do is to have my stator rewound by Randy out east, and buy the new EBR rotor modification. I have been browsing this forum for days now and found that really good article on removing the stator from that 22 year old. I found it very informative, but before I start tearing into this thing does anyone have any advise? a few questions I have are: Do I have to remove the Exhaust? How do i lift the bike or can i just do it on the kick stand or a set of T-rex stands, removing the rotor do I need anything special besides that deep socket? any other info would be greatly appreciated New gasket, and new rotor nut aside. anything else I should consider?  | ||
Sparky |
You need an official crankshaft locking tool and a good way to strap that bike to the ground when applying the 300 ft-lbs torque to the rotor nut. Probably should get the rotor installations from the '10 Service Manual (posted somewhere in this forum). | ||
Jamesquick |
Thanks Sparky, does the '09 Service manual have the rotor instructions as well? | ||
Zac4mac |
I think it still has the old specs... Get Loctite Red 272 for the rotor nut(get a new nut from EBR or H-D). Get Green Loctite 648 for the sprag bolts. The sprag is bolted to the back of the rotor, don't get it backwards. Break the sprag bolts loose BEFORE you take the rotor off. When you're ready to do the nut, apply some 272 to the threads. Tighten to 210 ft-lbs. Back nut off 720 degrees(2 turns). Tighten to 295 ft-lbs. Z | ||
Jamesquick |
Help I have all the bolts and nuts out and the wore pulled all the way through but I can't get the ignition cover off!!!!! Its like an inch off and some oil fell through the bottom but I can't get the damn thing off! I pulled so hard I was almost dragging the bike across te floor checked everything nothing is still holding it on not even those two secret screws under that black cap! | ||
Kenm123t |
Wiring Loom ? | ||
Jamesquick |
Already have that pulled out the three yellow wires? Yes all pulled out and ready  | ||
Duphuckincati |
There's a certain amount of magnetic pull holding it, but not crazy like. Here's some postings that may help too.. http://www.badweatherbikers.com/buell/messages/290 431/658983.html?1322146111 http://www.badweatherbikers.com/buell/messages/290 431/638723.html?1308786427 http://www.badweatherbikers.com/buell/messages/290 431/578856.html?1278604373 http://www.badweatherbikers.com/cgibin/discus/disc us.cgi?pg=next&topic=290431&page=578856 http://www.badweatherbikers.com/buell/messages/290 431/645445.html?1313038607 http://www.badweatherbikers.com/buell/messages/290 431/592310.html?1283454984 http://www.badweatherbikers.com/buell/messages/290 431/654656.html Maybe more than you need, but all helpful. | ||
Zac4mac |
CKP sensor At about 2 o'clock on the round part (Message edited by zac4mac on August 20, 2012) | ||
Zac4mac |
Another tip Get some 6 x 40 or so metric bolts( I think, take a bolt with you to your hardware store). I made 6 Cut the head off and round or sharpen the tips and use these as alignment studs. I use a piece of urethane tubing to spin them in and out. Saves wiring and gaskets when fighting the magnets. Z (Message edited by zac4mac on August 20, 2012) | ||
Jamesquick |
Thanks everyone for all the info. I managed to get the cover off and the stator out. It is on its way to Ricks for a Rewind. Now about the rotor. I have two questions. Do I HAVE to take the exhaust off, and where do I put the crankshaft locking tool. I currently do not have a bike lift or stand so ive been doing all this work on the kickstand. Do I need to lift it up for anything or can this be done without lifting it up. I have plenty of help with holding the bike up and what not. have extra guys to help. just need to know how to get this done. My riding season is ending very quickly up here and would Im gonna call EBR tommorow and order the new rotor and locking tool. Thanks again everyone all your help is making this process so much easier then lettting harley F me on service hours. | ||
Zoolander |
 the crankshaft locking tool(blue) goes into a recessed bolt underneath the engine...so you do have to take off the exhaust. I guess if someone sits on the bike to make sure it doesn't move when tightening the rotor nut back on, it can work without a stand or lift. I locked the front wheel down with a Baxley trailer chock and it didn't budge. Clearance wasn't an issue. I can see a cheap set of stands might be too unstable but I'm sure someone has done it like that without a problem. I wouldn't trust doing it on it's sidestand. | ||
Jamesquick |
Damn I was afraid of that....my exhaust won't come off easy. What if I strap the bike down to some i-bolts into the floor so the whole bike is compressed down hardcore, and put the bike in 6th gear with a 300+ lb man sitting on it (my father) and trie to remove the rotor nut, and did the same thing to Put it back on? Is this just a stupid idea? I have heard this an alternative solution to the crankshaft tool. Trust me I'm not too cheap to buy the tool it's just the bitch of removing my stock exhaust again would be hell. | ||
Jamesquick |
Does this look ok? i noticed that the gear above the rotor looks chipped? the silver disc that hold the gear in? 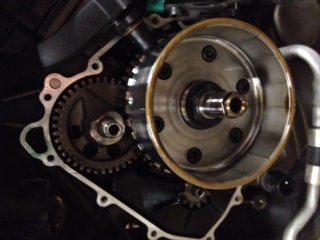 | ||
Jamesquick |
Damn I was afraid of that....my exhaust won't come off easy. What if I strap the bike down to some i-bolts into the floor so the whole bike is compressed down hardcore, and put the bike in 6th gear with a 300+ lb man sitting on it (my father) and trie to remove the rotor nut, and did the same thing to Put it back on? Is this just a stupid idea? I have heard this an alternative solution to the crankshaft tool. Trust me I'm not too cheap to buy the tool it's just the bitch of removing my stock exhaust again would be hell. | ||
Dktechguy112 |
No. Yes. Buy the tool. You are putting are $hit ton of torque on your transmission/engine/powertrain if you do it the way you are talking about. Its not worth it. The tool is $70 shipped, buy it. | ||
Duphuckincati |
What's the problem with your exhaust removal? | ||
Sparky |
Maybe he doesn't understand it's just the muffler (not the headers) that has to be removed: 4 bolts and 2 clamps? | ||
Jamesquick |
I understand its just the pipe removal. The reason I hate to do it. When I bought the bike it had an aftermarket exhaust, and i swapped it out for the stock one it took me and another guy about 4 hours to put it on. I have no lift or stands so its kind of a pain in the ass of course it was like -10 degrees in my garage that night so maybe it will be better now. But i went through like 2 sets of new gaskets trying to install it last time. its just hard to do on the ground is all. Does that piece look like its a problem in my picture? that chip missing out of the silver ring above the rotor? | ||
Pmjolly |
Jamesquick, to be honest, I can't see what you are talking about in your picture. | ||
Zac4mac |
I see now. James' pic is rotated 90 degrees CCW. James - you will need to replace the thrust washer, it's mangled. You can R&R by tilting it and sliding past the rotor edge. The "gear" above the rotor is part of the "top balance drive" Thrust washer p/n is CB0034.1AM Z (Message edited by zac4mac on August 21, 2012) | ||
Jamesquick |
Thanks Z. Yeah it just didnt look quite right to me. Sorry about the picture being sideways. My phone was being dumb lol. | ||
Northdrummer |
Anyone know what loctite is used for the stator 3 mount bolts into the aluminum stator housing? All is talked about is the rotor nut and sprag bolts. Looked like some kind of white residue on the upper threads. | ||
Baf |
I believe 243 (loctite) is specced in the service manual. I used permatex 24300 on mine (same stuff, just a different label, and was cheaper on Amazon when I bought it). For rotor nut, permatex 27200 is much easier to acquire (at least when I was buying). | ||
Northdrummer |
Thanks Baf, We just torqued my sons modded rotor on tonight and have the stator back from Rick's Stators rebuilt. We bought the right red and green loctite's for that and had a hell of a time acquiring a torque wrench for the 300 ft torque. All good there now. Thanks for the fast info! Getting on that first thing here. | ||
Northdrummer |
Looking on amazon now. I see it. It looks like it come in red or blue with 243 loctite. I also see the peratex 24300 Never knew so many loctite numbers were out there till this stator rebuild! | ||
Baf |
For the stator bolts, I believe the blue 243 is what you're going to want. | ||
Northdrummer |
Thanks Baf, While on the the stator job here. this would be a good finish for the job. I have the Loctite 243 coming from ebay. What is the torque on the the final bolts? The stator bolts them self's and the outer stator case back on the motor? I guess here is a good time to ask about loctite on the case bolts too. I assume the 243 would be good on the outer case bolts too? | ||
Baf |
The torque values are in the service manual - I can look it up if you don't have one... I usually don't bother torquing things like that though (just put it on good and snug, never had any issues). Loctite isn't specified for the case bolts. On those, I tightened them good and snug, and made sure they were still tight after a heat cycle or two. | ||
Baf |
I went ahead and looked it up for you. Here are the instructions given for installing stator, and ignition cover (and the torque sequence diagram):    | ||
Northdrummer |
Your the man Baf! Thanks my friend! Awesome info you posted. I did just download the service manual last night. It is a lot to scroll through but does get you what your looking for. I notice on the cover in above picture and the take apart direction it shows removing the center cover and locking ring. I did not know that when I took it apart. I did get the cover off with the center cap still in place. Should I remove it for the re-install? Thanks for your technical help by the way. | ||
Baf |
I've never bothered removing that. I always assumed it was just if you wanted to get a socket on the crankshaft to spin the motor. I just had mine torn apart today to swap stators, and dissembled and reassembled without removing the puck or locking ring. The cover is a bit of a pain to get aligned just right so the cover goes on the last 1/4 inch or so; so maybe removing that aids in reassembly. |