G oog le Buell 1125R Forum | Login/out | Topics | Search | Custodians | Register | Edit Profile


Buell Forum » 1125R Superbike Board » Archive through December 29, 2011 » EBR front brake mounting kit « Previous Next »

Author Message
Top of pagePrevious messageNext messageBottom of page Link to this message

Haus
Posted on Wednesday, November 30, 2011 - 05:38 pm:   Edit Post Delete Post View Post/Check IP Print Post    Move Post (Custodian/Admin Only) Ban Poster IP (Custodian/Admin only)

When installing the ebr front rotor mounting hardware do you still use the stock springs, they are not shown on the diagram?

Also when i go to check the flatness of my rotor what is allowed? I am looking into why i had a little uneven pressure or vibration when applying the front brake since i am changing tires anyways.
Top of pagePrevious messageNext messageBottom of page Link to this message

99buellx1
Posted on Wednesday, November 30, 2011 - 05:41 pm:   Edit Post Delete Post View Post/Check IP Print Post    Move Post (Custodian/Admin Only) Ban Poster IP (Custodian/Admin only)

No springs.
Top of pagePrevious messageNext messageBottom of page Link to this message

Froggy
Posted on Wednesday, November 30, 2011 - 05:49 pm:   Edit Post Delete Post View Post/Check IP Print Post    Move Post (Custodian/Admin Only) Ban Poster IP (Custodian/Admin only)

The EBR kit does not use springs
Top of pagePrevious messageNext messageBottom of page Link to this message

Stirz007
Posted on Wednesday, November 30, 2011 - 06:51 pm:   Edit Post Delete Post View Post/Check IP Print Post    Move Post (Custodian/Admin Only) Ban Poster IP (Custodian/Admin only)

According to Dugger - rim run-out is more likely than rotor run-out. I believe the rotor mounting kit includes a diagram of how to install spacers, washers, etc. (I have to go home and check mine to be sure of that, though). No springs +1
Top of pagePrevious messageNext messageBottom of page Link to this message

Jdugger
Posted on Wednesday, November 30, 2011 - 06:57 pm:   Edit Post Delete Post View Post/Check IP Print Post    Move Post (Custodian/Admin Only) Ban Poster IP (Custodian/Admin only)

Take the rotor off and measure run out of the rotor mounting tabs on the wheel. You will need to do with with the wheel mounted on the bike and the axle torqued to spec.

Spec is something like .030, but if you are north of .010 or so you will need to make some adjustments to the mounting hardware you use to allow the rotor more float or you will need to get the wheel machined.
Top of pagePrevious messageNext messageBottom of page Link to this message

Haus
Posted on Wednesday, November 30, 2011 - 07:16 pm:   Edit Post Delete Post View Post/Check IP Print Post    Move Post (Custodian/Admin Only) Ban Poster IP (Custodian/Admin only)

thanks for all the replies
Top of pagePrevious messageNext messageBottom of page Link to this message

Finedaddy1
Posted on Thursday, December 01, 2011 - 09:33 am:   Edit Post Delete Post View Post/Check IP Print Post    Move Post (Custodian/Admin Only) Ban Poster IP (Custodian/Admin only)

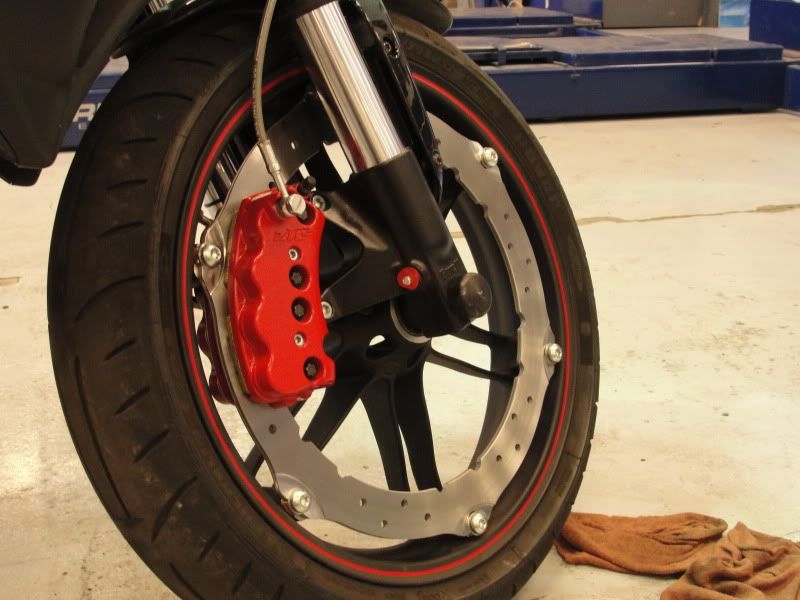
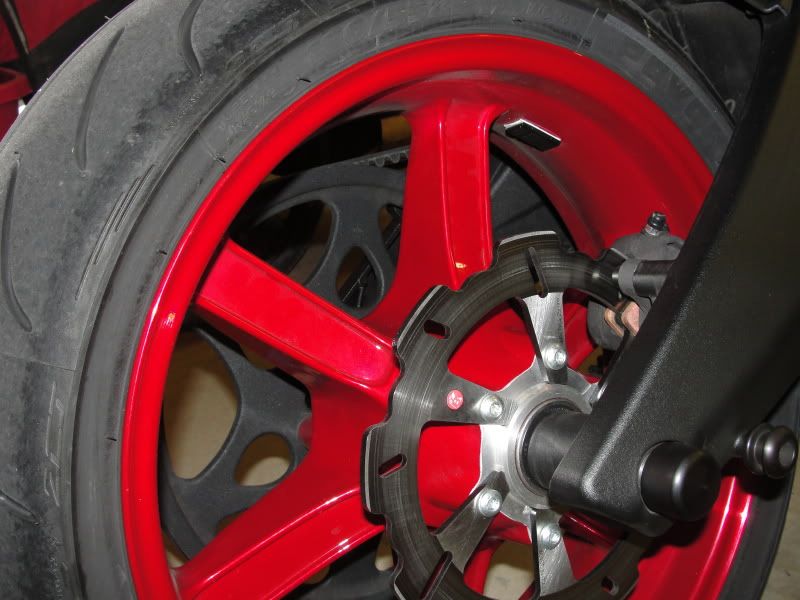
Pretty neat upgrade, I installed mine about a month ago.
Top of pagePrevious messageNext messageBottom of page Link to this message

Xtreme6669
Posted on Thursday, December 01, 2011 - 01:02 pm:   Edit Post Delete Post View Post/Check IP Print Post    Move Post (Custodian/Admin Only) Ban Poster IP (Custodian/Admin only)

The concave spring washer.... What direction dose it go on in relation to the bolt head... The directions seem to indicate that the center of the concave washer will touch the back side of the bolt head and the outer edge of the washer will touch the steel washer on the rotor side, that seem the oppisite of how I would think to run it. The directions are hard to read thou.
Top of pagePrevious messageNext messageBottom of page Link to this message

Ratbuell
Posted on Thursday, December 01, 2011 - 01:37 pm:   Edit Post Delete Post View Post/Check IP Print Post    Move Post (Custodian/Admin Only) Ban Poster IP (Custodian/Admin only)

You are correct. Center touches bolt, edge touches rotor. You aren't putting the screw head in a bowl, you're using the washer as a spring of sorts.

Have they changed the instruction sheet? The one that came with my kit was crystal clear as far as what to do, what parts to discard, and which way to install everything...
Top of pagePrevious messageNext messageBottom of page Link to this message

Xtreme6669
Posted on Thursday, December 01, 2011 - 02:08 pm:   Edit Post Delete Post View Post/Check IP Print Post    Move Post (Custodian/Admin Only) Ban Poster IP (Custodian/Admin only)


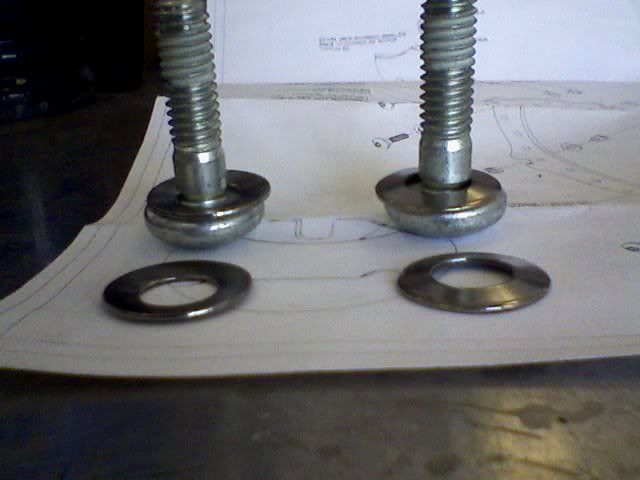
So it goes on like the one on the left?

(Message edited by xtreme6669 on December 01, 2011)
Top of pagePrevious messageNext messageBottom of page Link to this message

Jdugger
Posted on Thursday, December 01, 2011 - 05:10 pm:   Edit Post Delete Post View Post/Check IP Print Post    Move Post (Custodian/Admin Only) Ban Poster IP (Custodian/Admin only)

Correct, though in testing all kinds of ways to mount these rotors, I've found it to not really matter.

Once you have a couple of really hot heat cycles on the hardware they disc washers pictured above anneal and the rotor is basically loose to rattle.
Top of pagePrevious messageNext messageBottom of page Link to this message

Xtreme6669
Posted on Thursday, December 01, 2011 - 05:56 pm:   Edit Post Delete Post View Post/Check IP Print Post    Move Post (Custodian/Admin Only) Ban Poster IP (Custodian/Admin only)

THANKS GUYS!

Almost ready for my Sunday track day!
Top of pagePrevious messageNext messageBottom of page Link to this message

Xtreme6669
Posted on Thursday, December 01, 2011 - 11:15 pm:   Edit Post Delete Post View Post/Check IP Print Post    Move Post (Custodian/Admin Only) Ban Poster IP (Custodian/Admin only)


Top of pagePrevious messageNext messageBottom of page Link to this message

Xtreme6669
Posted on Thursday, December 01, 2011 - 11:16 pm:   Edit Post Delete Post View Post/Check IP Print Post    Move Post (Custodian/Admin Only) Ban Poster IP (Custodian/Admin only)

And a video of killing off the old tire:

http://s62.photobucket.com/albums/h94/xtreme6669/B UELL%201125CR/new%20brakes%20and%20a%20burn%20out/ ?action=view&current=burnout006.mp4

http://s62.photobucket.com/albums/h94/xtreme6669/B UELL%201125CR/new%20brakes%20and%20a%20burn%20out/ ?action=view&current=burnout004-1.mp4
Top of pagePrevious messageNext messageBottom of page Link to this message

Jdugger
Posted on Friday, December 02, 2011 - 08:34 am:   Edit Post Delete Post View Post/Check IP Print Post    Move Post (Custodian/Admin Only) Ban Poster IP (Custodian/Admin only)

Have a good time. I wish I were riding this weekend... it's just cold and pissing here.
Top of pagePrevious messageNext messageBottom of page Link to this message

Jdmagri
Posted on Thursday, May 17, 2012 - 11:41 am:   Edit Post Delete Post View Post/Check IP Print Post    Move Post (Custodian/Admin Only) Ban Poster IP (Custodian/Admin only)

Gents,

I believe that the instructions read to place the concave side of the washer toward the head of the bolt. So the correct mounting in the picture from Extreme is the bolt on the right.
« Previous Next »

Add Your Message Here
Post:
Bold text Italics Underline Create a hyperlink Insert a clipart image

Username: Posting Information:
This is a public posting area. Enter your username and password if you have an account. Otherwise, enter your full name as your username and leave the password blank. Your e-mail address is optional.
Password:
E-mail:
Options: Post as "Anonymous" (Valid reason required. Abusers will be exposed. If unsure, ask.)
Enable HTML code in message
Automatically activate URLs in message
Action:

Topics | Last Day | Tree View | Search | User List | Help/Instructions | Rules | Program Credits Administration