| Author | Message | ||
Ezblast |
Like the mirrors - are you doing dirt riding a lot? Just saying the ST66 would be a great tire for dirt roads that aren't too bumpy. The Blast will not do bumpy dirt roads - it trashes the front isolator. lol - experience - the info about smooth dirt roads and the performance of the st66 is from Maggie M. - who has put tons of miles - more than anyone else - actually. There are a lot of old clay roads in Fla to old plantations and such. EZ EZ | ||
Shagg1970 |
I thought you all might enjoy some pics of my wifes Blast that I have customized to resemble a Ulysses. 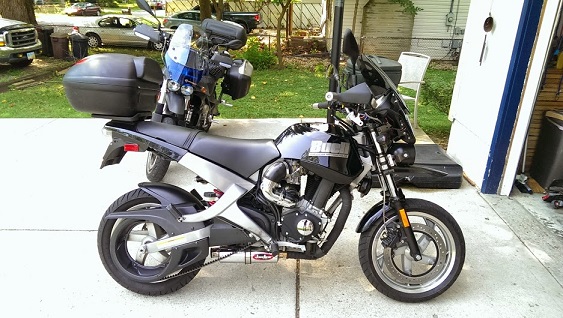 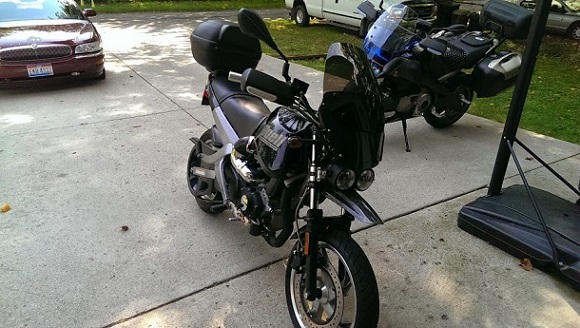 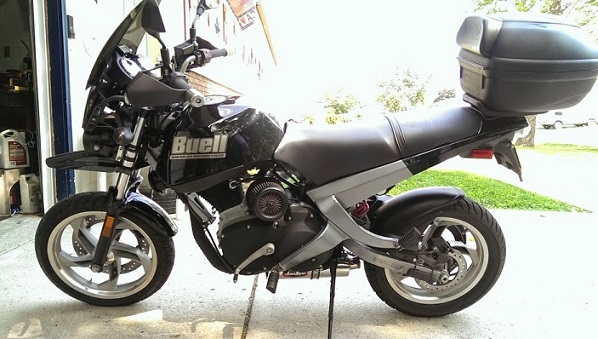  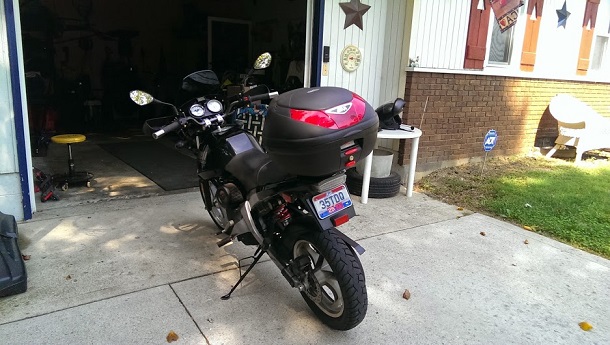 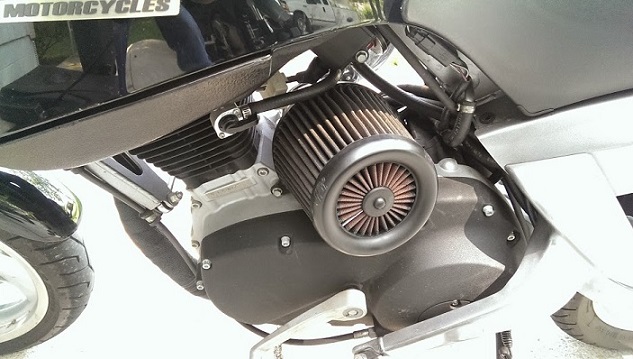 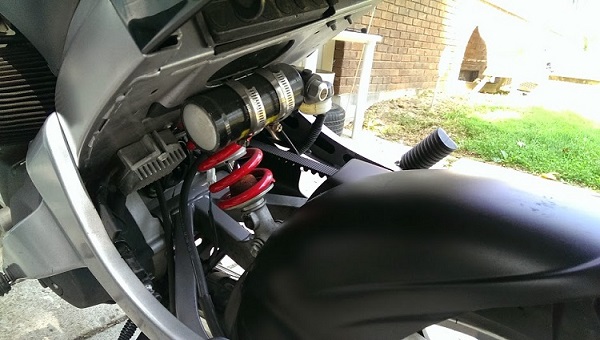 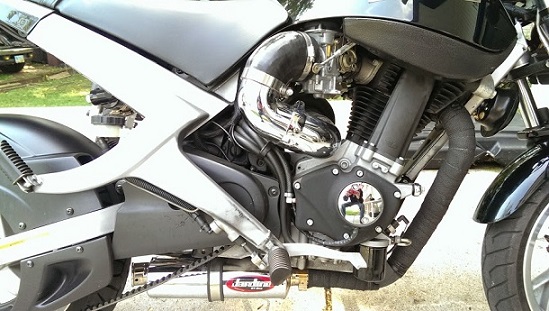 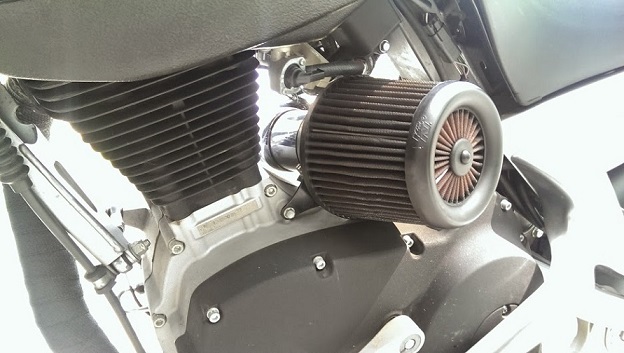 | ||
Kenny_gilgore |
John, That bike is Drop Dead Gorgeous. Can you explain your intake system please? And does the air cleaner interfere with the riders foot? Kenny G | ||
Shagg1970 |
Thank you. Starting at the carb, I have the velocity stack, then a 4" to 3" Rubber 90 degree elbow I ordered from the internet, Its like a turbo boot for a tuner car. then the Chrome plastic tubes are from advance auto parts (2 years ago), look in the tuner area. I have 2 90 deg elbows and a straight piece going to the K&N filter I also ordered online. I have a turnbuckle hooked to a motor mount link under the gas tank and screwed to the side of the plastic velocity stack to hold carb up with blue thread lock so it holds its adjustment. I started with the super boot and no support but it tore the boot and the carb fell off of the intake. been good since putting support on carb. as far as being in the way, no its not at all. | ||
Jmoe515 |
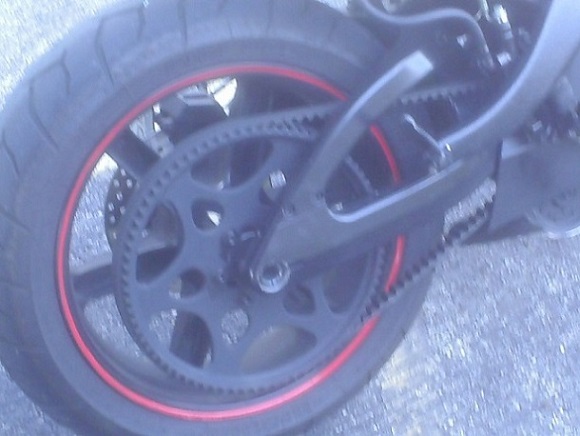
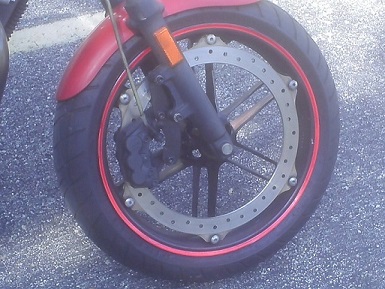
XB top end, XB wheels, brakes, swing arm. 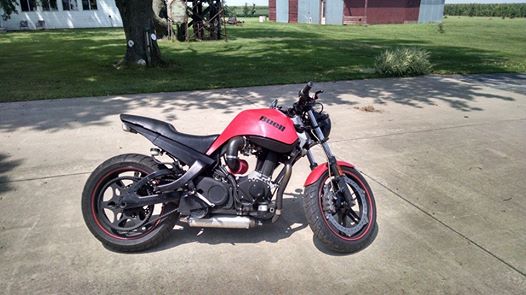 | ||
Kenny_gilgore |
John, Thank you very much. Your Blast is really nice. Kenny G | ||
Ezblast |
John - would love to see more pictures of both the front and rear wheel set up - that is some fantastic work there. EZ | ||
Shagg1970 |
Ok took many more pictures and close ups. I will work on resizing and uploading them tomorrow. Also more details on the build. | ||
Gearheaderiko |
Yes Josh, nicely done, looks factory! | ||
Shagg1970 |
Ok here are many more pictures... and the ones at the end show the pegasus decals I just added last night. About the bike it has gold cartridge emulators in the forks with progressive springs and 1" spacers. The rear shock is a used piece off flea bay from a Ducati, it was about a 1/2 inch wider at the lower mount and 3/4 inch longer. I just opened up the lower mounts a little and used a longer bolt. The shock is adjustable for preload compression and rebound. I replaced the original tires with Pirelli diablo scooter 110/70 front and 140/70 rear. It handles and rides great. I had to add 3" to the kick stand due to the shock, cut and welded in an old ratchet handle. then the kick stand would hit the rear control arm so I wrapped a piece of heater hose over it and zip tied it on to keep it from rattling. The dash is from flea bay and is a buell part. I added an inductive tach and had to make a bracket to mount the dash without moving the ignition switch. The handle bars are from american sport bike as are the hand guards. I also used 2" ROX risers. I installed the Jardine exhaust with black exhaust wrap and had the quiet insert in it but the wife likes it better out and loud. I jetted and set up the carb per instructions on here and it runs great. I also installed a braided front brake line. I cut the front off the stock fender and used an aftermarket carbon fiber beak and carbon fiber fly screen. I installed an aftermarket smoke windshield with two of the Ulysses recall bolt kits from Al at american sport bike. I used the original tall windshield hardware to fab a mount up for all of that, along with some angle aluminum. Hope this wasn't too messed up to follow, I have been too busy at work to concentrate on this and it has taken me several hours to finish. If you want to know any thing else just ask, I'm sure i forgot something. 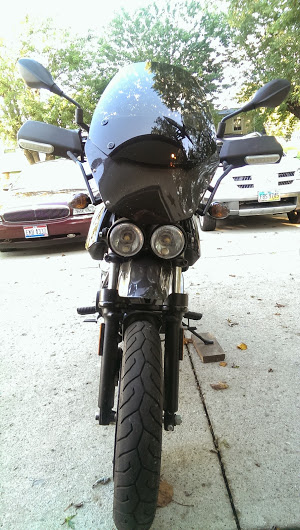 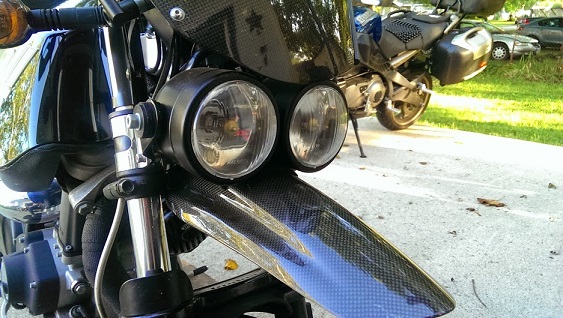 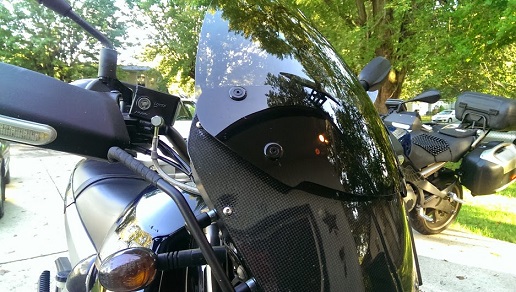 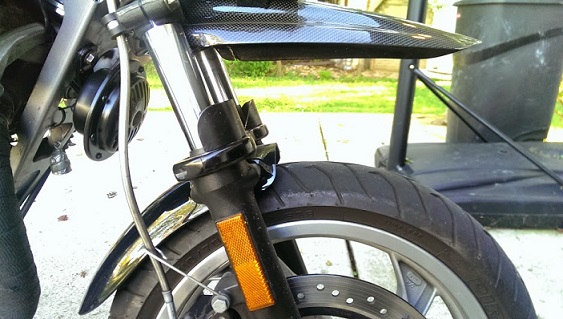  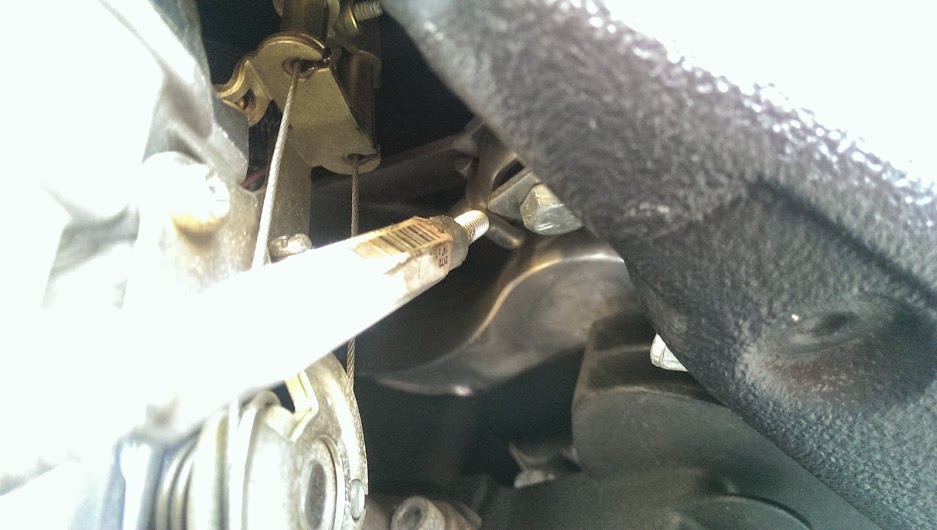 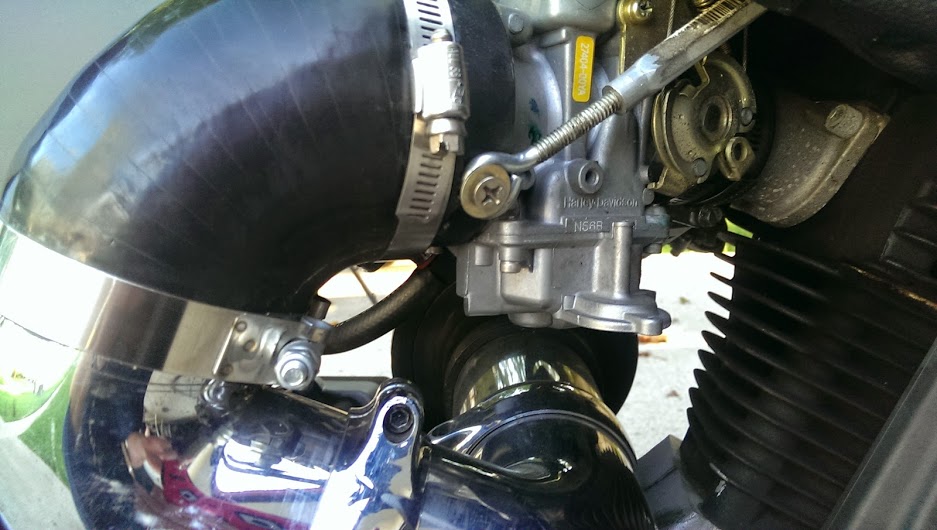 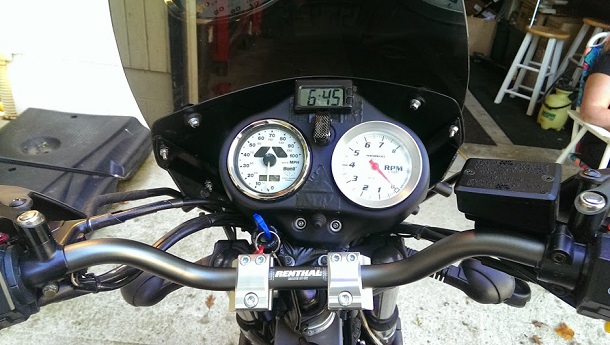 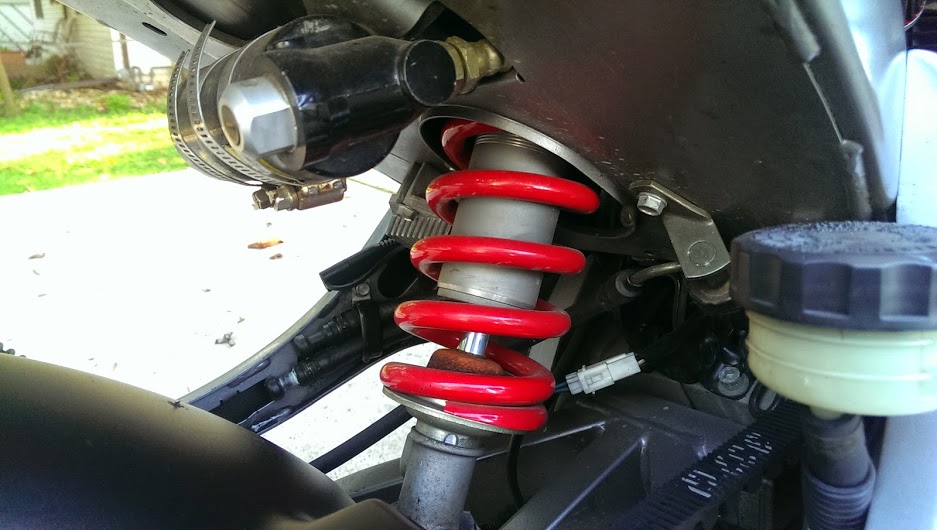 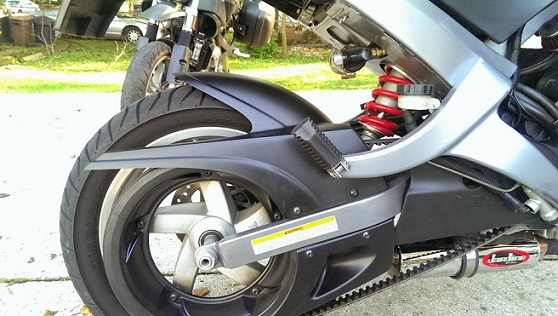 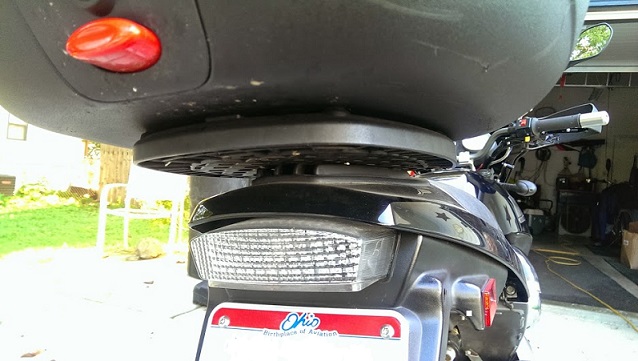  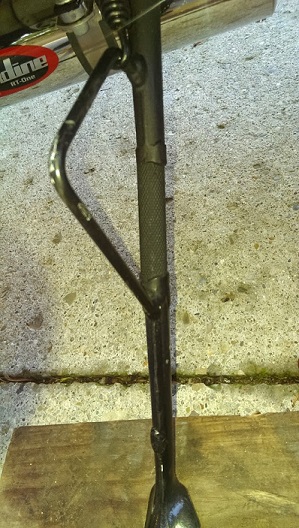 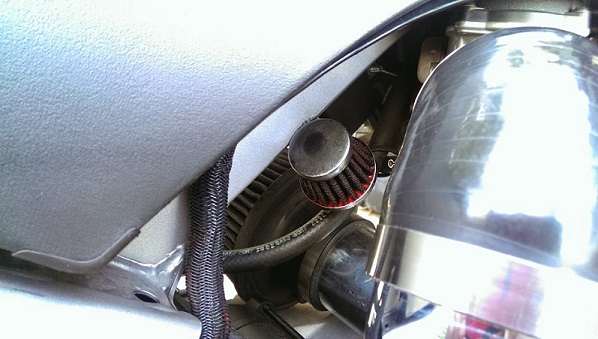 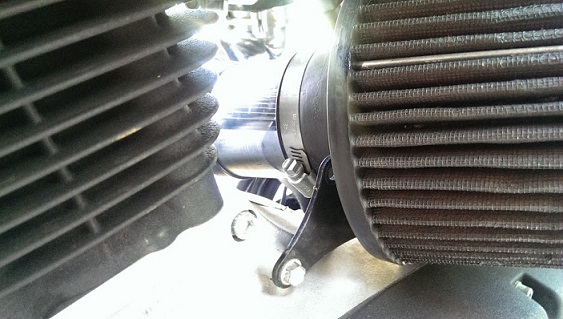  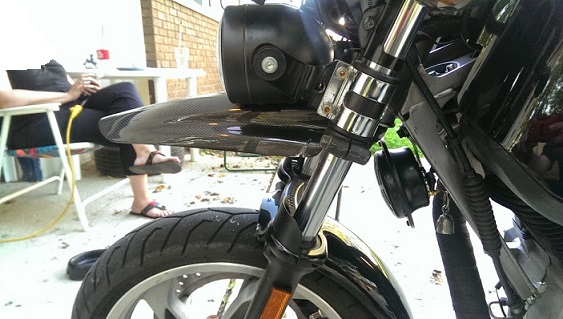  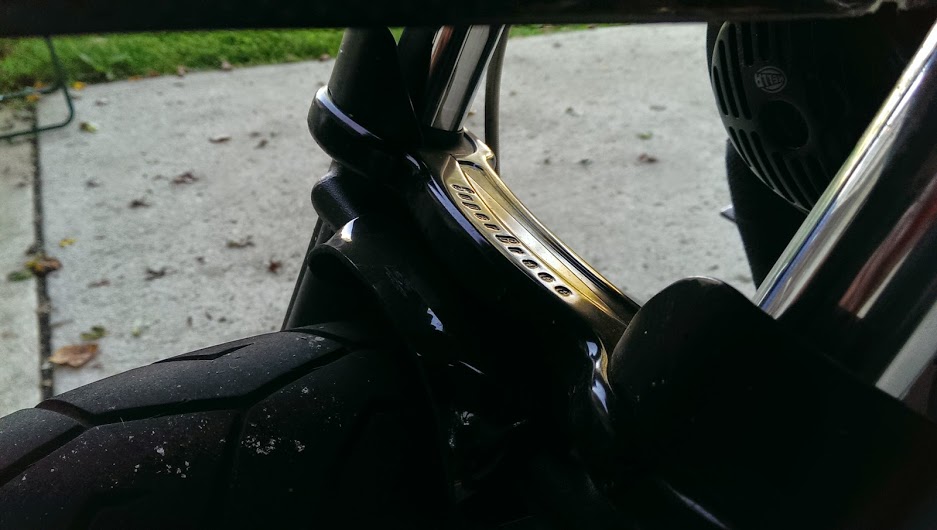 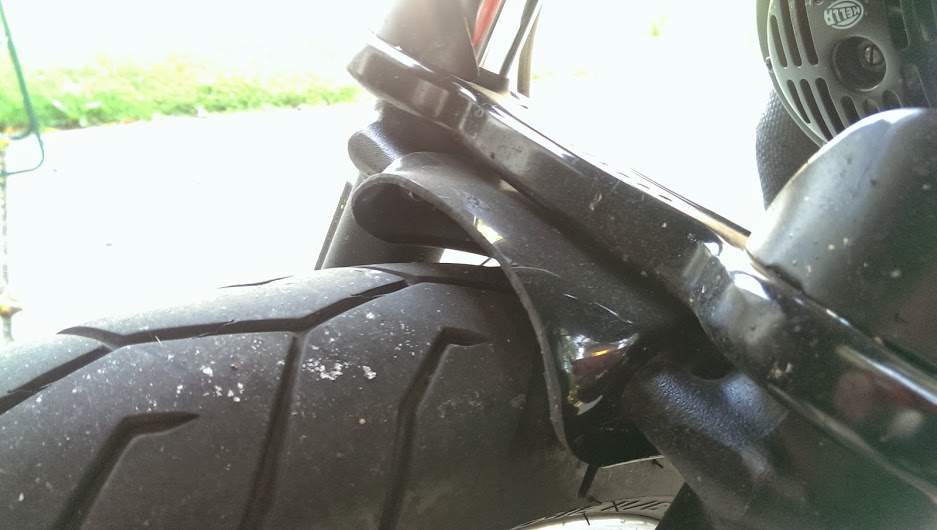  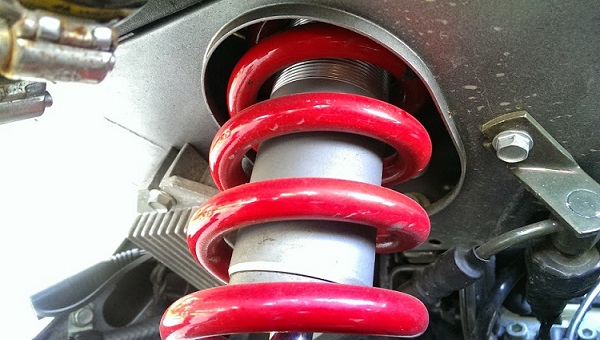 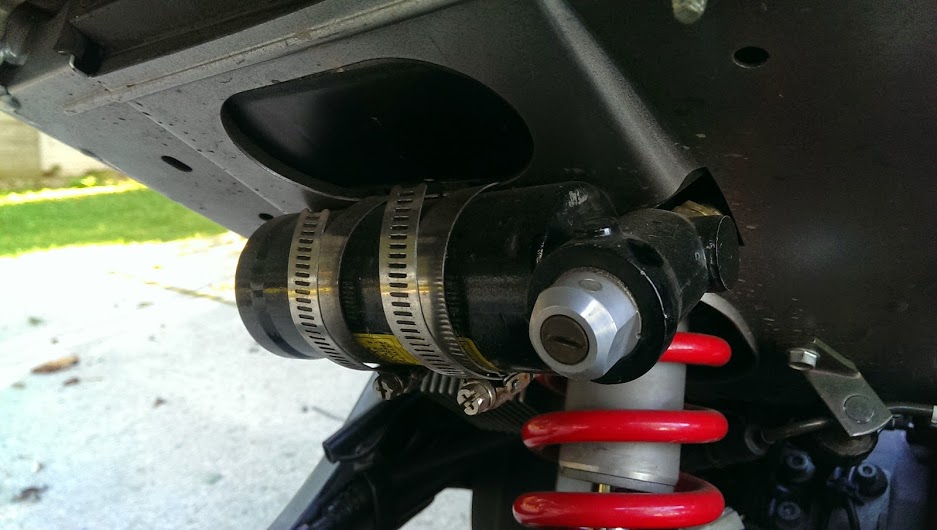 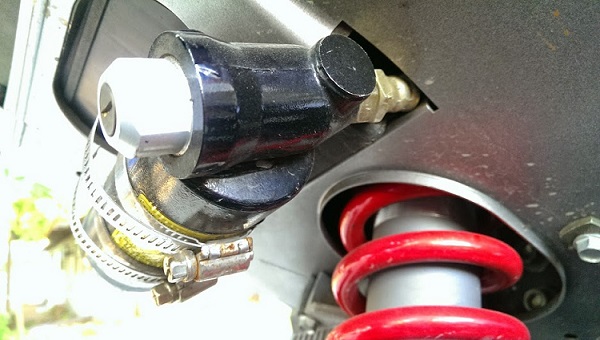 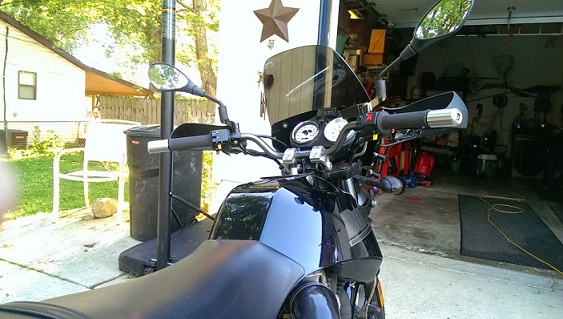 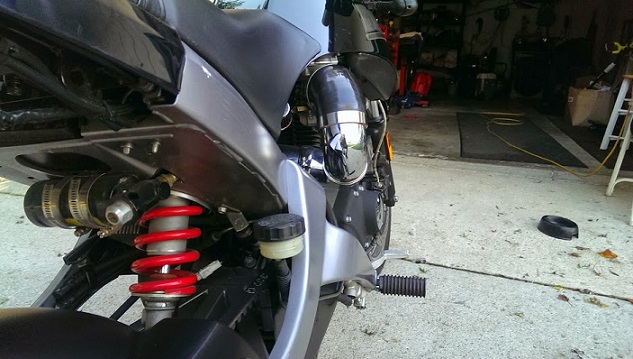 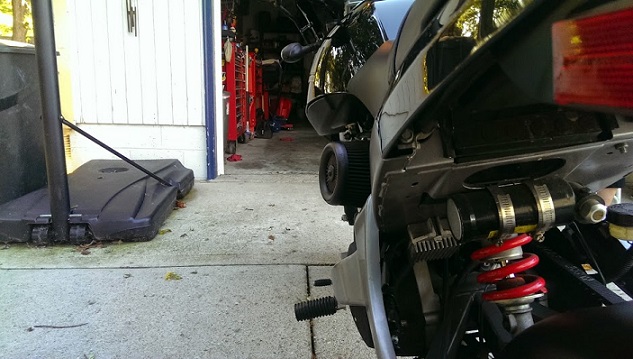   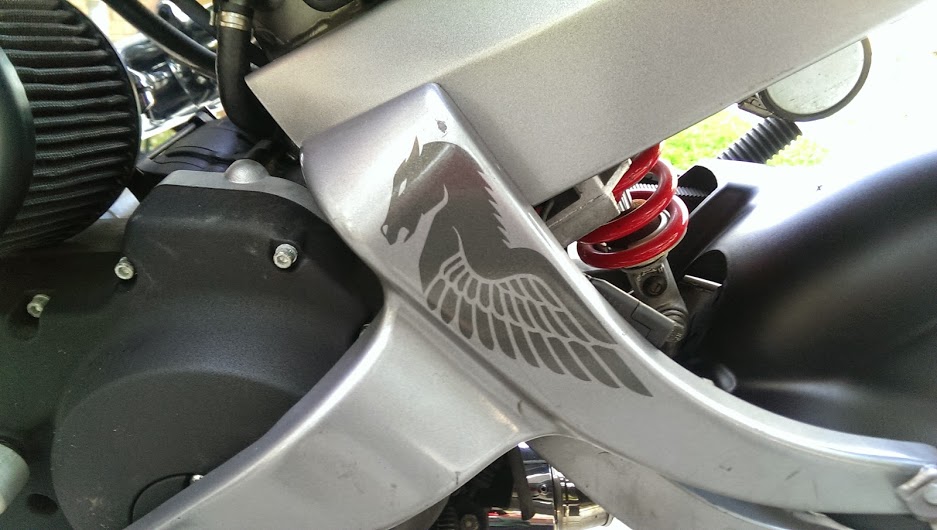 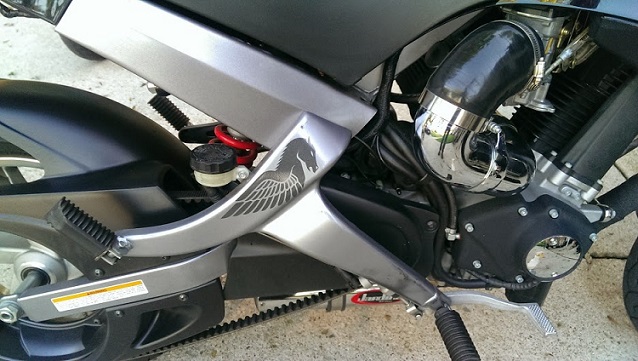 | ||
Jmoe515 |
Thanks Erik, That's what I was going for. It's gonna get at 26t drive pulley and 133t belt over the winter to get rid of the idler and gain some torque back. | ||
Ezblast |
Josh - would like to see more of your swing arm/wheel, and front wheel/brake conversion as well - please. EZ | ||
Ezblast |
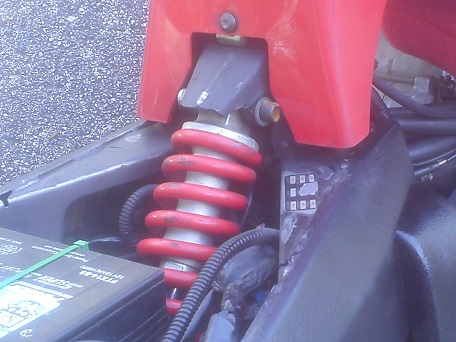
Also - what shock did you use? EZ | ||
Jmoe515 |
Sure, I'll get some pics of the set up today or tomorrow. It's a Suzuki TL1000 shock. It's about 9.5" so I only had to modify the shock mount instead of fabbing a completely new one. | ||
Jmoe515 |
   | ||
Ezblast |
Bravo!!!!! Something to take note of! EZ | ||
Nateblaster |
HI Guys Here are the rough ideas i had for a redesign of the tank and rear section of the bike. Let me know what you think. Trying to work most things out in cad before i get to fabricating. My measurements are off in the drawings so it wont scale right now but just trying to get all these ideas out of my head before i forget them.    | ||
Gearheaderiko |
That looks pretty cool! Are you using a rear suspension? Because you could use spring steel to mount the seat or mount it on a pivot with a small spring/shock. Just a thought as I don't really know what the final look will be  | ||
Nateblaster |
I was going to leave the suspension stock until i could upgrade the shock. I didn't think about making the seat mount out of spring steal because of the stock suspension but um maybe some extra bounce might be nice. I don't know what the final look will be either at this point but all suggestions are welcome. It got several months before winter hits down here in Georgia so its going to be awhile before anything major changes. Just going to get the basics done now while i am still thumping around. | ||
Bennyblast |
Plasti Dipped my blast about 2 weeks ago. I think it looks MAAAAD. (Camo Tan Plasti Dip) Thoughts? 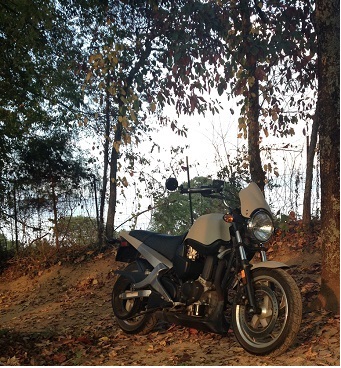 | ||
Blueblast |
Being a retired Marine, I can dig it!  | ||
Gearheaderiko |
Nice! I've read that the plasti dip will peal right off leaving the paint underneath unharmed. But that was for metal. How well did it stick to the plastic? | ||
Bennyblast |
It has stuck well to the plastic, i did have to peel off a part and the plastic was still the original color underneath.I have not noticed any bubbles or parts of the bike that are faded differently. | ||
Gearheaderiko |
I've wanted to try the plasti cote, but haven't had a chance. Looks like it came out very even and smooth. | ||
Kenny_gilgore |
Benny, Could you please list any specific procedures that you used in cleaning the parts and how you went about spraying the PlastiCote and how many coats, etc. Kenny G | ||
Bennyblast |
Sure thing. 1. You'll need to find a environment to spray in A garage, shed etc. it needs to be away from dust, bugs, wind or you could have uneven drying and bugs in your dip. 2. Decide what you want to dip and take those parts off and any stickers. 3. Really clean your parts. If you have any sticker residue,bugs,dirt,stuff make sure it gets rubbed off and washed. (I used car wash but scrubbed my parts really well) Then dry them with a towel. 4.Lay cardboard, newspaper, plastic etc down to protect the surface. 5. Shake the cans REALLY well, also dipyourcar.com sells a handle to make dipping easier not necessary but saves hand cramps (Respirator is recommended Sneezing plasti dip sucks.) 6.Spray the parts evenly. I did 5 coats the first two were thick then two were medium coats and then a light dusting. Make sure you let dip set AT LEAST 30 MINS between coats. When you finish don't touch it for a couple hours (I let mine set for a day) 7. Let the dip cure/set ATLEAST a week or more. I put my parts in the sun a hour every day. Tips. DO NOT SPILL GAS ON THE DIP IT WILL GEL THE DIP AND YOU WONT BE ABLE TO GET IT OFF! When you feel the can running low switch cans or else it will sputter and you will have a uneven coat. Dipyourcar.com has a youtube and they have instructional videos plus the website has lots of information. | ||
Kenny_gilgore |
Benny, Thank you very much. Kenny G | ||
Gearheaderiko |
\ | ||
Xb9er |
Jmoe515, I bet your bike is way fun to ride. Nice work! | ||
Jmoe515 |
XB9er - It absolutely is! |