| Author | Message | ||
Cfboss |
Where did you put the ECU? | ||
Rodrob |
Which version. I run gen2 | ||
Stirz007 |
Non-ram air, keep it where it is (you'll need to re-use stock ductwork) Ram-air Gen 1 or 2, you make a bracket out of 1" x 1/8" aluminum bar stock and mount it to the hole near the upper motor mount, angled toward the water pump. There's some pictures on here somewhere..... | ||
Jetbuilder |
my issue with Flexiglass as opposed to Airtech is there is no solid tie in to the bike structure on the pod covers. You bolt/screw them to the plastic undernieth. Not very strong. the Airtech is a solid piece up to the fairing stay. Red | ||
Stirz007 |
I dunno about that - I've run both non-ram and ram air Flexiglass - There's a couple of entire threads on here describing how to mount the non-ram lowers, which is pretty consistent with the way the stock pods mount (I used stock hardware). The Ram-air, once you figure it out, mounts pretty solid, too.... Here's the results of a low-side with non-ram Flexiglass - no problem. (Other than it would have been better had I stayed upright)  I'll post up photos of ram-air mounting tonight if I remember.... (Message edited by Stirz007 on August 17, 2012) | ||
Stirz007 |
OK - this is how I approached it. Duggram, Rob, and JDugger's methods may differ, so no warranty, guarantee, or promises..... The two lower inners are pretty straightforward. They mount directly to the K-brackets - you really can't screw this up.. 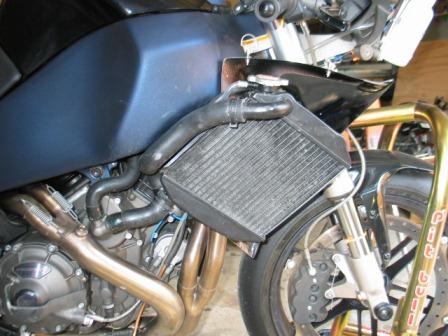  The radiators do not have any fixed mounts. They pretty much just lay in place. The ribs on the inners dictate where the rads go, so you just adjust hose connections to radiator to suit. You can see the location of the ribs on the top left and top right, respectively, of the photos above between the top radiator hose and the rad. I sanded the ductwork at the juncture of the lower part of the radiator to get better seal, getting rid of low and high points. I used some windshield washer hose, split lengthwise to cover the inner rib and protect the rad/provide a little cushioning. View of left side:  Both left and right inners will need to be modified (drill a hole through the inner to allow the tube to pass through - I used a rubber grommet to protect the inner and the tube, as well as to attempt to provide a better seal for air flow) to accommodate the balancing tube that connects the two radiators. The left may or may not need another penetration to allow for the radiator overflow tube. Views of left inner - right side same, except just one hose penetration. 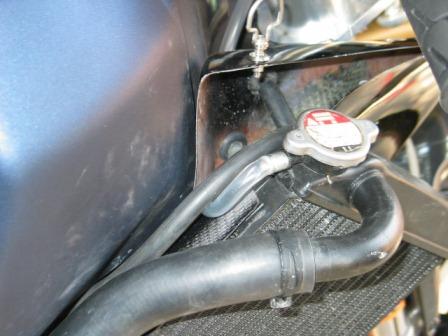  Clear hose goes to a remote overflow container. Behind the fairing seems to be the only/best place to go The EBR guys have a trick bottle set-up for both water and fuel OF that's cheap and easy to fabricate, but I was pressed for time and picked up an off the shelf model for too much money, and had to fabricate the bracket anyway..... 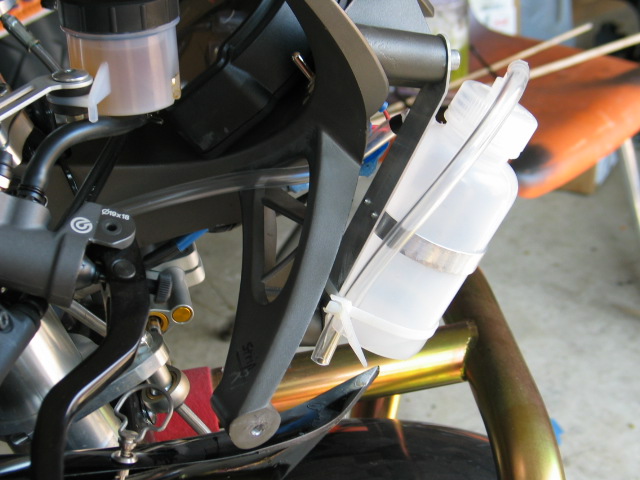 The outer lowers took a bit more wrangling to get an actual 'closure' then more wrangling to get a good fit. For me, the right upper radiator hose connection stuck too far 'outward', and conflicted with the lower. After some careful bending of the tube, I was able to get the panels to close. Then a bit more tweaking radiator location and some light sanding of the ductwork on the outer, and everything lined up pretty well. One issue with those using case covers - these will conflict with right side lowers, but a little sanding fixed that. I used six(6) Woodcraft Dzus and six (6) MilSpec Products Adjusting C-Spec fasteners (spendy at $10 each, but well worth it). The C-Spec have an adjustable clamping thickness, that allows you to have some flexibility with bracket thickness, number of panels joined, etc. The outer lower attaches to the inner using two C-specs along the top (first photo above) and one Dzu at the 'triangular tab' just to keep the panels in alignment. 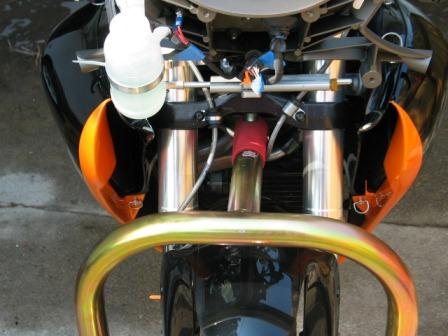 The belly mounts to lowers using four (4) Dzus and two C-Specs. The Woodcraft Dzus have clip-on 'female' side that allows some adjustment after mounting. The C-Specs are located at the rear of the belly and attach to the brackets you'll need to fabricate. 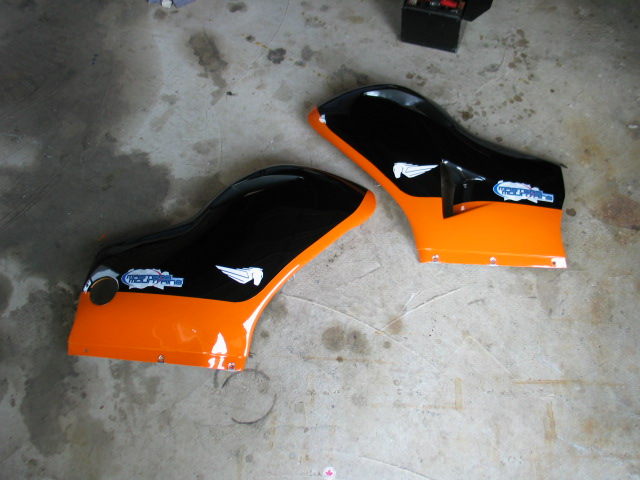 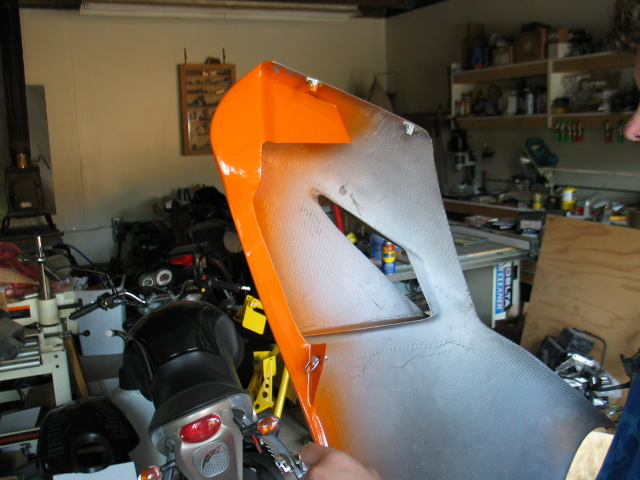 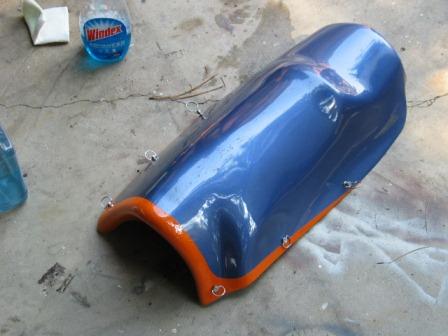 Both belly brackets were fabricated using 1" x 1/8" aluminum bar stock. Both were 5-6" long before bending. The brackets mount where indicated below. The existing steel spacer is approx. 0.56" OAL, so your new spacer needs to be about 0.125" shorter. Again, I was pressed for time and ended up using some 0.5" spacers and countersunk the bracket to get back to the original spacer length. Right Side: Red handle tee wrench shows mounting location.  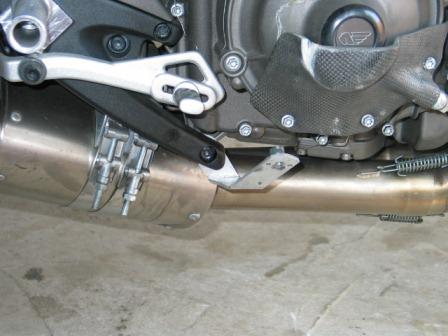 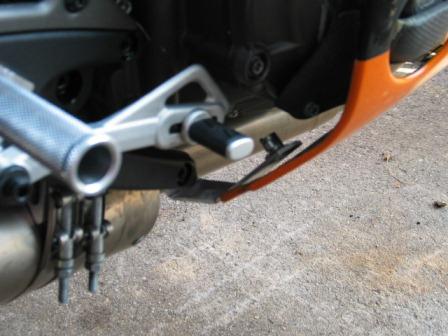 Left Side: 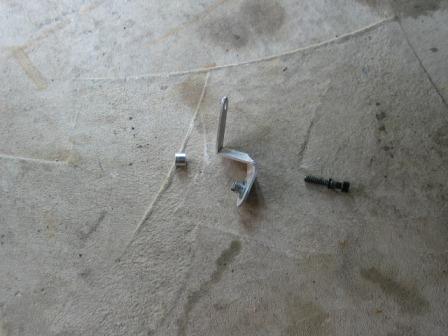 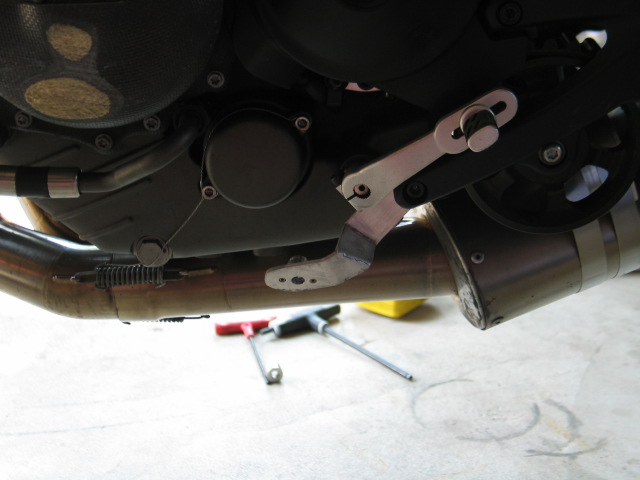  Relocate the ECM as indicated using 0.75" x 0.125" aluminum bar stock as mount material. This bolts right up to the hole left when you removed the stock inners. 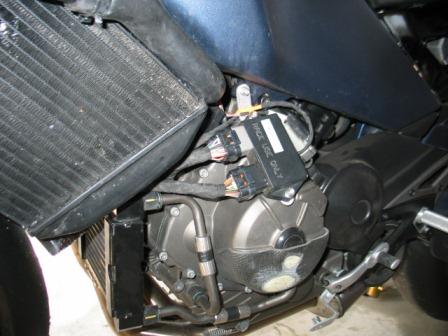  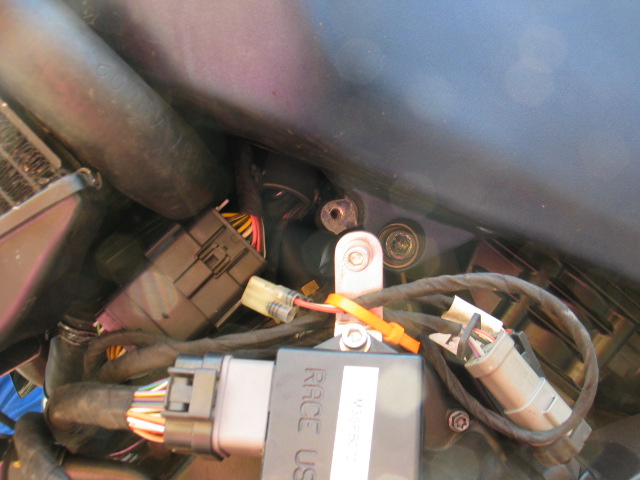 Finished Result: http://www.stephenwclark.com/p625081261/h36c4b949#h36c4b949 http://www.stephenwclark.com/p810961430/hd8f07a3#hf32840d | ||
Gbackus |
And there's absolutely no way to use a fan with these? That's too bad be ause these look great | ||
99buellx1 |
If you want to use a fan get the Catalyst Composites set, or the street set if you want holes for lights and such. | ||
Bob_thompson |
I agree with 99buellx1 completely. Below is a picture of my CC's but remember they come unpainted, mine are a one piece lower only and you need to fabricate brackets (not hard using 1/8"x1" aluminum strap) and cut an access for the kickstand. However mine only cost me $234.00 plus shipping from California. 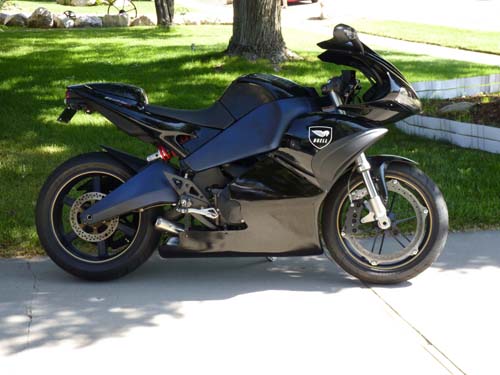 | ||
Gbackus |
the cc fairings do nothing to correct the 1125Rs overheating at the track problem. Unfortunately that makes it difficult to use the 1125r as a dual purpose bike. nor do they streamline the aesthetics the way the flexiglass fairings do (Message edited by gbackus on August 21, 2012) | ||
Stirz007 |
"And there's absolutely no way to use a fan with these? That's too bad because these look great" Not with the Flexiglass Ram-air (which would be useless for a daily rider). If you use the Flexiglass NON ram-air, as seen in the photo in my 8/17 post, the only thing you replace is the stock outer pods. All the overflows, fans, ECU mounts stay the same as the day you got the bike. I think Trev has some belly pans with kickstand cut-outs. NON ram-air:  | ||
99buellx1 |
Maybe I'm just lucky, but I've had no overheating issues at the track with the fan setup. | ||
Bdb_csiii |
Stirz, where to and how did you route the fuel vent tube? | ||
Stirz007 |
I ran it straight down through the space between the upper vent bung and the front of the airbox. You can see the bottom (piece of copper tubing) in the first photo in the 8/18 post. Dugger and EBR guys use a catch can behind the fairing and route vent tube through the airbox and to the catch can - a better set-up, IMO. |