| Author | Message | ||
Pnw_uly |
I had a belt fail a few months ago and had every intention of posting photos and a step-by-step roadside repair �how-to�, but as usual, life got in the way and I never posted the pictures or the process. Having seen a few recent posts of belt failure, thought it was time to put this together to perhaps help out other Uly riders. Substantial credit goes to Craig (aka SkiFastBadly), who�s write up on a multi-brand enthusiast website provided the bulk of instruction for my efforts. Luckily for me, my belt failed in the parking lot of my office, so I was able to effect �road-side� repairs in the comfort of the shop portion of our building. I did retrieve my Buell tool roll and a few other tools that were not on the bike, but this still could be done with the OEM tool pouch under the seat. . . Step 1. Loosen the rear axle pinch bolts, located on the right side bottom of the swingarm; no need to completely remove them, just loose enough to turn the axle. While the bike is still on the side-stand, break loose the rear axle. I put some tape around the axle nut area in order to protect the swingarm, obviously optional. 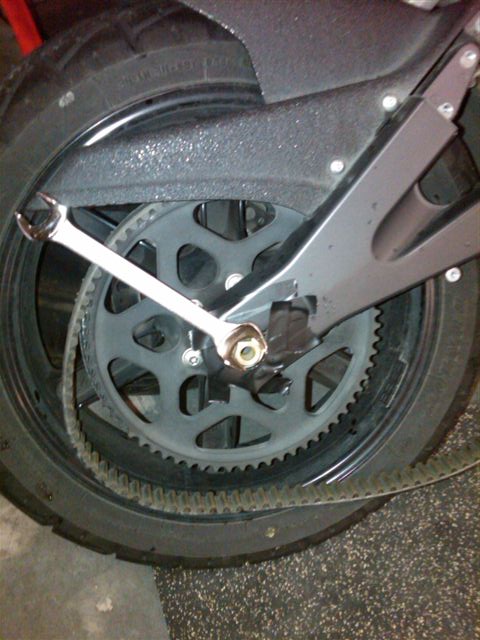 | ||
Pnw_uly |
Step 2. Remove the Lower Belt Guards, both the plastic outer cover and the aluminum inner piece. Remove the plastic from the forward sprocket/pulley. This picture shows the lower outer plastic belt guard removed, and the aluminum belt guard awaiting removal. At the far right of the picture, above-right of the belt tensioner, you can see the forward drive sprocket cover has been removed. 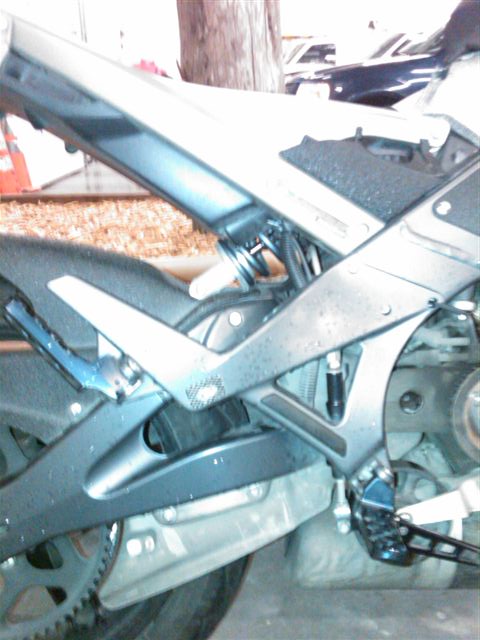 | ||
Pnw_uly |
Step 3. Remove the right passenger foot-peg mount, and lay on top of the rear fender. Then remove the swingarm piece. There is no requirement to disconnect the passenger peg bracket completely form the bike, you just need to move it out of the way to get to the swingarm piece removed. This picture shows the passenger peg atop the fender and the swingarm piece removed. . . 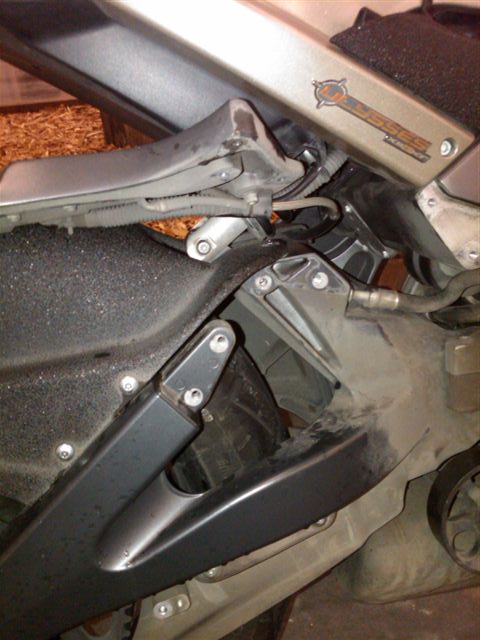 | ||
Pnw_uly |
Step 4. You really don�t need to �remove� the rear fender entirely. Remove the three fasteners on the right side of the fender and loosen the others in order to work the belt around the rear wheel sprocket. 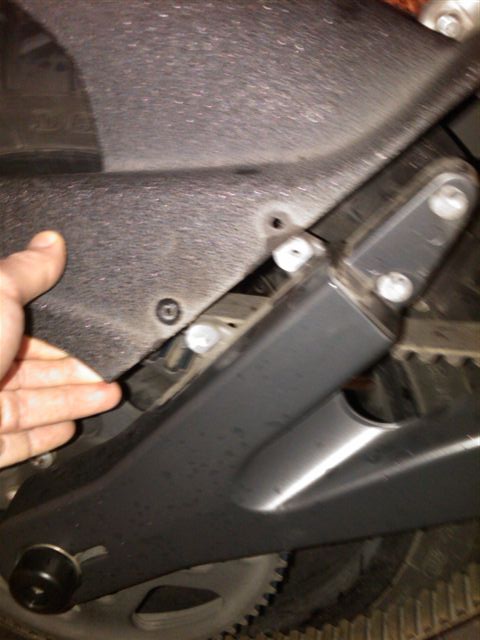 | ||
Pnw_uly |
Step 5. Lay the bike on its side or against an object that allows the rear wheel to lift completely off the ground. Loosen the axle about 15-20 turns. I pushed my Uly onto a couple of tires, and in this picture you can see a red ratchet strap that I used to keep the passenger peg out of the way. Others report that the side bags have been used to good effect for elevating the rear wheel, as wheel as dirt berms, grassy knolls, etc. 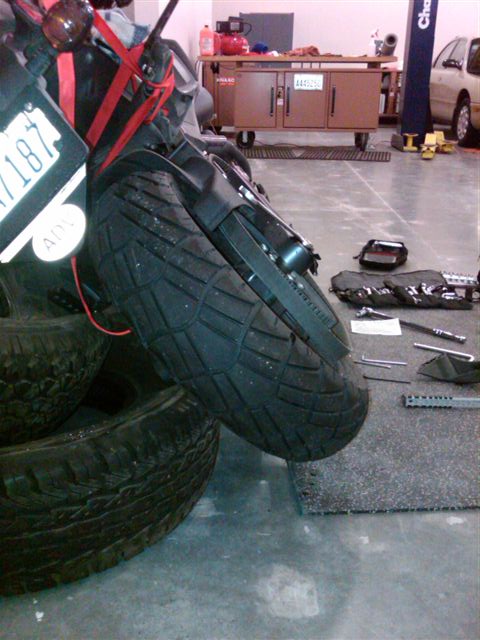 | ||
Pnw_uly |
Okay, a couple of things here - - first, I believe the service manual details either loosening or removing the belt tensioner, but as others have stated, and I�ll reiterate here, it is not required! Secondly, yes, you can put on a new belt without entirely removing the rear wheel. Third, and also reiterated on almost belt failure thread, is that a slightly used, stretched belt is much easier to fit while conducting a roadside repair. So buy a new belt, and when you swap out tires, put the new belt on and keep the used belt for your roadside repair. Step 6. With the swingarm piece removed, push a loop of the belt through the void and route it around the rear wheel sprocket. Then take the other portion of the belt and loop it around the front drive sprocket. If the belt can�t make it over the front drive sprocket, loosen the rear wheel in increments of 5 rotations until the belt fits over the front sprocket. 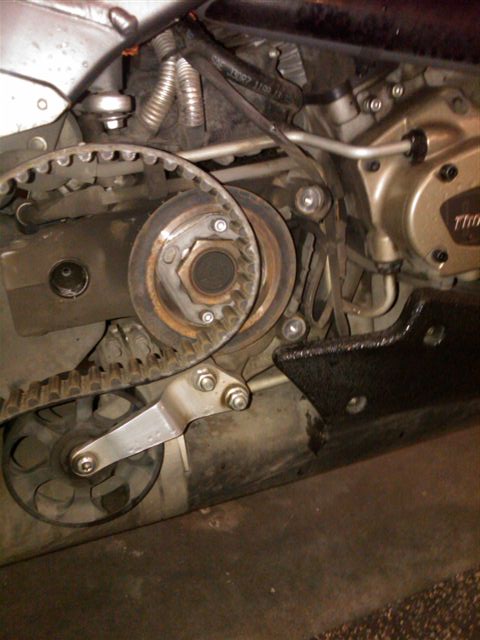 | ||
Pnw_uly |
Step 7. Once you get the belt fitted, go ahead and tighten the axle. You can tighten it pretty well with the rear wheel elevated, but I�d recommend standing the bike back up on the side-stand when you tighten it to spec. 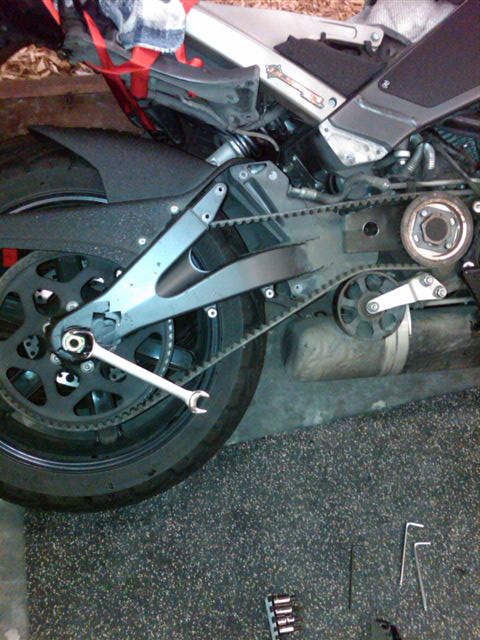 | ||
Pnw_uly |
Step 8. Replace the items previously removed in reverse order of their removal. Most things are back where they belong in this picture. Don�t forget the pinch bolts! 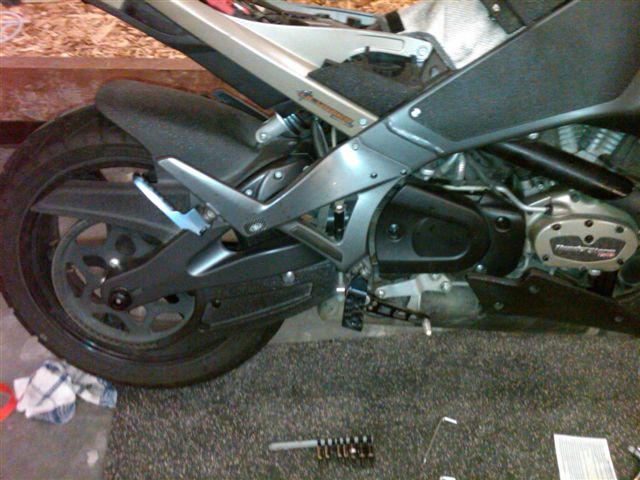 | ||
Pnw_uly |
A few final comments: This is a relatively simple procedure - - I don�t consider myself especially mechanically inclined, but like with most service or repair related issues, once you�ve done it the first time, you�ll wonder why you ever paid someone else to do it - - ever. For the stalwarts, please advise if I have left any gaping omissions; my intent was to provide a simple, user-friendly process that will be of some assistance to fellow Buell enthusiasts. Use of this instruction should be at your own risk or discretion. Ready for the next adventure. . . 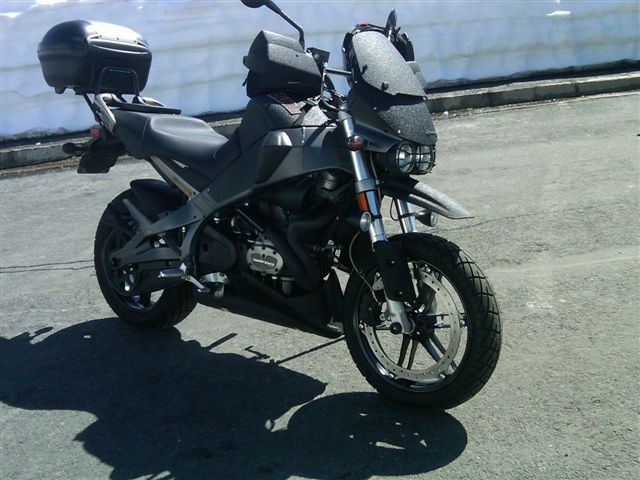 Paul | ||
Froggy |
Good writeup, but it has many extra steps. You do not need to even touch the axle or put the bike on its side. Basically, just remove/loosen belt guards, swingarm brace, footpeg mount, and then slide the new belt on and reassemble. | ||
Etennuly |
One thing I would recommend is to put the swing arm piece back in and tighten it before tightening the belt(putting the axle back in). If you do have a new unstretched belt it is easier to loosen the nuts on the idler to near the end of their studs, DO NOT remove them. This will allow for moving the idler pulley out enough(DO NOT remove the pulley) to help with starting that tight sombich back on the pulleys. Then you can push the idler back under the belt. I would not tip the bike over either. Any needed movement can be had by rolling the bike upright. Pnw uly is right.....this is a fairly simple procedure that should be known by a rider. You will find everyone has a little different method. | ||
Redshiftquasars |
Definitely FAQ worthy. Thank you for the write up with pics. Comes in handy especially since I�m changing my belt, now. Now for the important stuff  , your flyscreen and other plastic bits look to be painted with something similar to rhino liner. What did you use? , your flyscreen and other plastic bits look to be painted with something similar to rhino liner. What did you use? | ||
Dynasport |
Thanks for the write up. I think I will print this out and hold on to it. I am not particularly mechanical either and I can be intimidated by projects like this. It helps with my willingness to take on these kinds of things. | ||
Andymnelson |
Nice write up, but I agree, many extra steps. I swapped a brand new belt in my garage, but I honestly did not use any tools other than what I normally have under the seat anyway. No need to remove idler pulley No need to jack up bike, remove wheel etc. Simply loosen pinch bolts, loosen axle, remove from pulley cover, remove guards/pass bracket/swingarm brace as necessary, install new belt and reverse. As stated above, loosening the pulley might help, but don't remove it. | ||
Pnw_uly |
Appreciate the input, different ways to skin this cat, obviously. I prefer to get all the extraneous stuff out of the way, at least for the first time, rather than fighting around a component or two that could be quickly removed by a few torx bolts... Next time maybe I'll leave some more stuff on. . . RSQ - It's Line-X. I use the Uly for winter commuting, so wanted something that I wouldn't care about getting scuffed / scratched / dirty, etc... I just hose it off every couple of months - - and I think it looks bad-ass. | ||
Andymnelson |
I agree, and working in the garage I might normally do all of that. But for a road side repair, less work is better! Also, (and perhaps a lesson you learned here!) it is MUCH better to do your first belt change in your garage and not road side so that you know what to expect when you get there! | ||
Redshiftquasars |
@Pnw_uly. It does look bad ass. | ||
Skifastbadly |
Nice. Relative to some of the above comments, I believe you DO have to loosen the axle, else you won't have the play to get the belt on. I failed to remove the passenger peg brace, which made it harder to get that spacer out. I was informed after my post on ADV that it was OK to loosen the axle with the full weight of the bike on it, but I wasn't comfortable with that and if I had to repeat the exercise, I would get the weight off the tire again. Because I have the OEM hard bags, I just throw it over on its side. (Message edited by skifastbadly on July 27, 2011) | ||
Froggy |
My axle was seized to the swingarm, I couldn't remove it, I still installed a new belt. | ||
Schwara |
I appreciate the write up. In another 2K I'll probably be thinking about doing this for the 1st time and keeping the current belt for my spare. Does anyone have experience doing a belt change who has the Free Spirits Belt Tensioner from Trojan Horse Racing? I was just wondering is this makes the change easier, harder, no difference ... Thanks | ||
Pnw_uly |
Concur with unweighting the bike (laying on side / elevating rear wheel), but like already stated, many different ways to get this done - - this method worked for me, thought it'd be worth posting; YMMV. Ski - Looking maybe at a loop around Mount St. Helens on Sunday - - interested? | ||
Skifastbadly |
Duration of said loop? | ||
Etennuly |
I'm glad you posted it. It reminded me to put my old spare and my tools back under my seat. Looking maybe at a loop around Mount St. Helens on Sunday - - interested? Oh you suck! That has to be a beautiful ride. Post up some pictures for us Easterners! | ||
Uly_dude |
I have the free spirits tensioner. It makes the belt change a lot easier. I changed out my rear fender to an XB9 setup and now I don't have to remove that piece of plastic either. Just loosen the axle, remove the counter sprocket cover, and remove the swing arm brace. You don't even have to mess with the foot peg brace if you're really good. | ||
Schwara |
Thanks Uly_dude ... I think that is now on my list as well. Depending on available $$ might look into adding this when I do the belt change. | ||
Johnboy777 |
Hey Pnw_uly Thank you for the tutorial - great job. | ||
Eulysses |
Uly_dude...not to get us off of belt changing necessarily but when you are two up and hit dips do you still get the groan of the belt going super tight? I am thinking the spring of the Free Spirit tensioner would take some pressure off the belt and bearings for that matter. Euly | ||
Nillaice |
i ran my self thru this drill monday. i really only did it to familarize myself with the belt swap. PNW pretty much captures it all. i had a hell of a time until i loosened the axle. there is not enough clearance between the pulley, and the top of the swingarm brace bolting point to 'walk' the belt off of the rear pulley, and that idler mount puts up a fight. any torsional froces on the studs will lock that thing in place. so forget removing the idler pulley, you must loosen the axle. no additional slack is gained after about 15 turns, so stop there. since the spare belts i have are in worse shape than the one that is on there, i ended up putting it all back together as it was before. but i did take a moment to check the smoothness of the bearings, so it wasn't just a training exercise for me. | ||
Discochris |
Unless the spare was REALLY stretched, I don't see how you could do this without loosening the axle. Granted I just put a brand new belt on, so it was pretty tight, but even so, I don't see how it would be possible. | ||
Blake |
Froggy, Then you must have removed the idler pulley? |