| Author | Message | ||
Badrap |
I want to install auxiliary lights on the front of my bike and was wondering options you would recommend to wire them up? How are you switching them on? Are you using the high beam with a relay or have you installed a dedicated switch so you full control of when you have them. Thanks | ||
Ratbuell |
I have mine wired: Battery to lighting relay (came with lights) Relay to lights Relay switching terminal wired to high beam lead - high beams on, lights on. High beam off, lights off. Basically I used the high beam wire in place of the switch included with the lights (which is usually installed between a 12v source and the switching terminal). If you want TOTAL control, put a switch in line with the high beam trigger wire, that way you can override it and run high beams without the aux lights if you want. But using that as a power source limits you to only being able to use them with high beams. For my use...I wanted no more buttons, but definitely more light. So, I trigger the relay with the high beams. Simple to operate, no extra buttons. | ||
Itileman |
Have mine wired off the battery with a fuse to a switch on the dash. They're not HID's and I can turn them on and off whenever I want. Will eventually wire them up so they cannot be turned on with the ignition switch off as soon as I can figure that out.  | ||
Ratbuell |
You should be running a relay, very few switches will continue to handle the current directly through it. With a relay, you feed the trigger (switch) power from an ignition-switched source. It can be a small source, there's nearly no current draw through it. Use your gauge lights, your aux outlet...your headlights... No power to the switch = no power to the lights. | ||
Hughlysses |
I have mine wired like Ratbuell's. | ||
Union_man |
I wired a set of Auxiliary lights and Garage Door opener on my Uly. I wired TWO Autoswitchs to the "Flash to Pass" switch and to the Auxiliary lights and opener. They look like this... 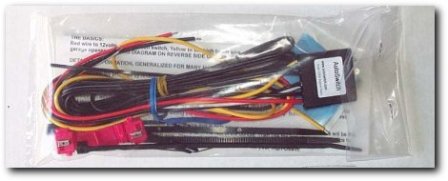 The AS5P is a single tap switch. When I press and hold the "Flash to Pass" trigger for one full second the Auxiliary lights go on and stay on. I do the same to turn them off.(I back fed the LED light that is supplied through the wiring loom and into the left hand control. I drilled a hole and installed light. This is so I can see that the lights are on.) The AS5P2 is a double press switch. When I quickly press the "Flash to Pass" trigger TWICE my garage door opens or closes! (I did not install the LED because I can see the door go up or down.) I used the Double Press for the Garage door so I can still "Flash to Pass"!!! This is a MOD that is very handy and avoids the need to mount ugly switches. | ||
Sleez |
i wired mine just like rat described.  | ||
Union_man |
Mine...   | ||
Xbimmer |
12AWG hot lead fused at the battery end, run to the relay up front, split to the lights, grounded to the flyscreen nacelle. Switched by double-tap AutoSwitch fed from the Aux Power wiring under the dash. The AutoSwitch has performed flawlessly for over three years and 50K, I'm impressed. Here're a couple wiring schemes, automotive but you'll get the idea.    | ||
Itileman |
Thanks for the info. So simple even a tileman can do it? | ||
Unravels |
union man. What type of lights are those and how are they mounted. They look good. | ||
Coolice |
where are you getting the Autoswitches? | ||
Ratbuell |
Well, if we're posting pictures.... 4" Hella Optilux cateye's. LED light ring (hard to see in daytime but very visible at night) wired to ignition. Main beams wired to high beam. Mounted to turn signal holes (no drilling) with signals moved to the CR mirrors (with LED flasher from A.S.B.). 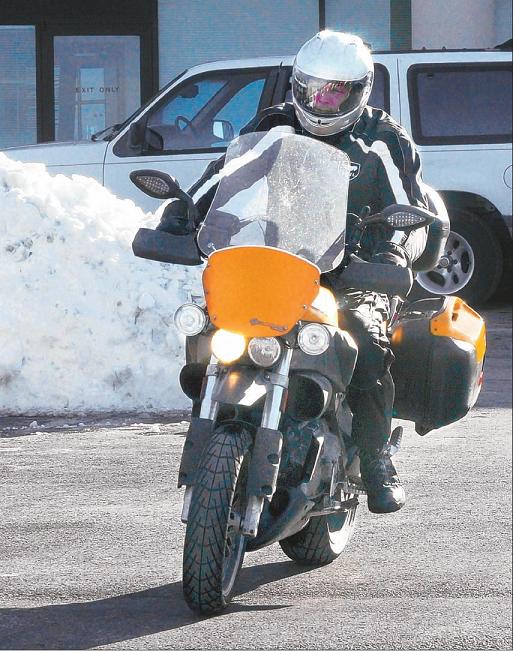 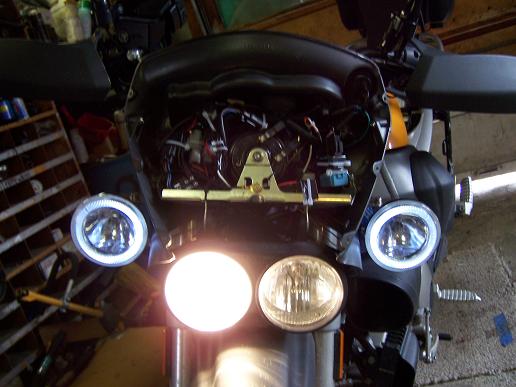 | ||
Ulynut |
 | ||
Union_man |
Thanks Unravels. I am very happy with the extra lights. The new lights, coupled with wiring both headlights to stay on when on HI beam is literally the difference between Night and Day!!! The extra light is confidence inspiring and makes night riding more fun. The Extra lights are Street Scene 55w lights (size 2.5 inch round) ($70) http://cgi.ebay.com/ebaymotors/Street-Scene-950-30000-Driving-Lights-2-5-in-Round-B_W0QQitemZ390152575688QQcmdZViewItemQQptZMotors_Car_Truck_Parts_Accessories?hash=item5ad6e7dac8  The quality of the lights are good. The cans are metal (not plastic) and painted gloss black. I have had no trouble with them after 1 riding season. I mounted them on an piece of flat aluminum stock. 3 inches tall and 1/8 thick and a foot long. To install... Remove the front fender. On the front fork there are 3 screw holes (two are used hold the fender the top middle one is not used). Drill holes (3) in the aluminum to match the fork holes.(Counter sink the middle hole to flush the screw or the fender won't go back on.) Buy screws that are 1/8 longer than the original screws (to compensate for the aluminum you added) and reinstall fender. !!!!Aluminum should be mounted behind front brake line!!! Drill one hole in your aluminum per side, one for each light. Discard the large angle attachment and use the hole to attach to your aluminum. I used a grinder to doll up the edges and spray painted it black. I used blue locktight to fasten the aluminum to the fork on install and red for all screws on the lights after adjustments to lights were made.  | ||
Union_man |
Coolice I got mine here http://www.autoswitch.com/ | ||
Wired2 |
SLEEZ HOW ARE YOUR LIGHTS MOUNTED AND WHAT ARE THEY .. I LIKE KEEPING TURN SIGNALS IN PLACE .. | ||
Coolice |
thanks UM! | ||
Sleez |
Wired2, here's my orig thread; lights are Hella Optilux 1500s http://www.badweatherbikers.com/buell/messages/142 838/460332.html?1242662201 any questions? (Message edited by sleez on February 10, 2010) | ||
Bttrthnwrk |
Mine are the Wallymart $17 specials (I can't remember the name, anymore). They use the common MR16 lamp that's available in a variety of sizes and beam widths. I bought 20W 10-degree spotlamps for mine, and aim them 5 degrees below horizontal. Wiring is direct from the battery to a FuzeBlock. The FuzeBlock can feed up to 6 leads, either switched or unswitched. My FuzeBlock sites under the flyscreen. along with my Stebel horn and the horn's relay. Mine are switched, which run through a relay built into the FuzeBLock and then to the lamps. Negative wires from the lamps return to the FuzeBlock. That way, the light come on when the key is on and the engine stop switch is on and the computer thinks there's enough current to allow it. No separate switch - if the bike's running, the lights are on. At 40W for the pair, I'm not too worried about having enough juice. Since the lamps are 10 degree spots, they through enough light to be noticeable and without blinding everybody in front of me (since they're 20W bulbs). If you're interested, FuzeBlocks are available here. http://www.fuzeblocks.com/ 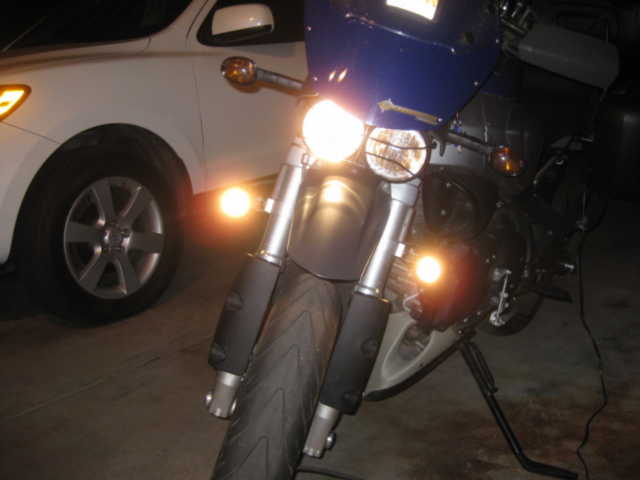 | ||
Badrap |
Wow, thanks everyone for all the great info. I really like the Autoswitch idea. I'm sure this has been ran into the ground but I would love to see more pics of peoples bike with lights installed on them. please tell me what brand and model of lights you have and what you think of them. | ||
Union_man |
Bttrthnwrk Have you considered the  FREE modification to shorten you front turn signals? FREE modification to shorten you front turn signals? Here is how... 1. Remove flyscreen 2. Disconnect blinker wires 3. Unscrew retaining nuts 4. Disassemble signals 5.Put "spacers" on the inside when re-assembing!! DONE!!!!  | ||
Bttrthnwrk |
Union: The price is right, but I've not had too much trouble with the long turn signal stalks, so far. I only broke a cover twice, and the long stalks are flexible enough to protect the turn signal itself, so far. So, yeah, I've considered it. Not yet ready for it, I guess. | ||
Union_man |
 | ||
Itileman |
Wallymart $16 Optronics stuck to the beak. Hey, it's winter, there's a foot of snow and ice in the alley outside my garage, I was bored to tears.  | ||
Ronmold |
Ulynut, this goes with your sign: http://nothingtoxic.com/media/1243471461/Shocking_ Video_-_Indian_Man_Electrocuted_to_Death_on_Top_of _Train | ||
Unravels |
itileman. I think your handgaurd deflectors are on the outside when they are supposed to be on the inside. Could be wrong. | ||
Itileman |
 You could be right. Got them used with no instructions. You could be right. Got them used with no instructions. Or, I did it that way for better airflow? | ||
Unravels |
They look like the ones I have. are they touratech? http://www.touratech-usa.com/shop/show.lasso?sku=3 80-0050&-session=touratech:633176B205276383C0NSR24 C5D02 If so click on the link, instructions are in the middle of the page, | ||
Electraglider_1997 |
    |